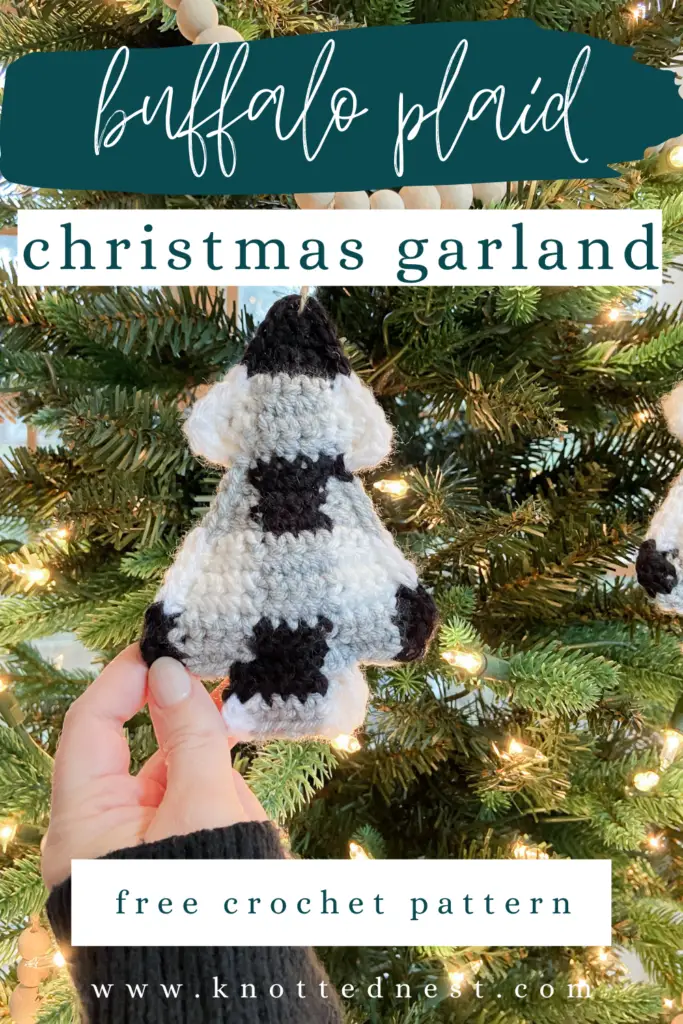
Buffalo Plaid Christmas Crochet Garland Free Pattern
Add a farmhouse twist to your Christmas crochet decor this year with the Buffalo Plaid Christmas Tree Garland!
Scroll down to get the free pattern or read on for a little bit of backstory and some materials and construction info!
CLICK HERE TO PIN THIS FREE CHRISTMAS CROCHET GARLAND FOR LATER!
This post may contain affiliate links, which means I may receive a small commission, at no extra cost to you, when you make a purchase. Please read my affiliate disclosure for more details.
Christmas Crochet Inspiration
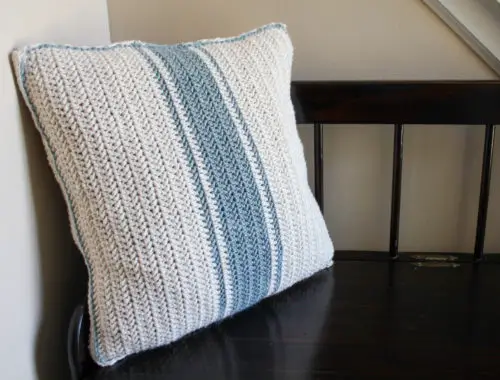
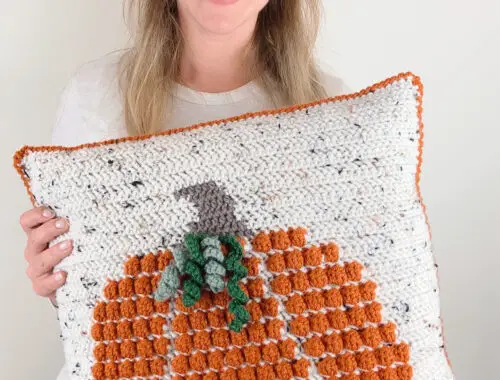
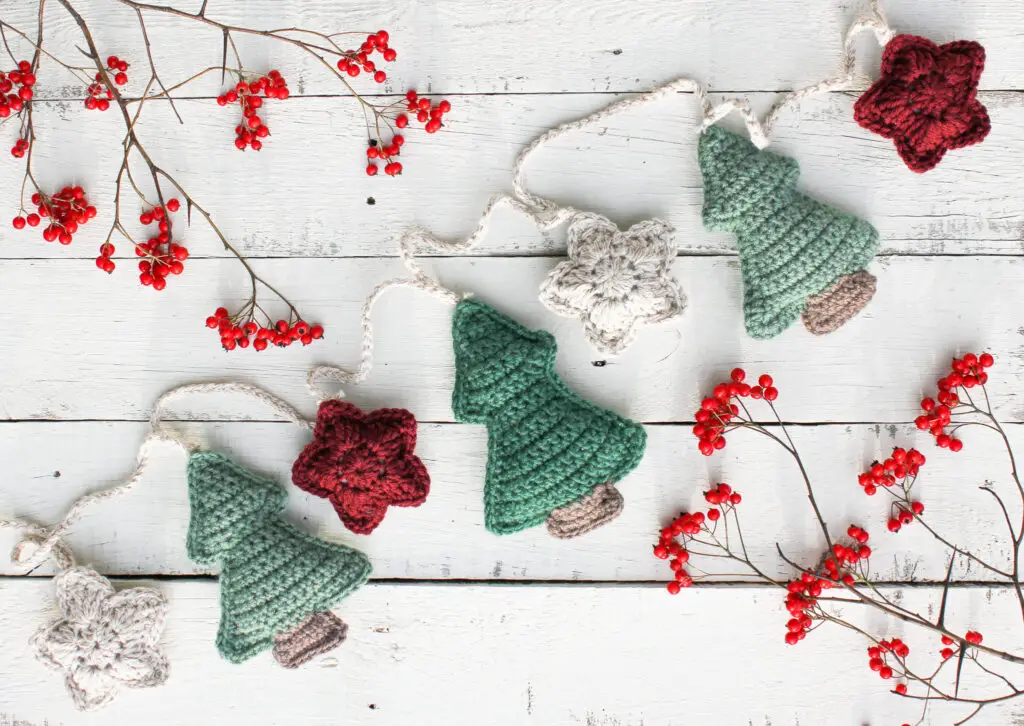
Last holiday season, I was on a big crochet garland kick. I had so much fun creating my Easter Bunny Garland and then my Rustic Pumpkin Garland, I figured why not keep it going with a Christmas crochet garland! And so, the Christmas Tree and Star Garland was born. In the year since, it has become my most popular pattern and one of my personal favorites.
This year, I branched out a bit with my Christmas crochet and designed the Bobble Christmas Tree Stocking, but a part of me just couldn’t let the holiday season go by without adding another garland to the collection.
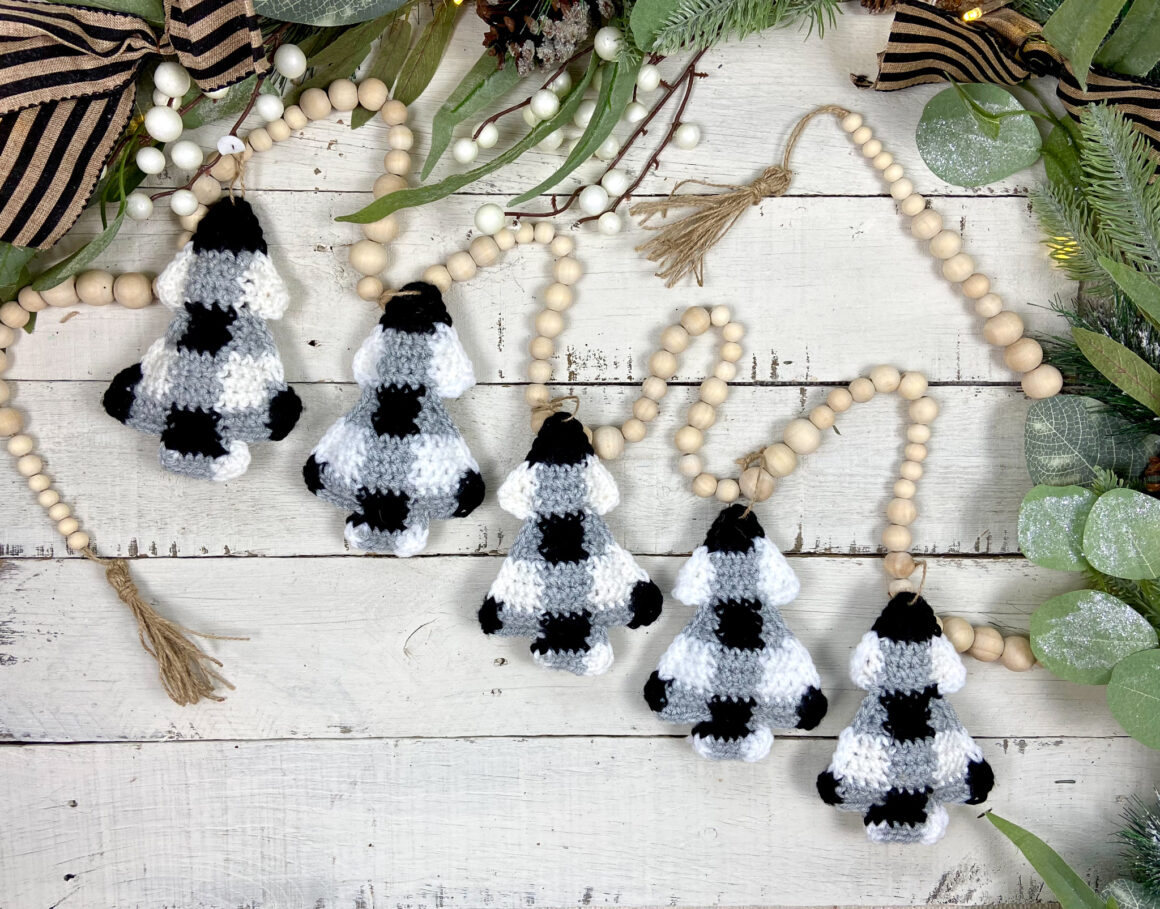
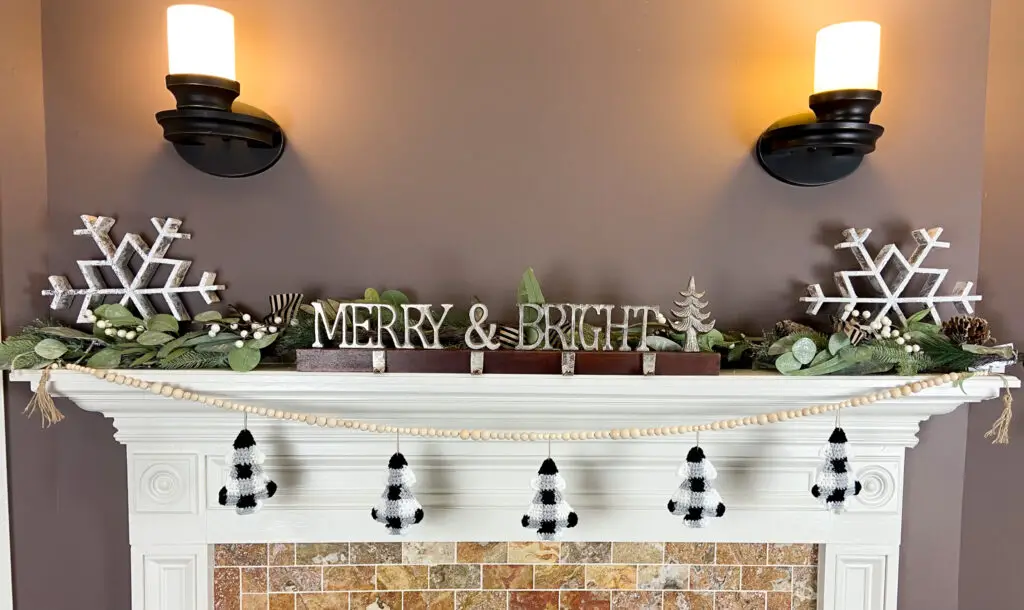
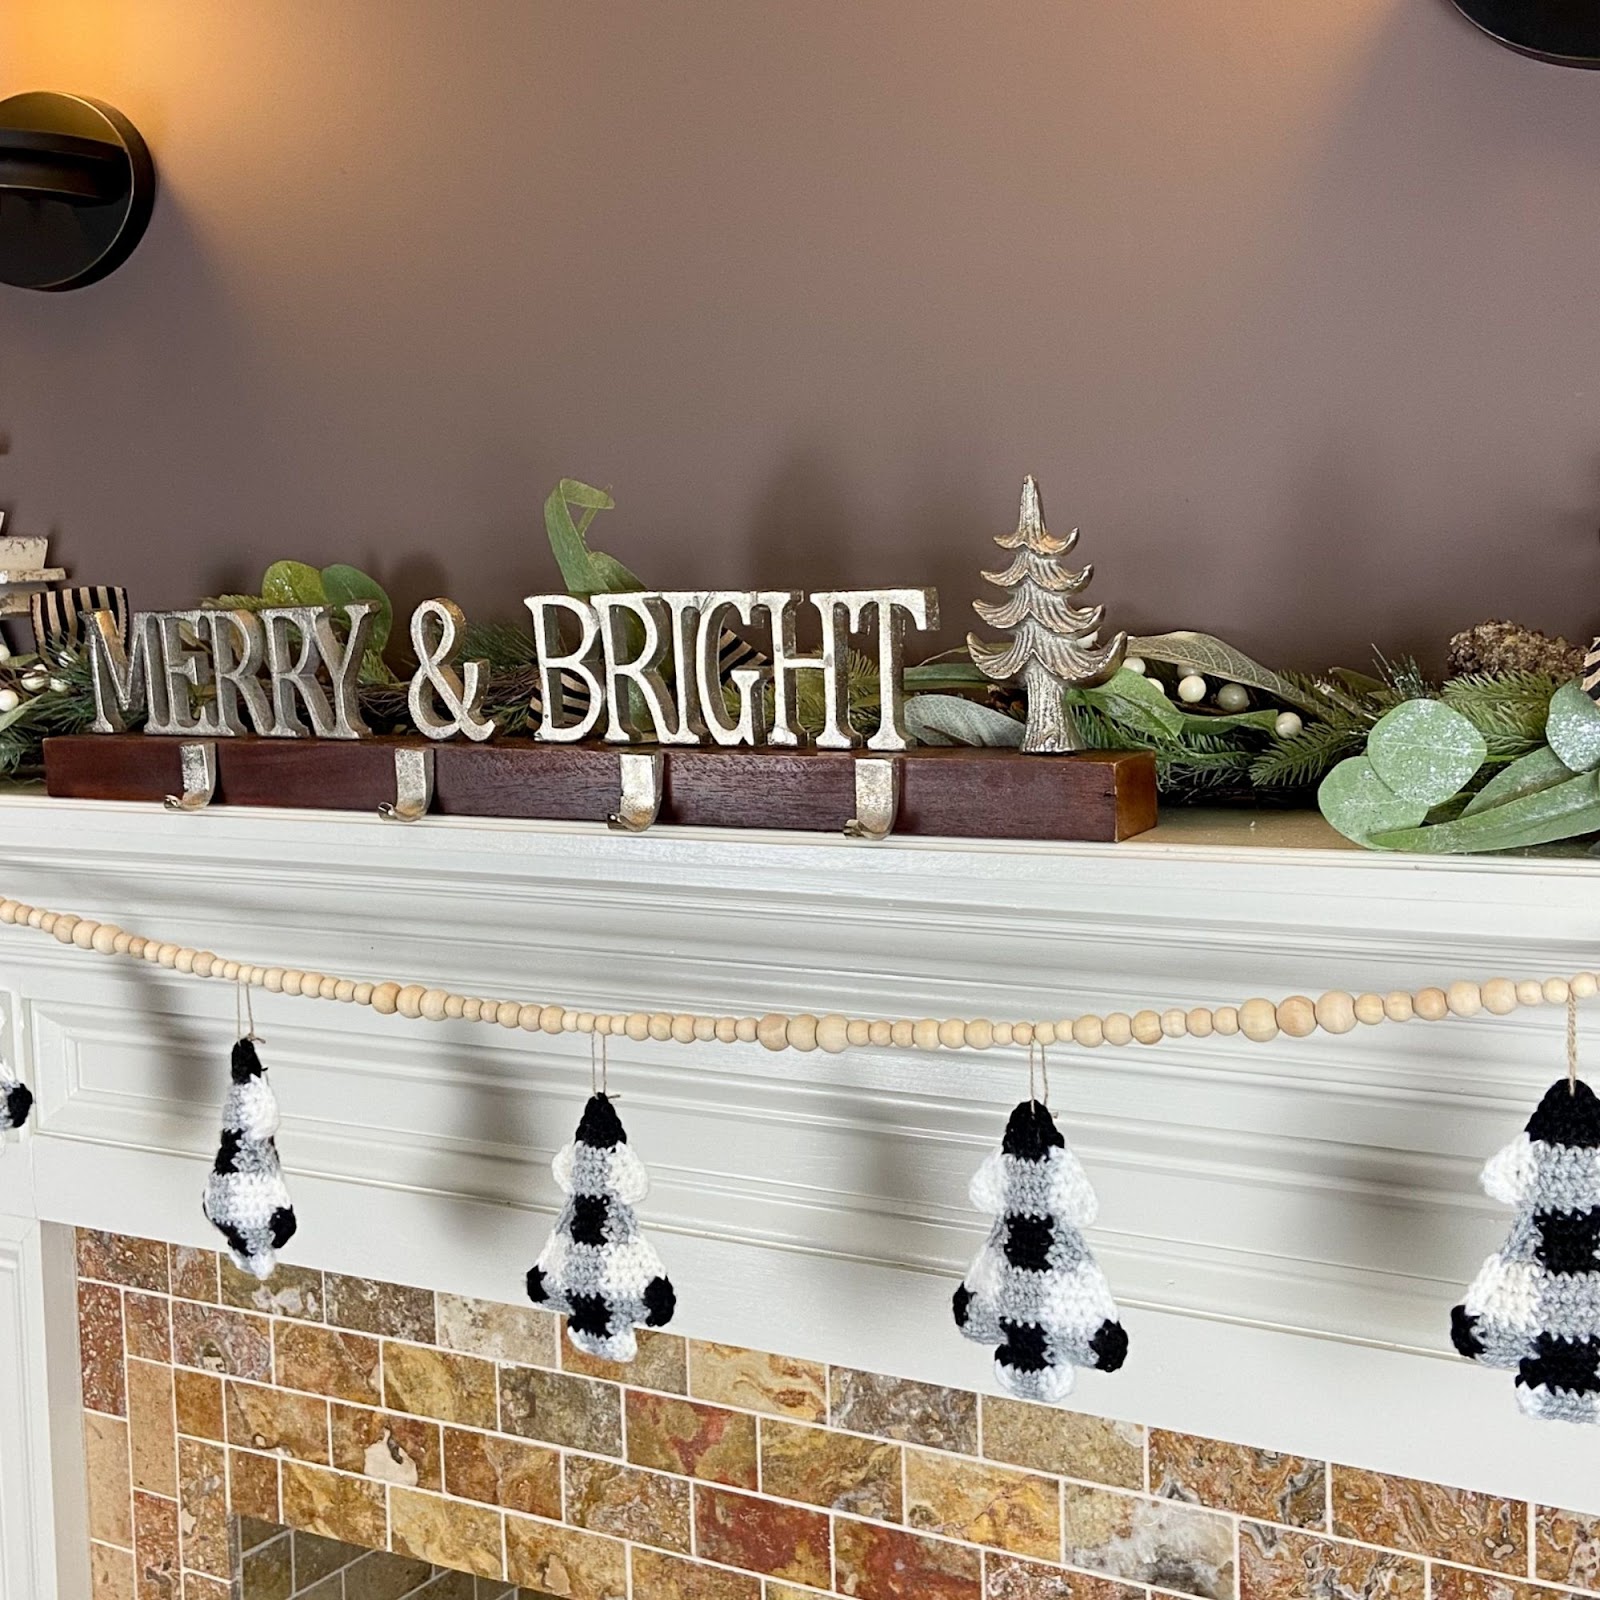
I was really feeling the buffalo plaid/ buffalo check look for our family pictures this Christmas, and I wanted to bring that farmhouse-y vibe to our decor as well…so I grabbed my hook and three colors of yarn and set to work trying to adapt the checkered pattern into something that could be used as a holiday garland. Much trial and error later and – ta da! – I present the Buffalo Plaid Christmas Crochet Garland!
Materials
To make this Christmas crochet garland pattern you will need a size I crochet hook and worsted weight yarn in three colors. Classic Buffalo Plaid colors are black, white, and grey, but you could mix it up however you choose. The general color scheme you want to shoot for is a dark color, a light color, and a color somewhere in between the two.

Some other combos that would look fabulous for this pattern are the equally classic black, red, and maroon – or – to go a little off the beaten path, a green version with hunter green, beige, and a light sage. So many options!
You will also need a small amount of polyfill or other stuffing material. If you choose to string the bunting on a wooden bead garland like I did, you will need to grab a wooden bead kit or similar.
Construction
Each tree is made by crocheting two flat panels (in rows of single crochet) then joining them with a single crochet border and lightly stuffing to give it a 3D effect. The shaping of the tree panels is done with some basic single crochet increases at the end of each row.
To get the Buffalo check/gingham pattern, you will crochet blocks of color that are four stitches wide and four rows tall. The pattern is created by doing a repeat of light and medium blocks, then a repeat of medium and dark blocks. Of course, making the buffalo plaid pattern in a tree shape requires A LOT of color changes in a small space, but I walk you through each step with very detailed written instructions as well as step-by-step pictures and a color pattern graph. You can do this!
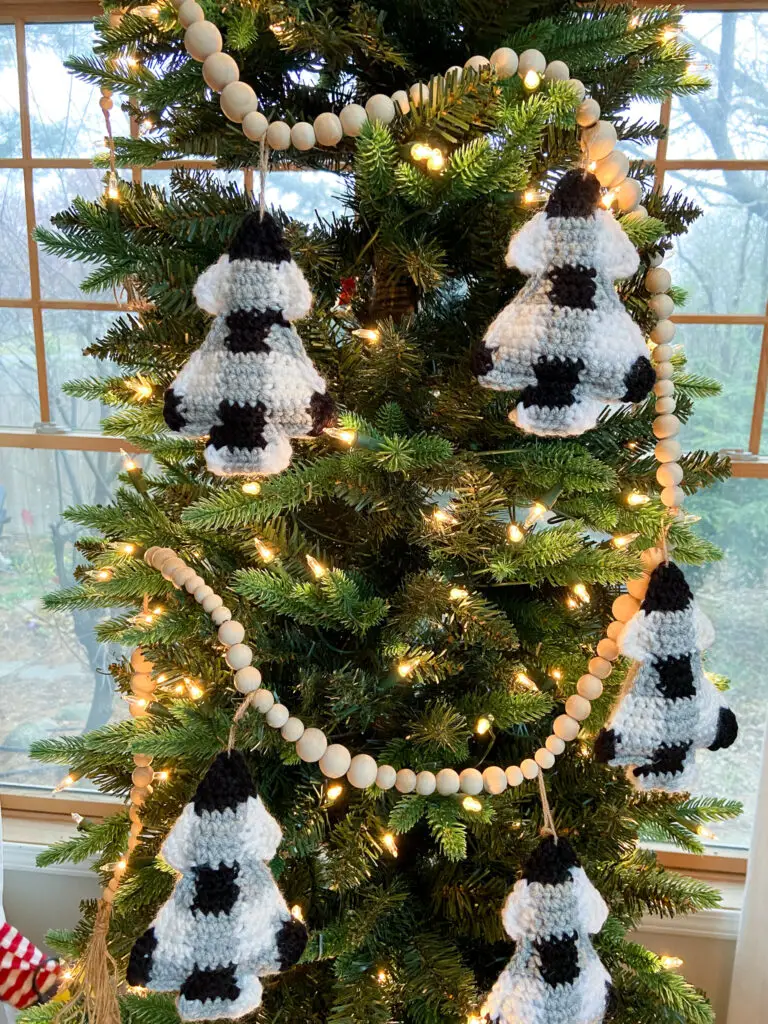
The pattern includes instructions for how to string these crochet Christmas trees as a garland using yarn or using the wooden bead kit that I have linked in the pattern. You could also hang the trees individually and use them as ornaments or even table decor!
I hope you enjoy this Christmas crochet garland pattern and have a happy and healthy holiday season!
Grab a printable (ad-free) PDF version of this Christmas crochet garland pattern on Etsy or Ravelry!
Buffalo Plaid Christmas Crochet Garland
Skill Level
Intermediate: this pattern involves frequent color changes and increasing.
MATERIALS
- Yarn:
- Per tree, you will need about 15-20 yards of worsted weight (size 4) yarn in 3 colors. For the whole garland, I used less than one skein each of WeCrochet’s “Brava Worsted” (100% acrylic, 218yds/100g per skein) in the colors White, Black, and Dove Heather.
- You will also need an additional 20 yards or so of one color for the Garland chain if you choose to string your garland with yarn.
- Size I (5.50mm) crochet hook (optional size G (4.00mm) hook for yarn garland chain)
- A small amount of Polyfil or other stuffing material
- (Optional) Wooden beads
- Scissors, Yarn needle
MEASURMENTS
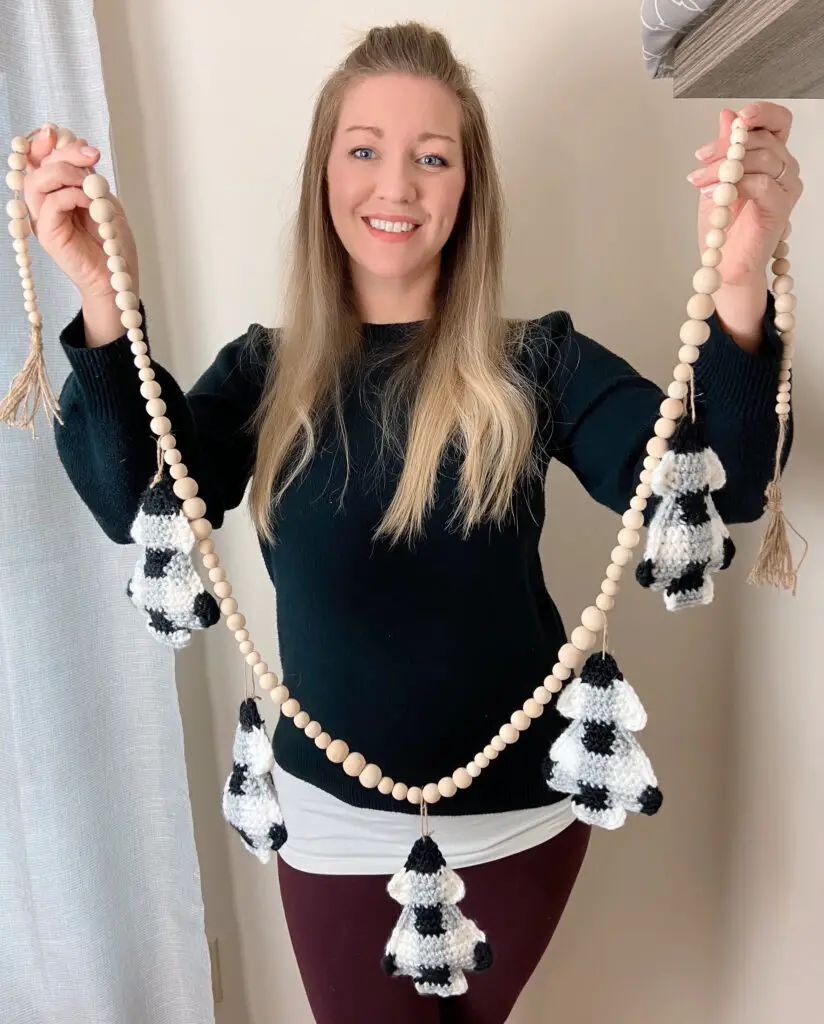
The finished tree is approximately 5.5” – 6” tall. As pictured, the finished garland is approximately 6 feet long.
GAUGE
9 sts x 8 rows = 2” square using single crochet
NOTES
- Each tree is made of two flat panels (worked in rows) that are joined together with single crochet and lightly stuffed.
- You will need three colors for this project – a light shade, a dark shade, and a color that is between the two. I have abbreviated the colors as follows:
- Lt = light color (I used white)
- Dk = dark color (I used black)
- Mid = middle color (I used gray)
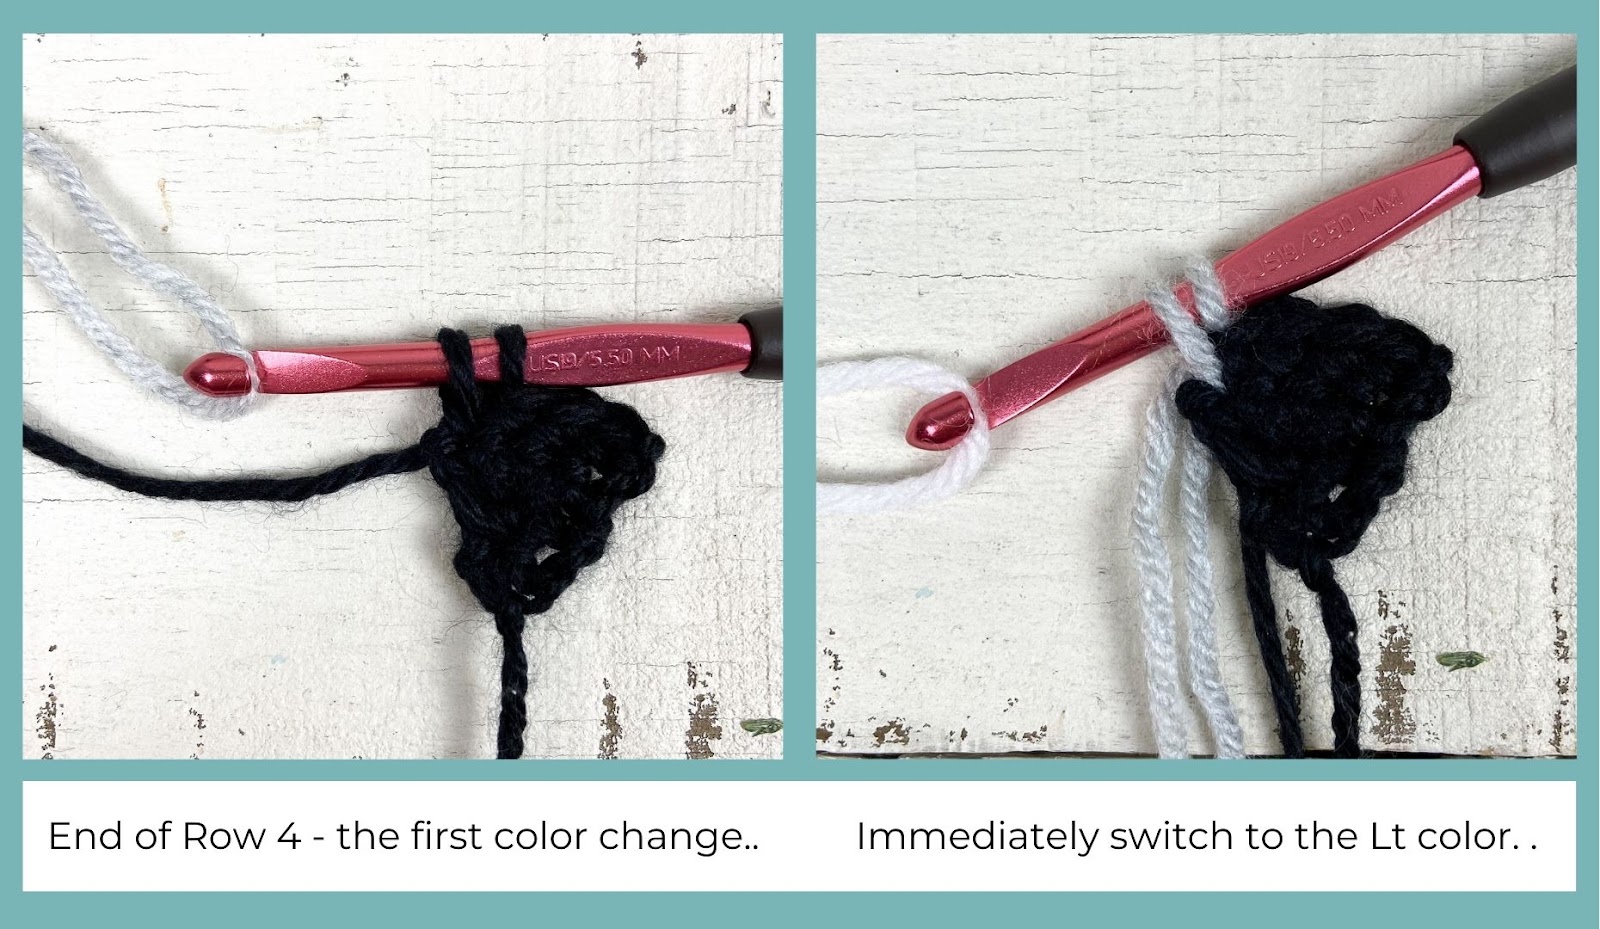
- For all color changes: when working the last single crochet of the “old” color, stop before the last “pull through” of the stitch. There will be two loops left on the hook. Pull through with the “new” color and continue with the pattern. Give each color a tug to tighten and keep the color changes sharp.
- Choose one side of each panel to be the “wrong side” (this will be the side facing in when you join the two panels – it doesn’t matter which side you choose). Note that, since you will turn at the end of each row, sometimes the wrong side will be facing you as you work, sometimes it will be facing away from you. When changing colors, always drop the unused yarn to this “wrong side.” Since you won’t see it, you can drop the yarn when not in use and carry it over the back of the work to pick up the next time you need it.
- The ch 1 at the beginning of each row does NOT count as a stitch.
- Pattern written in US terms.
- Crochet Abbreviations:
- ch = chain
- sc =single crochet
- sl st = slip stitch
- st =stitch
CHRISTMAS CROCHET GARLAND PATTERN
Tree Panel (make 2):
With a size I hook and Dark yarn, ch 2.
Row 1: 2 sc in 2nd chain from hook. Ch 1, turn <2 sc>
Row 2: 1 sc in 1st st, 2 sc (this is an increase) in 2nd st. Ch 1, turn. <3 sc>
Row 3: 1 sc in next 2 sts, 2 sc in last st. Ch 1, turn. <4 sc>
Color change chart – please note that the chart only shows the number of stitches of each color per row. It does not show where each stitch should be placed.

Tips: The first few rows of the color changes are the trickiest. Sometimes you may only need to work one sc with a color and then immediately change to another color on the last pull through of that stitch. Sometimes you may need to work one sc of an increase in one color and the other sc in a different color. I tried to be very clear where the color changes need to happen, but please check the color chart for additional help!
Don’t forget to choose a side to be the “wrong side” and be sure to drop the color that’s not being used to that side for every color change.
Row 4: 1 sc in next 3 sts, in the last st work 1 sc with Dk (switch to Med color – that means you will work the last “pull through” of the Dk sc with Med color. Drop Dk to the wrong side of your panel for now) and work 1 sc with Med color in the same st (switch to Lt color). Ch 1, turn. <5 sc>
Row 5: With Lt color, 1 sc in first st (switch to Med color), with Med work 1 sc in next 3 sts, in the last st work 1 sc with Med (switch to Lt color – you’ll pull this up from where you dropped it before) and 1 sc with Lt color in same st. Ch 1, turn. <6 sc>

Row 6: With Lt color, 1 sc in first st (switch to Med), with Med work 1 sc in next 4 sts (switch to Lt), with Lt work 2 sc in last st. Ch 1, turn. <7 sc>

Row 7: With Lt color, 1 sc in first 2 sts (switch to Med), with Med color work 1 sc in next 4 sts (switch to Lt), with Lt work 2 sc in last st. Ch 1, turn. <8 sc>
Row 8: With Lt color, 2 sc in first st, 1 sc in next (switch to Med), with Med work 1 sc in next 4 sts (switch to Lt), with Lt work 1 sc in the next st and 2 sc in last st. Cut Lt yarn and fasten off. <10 sc>

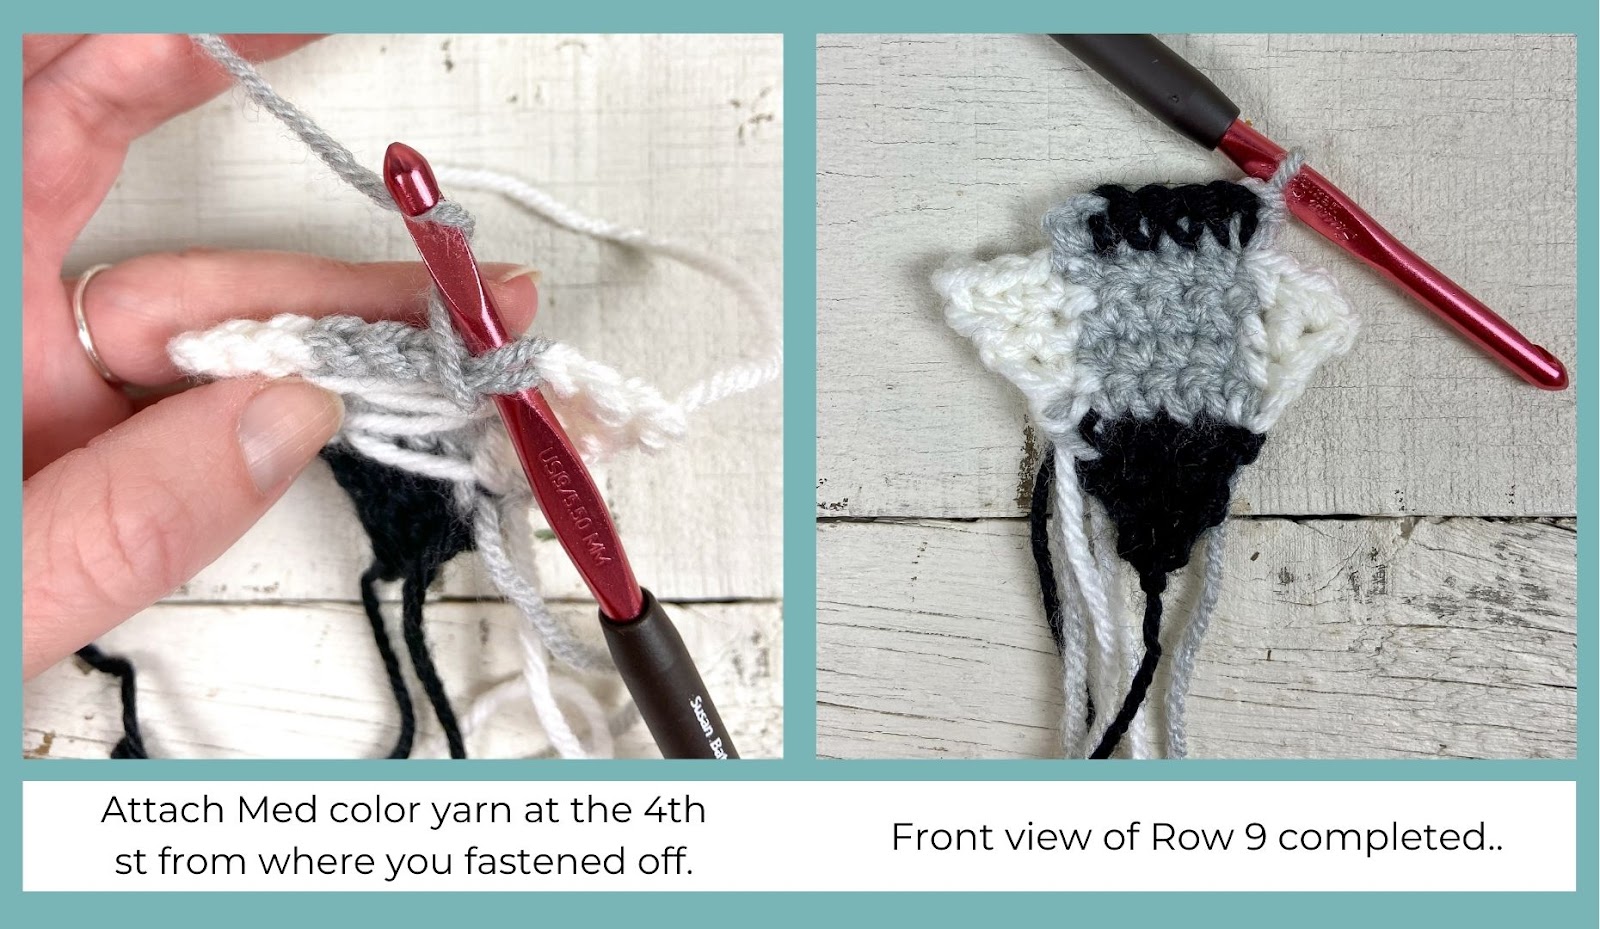
Turn work so that you are looking at the wrong side. Starting where you just fastened off, count in 4 sts and attach Med yarn with a sl st to the 4th st.
Row 9: With Med color, ch 1 and 1 sc in the same st (switch to Dk color), with Dk color 1 sc in same st, 1 sc in next 2 sts, in the next st work 1 sc with Dk (switch to Med color – you’ll pull this up from where you dropped it before) and 1 sc with Med color in the same st. Leave remaining sts unworked. Ch 1, turn. <6 sc>
Row 10: With Med color, 1 sc in first st (switch to Dk), with Dk work 1 sc in next 4 sts (switch to Med), with Med work 2 sc in last st. Ch 1, turn <7 sc>
Row 11: With Med color, 1 sc in first 2 sts (switch to Dk), with Dk work 1 sc in next 4 sts (switch to Med), with Med work 2 sc in last st. Ch 1, turn. <8 sc>
Row 12: With Med color, 1 sc in first 2 sts (switch to Dk), with Dk work 1 sc in next 4 sts (switch to Med), with Med work 1 sc in the next st and 2 sc in last st (switch to Lt). Ch 1, turn. <9 sc>
Row 13: With Lt color, 1 sc in first 3 sts (switch to Med), with Med work 1 sc in next 4 sts (switch to Lt), with Lt work 1 sc in the next st and 2 sc in last st. Ch 1, turn. <10 sc>
Row 14: With Lt color, 1 sc in first 3 sts (switch to Med), with Med work 1 sc in next 4 sts (switch to Lt), with Lt work 1 sc in the next 2 sts and 2 sc in last st. Ch 1, turn. <11 sc>
Row 15: With Lt color, 1 sc in first 4 sts (switch to Med), with Med work 1 sc in next 4 sts (switch to Lt), with Lt work 1 sc in the next 2 sts and 2 sc in last st. Ch 1, turn. <12 sc>
Row 16: With Lt color, 1 sc in first 4 sts (switch to Med), with Med work 1 sc in next 4 sts (switch to Lt), with Lt work 1 sc in the next 3 st, in the last st work 1 sc with Lt (switch to Med) and 1 sc with Med color in same st (switch to Dk). Ch 1, turn. <13 sc>

Row 17: With Dk color, 2 sc in first st (switch to Med), with Med work 1 sc in the next 4 sts (switch to Dk), with Dk work 1 sc in the next 4 sts (switch to Med), with Med work 1 sc in the next 3 sts, in the last st work 1 sc with Med (switch to Dk) and 1 sc in the same st with Dk. Ch 1, turn. <15 sc>

Row 18: With Dk color, 2 sc in first st (switch to Med), with Med work 1 sc in the next 4 sts (switch to Dk), with Dk work 1 sc in the next 4 sts (switch to Med), with Med work 1 sc in the next 4 sts (switch to Dk), with Dk 1 sc in the next st and 2 sc in the last st. Cut Dk yarn and fasten off. <17 sc>
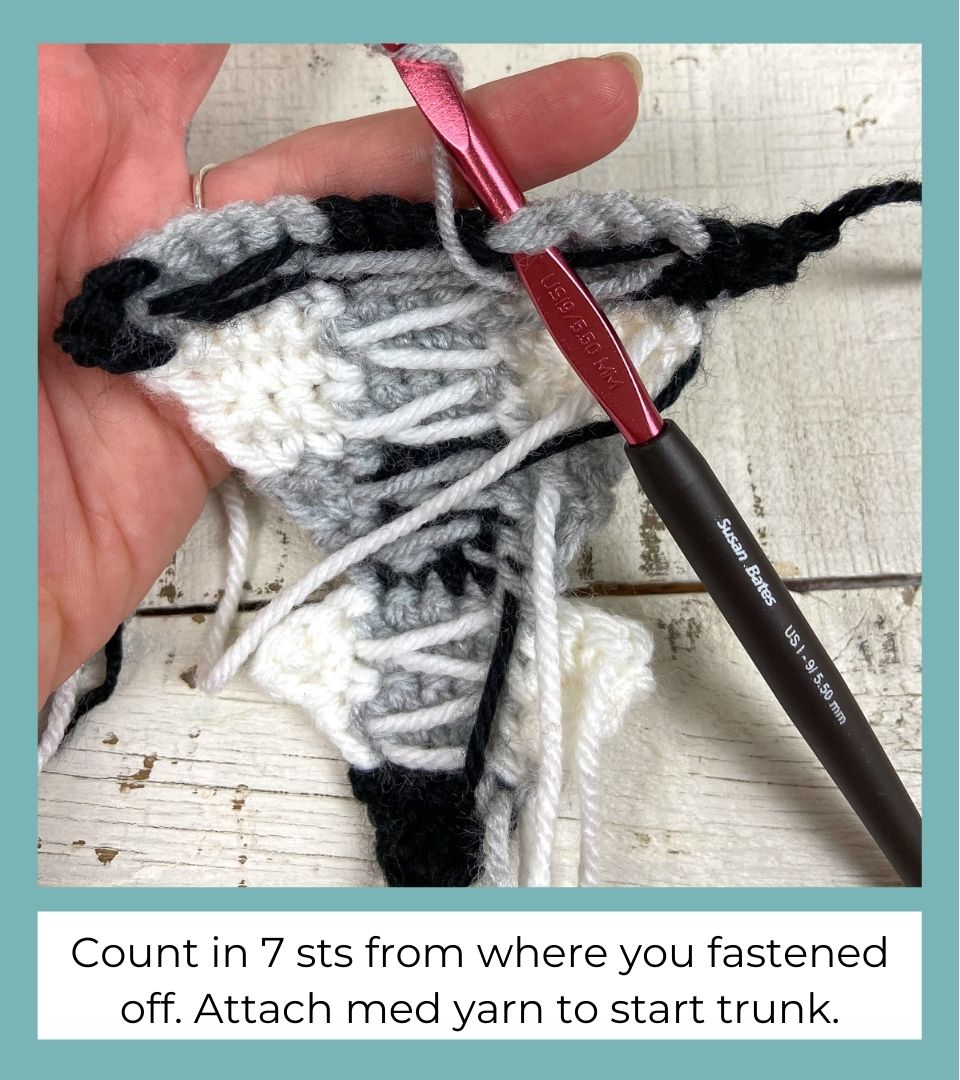
Trunk
Turn work so that you are looking at the wrong side. Starting where you just fastened off, count in 7 sts and attach Med yarn with a sl st to the 7th st.
Row 19: With Med color, 1 sc in the same st (switch to Dk), with Dk work 1 sc in next 4 sts. Ch 1, turn. <5 sc>
Row 20: With Dk color, 1 sc in first 4 st (switch to Med), with Med work 1 sc in last st (switch to Lt). Ch 1, turn. <5sc>

Row 21: With Lt color, 2 sc in first st (switch to Med), with Med work 1 sc in next 3 sts, in the last st work 1 sc with Med (switch to Lt) and 1 sc with Lt in same st. Cut yarn and fasten off. <7 sc>
Panel complete.
Tip: to prep for assembly, it’s helpful to use a yarn needle to loosely weave in some of the yarn ends on the back of the panel (mainly the parts where you fastened off) and use scissors to trim all yarn ends to about 1” long. This just makes lining up the panels and tucking everything in a little less cumbersome.
Tree Assembly
- Align two tree panels with wrong sides facing in. Tuck in any loose ends.

- Attach Med yarn with a sl st through both panels where the trunk connects to the tree.
- You will be changing colors as you go to correspond with the colors on the front panel (the panel facing you will be the front). This takes a little eyeballing to figure out the best place to work each stitch and make your color changes. As you are joining, keep the unused colors tucked between the two panels and pull them up as needed.

- To join, (be sure to crochet through both pieces) sc evenly around the main body of the tree, changing colors as needed. To keep the points sharp, (sc, ch 1, sc) in the same st at each point and sl st at each indent.
- Stop when you get to the bottom corner of the base and lightly stuff with polyfill before continuing to sc across base.
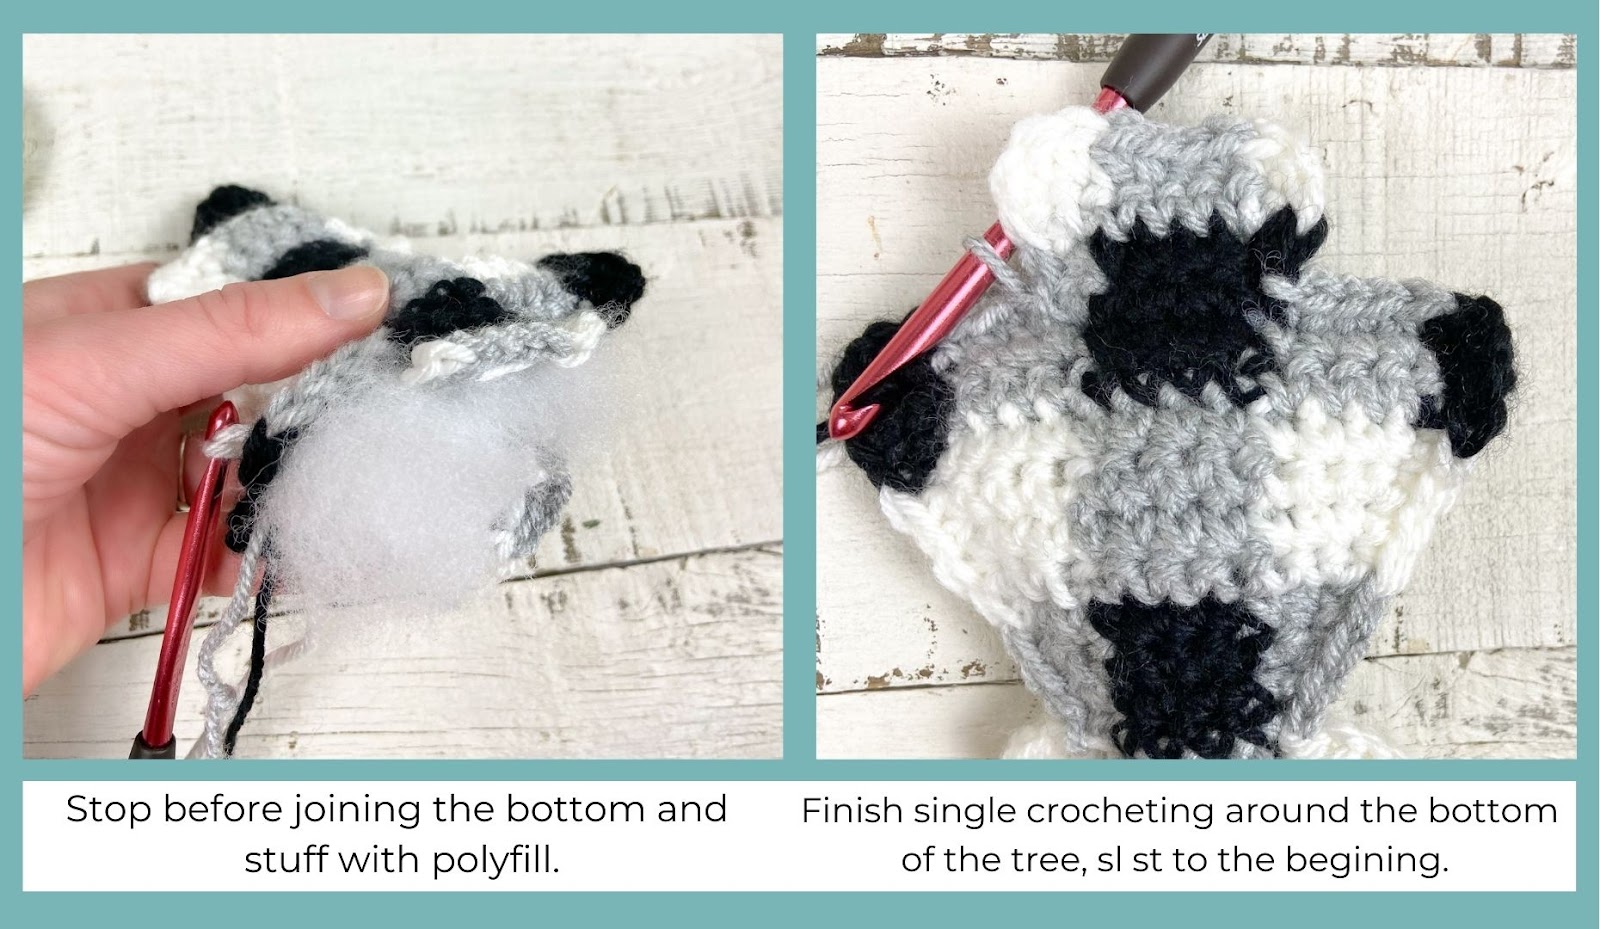
- When you get to the trunk, continue to sc (changing colors as needed) around the trunk of both panels to close. Sl st to the base of the first sc. Fasten off and weave in ends. Tree complete!

Garland Assembly
There are dozens of ways you can string the garland, but here are two easy options!
Option A – Yarn chain:
- Using your color of choice and a size G hook, ch 250. Fasten off.
- Arrange trees evenly along the chain, making sure the front side of each one is facing forward.
- Use a tapestry needle to thread a small length of yarn through the back of the tree at the top, then thread it through the chain where you would like to attach the piece (this keeps the piece from sliding along the chain). Check that the piece will hang correctly, then tie it securely. Trim ends.
Option B – Wooden Bead Garland
- I used this wooden bead kit from Amazon to create this version of the garland.
- Using the twine that came with the kit and a yarn needle, I strung about a 6 foot length with different sizes of beads.
- I used a small piece of the twine to attach each tree to the garland.
- With the leftover twine, I made two small tassels and attached one to each end of the garland.

Your garland is finished!

I hope you enjoyed this Christmas crochet pattern! Tag me on Instagram @theknottednest to share your project. For more handmade Christmas decor, check out my Bobble Christmas Tree Stocking on the blog! Or you can find more project ideas and patterns from The Knotted Nest at www.knottednest.com.
Happy making!