Crochet Easter Bunny Garland- Free Pattern
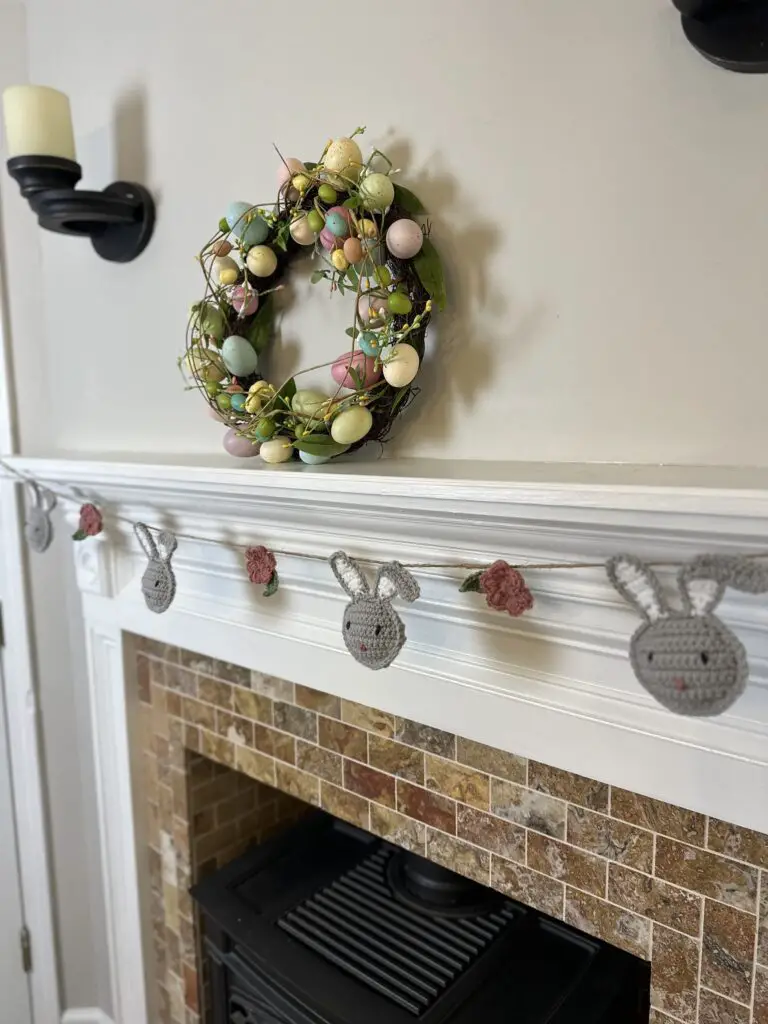
Add a touch of handmade charm to your Easter or spring decor with this crochet Easter Bunny garland! This pattern includes step-by-step instructions and a photo tutorial to create the bunnies, flowers, and leaves, plus tips on assembling the garland. Perfect for decorating your mantle, crafting an Easter wreath, or making a cute basket stuffer! Scroll down (or click here) for the free pattern or click to purchase an ad-free printable version from my Etsy or Ravelry shops.

Don’t have time to make it now? Pin this pattern for later!
This pattern may contain affiliate links, which means I may receive a small commission, at no extra cost to you, when you make a purchase. Please read my affiliate disclosure for more details.

About the Crochet Easter Bunny Garland
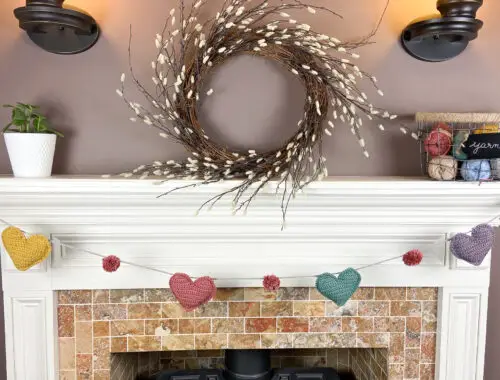
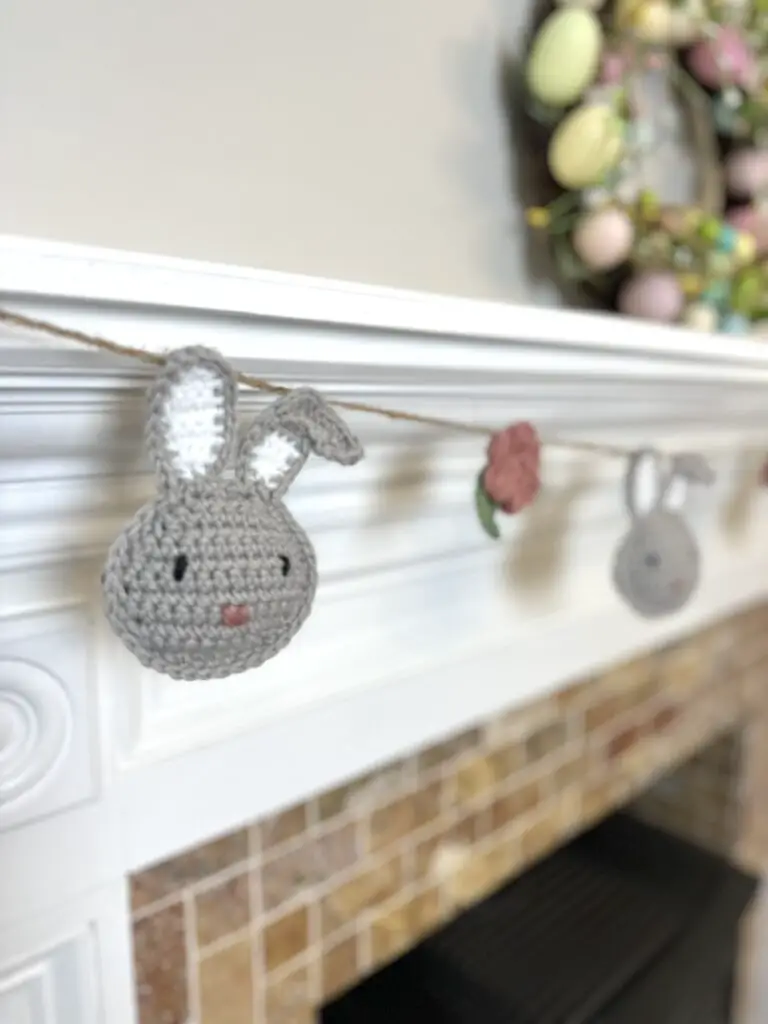
If you poke around on my blog a bit, you’ll probably notice that I have a thing for crochet garlands. I have no idea why, haha. They are just a quick and fun project that doesn’t use a lot of yarn and I like the challenge of trying to create a crocheted version of the picture I have in my mind. Plus they are just so darn cute! My kids love changing out the garlands on our fireplace for every season/holiday.
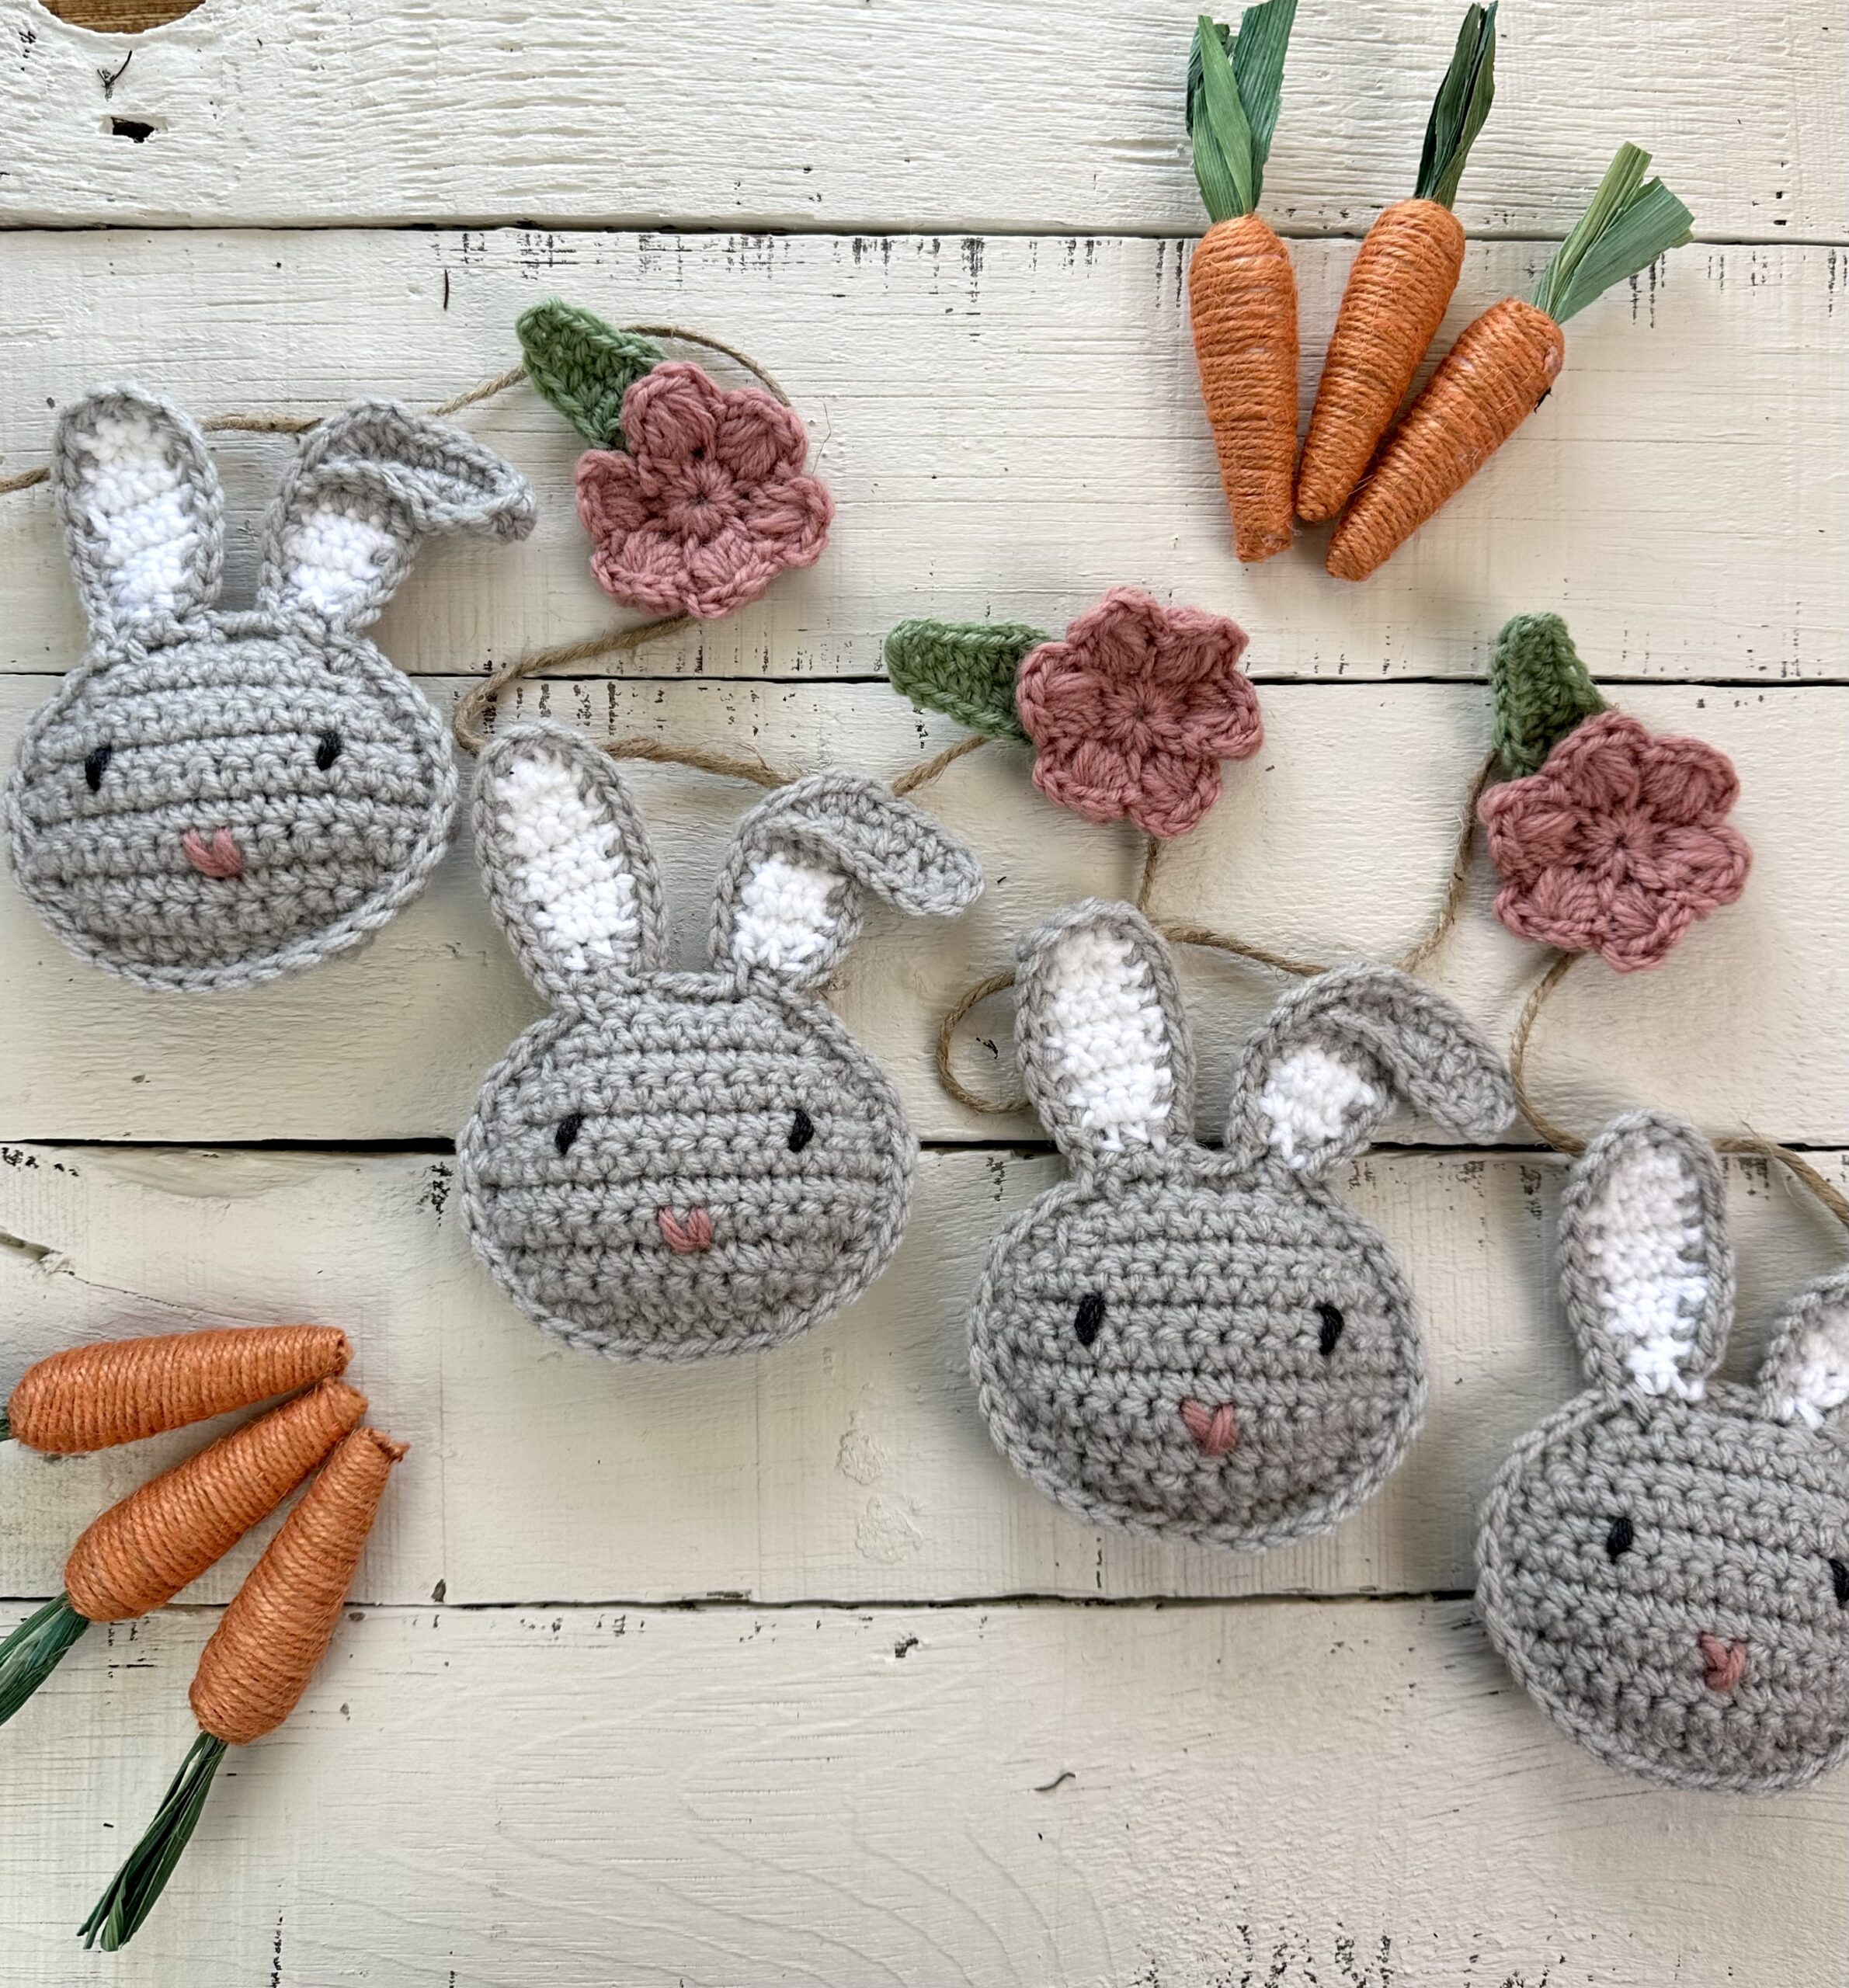
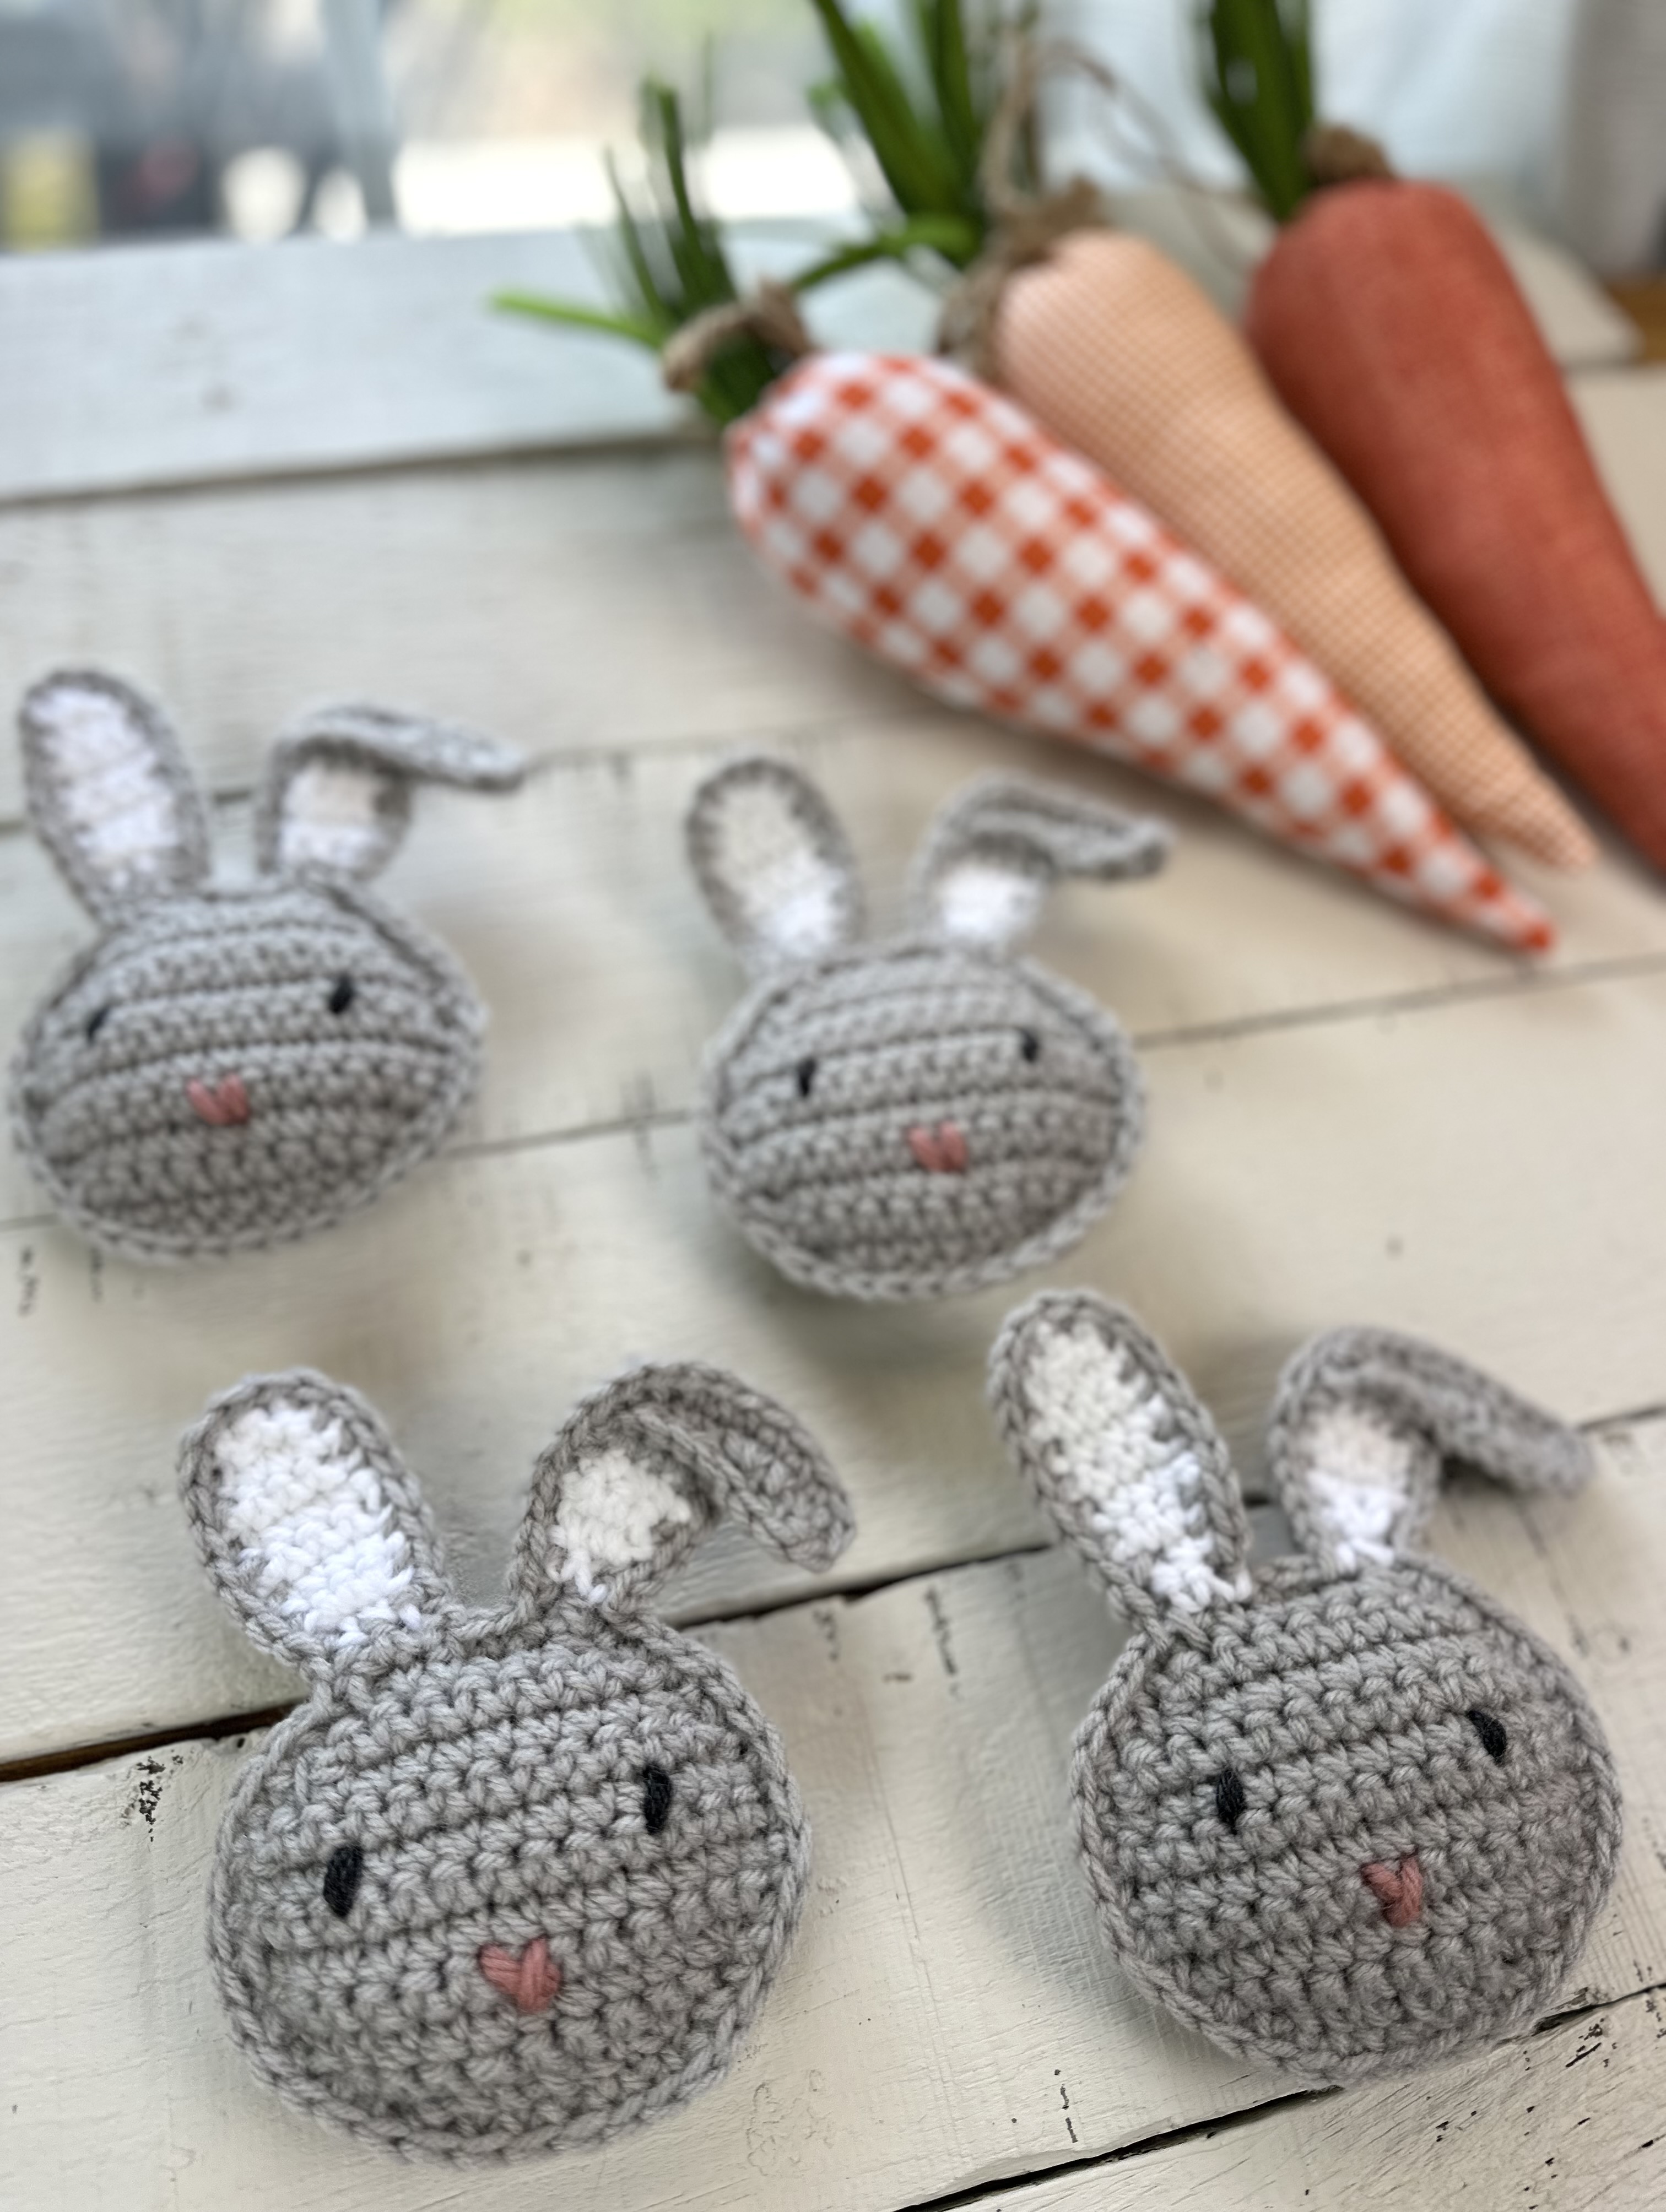
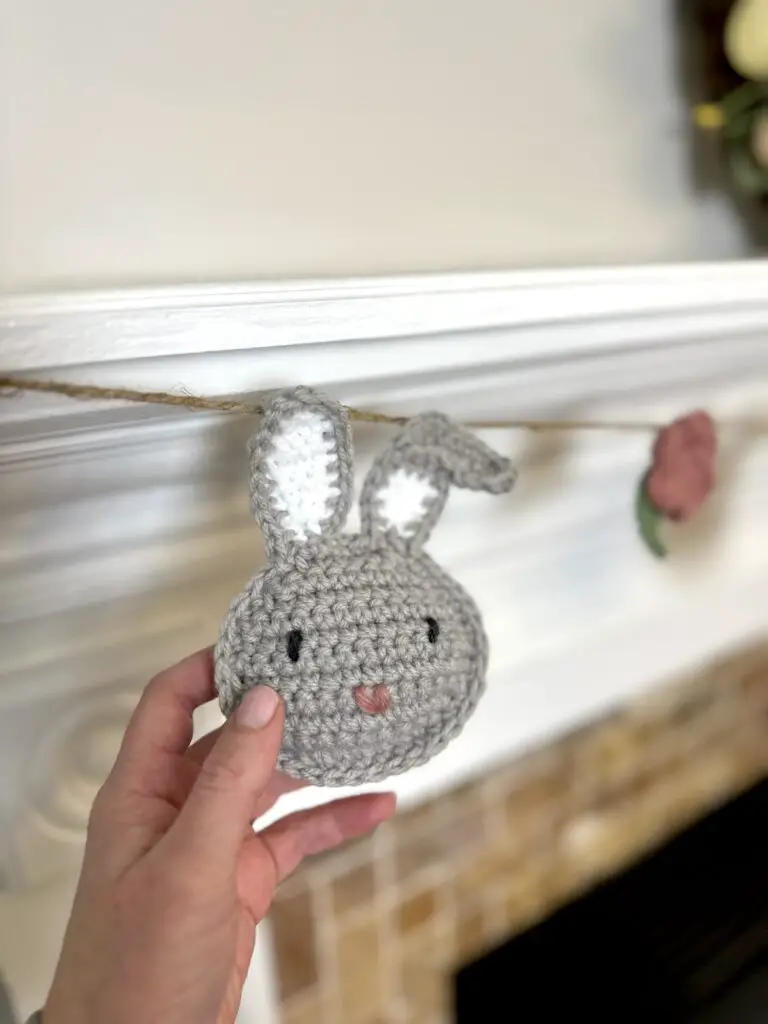
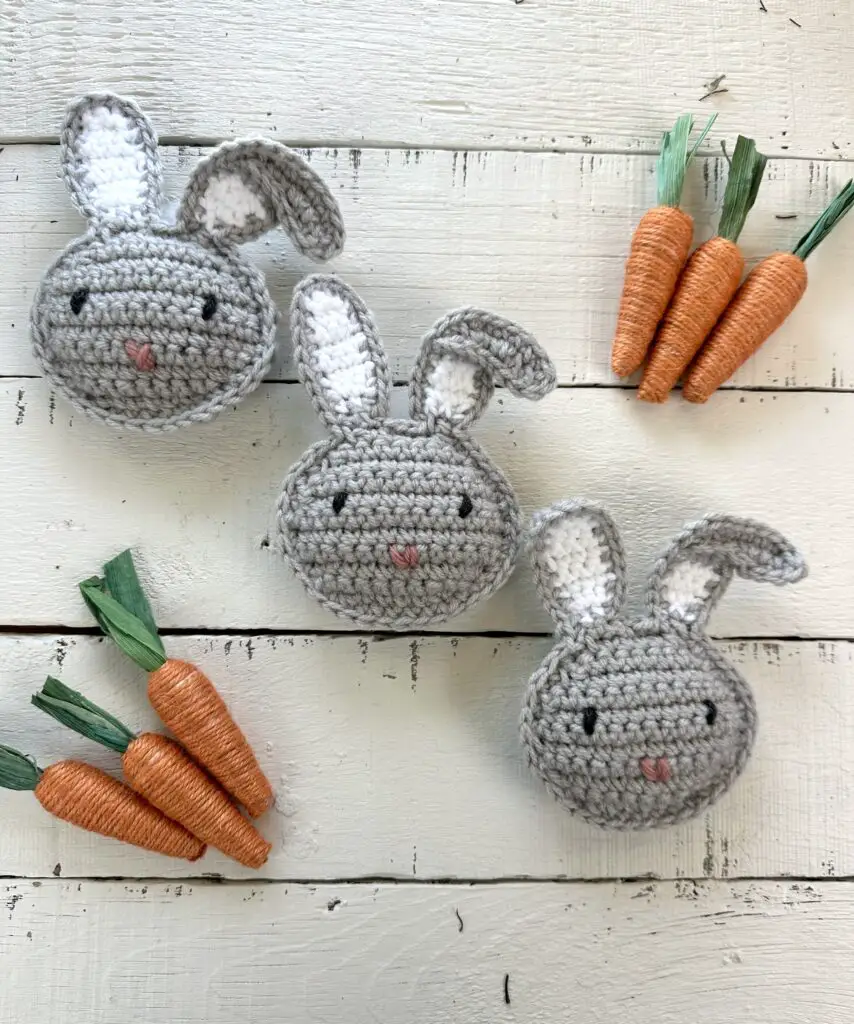
The idea for this Easter Bunny Garland popped into my head one Saturday while I was watching my twins’ soccer tournament. It might seem a little over the top, but I always carry yarn and a hook in my purse, just in case inspiration strikes, and I had the prototype ready by the 4th round of the tournament! I do already have a pattern for an Easter Bunny Garland, but it is more of a rear view (I call it the Bunny Butts Garland). This time, I wanted to make something with a cute bunny face and maybe a floppy ear. I love how it turned out!

To give it more of a spring vibe, I added some mollie flowers to the garland and I think it’s the perfect touch. Instructions for the flower are also included in this post.

More Free Crochet Garland Patterns
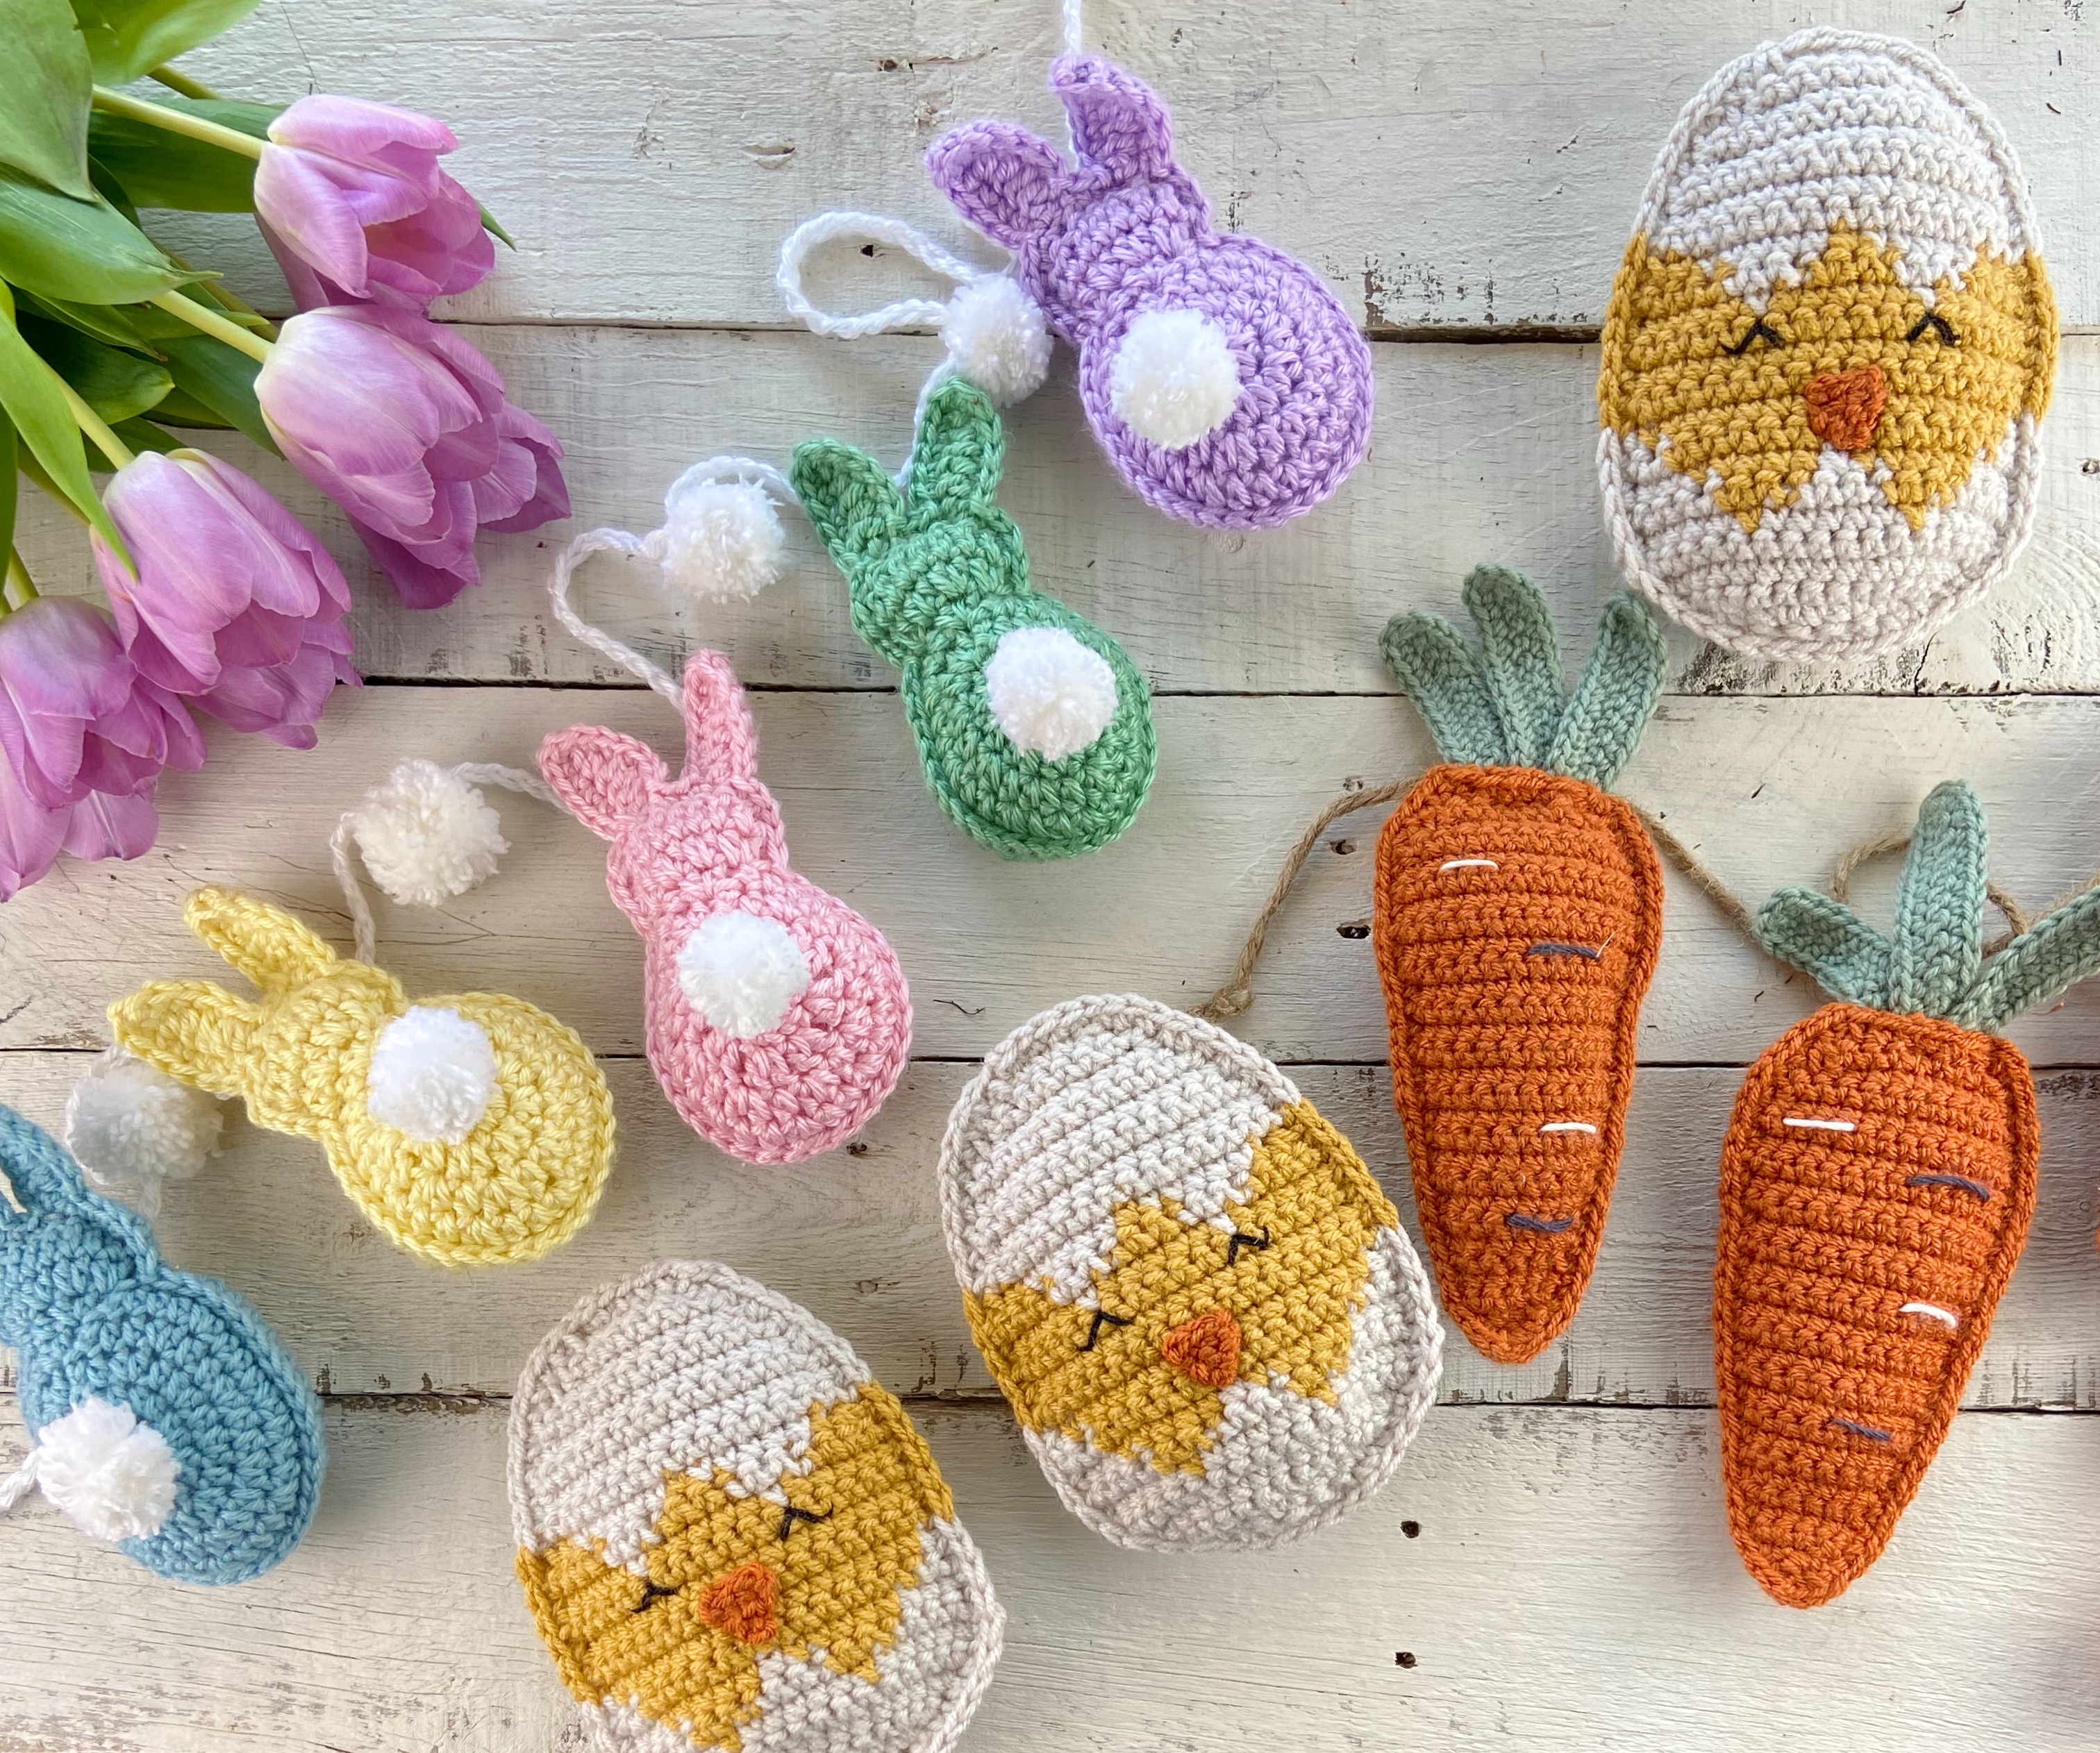
Spring/Easter themed garlands are my fave to make so I have quite a few other free bunny/carrot/chick patterns you can find here on the blog. You could even mix and match pieces from different garlands (how cute would a bunny and carrot garland be?!) Or if you’re looking ahead, I have garlands for most every season!
Crochet Easter Bunny Garland – Materials
You won’t need much in the way of materials to crochet the Easter Bunny Garland. For yarn, each bunny only uses about 25 yards of worsted weight yarn so it’s a great stash buster. The flowers clock in at about 6-7 yards of WW, including the leaf. For the bunnies, I used Lion Brand Pound of Love in the colors “Elephant Gray” for the main color and “White” for the ears.
You will also need a small amount (about a yard or two for the whole garland) of black or dark gray yarn for the eyes. I used Caron Simply Soft in Charcoal. I used the same yarn for the nose as for the flowers to keep things simple (Lion Brand Local Grown Wool in the color “Cherry Blossom”) but you could mix it up! If you choose to make the leaves, you’ll need a few yards of green WW. I just used scrap yarn. Finally, you will need a 6′- 8′ length of twine, string, or yarn to string your garland.
Additional materials include a size G hook, polyfil or other stuffing material, a yarn needle, stitch markers, and scissors.
Construction
These Easter Bunnies are made in the same 2D style as my other garlands – meaning each bunny is made of two flat panels, crocheted in rows, that are joined along the edges using single crochet and lightly stuffed. The face details are embroidered on with a yarn needle.
I rated this pattern as Easy – Level 2 for skill level. It is mainly worked in single crochet, but there are a few color changes and some increasing/decreasing is involved so it’s probably a smidge above a beginner/easy level…but don’t let that hold you back if you want to try! The pattern includes detailed instructions for any of the tricky parts!
The flowers and leaves are made separately and sewn together. The pattern also includes two options for how to string the garland. If garlands aren’t your thing, I have seen people use my garland pieces to make wreaths, table runners or decor, or even to dress up Easter baskets! People are so creative!
Ok let’s make some Easter bunnies!
Purchase an ad-free Printer friendly version of this pattern in my Etsy shop or Ravelry shop.
A video tutorial is now available for the Easter Bunny Garland! Follow along below!
Crochet Easter Bunny Garland Free Pattern
Skill Level
Easy – Level 2: this pattern is mainly worked in single crochet, with some increasing and decreasing and a few color changes. Single crochet is used to join the two bunny head panels and some sewing/embroidery is required to add the details.
Materials
- Yarn (per bunny):
- About 20 yards of worsted weight (size 4) yarn for the main color (gray). I used Lion Brand Pound of Love in “Elephant Gray” (100% acrylic, 16oz/454g, 1020yds/932m).
- About 2 yards of worsted weight (4) yarn for the inside of the ears (white). I used Lion Brand Pound of Love in “White” (100% acrylic, 16oz/454g, 1020yds/932m).
- A small amount of worsted weight (4) yarn for the eyes (black or dark gray). I used Caron Simply Soft in “Charcoal” (100% acrylic, 5oz/142g, 250yds/228m).
- A small amount of worsted weight (4) yarn for the nose (pink). I used Lion Brand Local Grown Wool in the color “Cherry Blossom” (100% wool, 3.5oz/100g, 186yds/170m).
- Yarn (per flower + leaf):
- About 4 yards of worsted weight (size 4) yarn for the flower. I used Lion Brand Local Grown Wool in the color “Cherry Blossom” (100% wool, 3.5oz/100g, 186yds/170m).
- About 1 – 2 yards of worsted weight (4) yarn for the leaf. I used green scrap yarn.
- About 4 yards of yarn, string, or twine for stringing the garland.
- Hook: size G/6 (4.00mm)
- Polyfil or other stuffing material
- Stitch marker
- Yarn needle, (optional) extra large yarn needle if using twine, scissors
Size
Each bunny is about 3.75″ x 5.5″. The finished garland is about 6′ long as shown.
Gauge
8 sts x 8 rows in 2″ square using sc.
Notes
- Each bunny is made of two flat panels (worked in rows) that are joined together with single crochet and lightly stuffed. The face details are embroidered onto the front panel before joining. The flowers and leaves are made separately and sewn together before adding to the garland.
- Working in the Back Bump – Make your initial chain as instructed. You will see the two loops of each chain in a V-shape. Turn the chain over and on the back of each “V” you should see another loop or “bump.” This is what you will work your Row 1 stitches into. This is optional, but makes a cleaner looking starting edge. See this blog post for more info on this technique.
- For all color changes: when working the last sc of the “old” color, stop before the last pull through of the stitch (there will be 2 loops on the hook), pull through with the “new” color and continue with the pattern. I like to tie the two ends together to secure.
- For part of the second ear, you will be instructed to work in the back loop only (blo). This mean you will only insert your hook under the loop furthest from you rather than under both loops.
- The ch 1 at the beginning of each row does not count as a stitch.
- For the mollie flower, you will need to make a magic circle. You can find a video tutorial for that here.
- Pattern is written in US crochet terms.
Special Stitches
- Decrease (dec) – Insert hook into first stitch, yo and pull up a loop, insert hook into next stitch, yo and pull up a loop (3 loops on hook), yo and pull through all 3 loops.
- Increase (inc) – Work 2 scs in one stitch.
Abbreviations
- blo = back loop only
- ch(s) = chain(s)
- dc =double crochet
- dec = decrease
- hdc = half double crochet
- inc = increase
- rep = repeat
- sc = single crochet
- sl st = slip stitch
- st(s) = stitch(es)
- yo = yarn over
Crochet Easter Bunny Garland Pattern
FOR EACH BUNNY:
Front Bunny Panel (make 1)
Using gray, chain 7
Row 1: (Working in the back bump of the chain) Inc in 2nd ch from hook, 1 sc in each of the next 4 chs, inc in last ch. Ch 1, turn. (8 sc)
Row 2: Inc, 1 sc in each of the next 6 sts, inc. Ch 1, turn. (10 sc)
Row 3: Inc, 1 sc in each of the next 8 sts, inc. Ch 1, turn. (12 sc)
Row 4: Inc, 1 sc in each of the next 10 sts, inc. Ch 1, turn. (14 sc)
Rows 5 – 7: 1 sc in each st. Ch 1, turn. (14 sc)
Row 8: Dec, 1 sc in each of the next 10 sts, dec. Ch 1, turn. (12 sc)
Row 9: Dec, 1 sc in each of the next 8 sts, dec. Ch 1, turn. (10 sc)
Row 10 Dec, 1 sc in each of the next 6 sts, dec. Ch 1, turn. (8 sc)
Row 11: Dec, 1 sc in each of the next 4 sts, dec. Before turning, place a stitch marker on the side of the panel you are looking at. This will be the “right side”. Ch 1, turn. (6 sc)
Do not fasten off.

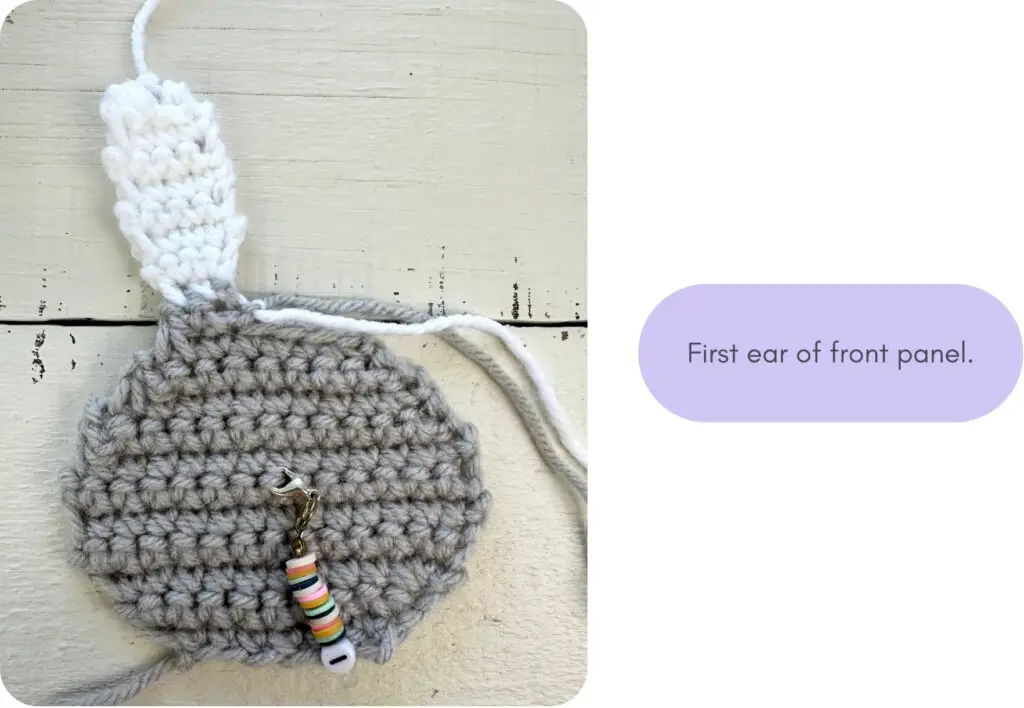
First Ear
Continuing from where we were after Row 11…
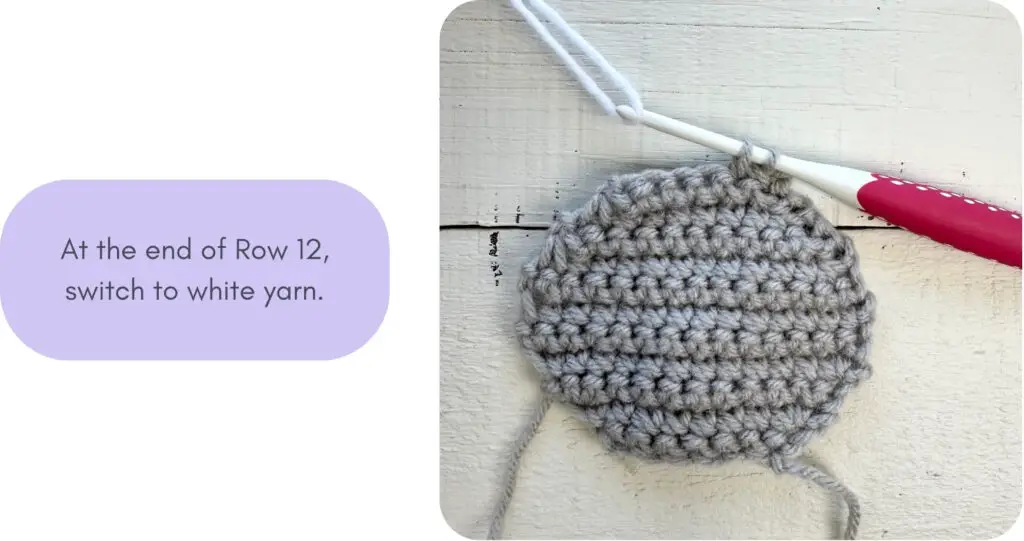
Row 12: 1 sc in each of the first 2 sts (leave remaining stitches unworked for now). On the last pull through of the 2nd sc, switch to white yarn. Ch 1, turn. (2 sc)
Using white yarn,
Row 13: 1 sc in each st. Ch 1, turn. (2 sc)
Row 14: Inc, inc. Ch 1, turn. (4 sc)
Rows 15 – 19: 1 sc in each st. Ch 1, turn. (4 sc)
Row 20: Dec, dec. (2 sc)
Fasten off and weave in ends.
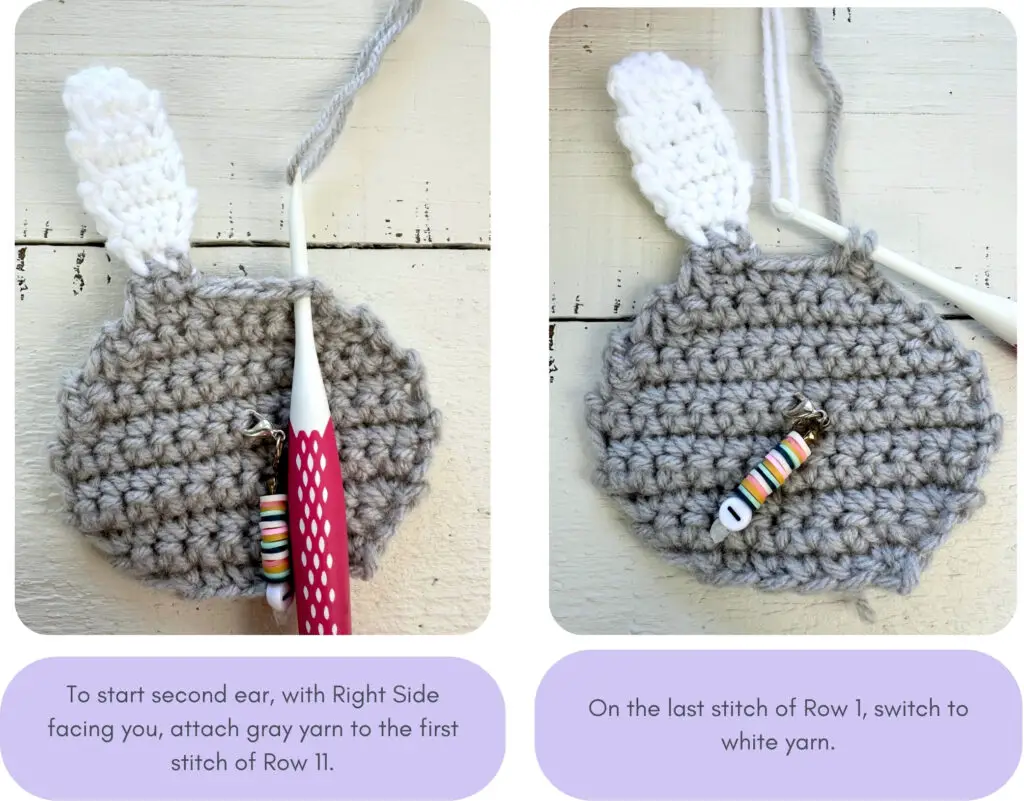
Second Ear (floppy ear)
With “right side” facing you, attach gray yarn to the 1st st you made in Row 11 with a sl st.
Row 1 : 1 sc in the same st you just attached to, sc in next st (leave remaining sts unworked). On the last pull through of the 2nd sc, switch to white yarn. Ch 1, turn. (2 sc)
Row 2: With white, 1 sc in each st. Ch 1, turn. (2 sc)
Row 3: Inc, inc. Ch 1, turn. (4 sc)
Tip – If you don’t want to make the second ear floppy (i.e. if you want the ears to match), stop here and follow the directions for the First Ear starting at Row 15.
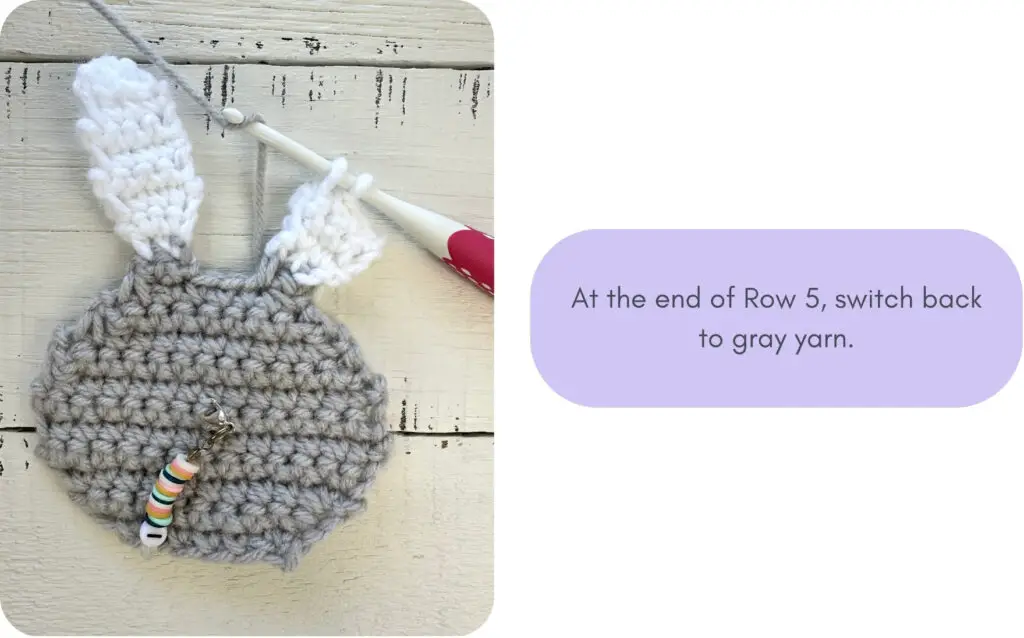
Rows 4 – 5: 1 sc in each st. Ch 1, turn. Switch to gray yarn on the last sc of Row 5. (4 sc)
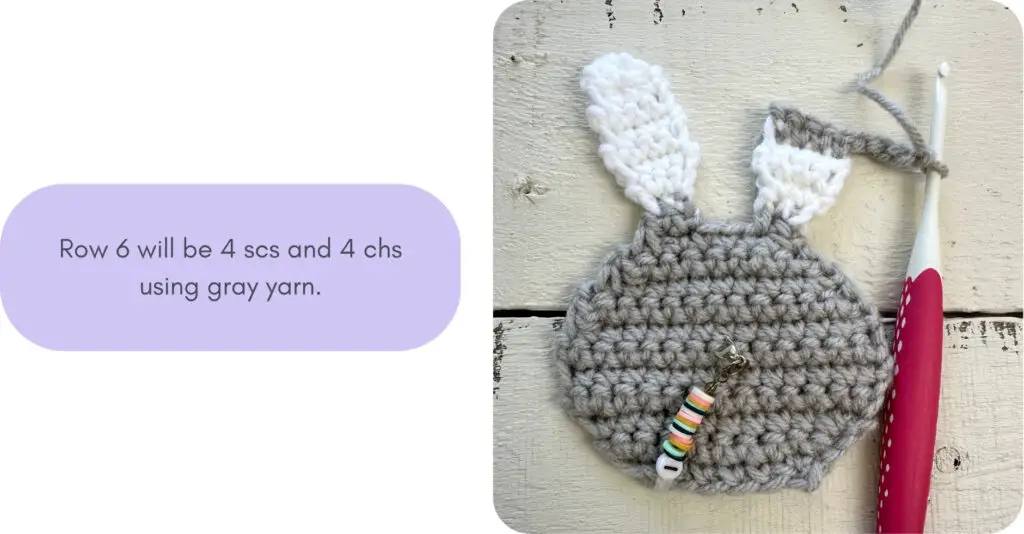
Row 6: 1 sc in each st, ch 4. Turn. (4 sc, 4 chs)
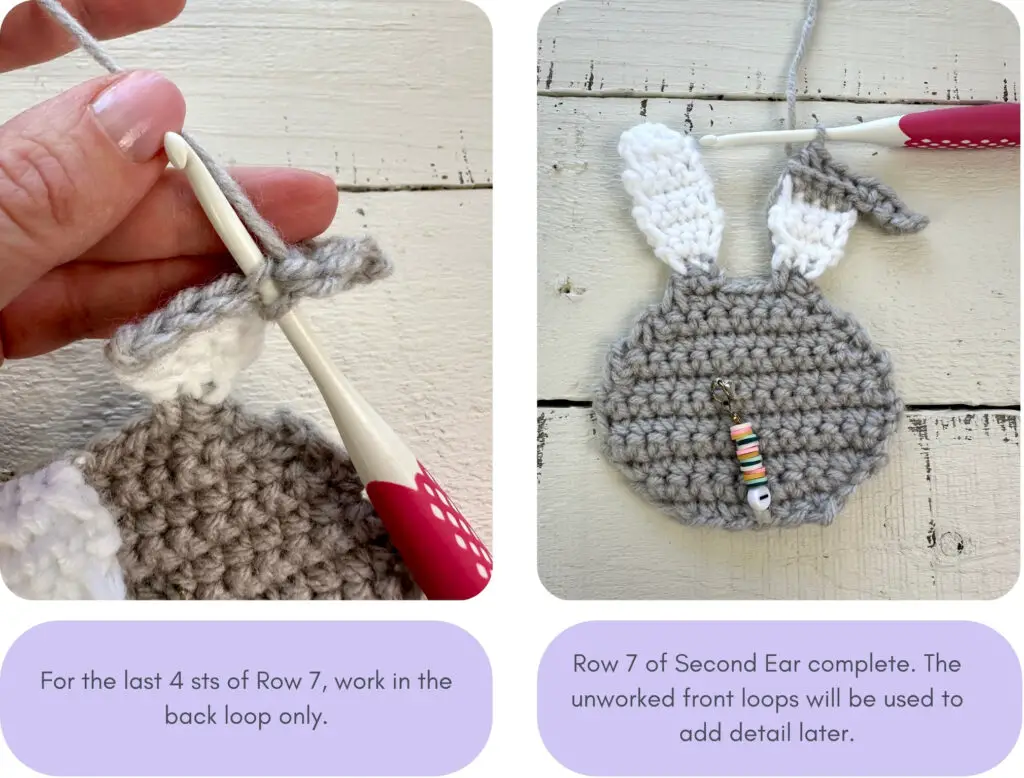
Row 7: 1 sc in the 2nd ch from hook and 1 sc in the next ch, inc in next ch, 1 sc in blo in each of the next 2 sts, dec in the blo over the last 2 sts. (7 sc) Working in the blo will leave the front loops open for adding some detail later.
Fasten off and weave in ends.
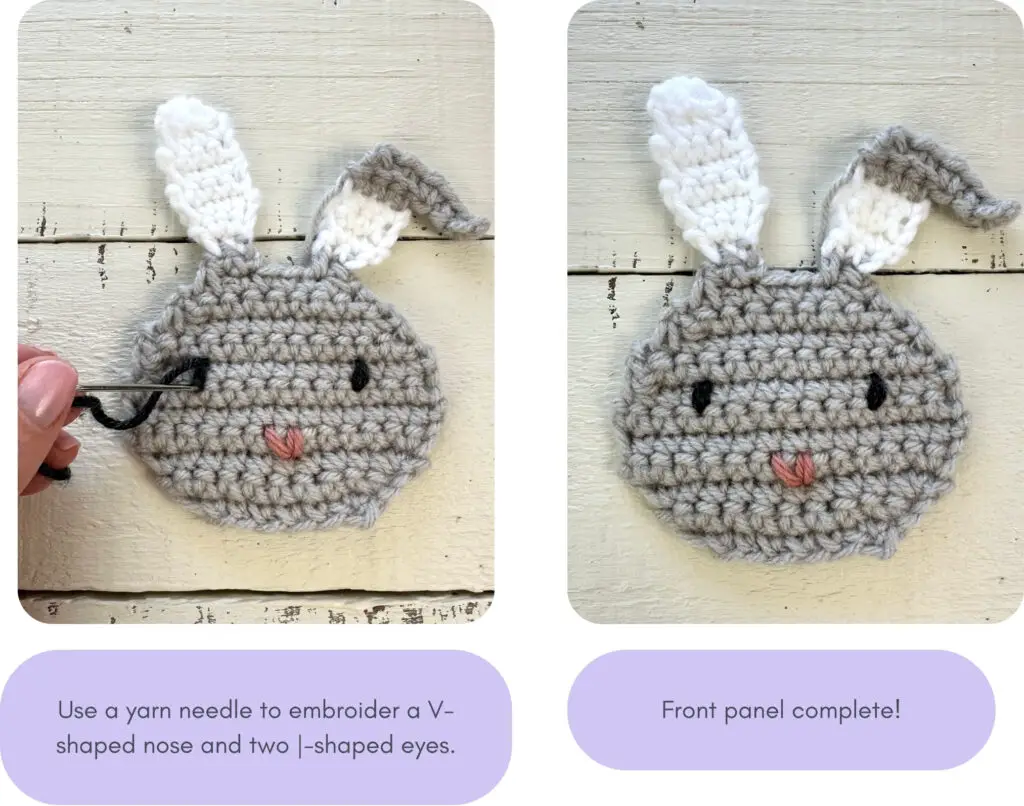
Adding Face Details
Nose
- Thread a yarn needle with a 6″ length of pink yarn.
- In the center of the face circle, at about Row 4, sew a “V” shape.
- Make 2 passes on each side of the V to make it stand out.
- Tie the two ends together on the wrong side of the panel to secure.
Eyes
- Thread a yarn needle with a 12″ length of black/dark gray yarn.
- At about Row 7, about 3 sts in from one edge, sew a “|” shape to make one eye.
- Make 2 passes to make it stand out.
- Repeat on the other side of the face for the other eye.
- Tie the two ends together on the wrong side of the panel to secure.
First panel complete!
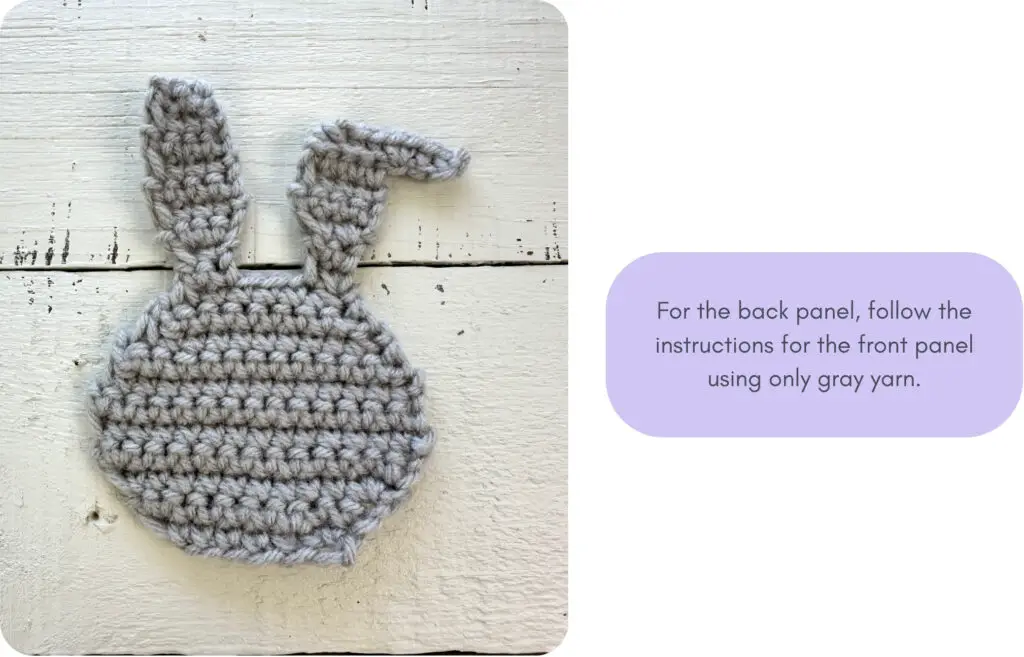
Back Bunny Panel (make 1)
Repeat the instructions for the Front Bunny Panel using only gray yarn. Do not switch to white yarn for the ears and do not add face details.
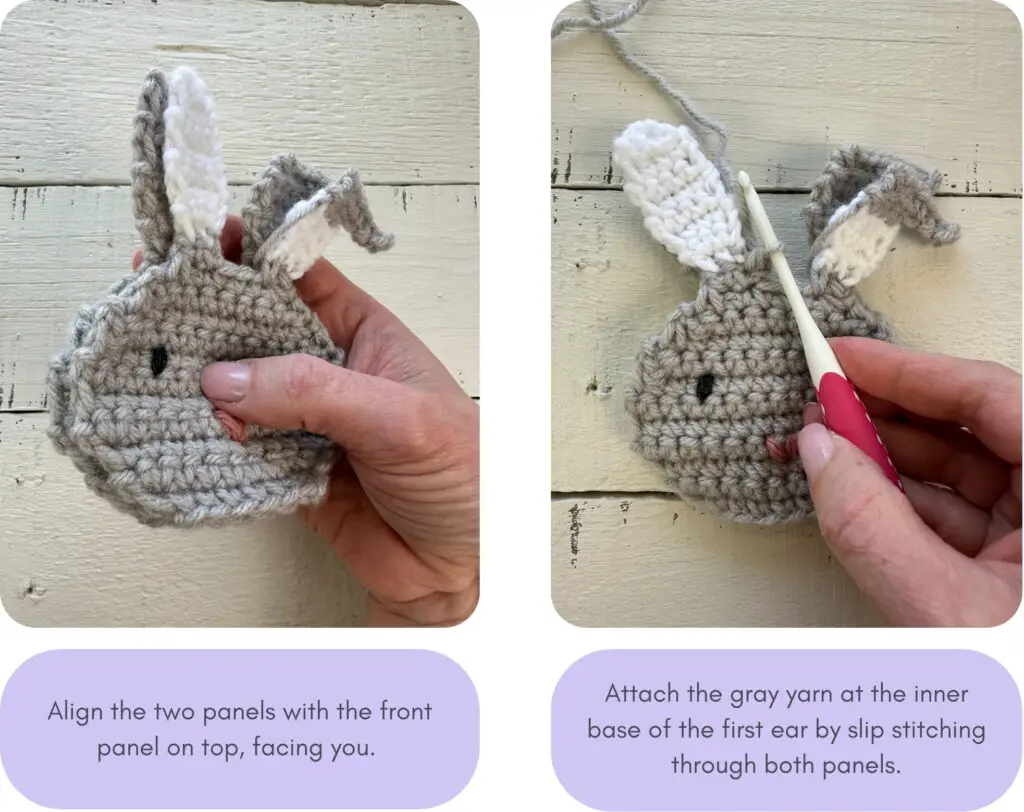
Joining the Front and Back Bunny Panels
- Lay the front panel on top of the back panel.
- With the front panel facing you, attach gray yarn with sl st at the inner base of the 1st ear.
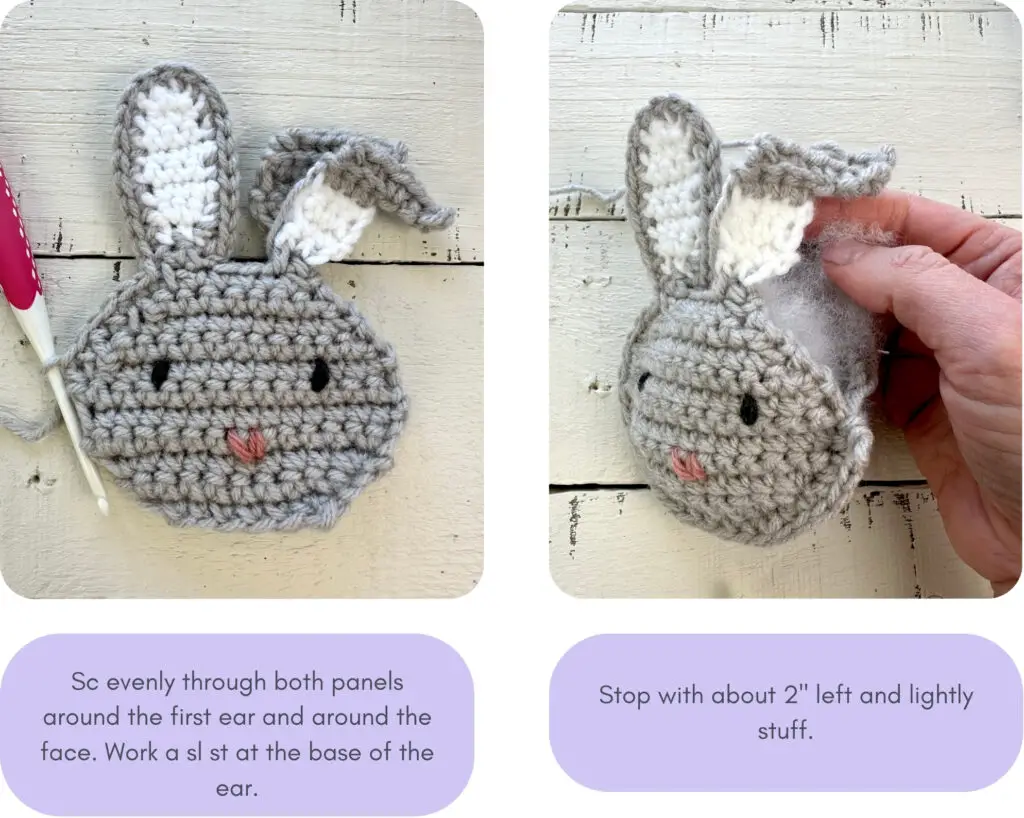
- Begin single crocheting up the inner edge of the ear through both panels to join.
- Sc around the top of the ear and down the other side, working around the perimeter of the ear.
- Try to space the scs evenly.
- Work a sl st where the ear joins the head to make the indent more pronounced.
- Continue sc-ing through both panels down the side of the face, around the bottom, and start up the other side.
- Stop with about 2″ to go and lightly stuff the face part of the panels (no need to stuff the ears).
- Continue sc-ing to join the rest of the face area.
- Work a sl st at the base of the second ear and start sc-ing up the outside of the second ear.
- Stop when you get to the top of the white sts (just under the floppy part of the ear).
- Work a sl st here and fasten off. Weave in ends. We will reattach the yarn in a different spot to finish joining the panels.

- Turn the bunny head around so that the ears are toward you.
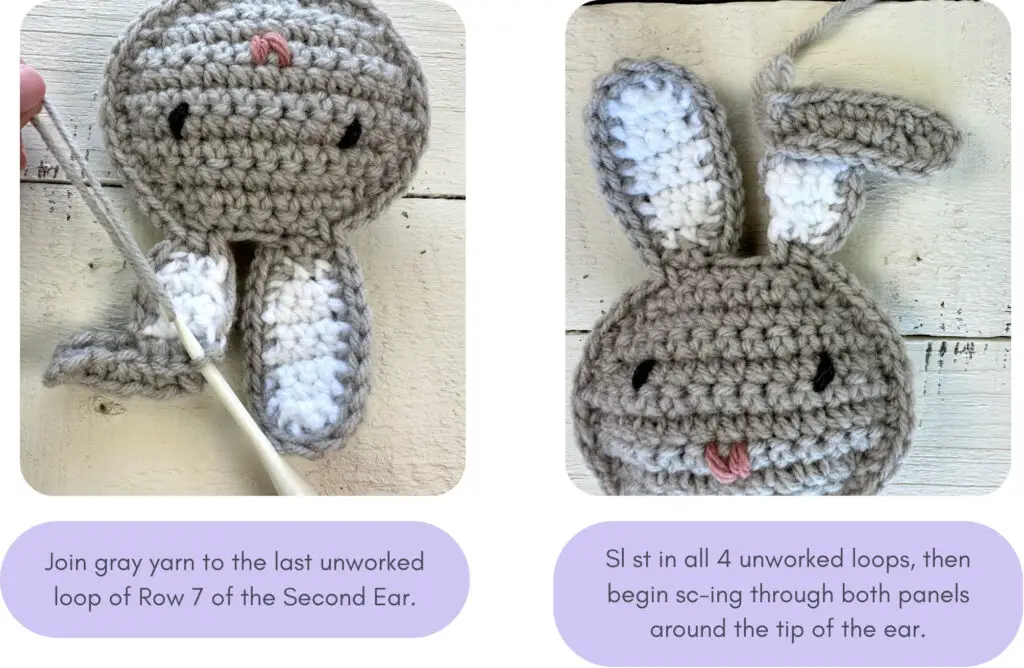
- Insert empty hook into the last unworked loop from Row 7 of the second ear. This should be the decrease from Row 7 and it should be the unworked loop closest to the gap between the ears.
- Attach gray yarn to this unworked loop with a sl st.
- Sl st in each of the next three unworked loops.
- Continuing to the underside of the floppy ear, begin sc-ing through both panels of the floppy part of the ear to join.
- Continue evenly sc-ing through both panels around the tip of the ear, across the top of the ear, and then down the inside edge of the ear.
- Sl st at the base of the second ear.
- Sc through both panels for the 2 sts at the top of the head (between the ears).
- Sl st at the inner base of the first ear.
- Fasten off and weave in ends.
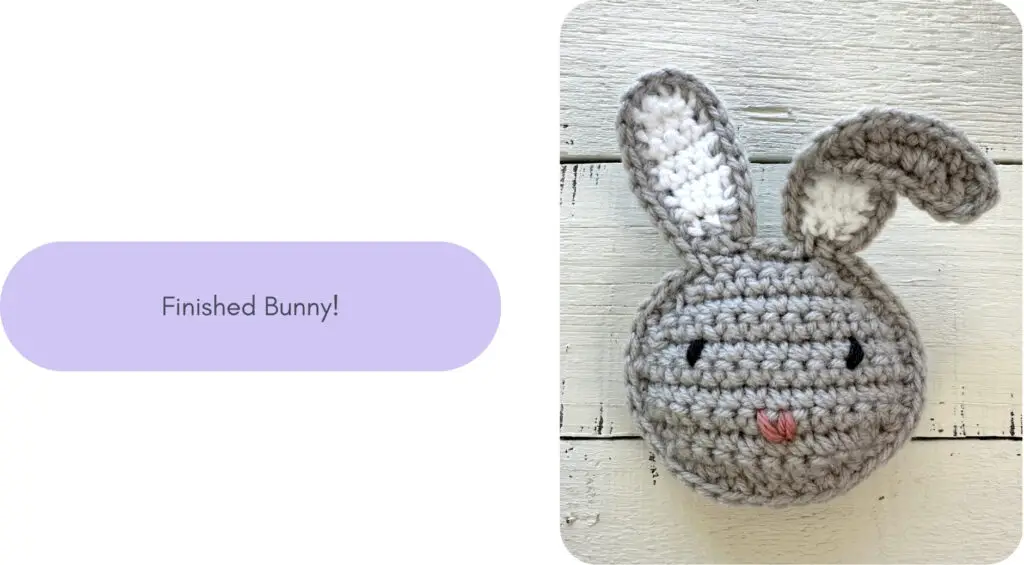
- Your bunny is complete!
Mollie Flower
Using pink yarn and G hook,
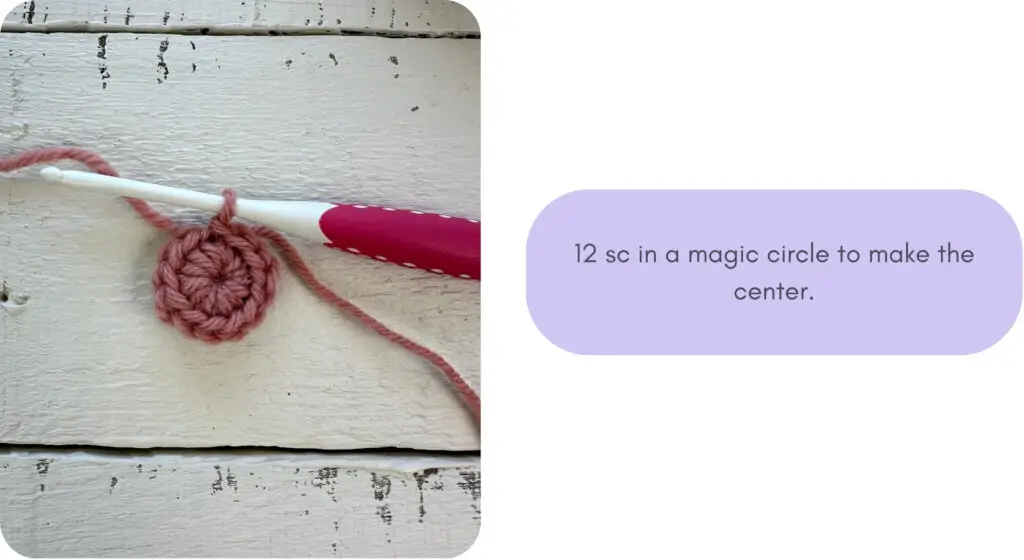
Center: Make a magic circle. Work 12 scs in the magic circle. Sl st to join to the 1st sc and pull the circle tight.
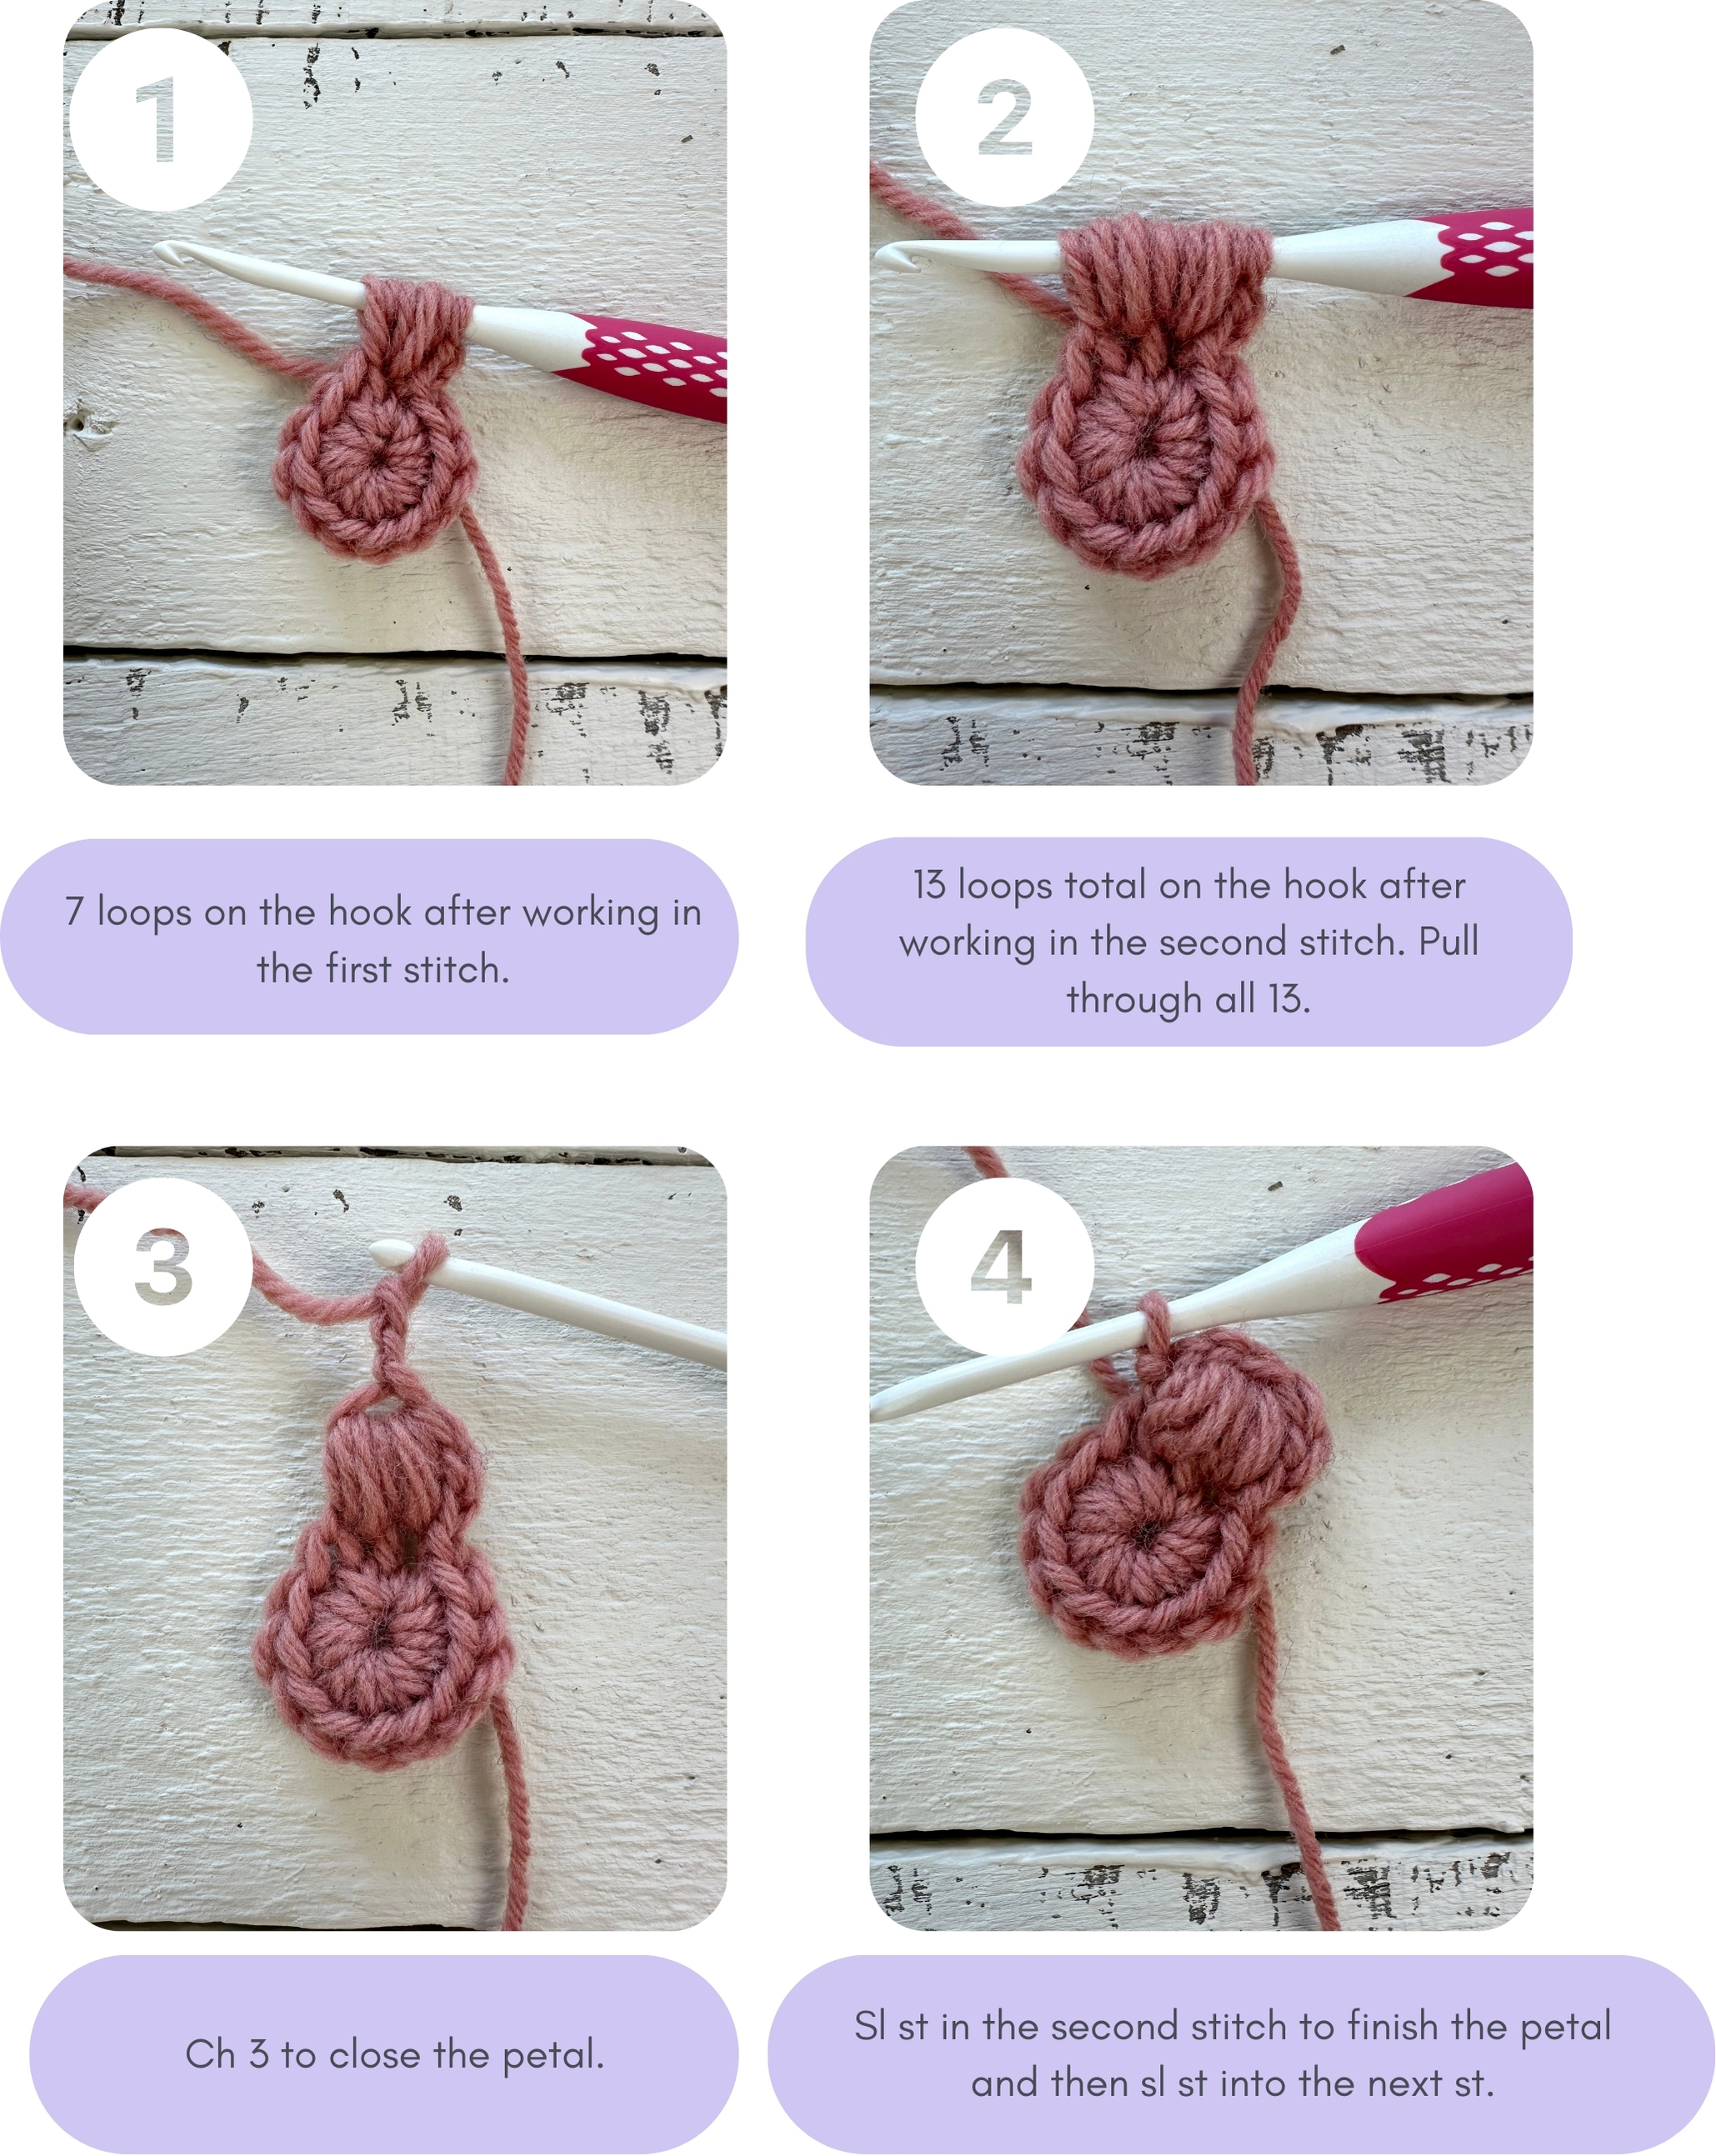
Petal: Ch 2. *Yo and insert hook into the 1st st (the same st you sl st’d into), yo and pull up a loop (pull it up tall), rep from * two more times in the 1st st,
**yo and insert hook into the next st, yo and pull up a loop (tall). Rep from ** two more times in 2nd st,
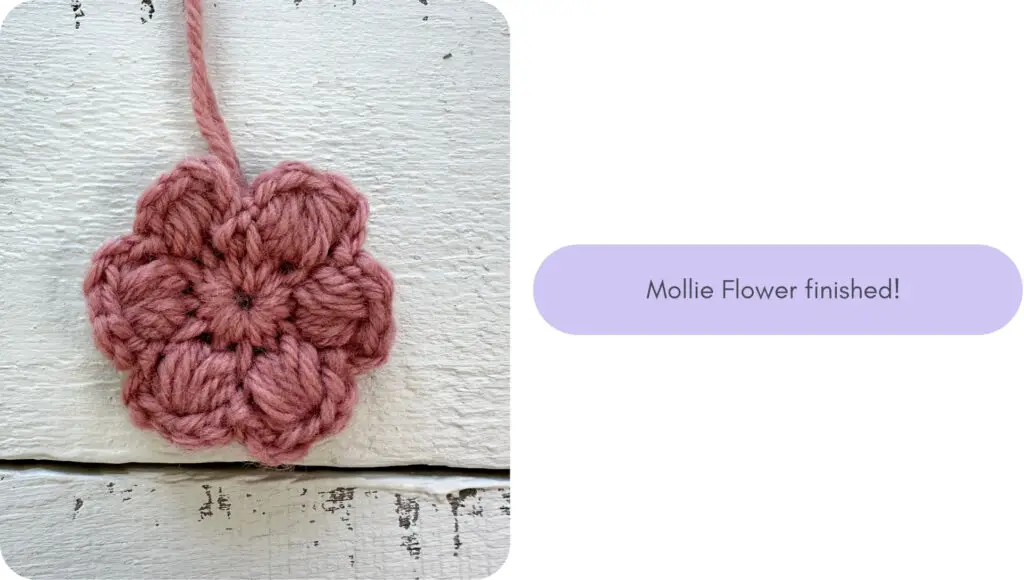
yo and pull through all 13 loops on hook,
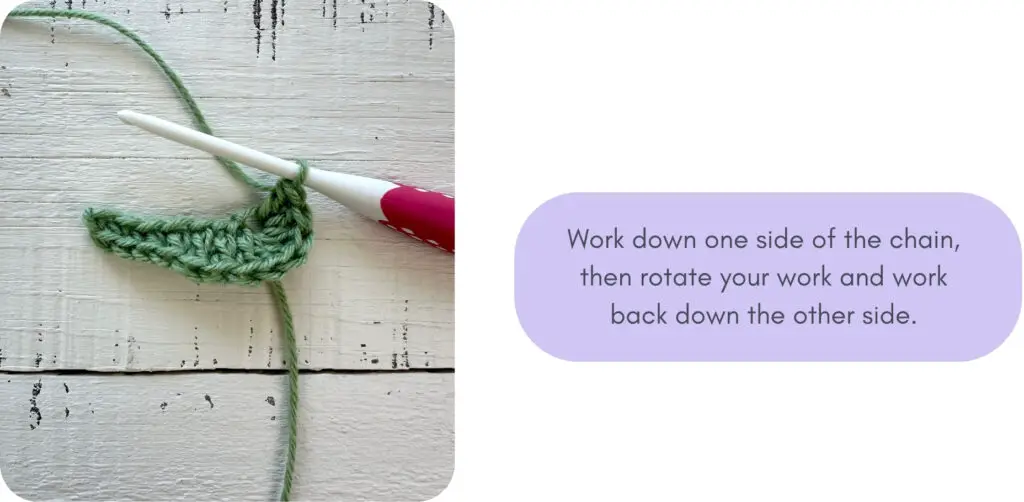
ch 3 and sl st into the 2nd st.
Sl st into the next st (this sets you up to start the next petal).
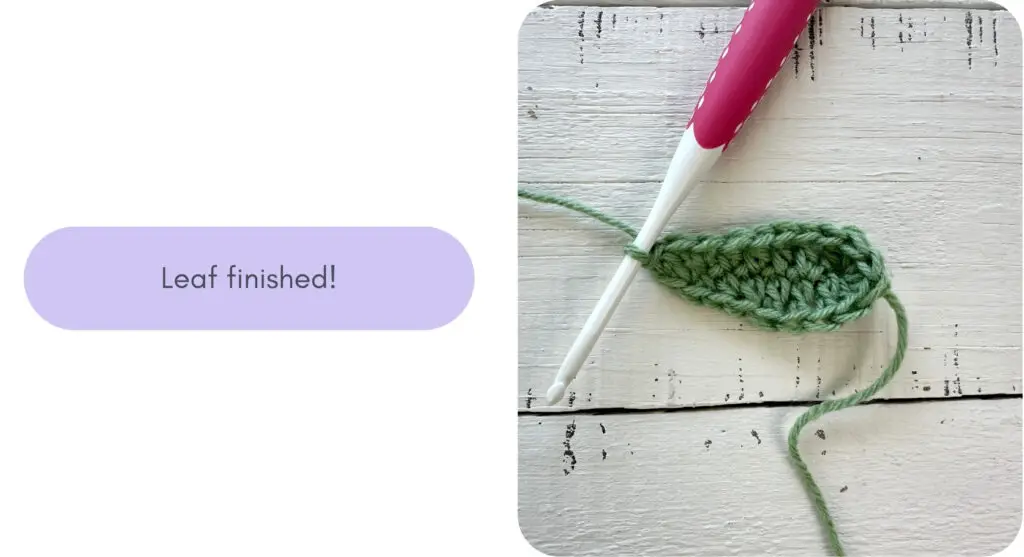
Petal made.
- Repeat petal instructions 5 more times. On the last petal, finish by slip stitching into the second st and then fasten off.
- Tie the two ends together to secure and use them to attach the flower to the garland (if using Option B for making the garland. If using Option A, trim or weave in the ends).
Leaf
Using green yarn and G hook,
Ch 8.
Working in the back bump of the chain, sc in 2nd chain from hook, 1 sc in next ch, 1 hdc in each of the next 2 chs, 1 dc in each of the next 2 chs, 6 dc in the last ch,
Rotate your work so that you are working back down the other side of the chain (the unused front and back loops),
1 dc in each of the next 2 chs, 1 hdc in each of the next 2 chs, 1 sc in each of the last 2 chs. Sl st to the first sc you made to join the round.
Fasten off and weave in the end tail, but keep the starting tail. We will use it to attach the leaf to the flower.
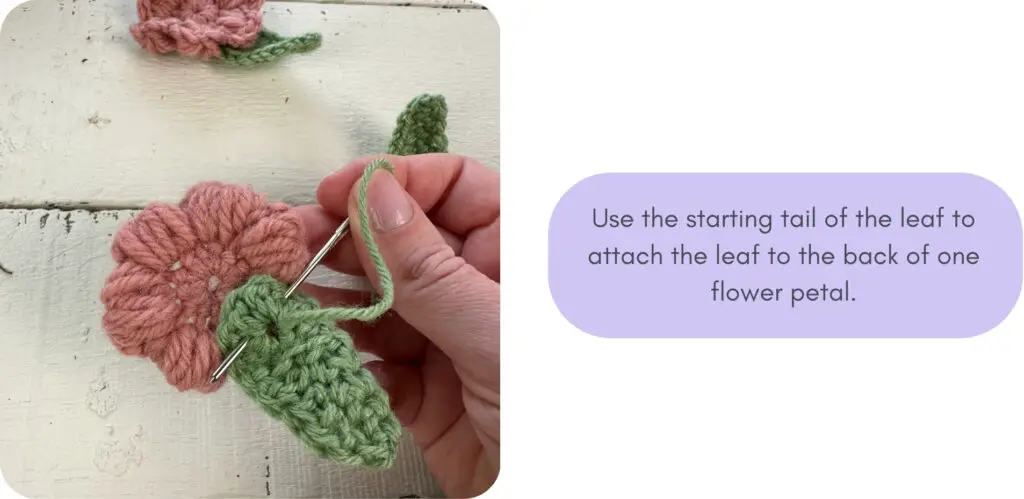
Attaching the Leaf to the Flower
- Position the wider part of the leaf behind one of the petals of the flower.
- Thread your yarn needle with the starting tail of the leaf.
- Sew through the leaf and the back loops of the petal to attach the leaf.
- Attach one or two leaves per flower.
Making the Garland
Make as many bunnies and flowers as you would like for your garland – I made four bunnies and three flowers for a 6 foot garland. There are two options for stringing the garland:
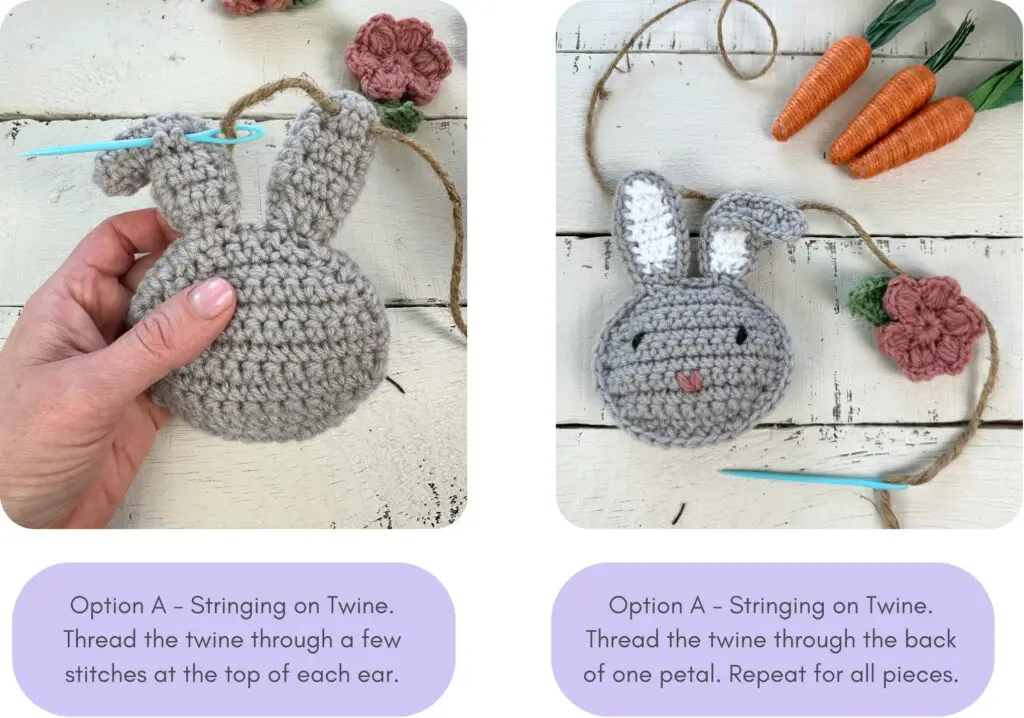
Option A:
- Cut a 6-foot piece of twine, string, or yarn and thread it onto an (extra large) yarn needle.
- Use the needle to thread the string through a few stitches on the back of each ear of the bunnies (near the top of the ears), and through the back of one petal on each flower.
- Continue attaching the other bunnies and flowers and slide them to adjust positioning.
- This is the faster and easier method, but the pieces might slide around once hung.
- Your garland is finished!
Option B:
- With a G hook and worsted weight yarn, ch 280. Fasten off. I think it’s easiest to hang the yarn chain first (stretching it tight because it will sag a lot with the weight of the crochet pieces).
- Attach the center pieces first and work out from there. Thread a 6” piece of yarn through a few stitches on the top of one bunny ear. Use a needle to thread each end through the garland chain (threading it through the chain will keep the bunnies from sliding).
- Tie the two ends tightly and trim or tuck them. Repeat this on the other ear so that each bunny is attached to the chain in two places.
- Repeat for each bunny.
- Use the loose ends of the flower to attach it to the chain using the same method.
- This method is more time consuming, but might be the better option if you are worried about the pieces sliding.
- Your garland is finished!
I hope you enjoyed crocheting this Easter Bunny Garland pattern! Tag me on Instagram @theknottednest to share your project. You can find more project ideas and patterns in the Patterns Section here on the blog.
Happy making!