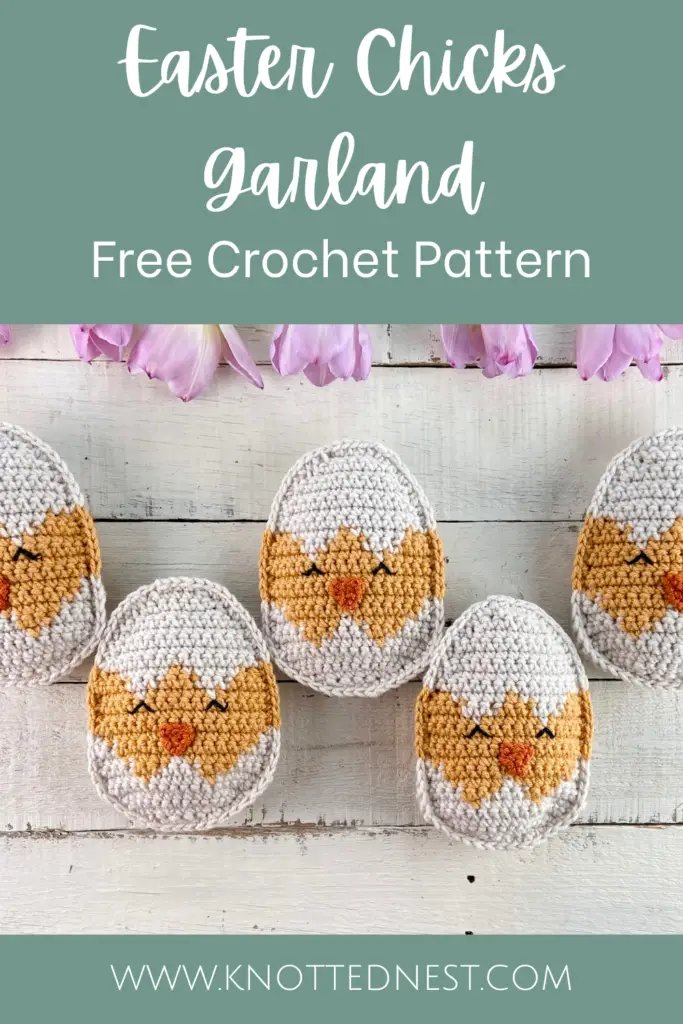
Easter Chick Crochet Garland Free Pattern
These easy Easter crochet chicks will add a sweet handmade touch to your Spring decor!
Read on for more info on the inspiration, materials, and construction or scroll down or click the button below to go straight to the free pattern.
Click here to Pin this Post for later!
This post may contain affiliate links, which means I may receive a small commission, at no extra cost to you, when you make a purchase. Please read my affiliate disclosure for more details.
Inspiration
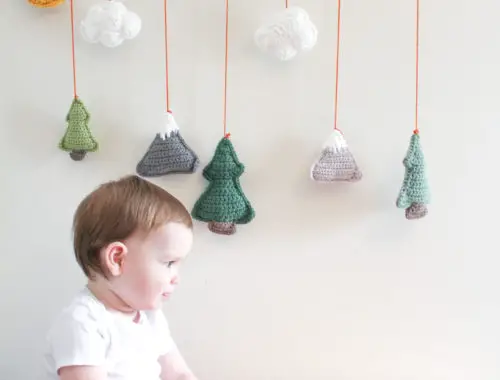
If you’ve poked around my blog a bit, you may have noticed that I kinda have a thing for crochet garlands. Easter garlands, in particular. 🙂 If you came here looking for an easy Easter crochet garland, I’m your girl!
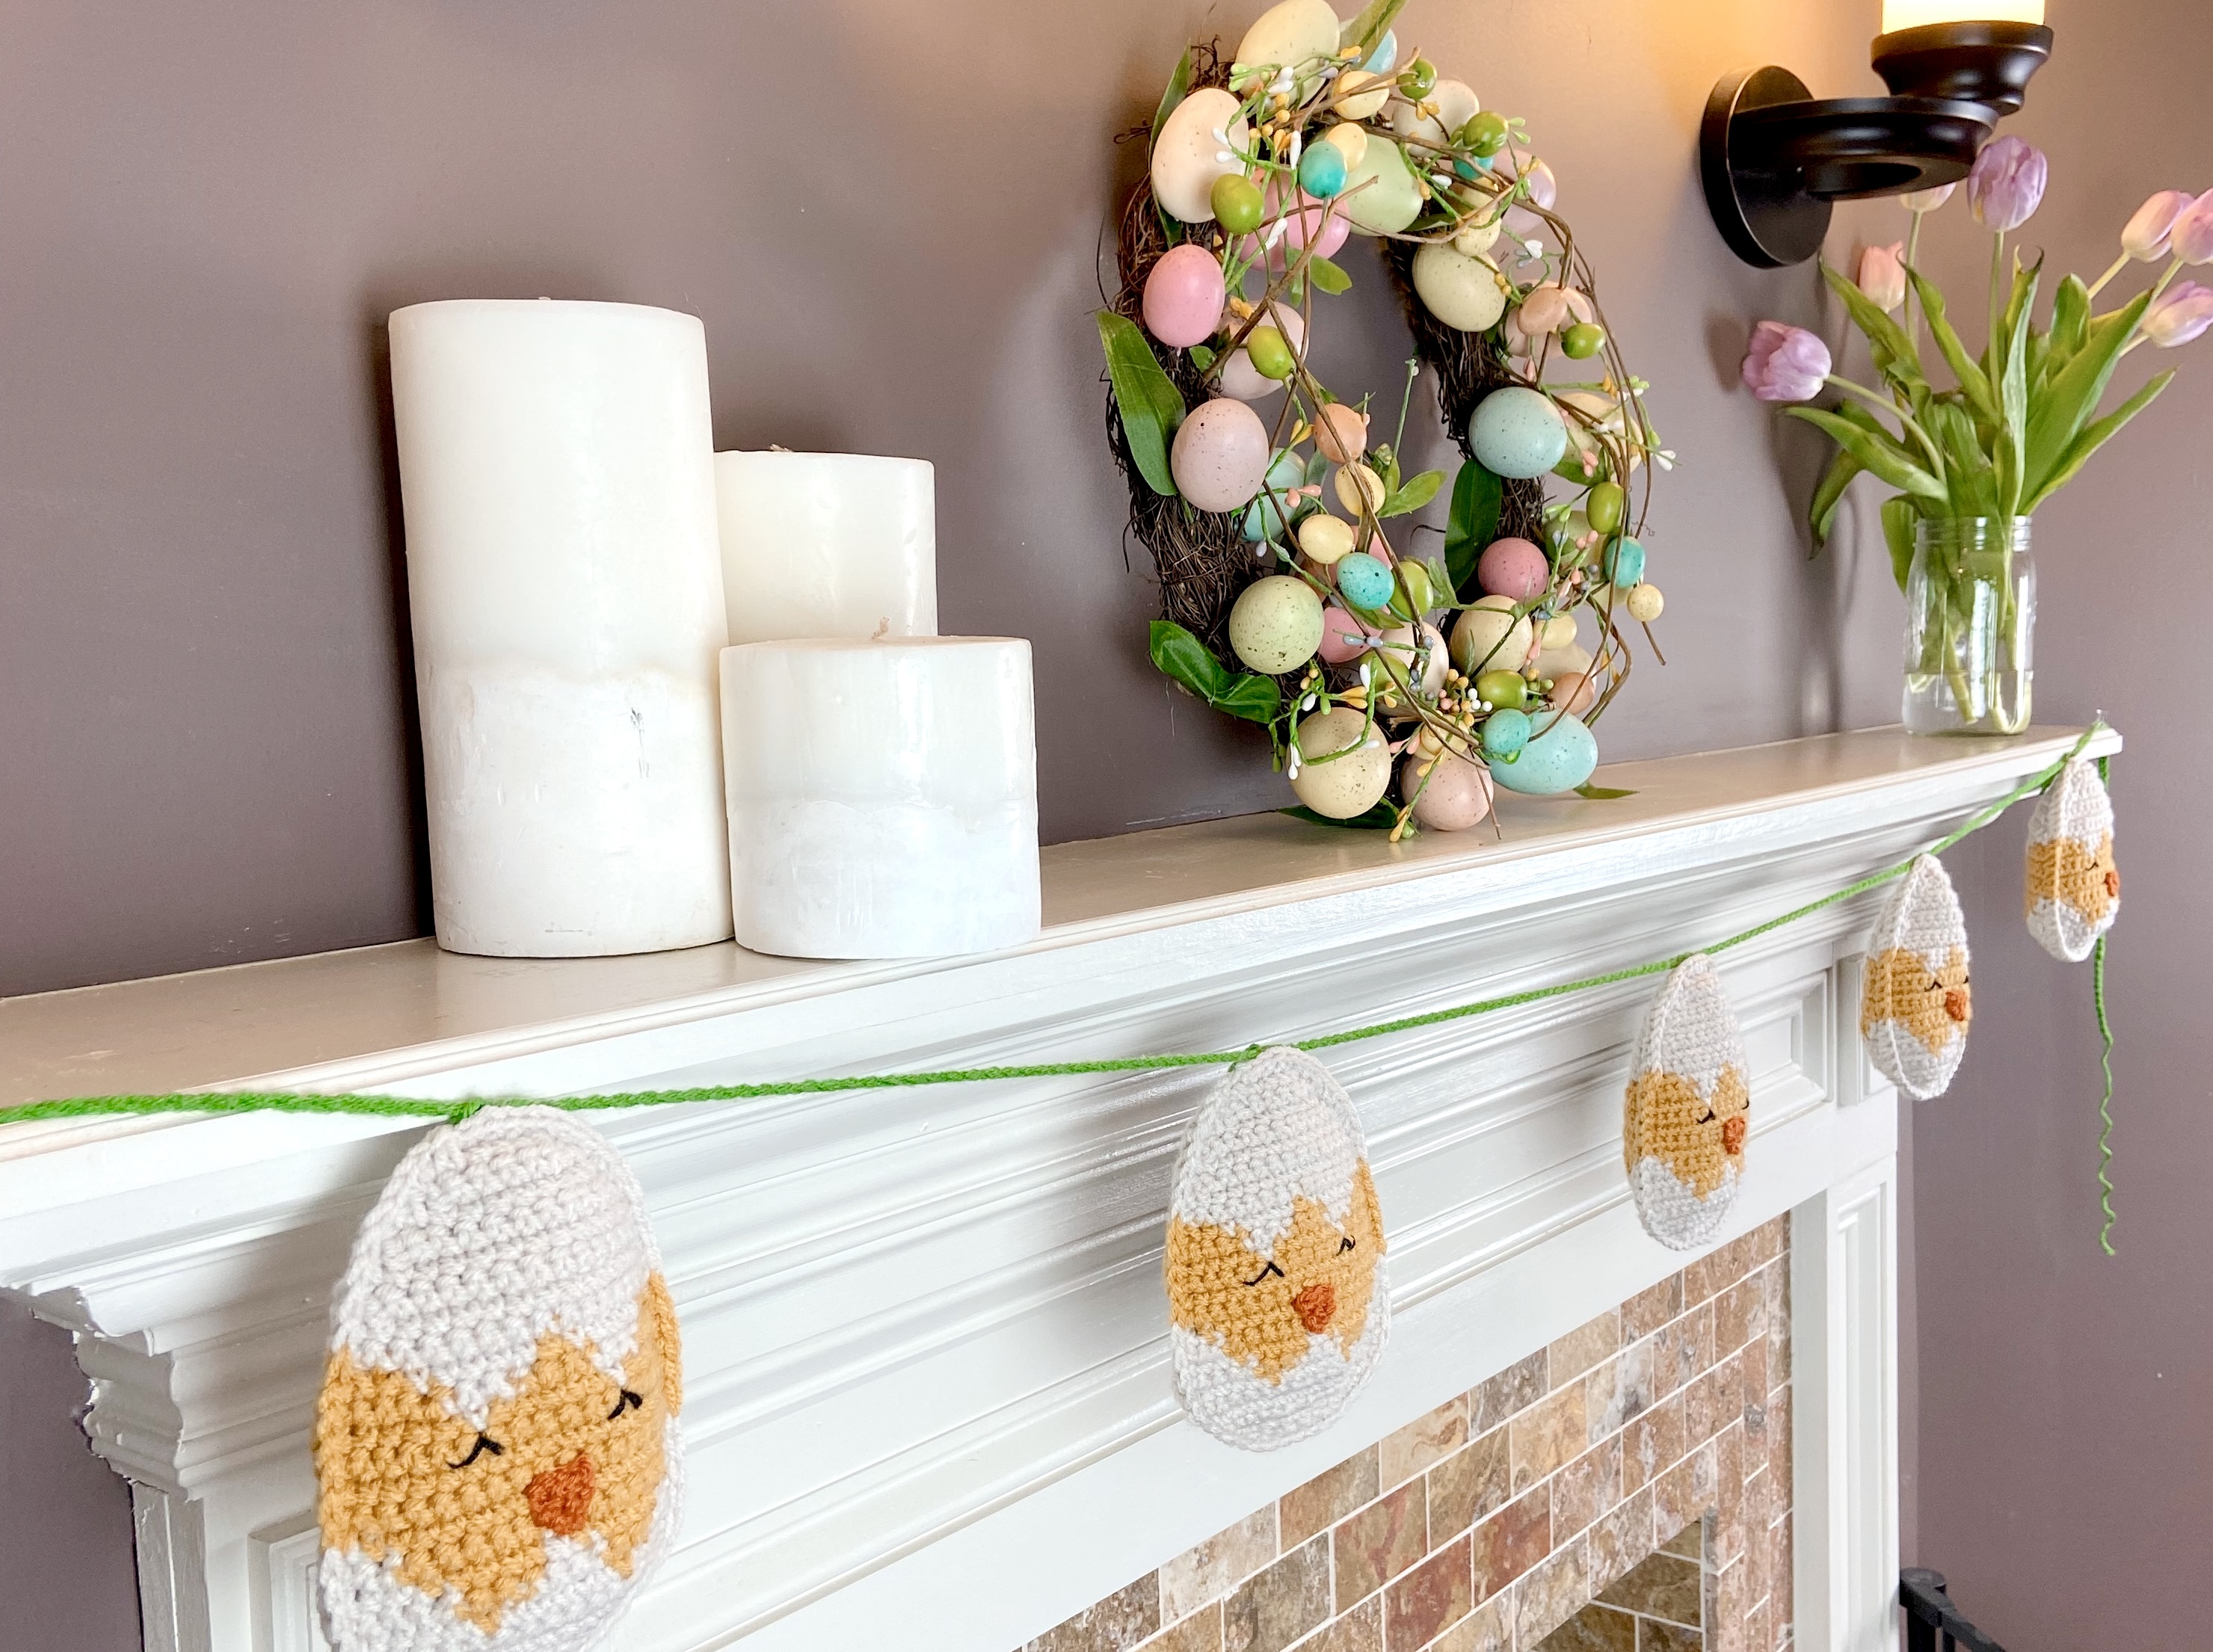
Not sure why Easter time makes me feel so creative (maybe because Spring is my absolute favorite season??), but I’m not complaining because it has inspired three of my all-time favorite designs: The Easter Bunny Garland, The Easter Carrot Garland, and now, The Easter Chick Garland.
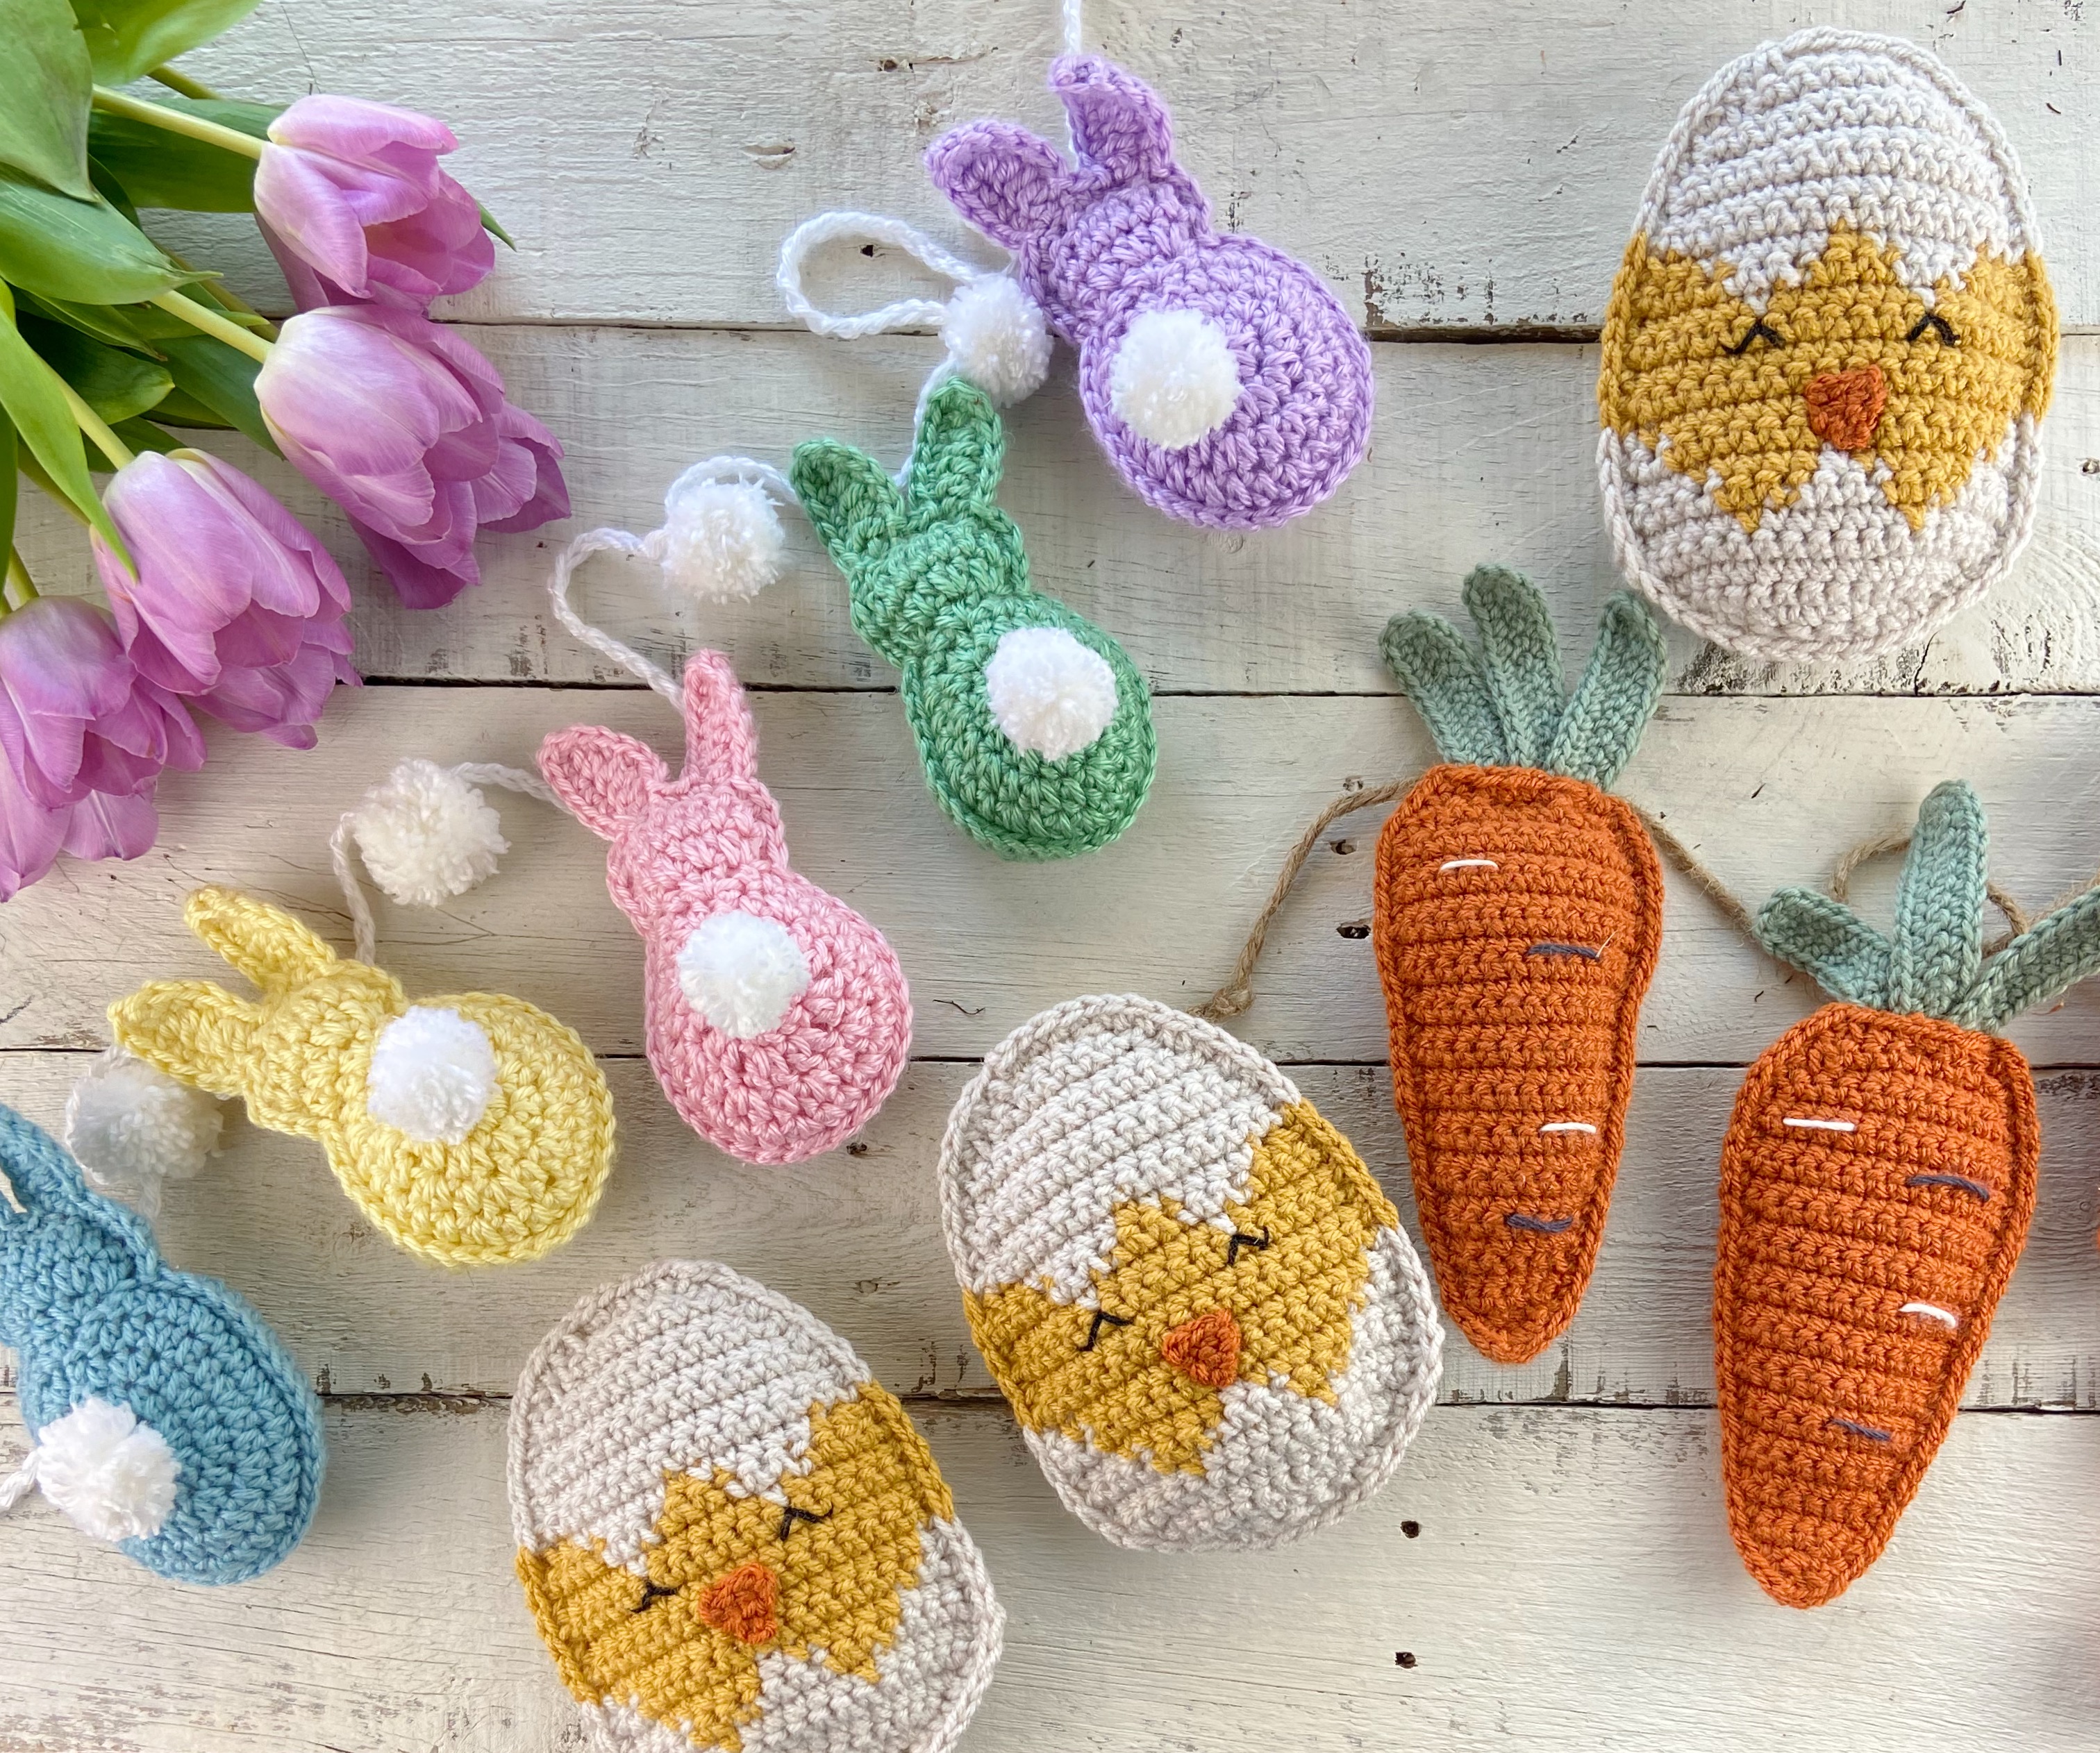
All three of these easy Easter crochet patterns are free here on the blog so feel free to mix and match!
Construction
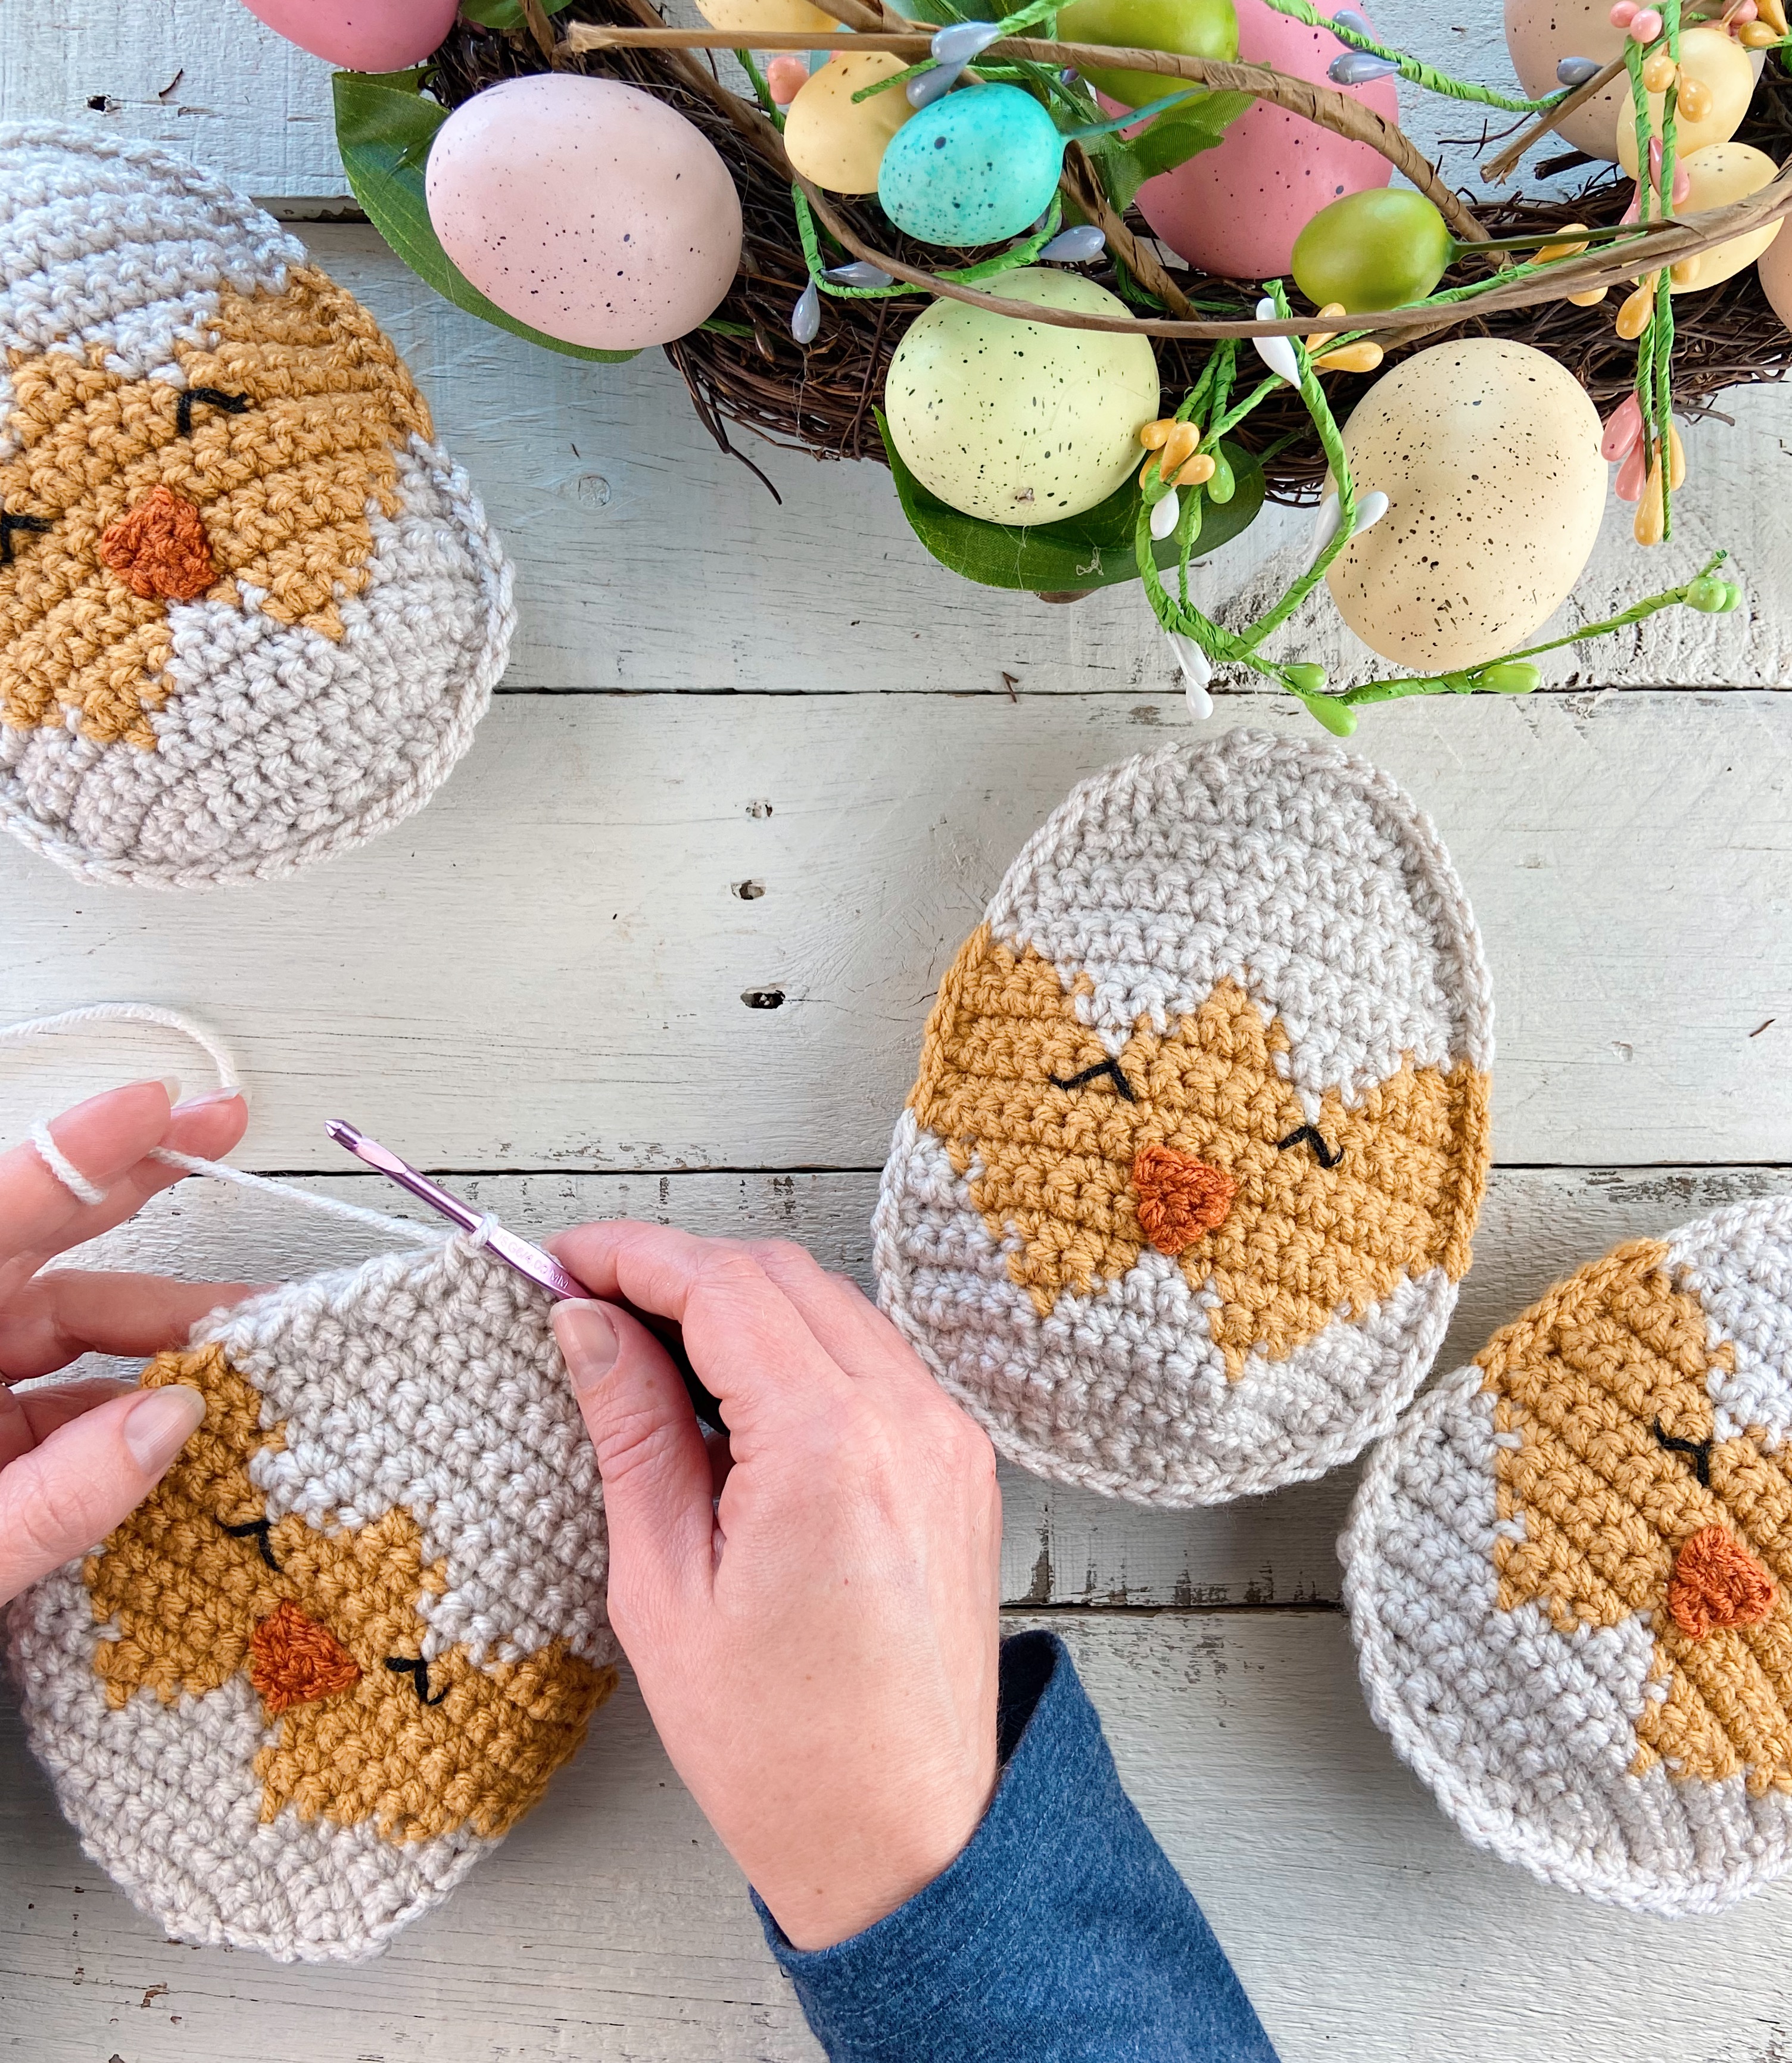
These Easter chicks are made in the same 2D style as most of my other garlands (you can find all of my seasonal/holiday themed garlands here), meaning that each chick is constructed of two flat panels (worked in rows) that are joined together with single crochet and lightly stuffed. If you can single crochet, you can make these chicks!
To make each easy Easter crochet chick, you’ll need worsted weight yarn in white and yellow (or whatever chick color you choose – rainbow or pastel chicks would be so fun!), a small amount of orange yarn for the beaks, some black crochet thread for the eyes, and a small amount of stuffing material.
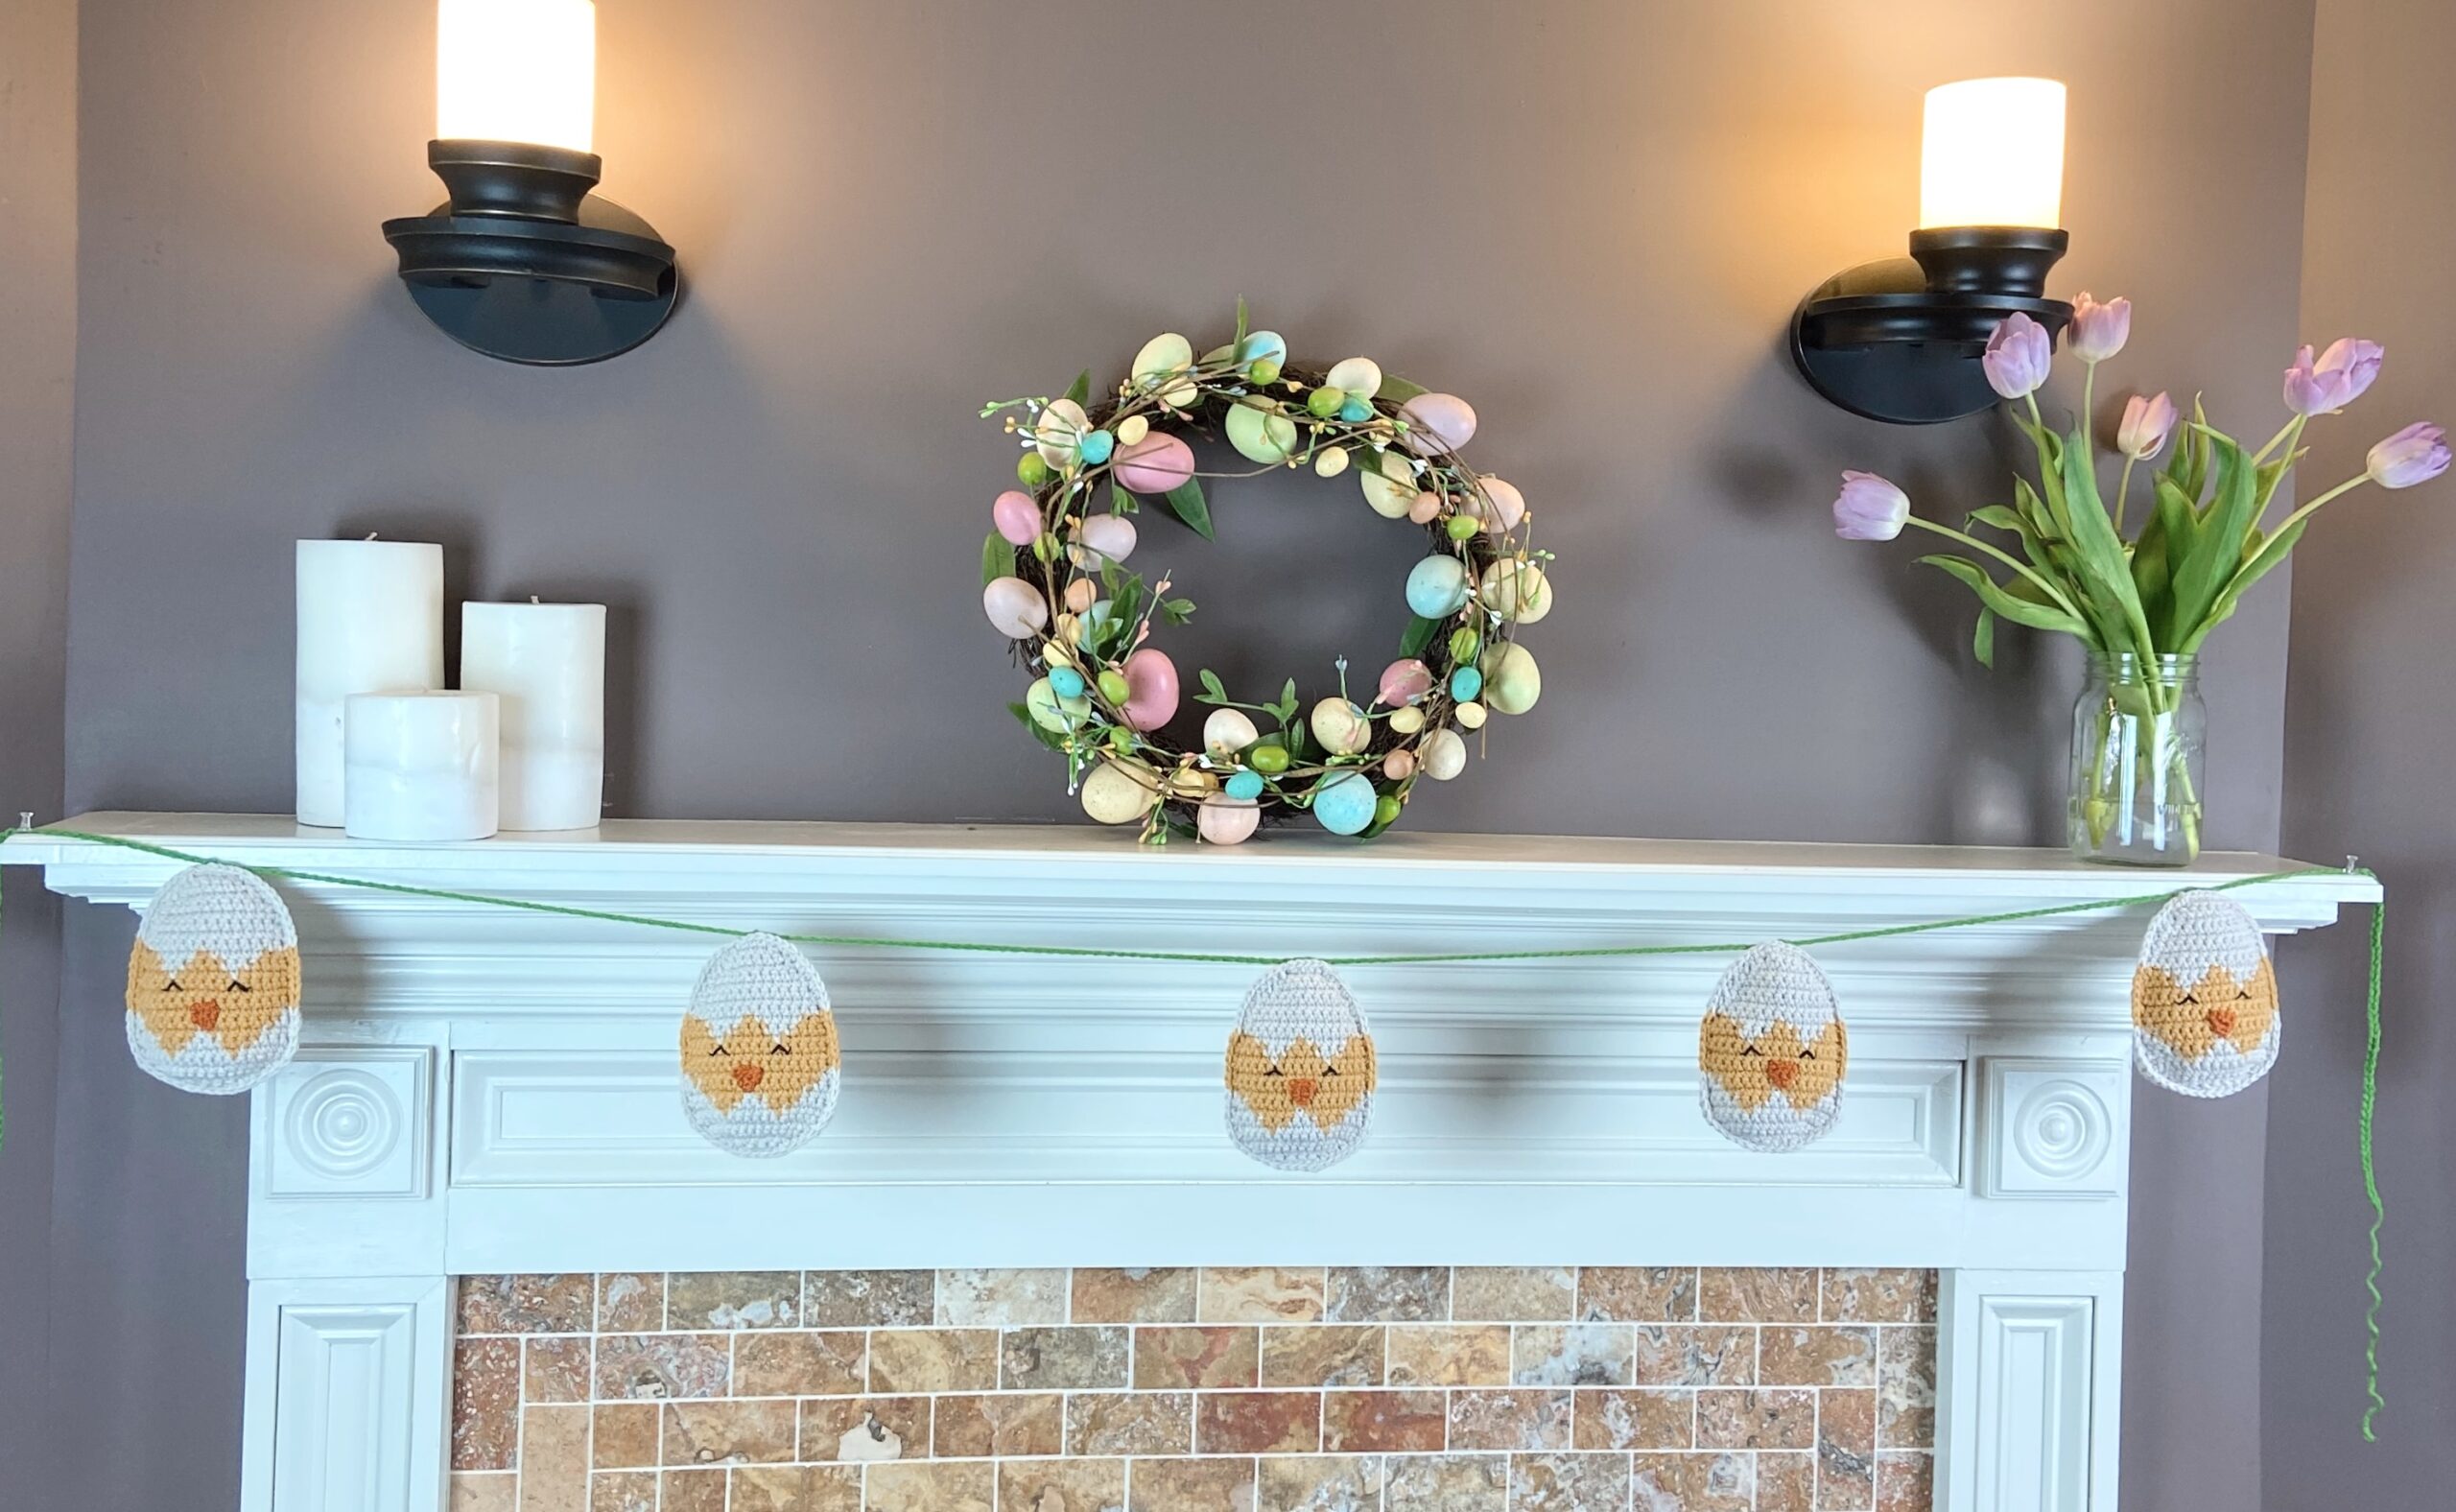
The pattern includes instructions for stringing the chicks as a garland, but you could use them in so many different ways! They would be adorable attached to a spring time wreath, or great to use as Easter table decor, or even as an Easter basket gift!
You can find a printable, ad-free PDF version of this pattern in my Etsy and Ravelry shops!
Let’s crochet!
Easy Crochet Chick Garland Pattern
Skill Level
Easy – Level 2: this pattern is worked in single crochet, with some increasing and decreasing and simple color changes.
MATERIALS
- Yarn: For each chick, you’ll need worsted weight (4) yarn in the following amounts –
- About 40 yards of white yarn. I used Hobby Lobby’s I Love This Yarn in the color “Linen.”
- About 20 yards of yellow yarn. I used ILTY in the color “Sungold.”
- A small amount of orange yarn for the beaks.
- Black crochet thread for the eyes.
- A few yards of yarn or twine for stringing a garland.
- Size G/6 (4.25mm) crochet hook.
- Polyfil or other stuffing material.
- Notions: Scissors, Yarn needle
DIMENSIONS
Each chick/egg is about 6.5 inches tall and about 4.75 inches wide. As written, the finished garland is about 70 inches long.
GAUGE
8 sc x 8 rows = 2” square using single crochet.
NOTES
- Each chick is made of two flat panels (worked in rows) that are joined together with single crochet and lightly stuffed.
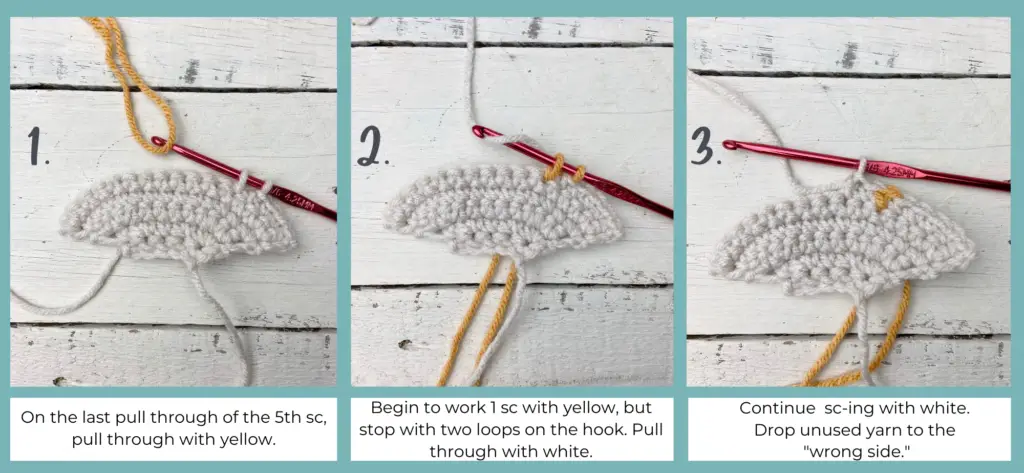
- For all color changes: when working the last single crochet of the “old” color, stop before the last “pull through” of the stitch. There will be two loops left on the hook. Pull through with the “new” color and continue with the pattern. Give each color a tug to tighten and keep the color changes sharp.
- Choose one side of each panel to be the “wrong side” (this will be the side facing in when you join the two panels – it doesn’t matter which side you choose). Note that, since you will turn at the end of each row, sometimes the wrong side will be facing you as you work, sometimes it will be facing away from you. When changing colors, always drop the unused yarn to this “wrong side.” Since you won’t see it, you can drop the yarn when not in use and carry it over the back of the work to pick up the next time you need it.
- The ch 1 at the beginning of each row does NOT count as a stitch.
- Pattern written in US terms.
- Crochet Abbreviations:
- ch = chain
- dec = decrease
- inc = increase
- sc =single crochet
- sl st = slip stitch
- st =stitch
- ye = yellow
- wh = white
PATTERN
- Single Crochet Increase (Inc) = work 2 sc in one stitch.
- Single Crochet Decrease (Dec) = insert hook into first st, yo and pull up a loop (2 loops on hook), insert hook into next st, yo and pull up a loop (3 loops on hook), yo and pull through all 3 loops.
Chick Panel (make 2):
Note: This pattern is written in standard crochet shorthand.
Example: “sc 4 (ye)” indicates that you should make one sc in each of the next 4 sts with the color yellow.
With a size G/6 (4.25mm) hook and white yarn, ch 6.
Row 1: Sc in 2nd ch from hook and in each ch. Ch 1, turn. Stitch count: 5 sc
Row 2: Inc in first st, inc in next st, sc 1 in the next st, inc in next st , inc in last st. Ch 1, turn. Stitch count: 9 sc
Row 3: Inc, inc, sc 5, inc, inc. Ch 1, turn. Stitch count: 13 sc
Row 4: Inc, sc 11, inc. Ch 1, turn. Stitch count: 15 sc
Row 5: Inc, sc 13, inc. Ch 1, turn. Stitch count: 17 sc
Row 6 starts the color change portion of this pattern. Remember to switch to the new color on the last “pull through” of the last old color st. Also remember to drop unused yarn to the “wrong side” of the panel. See “Notes” section for more info.
Row 6: Sc 5 (wh), sc 1 (ye) , sc 5 (wh), sc 1 (ye), sc 5 (wh). Ch 1, turn. Stitch count: 17 sc
Row 7: Sc 4 (wh), sc 3 (ye) , sc 3 (wh), sc 3 (ye), sc 4 (wh). Ch 1, turn. Stitch count: 17 sc
Row 8: Sc 3 (wh), sc 5 (ye) , sc 1 (wh), sc 5 (ye), sc 3 (wh). Ch 1, turn. Stitch count: 17 sc
Row 9: Sc 2 (wh), sc 13 (ye) , sc 2 (wh). Ch 1, turn. Stitch count: 17 sc
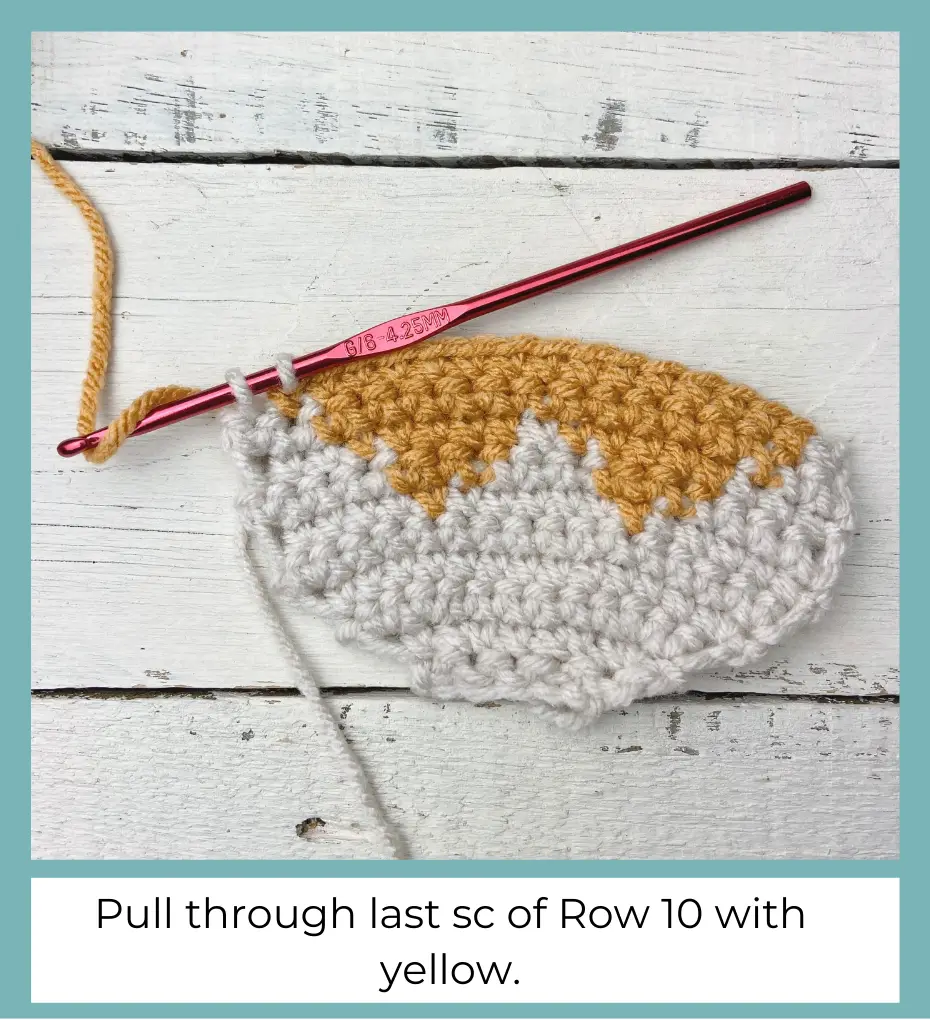
Row 10: Sc 1 (wh), sc 15 (ye) , sc 1 (wh). On the last (wh) sc, pull through with (ye). Ch 1, turn. Stitch count: 17 sc
Rows 11 – 13: Sc 17 (ye). Ch 1, turn. Stitch count: 17 sc
Row 14: Sc 5 (ye), sc 1 (wh) , sc 5 (ye), sc 1 (wh), sc 5 (ye). Ch 1, turn. Stitch count: 17 sc
Row 15: Sc 4 (ye), sc 3 (wh) , sc 3 (ye), sc 3 (wh), sc 4 (ye). Ch 1, turn. Stitch count: 17 sc
Row 16: Dec (ye), sc 1 (ye) , sc 5 (wh), sc 1 (ye), sc 5 (wh), sc 1 (ye), dec (ye). On the last (ye) dec, pull through with (wh). Ch 1, turn. Stitch count: 15 sc
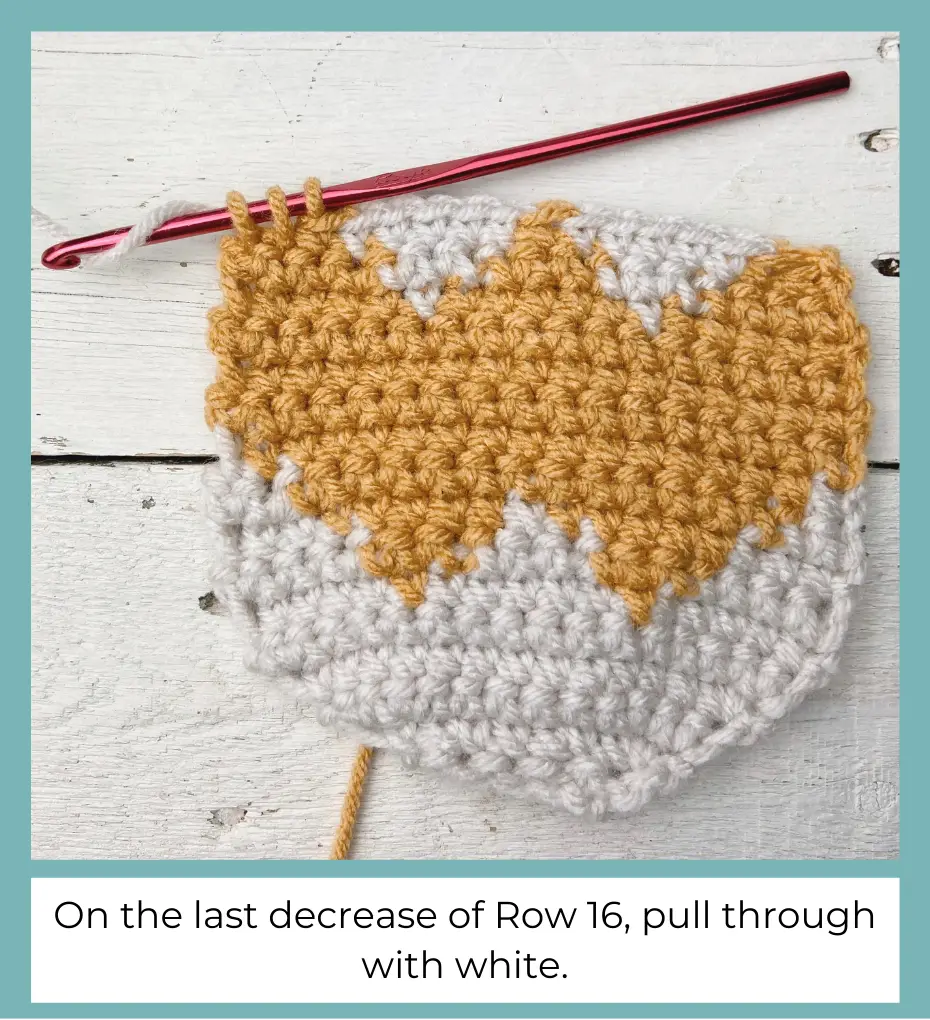
You can fasten off yellow here. Remaining rows are all (wh).
Rows 17 – 18: With (wh), sc in each st. Ch 1, turn. Stitch count: 15 sc
Row 19: Dec, sc 11, dec. Ch 1, turn. Stitch count: 13 sc
Row 20: Sc in each st. Ch 1, turn. Stitch count: 13 sc
Row 21: Dec, sc 9, dec. Ch 1, turn. Stitch count: 11 sc
Row 22: Dec, sc 7, dec. Ch 1, turn. Stitch count: 9 sc
Row 23: Dec, sc 5, dec. Ch 1, turn. Stitch count: 7 sc
Row 24: Dec, sc 3, dec. Ch 1, turn. Stitch count: 5 sc
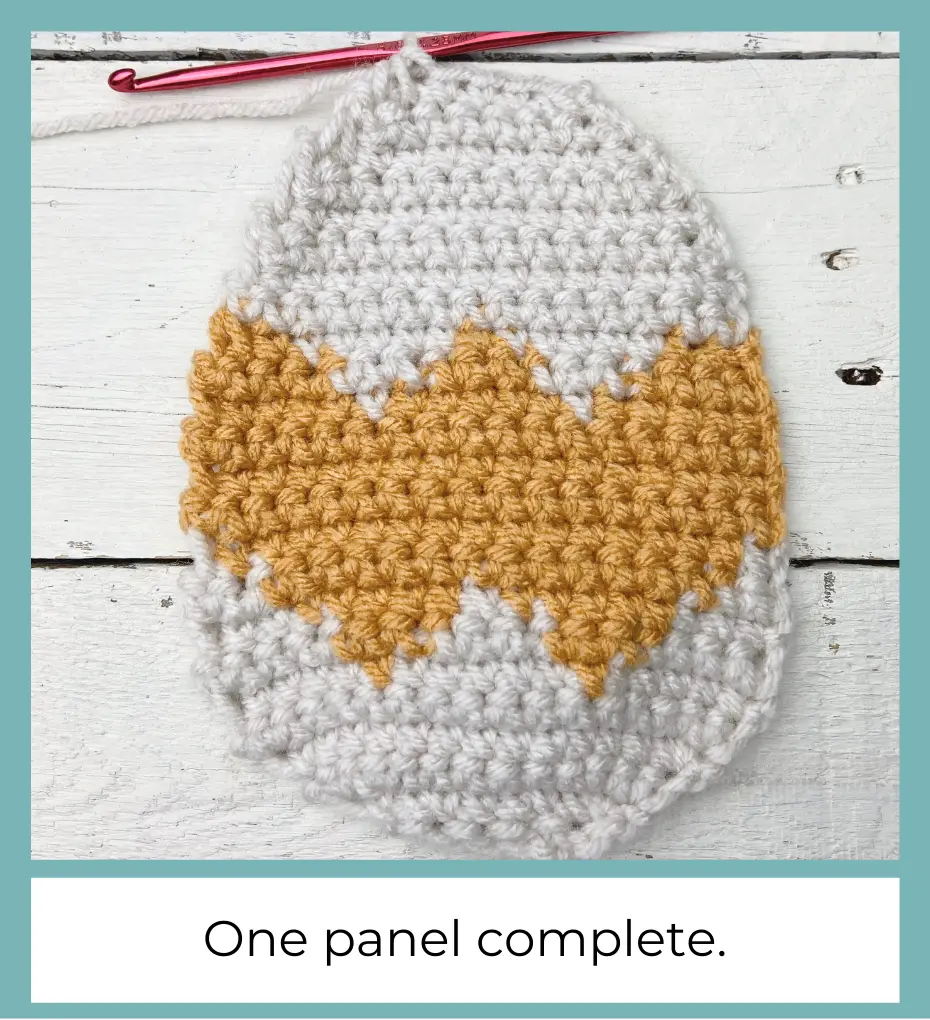
Fasten off the first panel. Leave second panel attached to white yarn. It’s not necessary to weave in your ends since the “wrong sides” will be facing in, but I like to make sure they are secure (use a yarn needle to thread them under a few stitches) and trim the ends short to make them easier to tuck in.
Face Details
Chick Beak
With a size G/6 (4.25mm) hook and orange yarn, ch 2.
Row 1: Inc in second ch from hook. Ch 1, turn. Stitch count: 2 sc
Row 2: Sc 1, inc. Stitch count: 3 sc
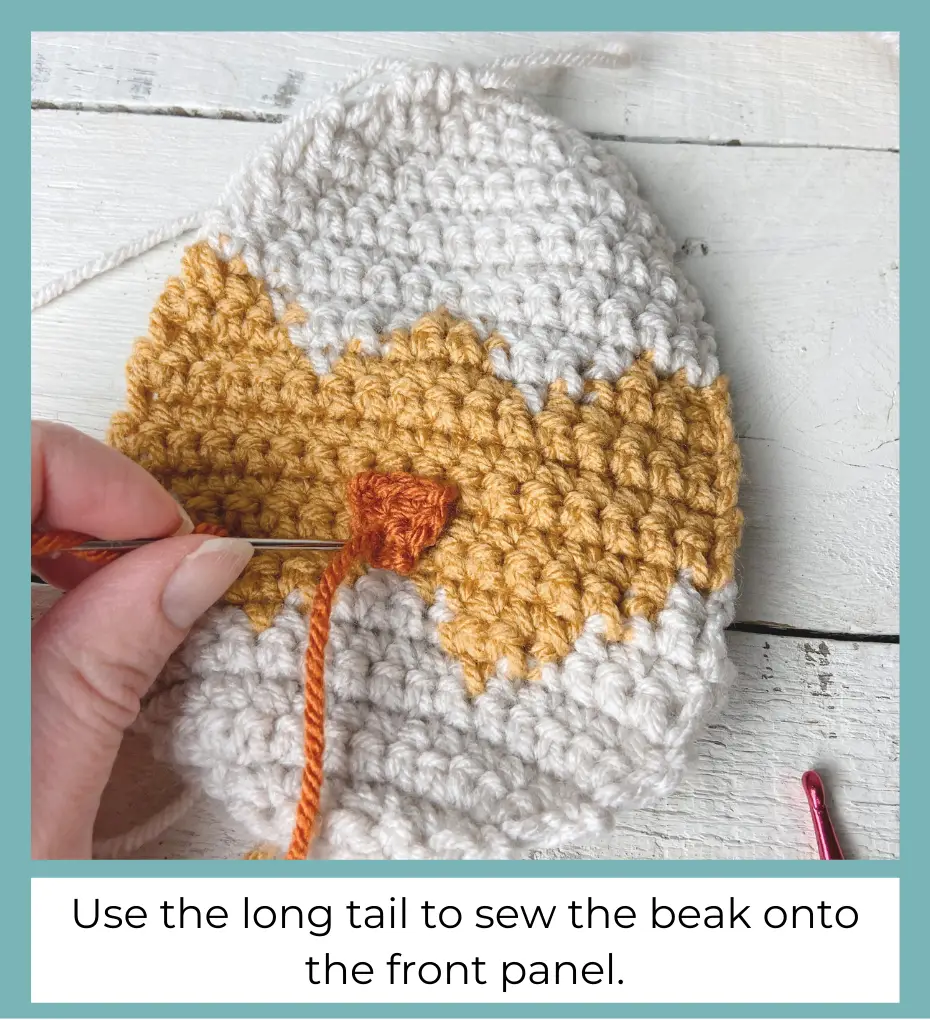
Fasten off and leave an 8” tail for sewing beak onto the panel. Weave in the other end.
On the panel with the working yarn still attached (this will be your front panel), use the long tail and a yarn needle to sew the beak on. I lined it up so that the point of the beak was touching the top of the bottom white shell point. Tie to secure.
Chick Eyes
With black crochet thread and a yarn needle, embroider two eyes on the front panel.
Tips for embroidering eyes:
- For each eye: make two lines, each at an opposing 45 degree angle to the other, with the peak landing at the bottom of one white shell point (see picture).

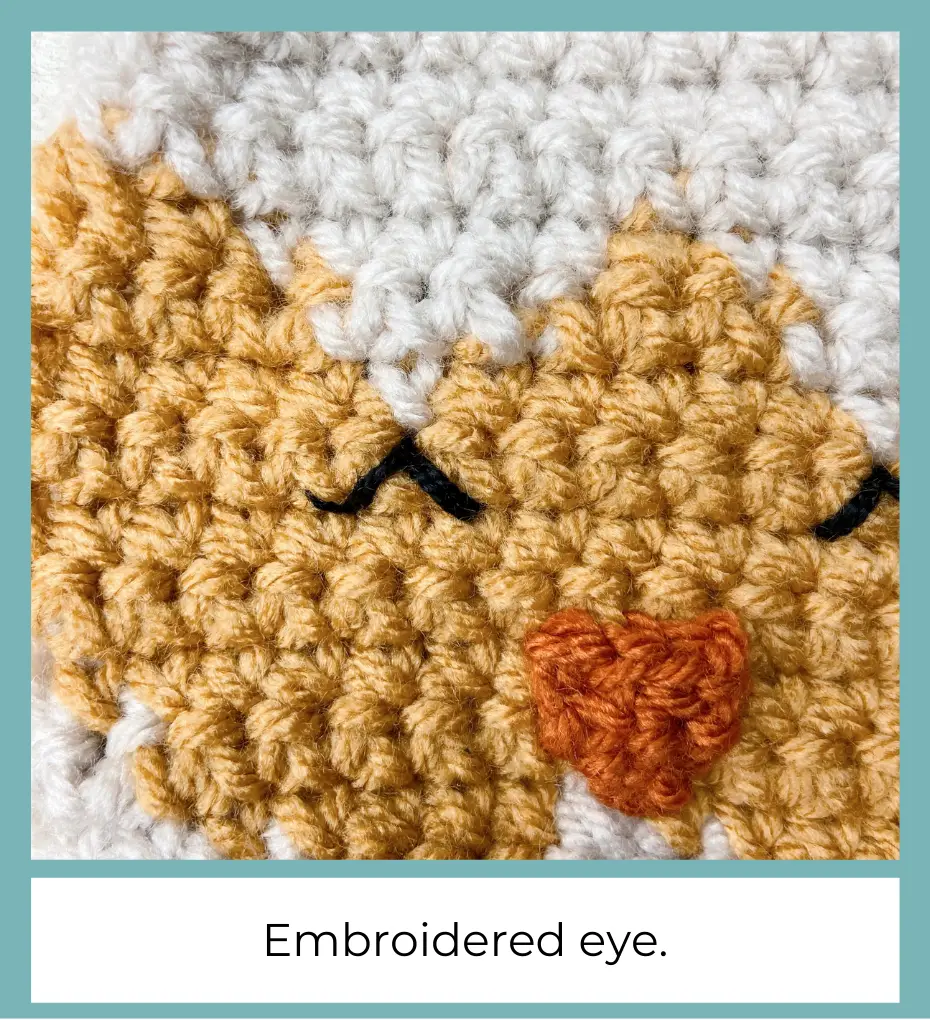
- Sew over each of these lines again to add a little extra thickness.
- Then, at the outside corner of the eye, make a shorter line (also at a 45 degree angle) to look like eyelashes. I only did one pass on this line so it appears a little thinner.
- Tie the two ends of the crochet thread together on the back side of the panel to finish each eye (this step is important so that the embroidery doesn’t pull out).
- Repeat for the other eye.
Assembly:
- Align two panels with wrong sides in and the “face” panel on top, facing you. Tuck in any ends.
- With the (wh) working yarn that is still attached to the top panel, ch 1.
- Begin single crocheting through both panels to join. Work the scs evenly around the edges, working into the sides of the rows.
- When you get to the yellow part of the panels, switch to yellow yarn for the scs and tuck the unused white yarn in between the two panels to be picked back up when we need it.
- Continue single crocheting around the egg/chick to join the two panels, switching colors as needed.
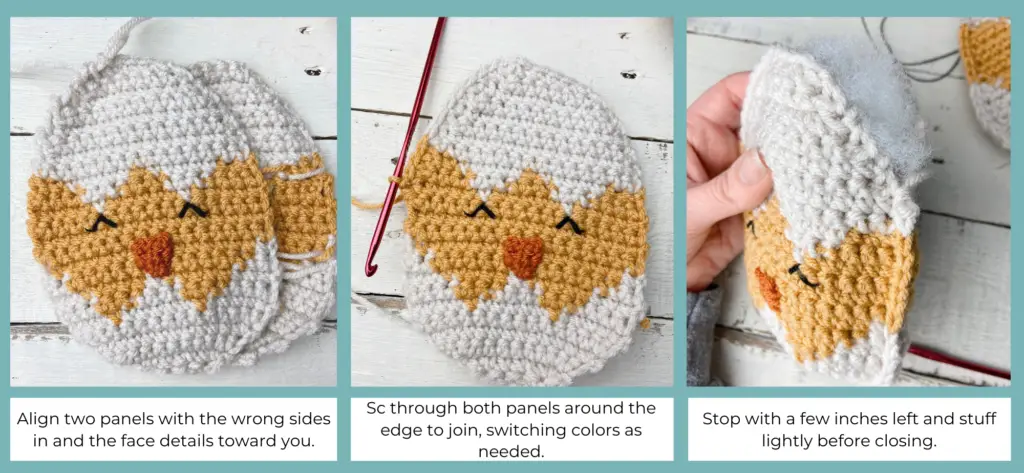
- Stop after you have finished the last yellow sc and stuff lightly with polyfill or other stuffing material.
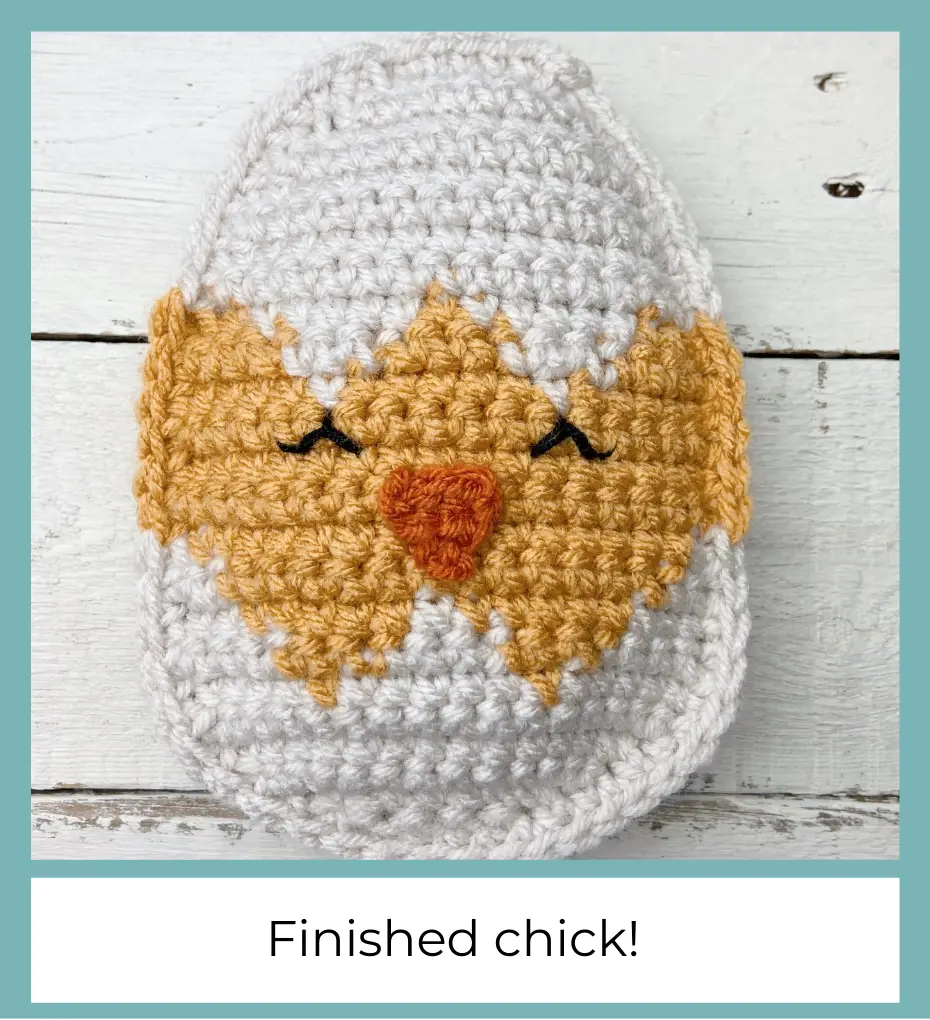
- Continue sc with white until you reach the first sc of the round. Sl st to join the round and fasten off. Weave in the end and your chick is finished!
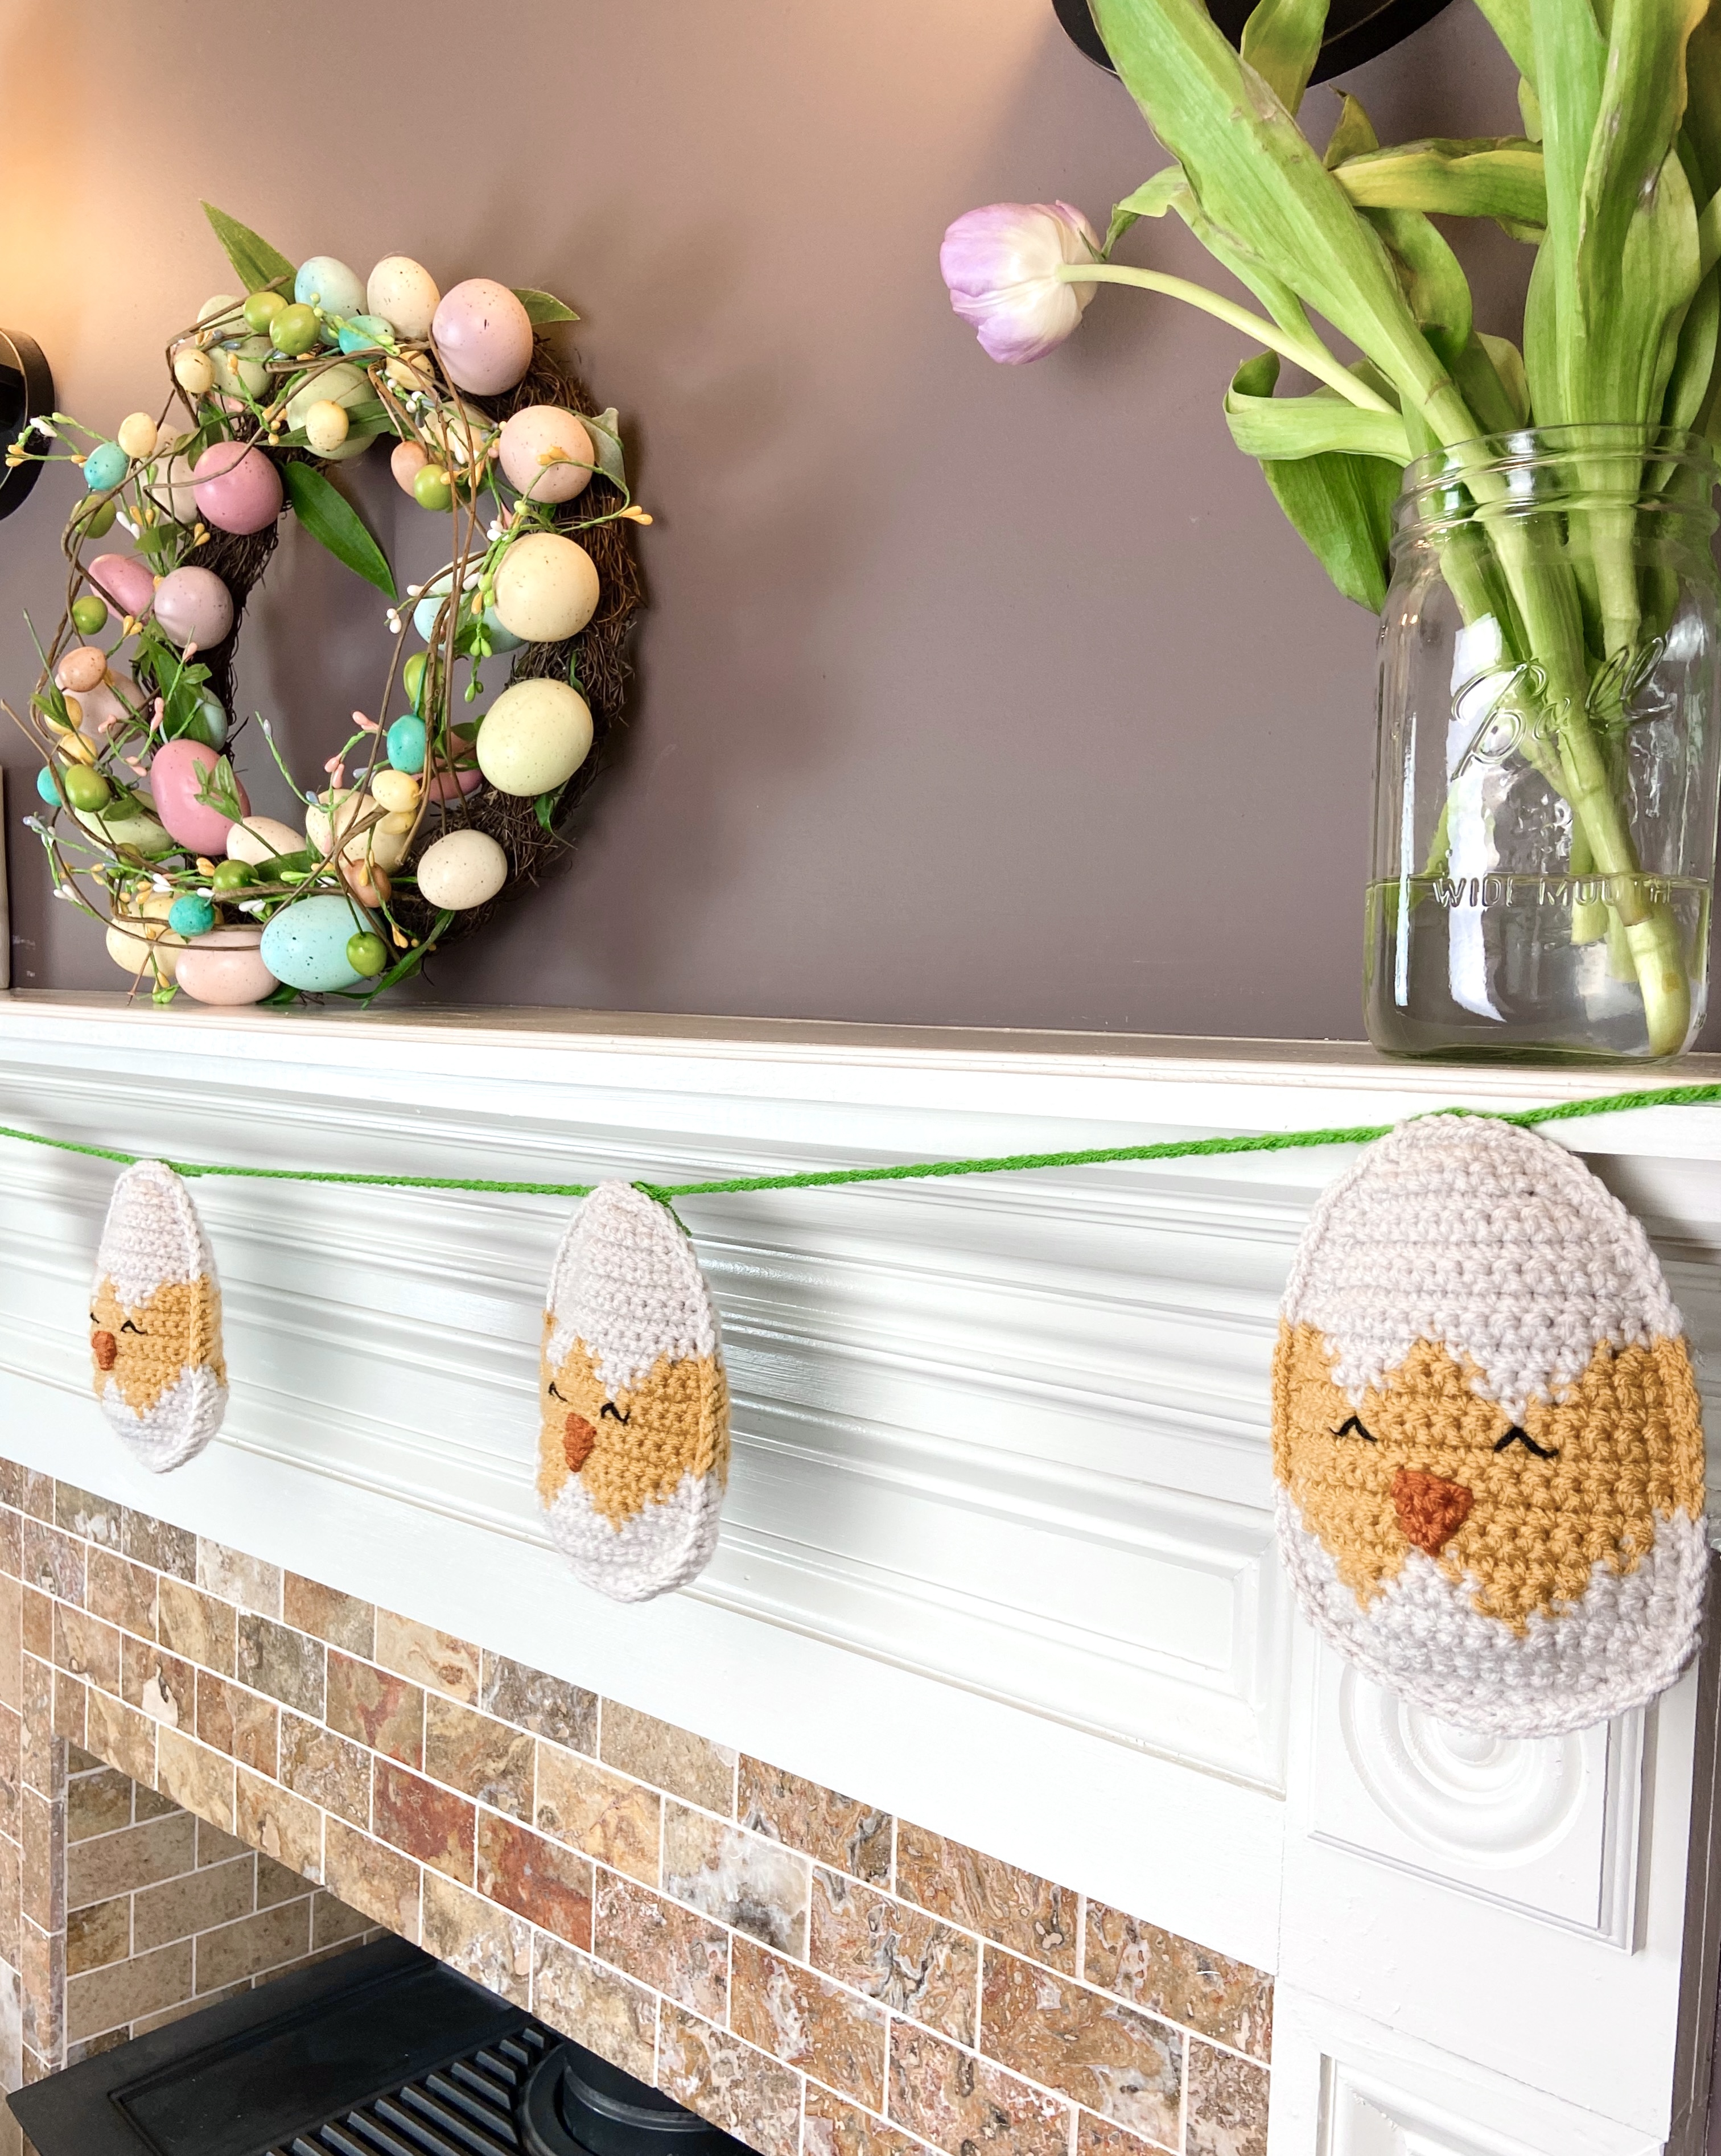
Garland:
Make as many chicks as you would like for your garland – I made 5 for a 6 foot garland.
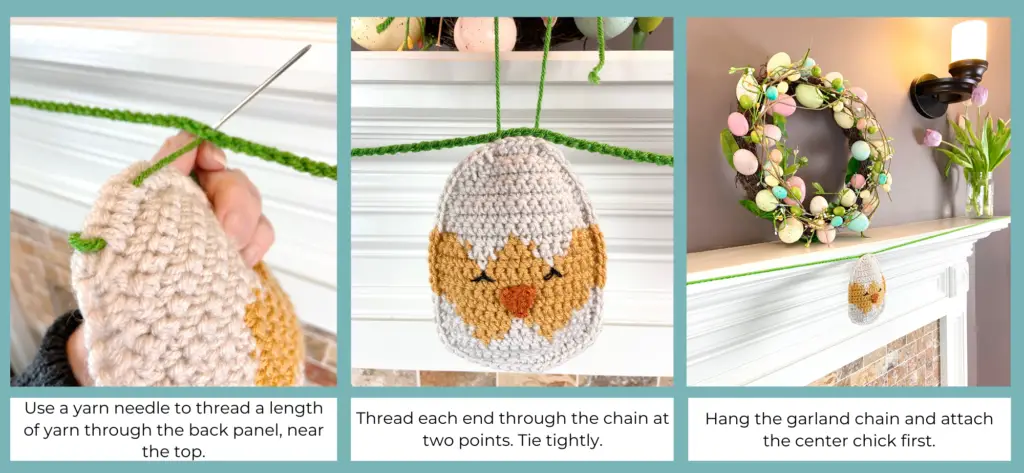
Option A: Cut a 6 foot piece of twine, string, or yarn and thread it onto a yarn needle. Use the needle to thread the string through a few stitches on the back panel of each chick (at the very top). Continue attaching chicks and slide them to adjust positioning. This is the faster and easier method, but the chicks can slide around once hung.
Option B: With a G hook and worsted weight yarn, ch 270. Fasten off. I think it’s easiest to hang the yarn chain first (stretching it tight because it will sag a lot with the weight of the chicks) and then attach the chicks.
Attach the center chick first. Thread a 8” piece of yarn through a few stitches on the back panel of one chick (at the very top). Use a needle to thread each end through the garland chain (threading it through the chain will keep the chicks from sliding). Tie the two ends tightly and trim or tuck them.
Repeat for each chick. This method is more time consuming, but the chicks will stay where you put them.
Your garland is finished!
I hope you enjoyed this easy Easter crochet pattern! Tag me on Instagram @theknottednest to share your project. You can find more project ideas in the Patterns section here on the blog.
Happy Making!

COPYRIGHT: The Easter Chick Garland pattern and photographs are property of The Knotted Nest and are for personal, non-commercial use only. You may not alter, share, or sell this pattern in any way. However you are welcome to sell the finished product you produce using this pattern. Please credit The Knotted Nest by including a link to the pattern listing if selling the finished piece online.