How to Crochet in the Back Bump of a Chain
Learn how to crochet in the back bump of a chain for a quick and easy way to make your crochet projects look more polished!
Have you ever admired someone else’s crochet and wondered how they made it look so neat and even?
After nearly 20 years crocheting, I’m pretty confident in saying that it’s the little things that produce more professional looking projects. In this post, I’m going to give you a quick tutorial for a super simple technique that will instantly improve the look of almost anything you crochet – crocheting in the back bump of the chain!
Pin this post for later!
Why crochet in the back bump?
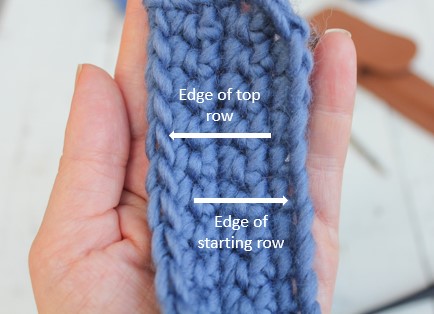
The short answer is that it makes your edges match. Starting your project with this technique will give the bottom of your foundation chain the same “V” as the stitches on your top row. This gives your piece a more uniform, finished look!
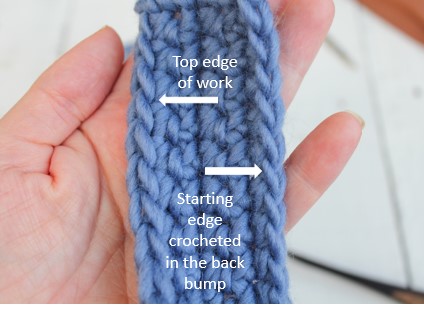
Have you ever noticed that your starting edge looks a little wonky? The “standard” method of working into a chain (working into the front or back loop) produces more of a rolling ridge than the “V” you will see at the top of your work. It’s a small detail, but it can make a big difference in the neatness of your finished work!
Why does it matter?
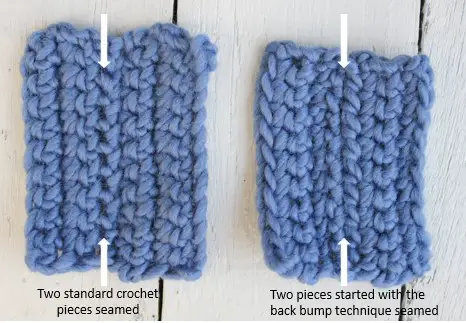
More importantly, crocheting in the back bump of the chain will eliminate small gaps when you are adding a boarder or seaming two pieces together!
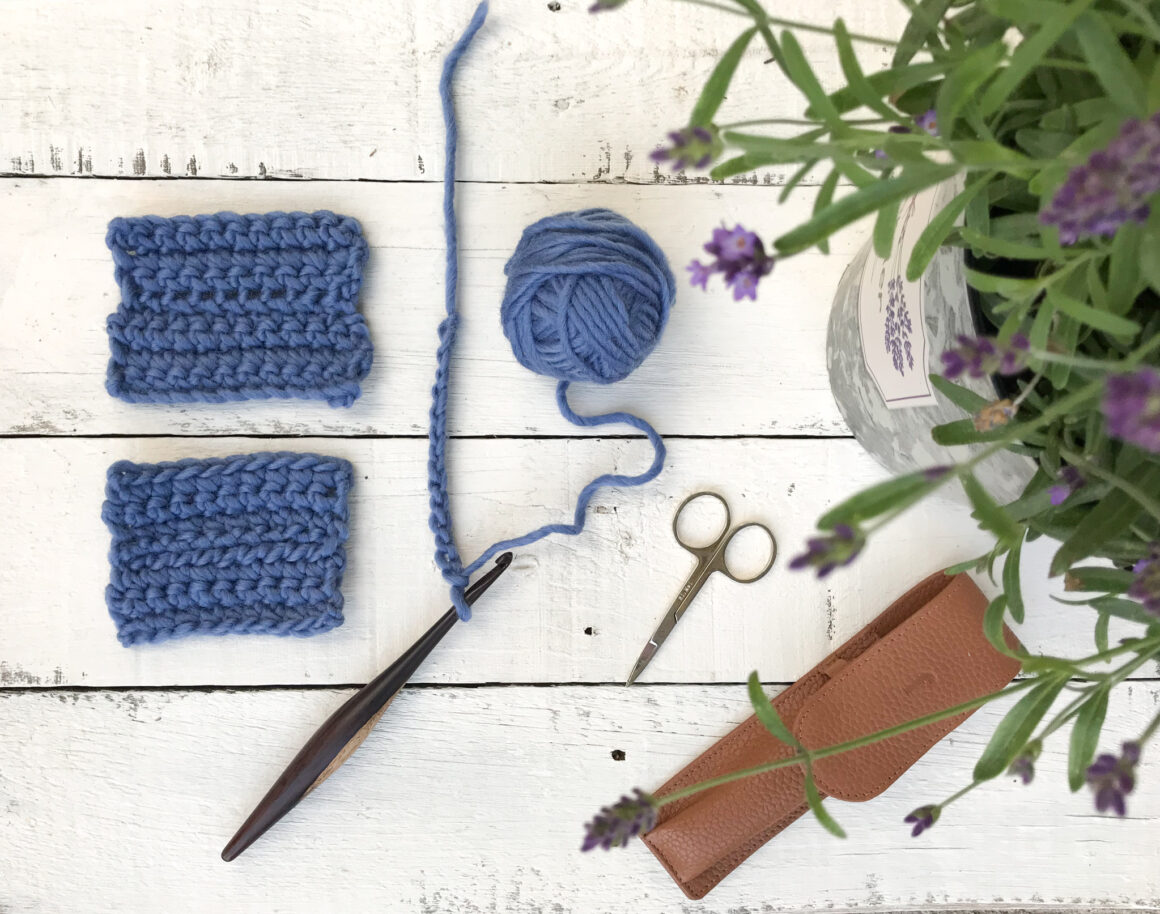
The example below shows two pieces started with the standard method (left), seamed together, and two pieces started with the back bump technique (right), seamed together. You can see on the left that the wonky rolling edge causes small gaps between the two sections. On the right, the back bump technique produces a nice even seam between the two pieces. It can also make your work a bit more sturdy for things with a lot of seams like garments and pillows (Check out my Easy Crochet Grain Sack Pillow pattern for an example!).
Is it a massive difference? Maybe not. BUT it’s a small change that makes my work a little more neat and tidy, so I’ll take it!
Onboard? Read on to find out how easy it is to do!
How to crochet in the back bump of the chain
This technique can be used for any crochet that starts with a foundation chain.
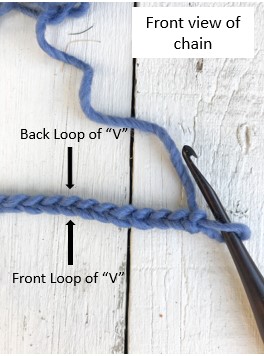
First, let’s look at the parts of a crochet chain. On the front view of the chain, you will see a “V” shape made up of the front loop (nearest you) and back loop (farthest from you).
The “standard” method of crocheting into a chain is to insert your hook into either the front or back loop of the “V” to work your first row of stitches.
Now, let’s talk about the back bump. To find the back bump, simply turn the chain over and find the single bump on the back of the chain (don’tcha love it when the terminology makes sense?!).
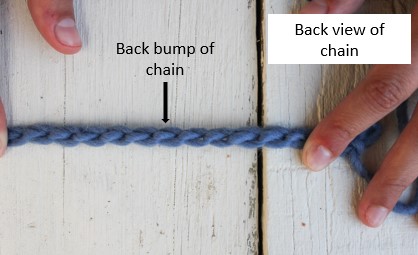
This back bump is where you will insert your hook to make your first row of stitches! That’s it! You make your stitches as usual (it works for any stitch….SC, DC, HDC, etc.), you’re just working into a slightly different part of the chain. As a result, the “V” from the front of the starting chain will now be your bottom edge.
It can take a minute to get used to working into the back of the chain, but once you get the hang of it, you’ll never go back to the old method!
There you have it!
I hope you enjoyed this quick tutorial and learned something new! Have questions or comments about this technique? Feel free to comment or hit me up on Instagram (@theknottednest).
P.S. Looking for an easy garment to try out your new skills? Take a peek at my Magnolia Summer Cardigan!