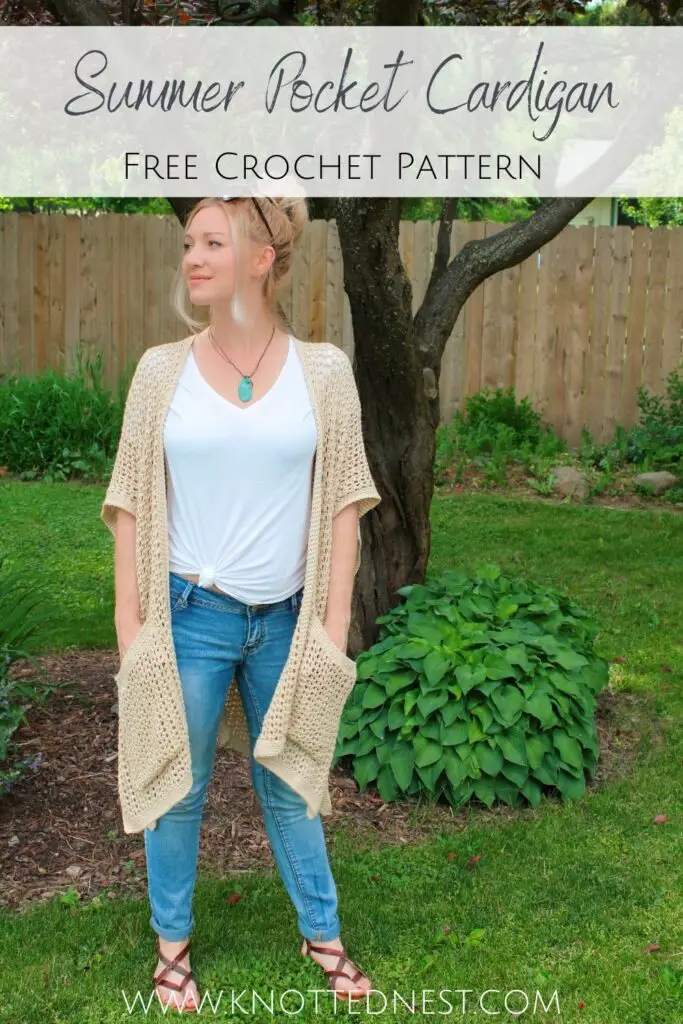
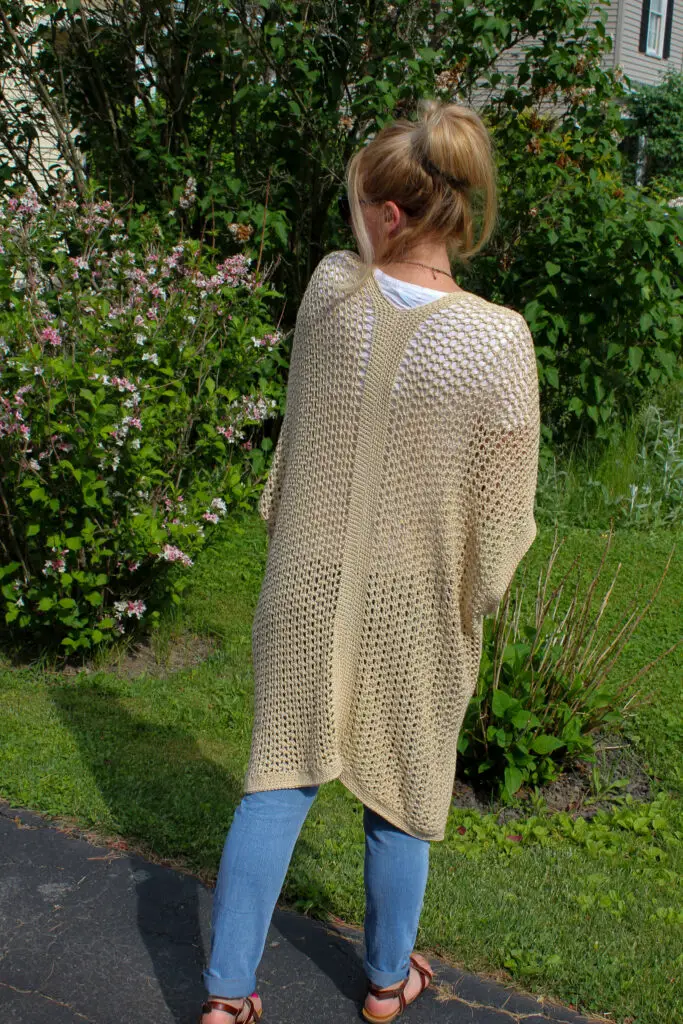
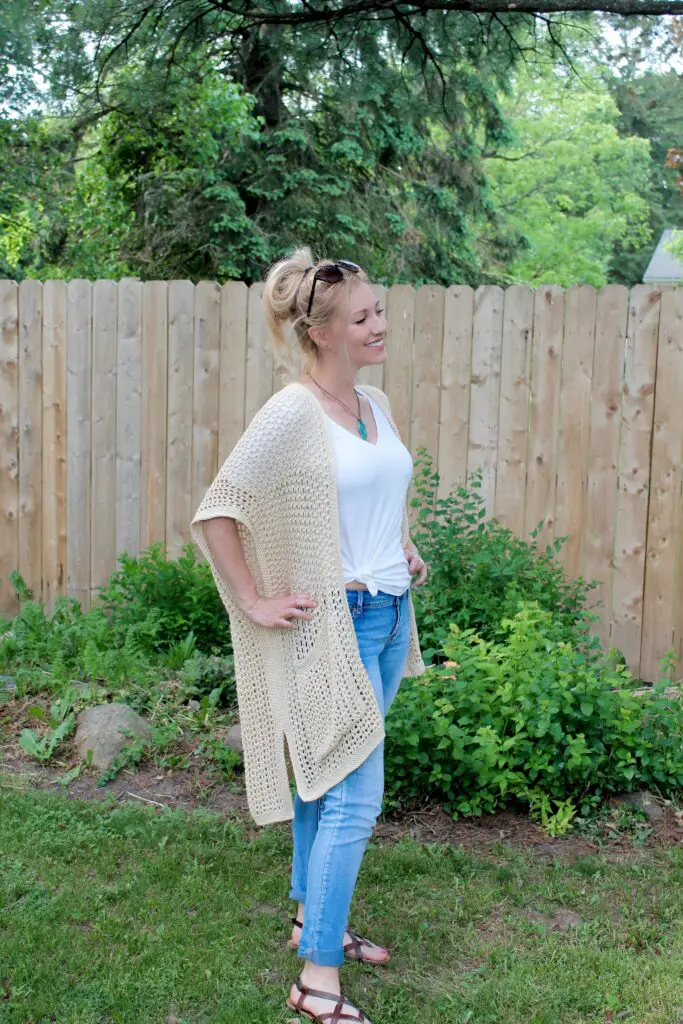
Magnolia Summer Cardigan Free Crochet Pattern
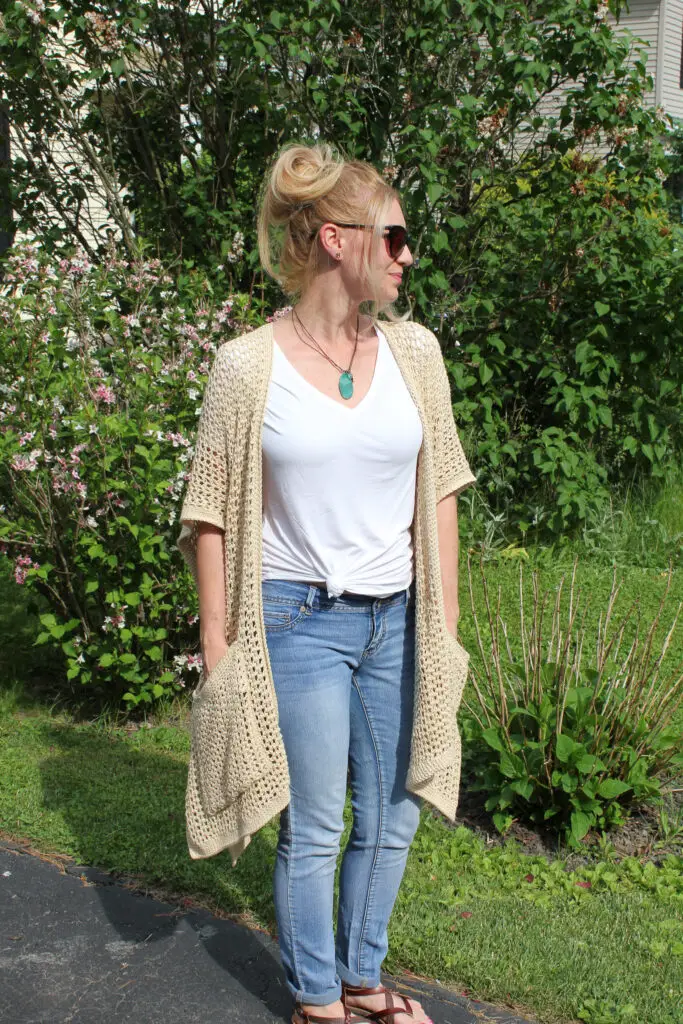
Woohoo, it’s summer! My kiddos just finished their distance learning school year last week and we are so ready to bring on the lazy pool days and campfire cookouts. I’m even thinking summer when it comes to crochet with my latest free pattern – the Magnolia Summer Cardigan!
Pin this post for later!
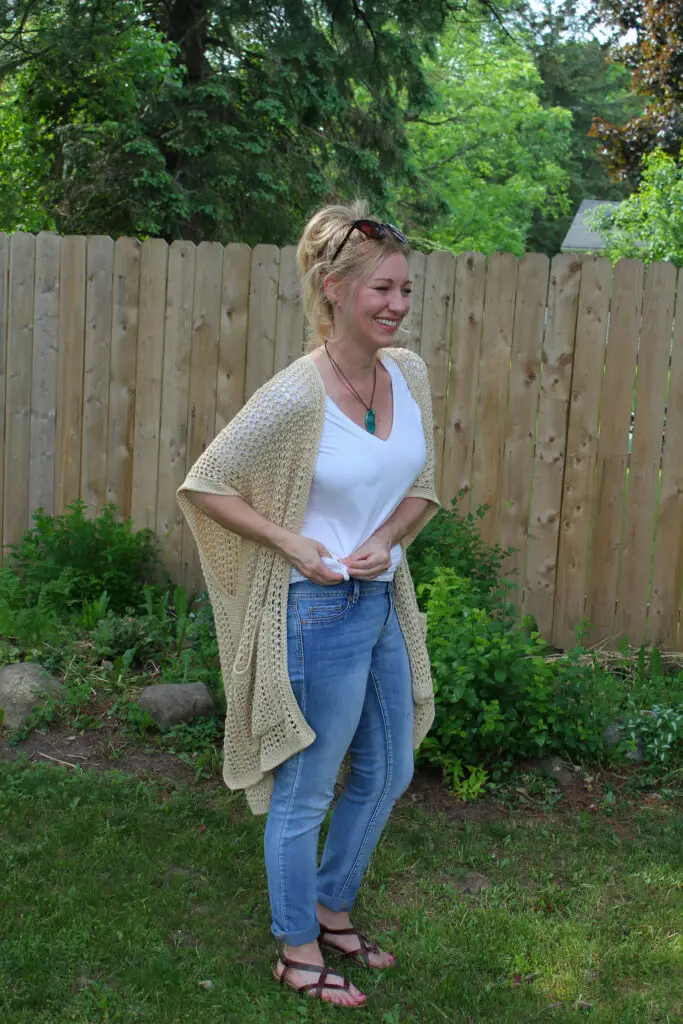
If you’ve never made a garment before, this poncho-style cardigan is a great first project. It’s just two rectangles and a bit of seaming – no increasing/decreasing necessary! The pockets are optional, of course, but who doesn’t love pockets?!
Read on to learn more about the inspiration for this summer cardigan crochet pattern and the awesome Lion Brand Yarn I chose for it (in the color “Magnolia”, hence the name) or scroll on down to get the free pattern.
The Inspiration
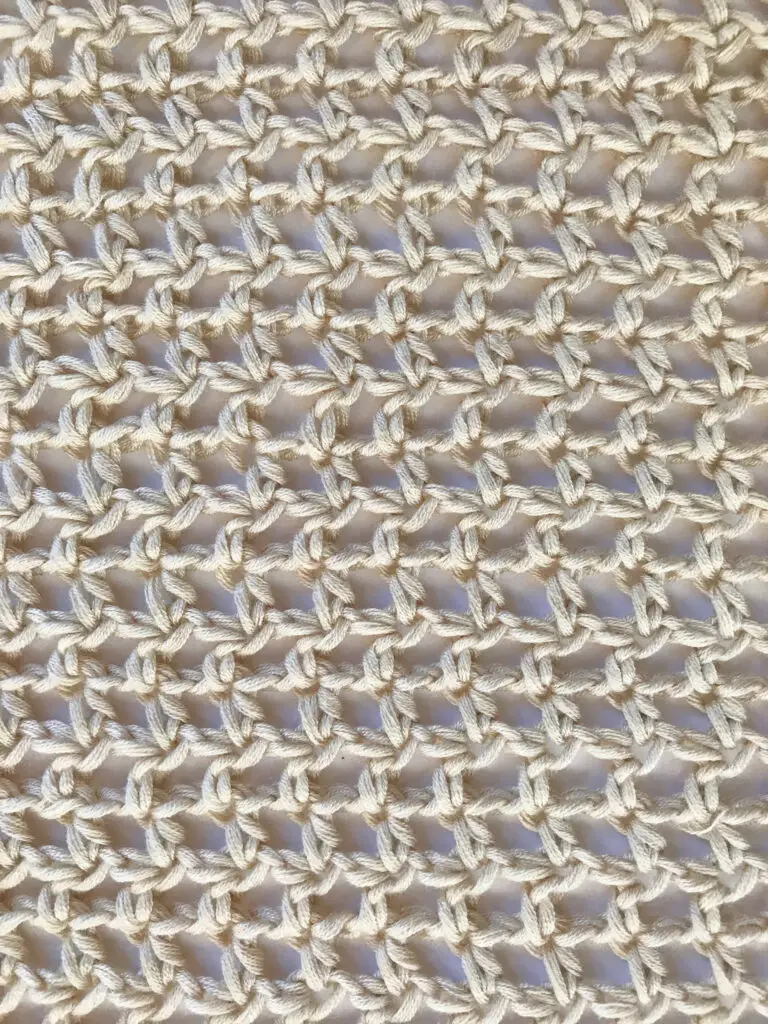
I really wanted my first crochet garment pattern to be something garment beginners would feel comfortable with and I think I got there! This simple summer cardigan crochet pattern is equal parts easy and interesting. The construction is just two rectangles seamed together, but the hdc mesh stitch gives it a unique texture and drape.
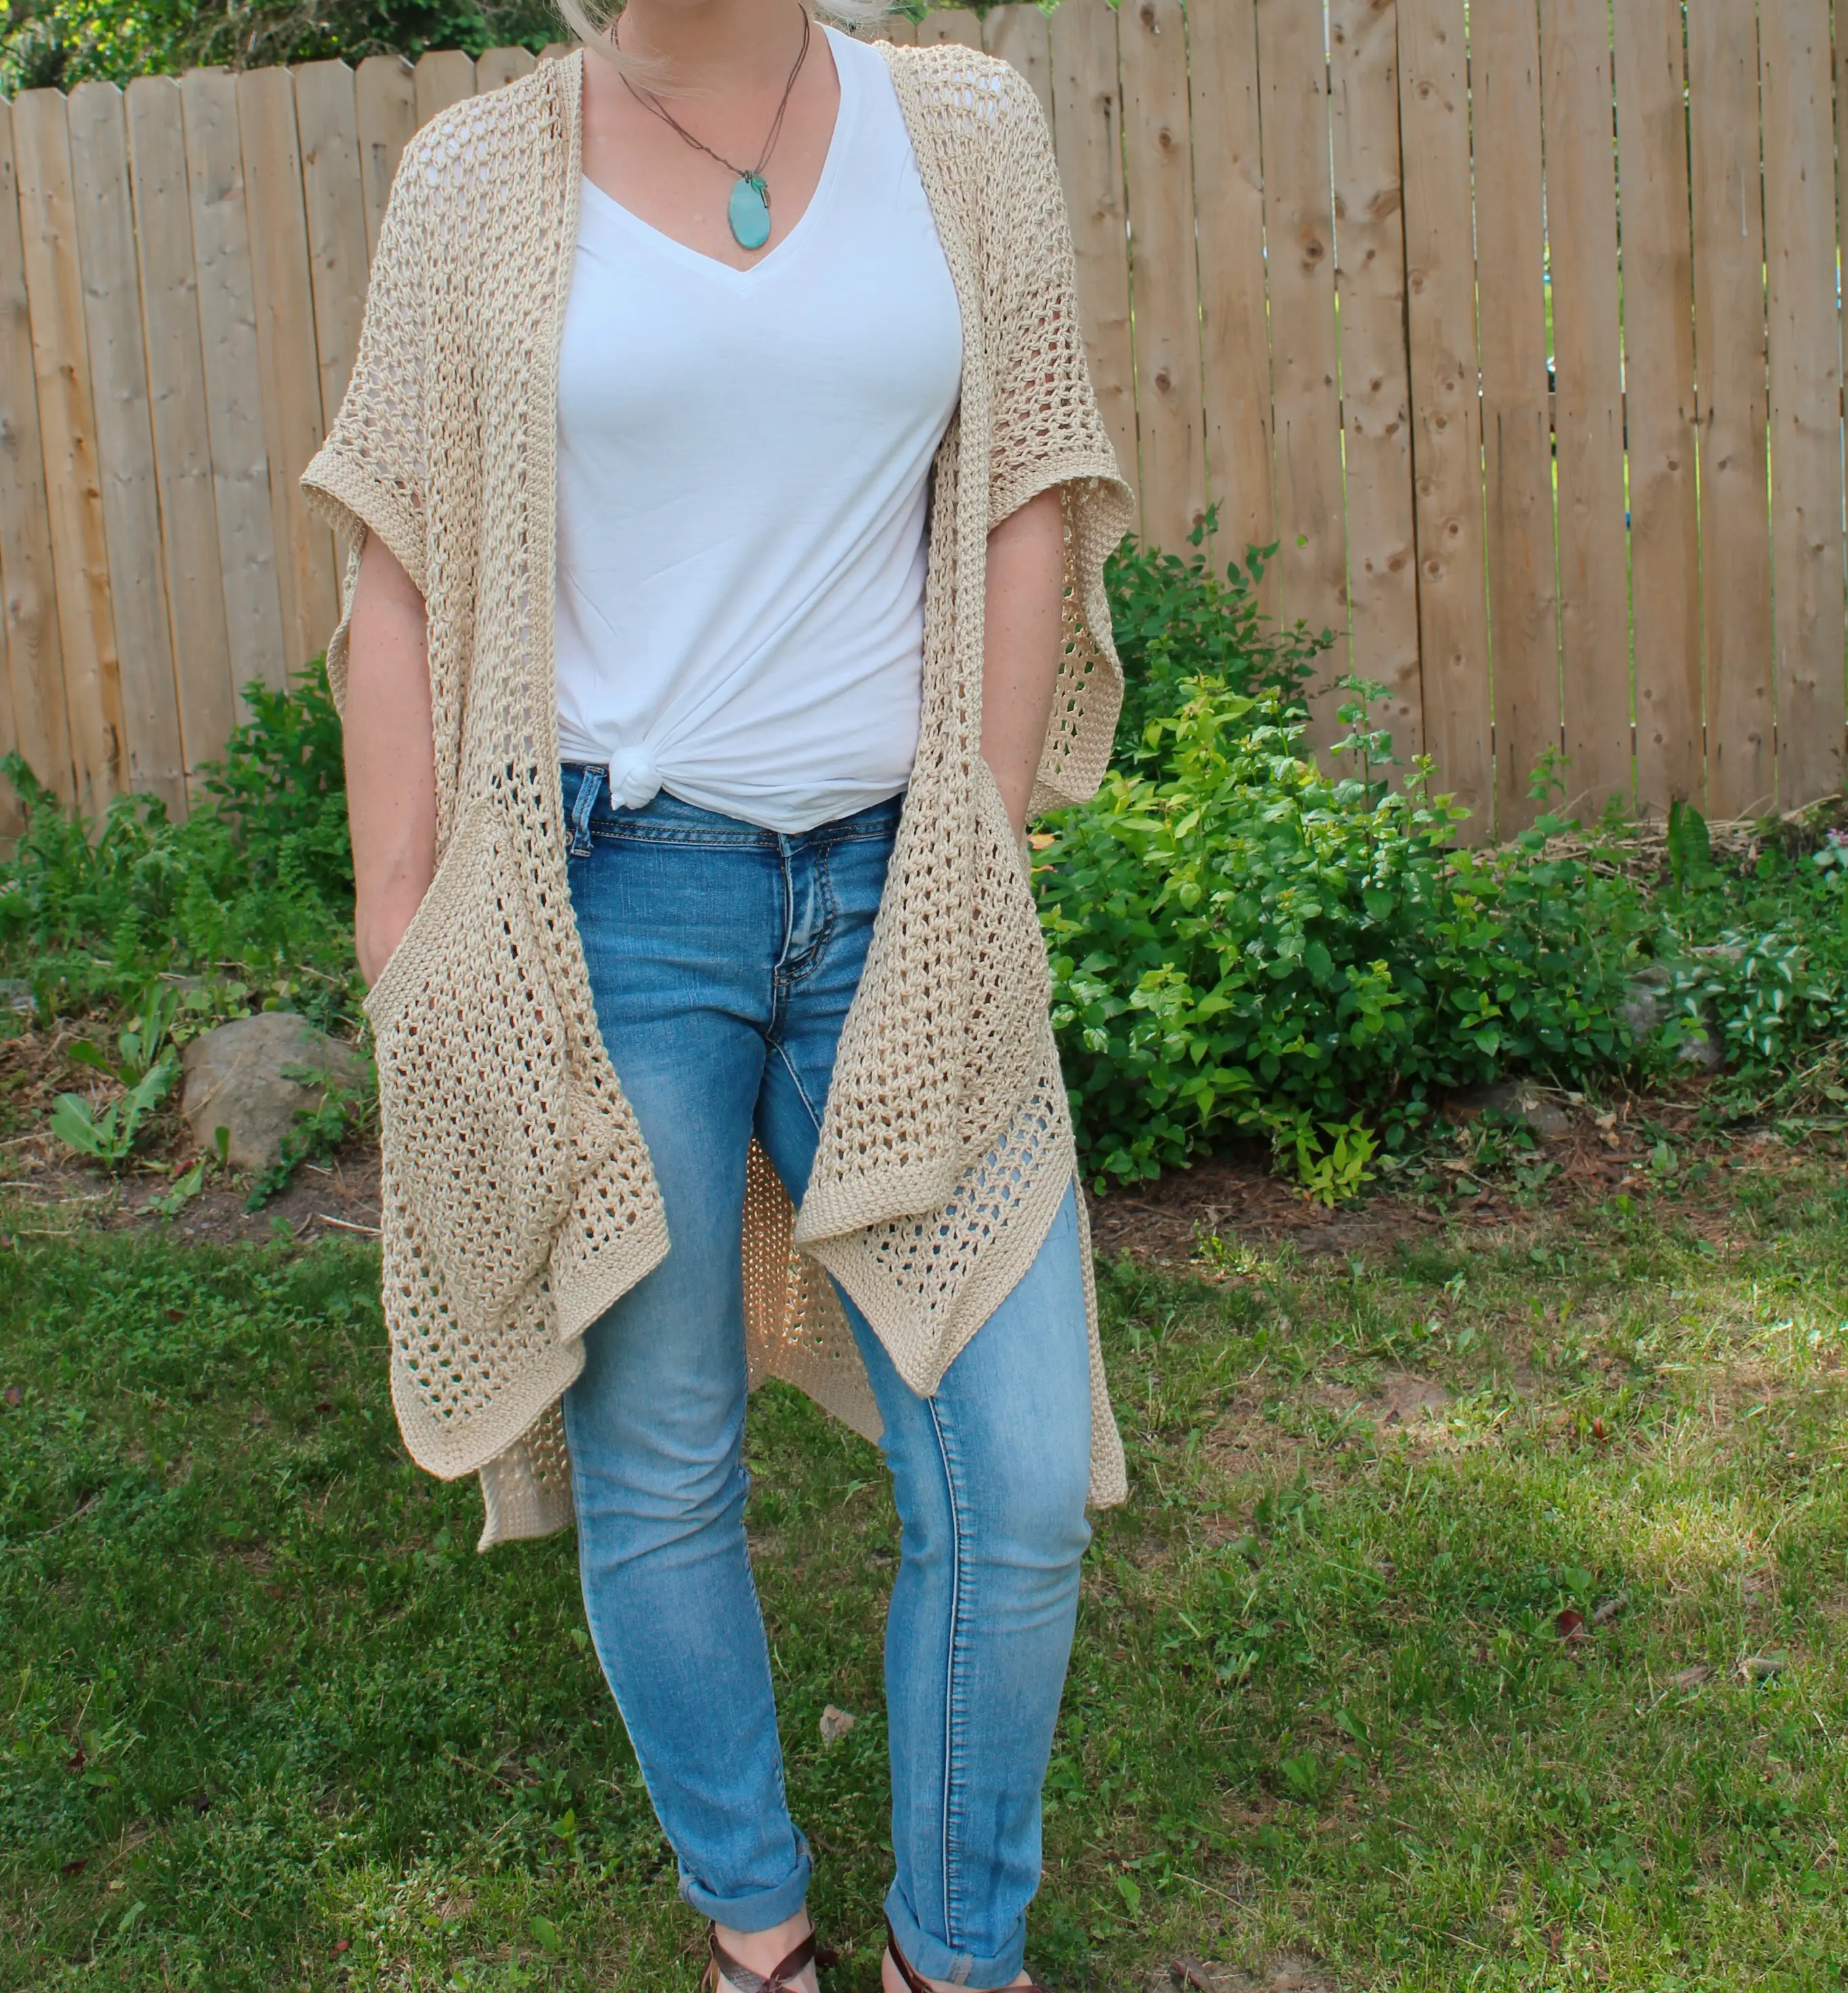
To get the light airy feel I was shooting for with this pattern, I chose Lion Brand’s LB Collection Cotton Bamboo yarn in the colorway “Magnolia”. It’s a DK weight and super soft, but works up fast when paired with the hdc mesh stitch. (Side note – if you’re a fan of the hdc mesh stitch, try whipping up my Easy Boho Headband, which, I just realized, would look so cute paired with this cardigan!)
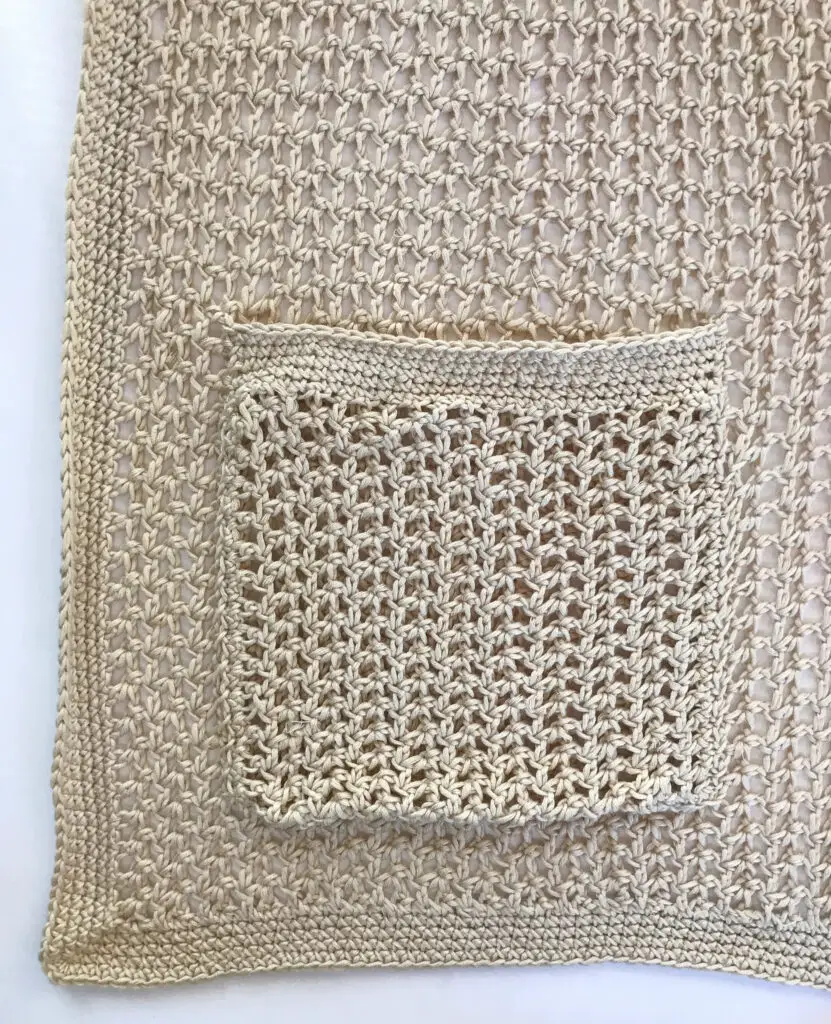
The pockets are optional, but I think they make this cardigan feel a little more special and they are surprisingly easy to make. These pockets are just smaller rectangles made using the same hdc mesh stitch, add a little bit of edging, whip stitch to the front panels of the cardigan, and ta-da! Pockets!
In short, this easy breezy lightweight cardigan is the perfect layering piece all summer long. Pretty sure I’ll be wearing it well into fall, too!
Grab the PDF version of this Pattern on Etsy or Ravelry!
Magnolia Summer Cardigan Crochet Pattern
SKILL LEVEL
Easy – level 2. This pattern is beginner-friendly, but does require some knowledge of basic stitches and pattern reading.
MATERIALS
Approximately 1500 yards DK weight yarn. I used Lion Brand’s LB Collection Cotton Bamboo (6 skeins) in the color way “Magnolia”.
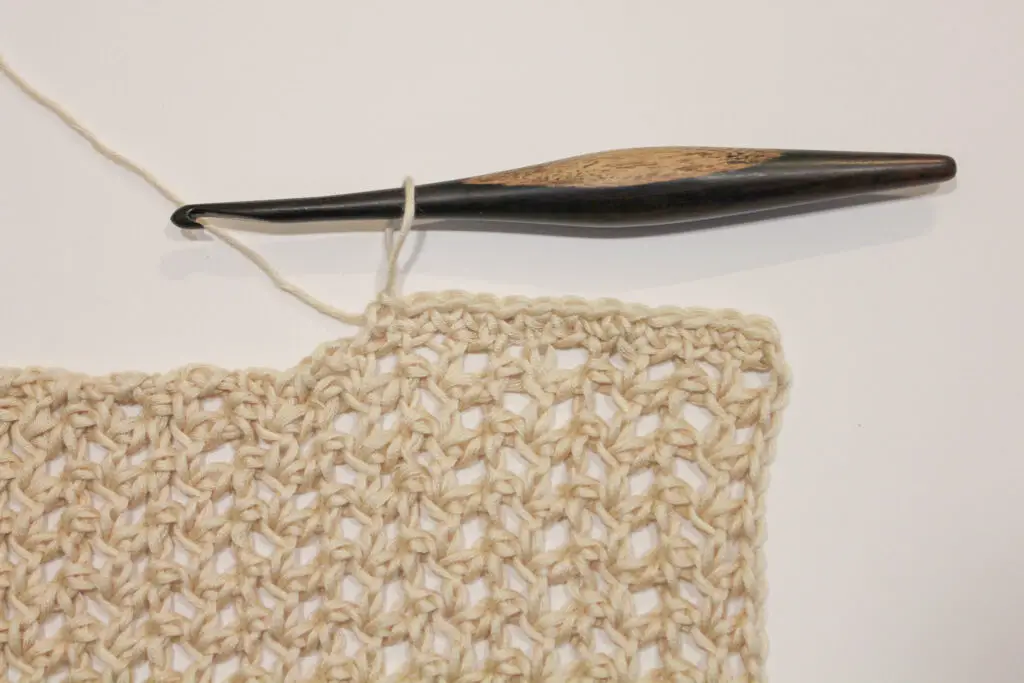
Size K (6.5 mm) hook (I love these hooks!)
Scissors, yarn needle
Stitch markers or pins (optional)
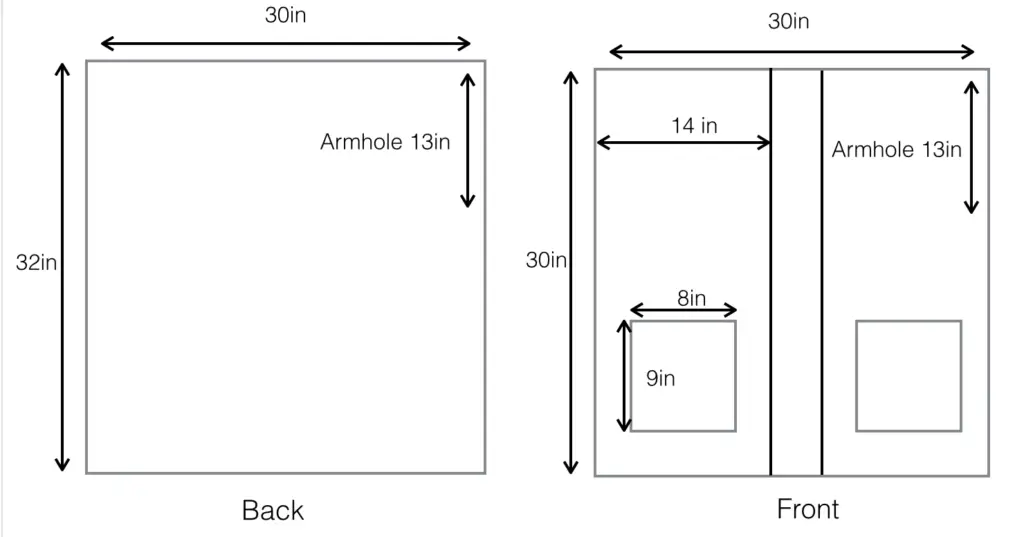
DIMENSIONS
One Size (Adult), but instructions are given to easily adjust the size. Measurements are taken with garment laying flat. It has about 4” of drape when wearing.
GAUGE
8 hdc sts x 9 rows in 4” square (in HDC mesh stitch)
NOTES
- This pattern is worked in rows to create two rectangles which are seamed together at the back and sides. Instructions for optional pockets are also included.
- Pattern written in US terms.
- The ch 3 at the beginning of each hdc mesh stitch row DOES count as an hdc stitch + ch 1. The ch 1 at the beginning of each edging row does NOT count as a stitch.
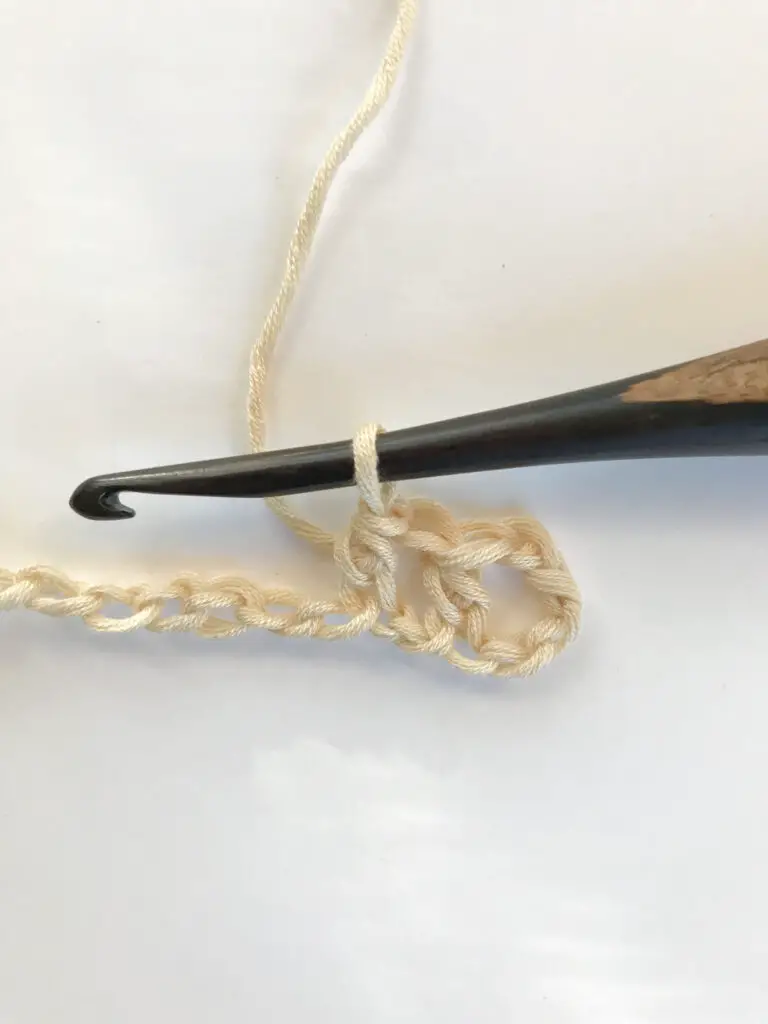
- Special stitch: Hdc mesh (check out this step-by-step tutorial).
- Abbreviations:
ch = chain
hdc = half double crochet
sc = single crochet
sk = skip
sl st = slip stitch
st = stitch
PATTERN
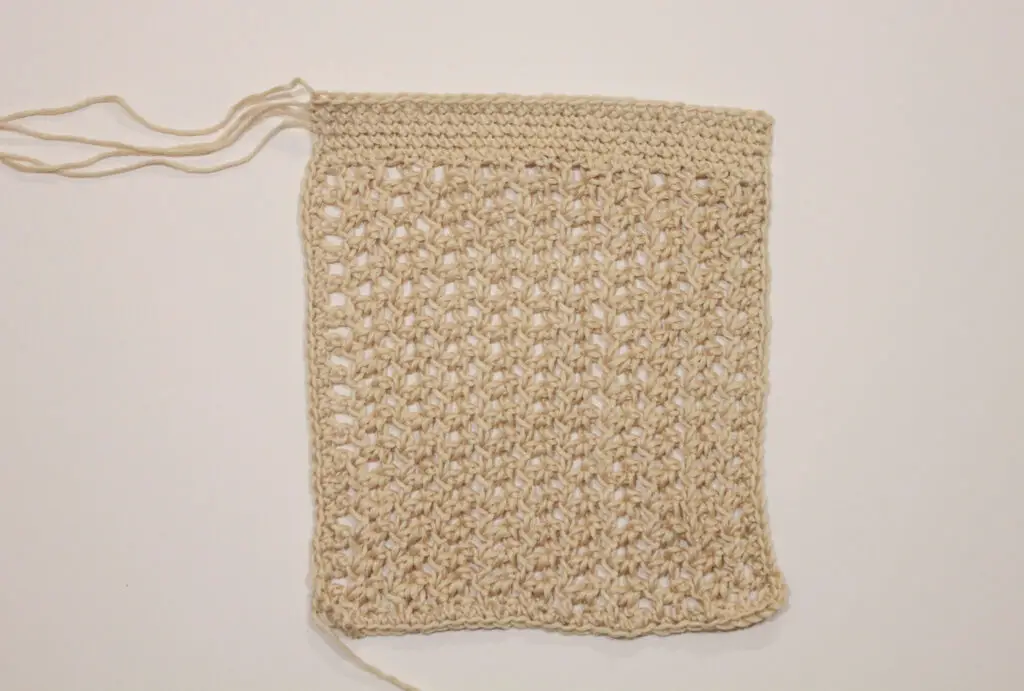
Body Panels (Make 2):
Ch 220 (or any even number if you wish to adjust the LENGTH of your cardigan).
Row 1: Hdc in fourth ch from hook (the first 3 chs you skipped will count as a hdc + ch 1), [ch 1, sk st, hdc in the next st] repeat [ ] across to end of row. Tip: Hdc in the back bump of the chain to get a more finished looking edge. <110 hdc & 109 ch >
Row 2: Ch 3 (counts as hdc + ch 1), turn, sk first st, hdc in next st (work into the stitch, not the ch 1 space), [ch 1, sk st, hdc in next st] repeat [ ] across. <110 hdc & 109 ch>
Rows 3 – 34: Repeat Row 2 (Adjust the number of rows if you wish to modify the WIDTH of your cardigan).
Body Panel Edging
Do not finish off. Ch 1, and turn your work 90 degrees so that you are working down the sides of the rows (the short side of the rectangle).
Row 1: Sc evenly down the sides of the rows (try to place 1-2 scs per row side, so that the fabric doesn’t pull). Ch 3 in the corner stitch. Continue evenly sc around the rectangle (place 1 sc in each st and ch of the long side of the rectangle), working 3 sc in each corner until you reach the first sc of the row. Sl st to the first sc. <st count will vary>
Rows 2 -5: Ch 1, do not turn. Sc in each st, working 3 sc in each corner. Sl st to first sc. <st count will vary>
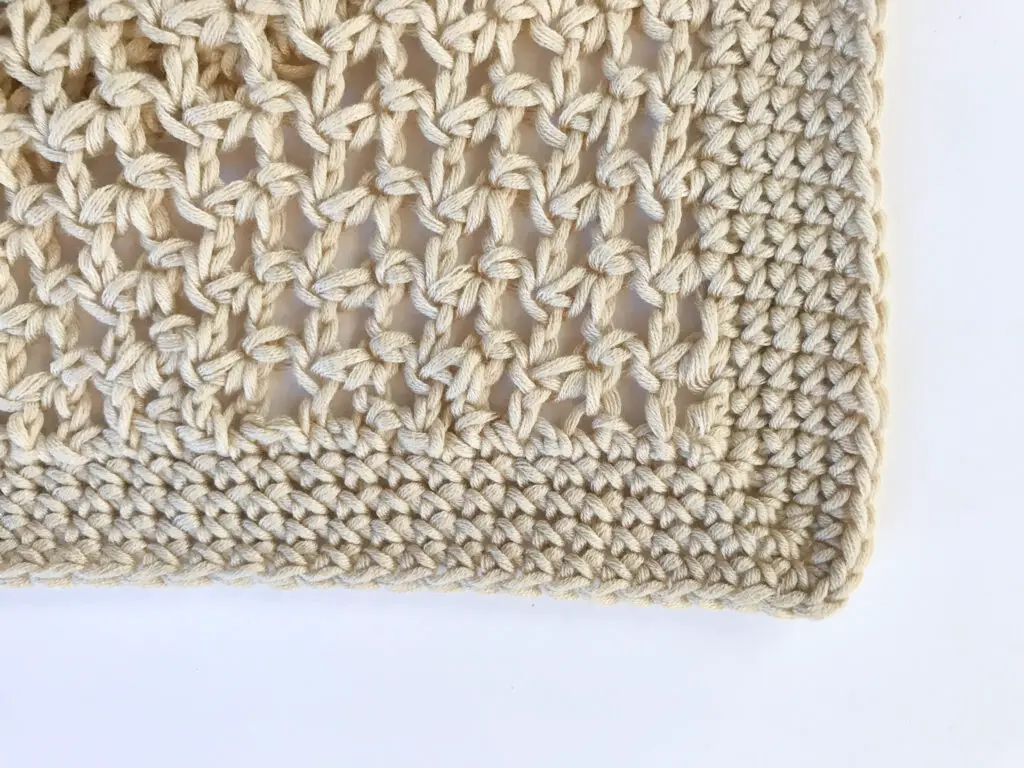
Fasten off and weave in ends.
Pockets (make 2):
Ch 34.
Row 1: Hdc in fourth ch from hook, [ch 1, sk st, hdc in the next st] repeat [ ] across to end of row. <17 hdc, 16 ch >
Row 2: Ch 3 (counts as hdc + ch 1), turn, sk first st, hdc in next st (work into the stitch, not the ch 1 space), [ch 1, sk st, hdc in next st] repeat [ ] across. <17 hdc & 16 ch >
Rows 3 – 23: Repeat Row 2.
Pocket Edging
Do not finish off. Ch 1, and turn your work 90 degrees so that you are working down the sides of the rows. Note that this side will be the “top” of your pocket so that the rows will run in the same direction as the Body Panel rows when pocket is attached.
Row 1: Sc evenly around the pocket as described in the Body Panel Edging section above (Remember to ch 3 at each corner). Sl st to the first sc. <st count will vary>
Row 2: Ch 1 and sc in each st across just the “top” of the pocket (just the first side of the square). Cut yarn and fasten off.
Note: I wanted to keep the same look for the pocket top edging as I had for the body panels so I chose to fasten off the end of each row and reattach the yarn to start the next row. This keeps the right side of the scs always facing you as it is on the body panels. If you don’t mind the pocket edging looking slightly different, you could just ch 1 and turn at the end of each row.
Rows 3-5: Attach yarn at the beginning of the row and sc in each st across just the “top” of the pocket. Cut yarn and fasten off. Weave in ends.
Seaming and Assembly
Body Panels
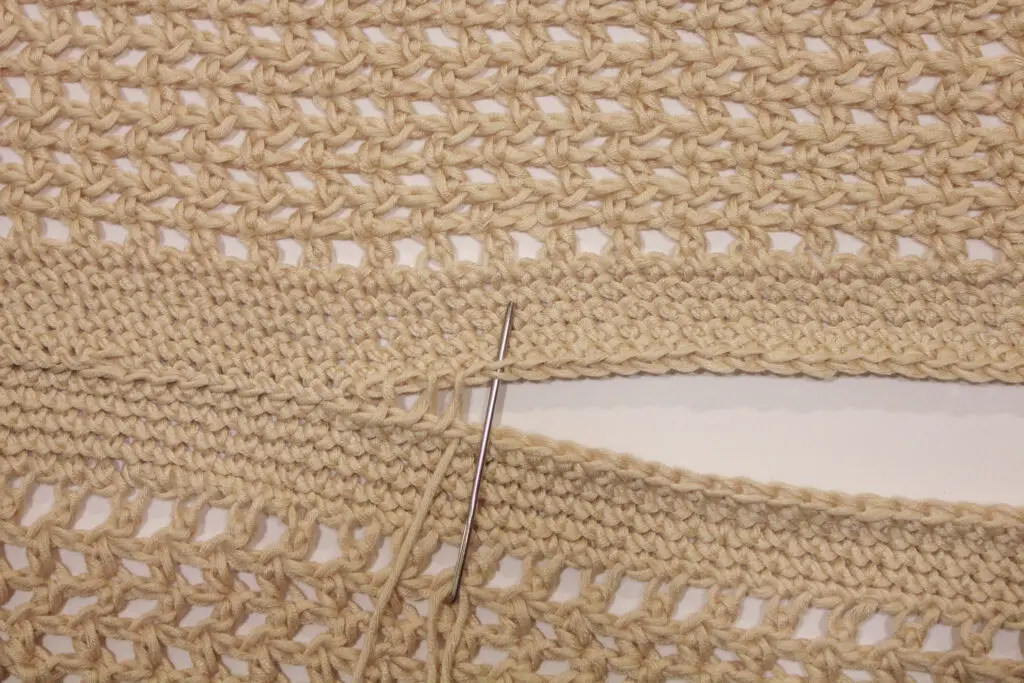
There are many methods used to seam, such as using slip stitches, a whip stitch, or the mattress stitch. The mattress stitch is recommended for a smooth, seamless look.
Step 1: We will start by connecting the two body panels. Lay the two rectangles out flat with the long sides touching and the right sides facing you.
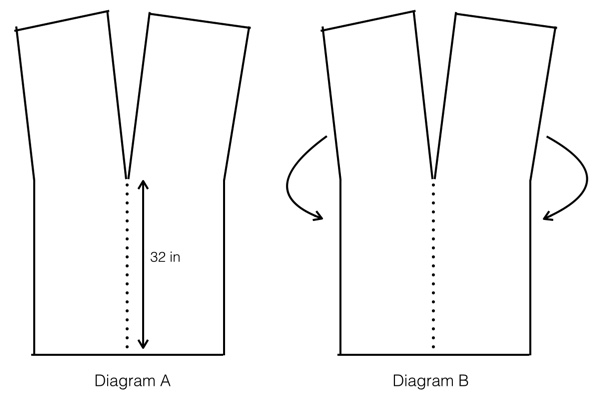
Step 2: Using a tapestry needle and a 40” length of yarn, begin mattress stitching (through both loops of the sc edging on each panel) at one end and continue sewing the two panels together for about 32”, leaving the rest of the panels unseamed (See Diagram A).
Tip: Place a stitch marker at 32” before you begin sewing so you don’t have to keep stopping to measure.
Secure both ends of the sewn portion tightly.
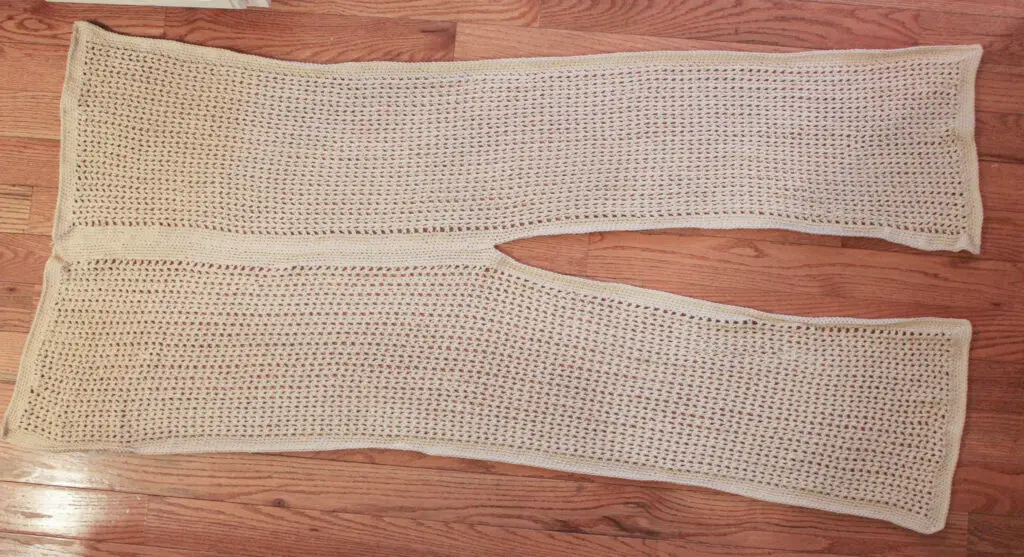
Step 3: Now we will seam the side of the front panel to the back panel. Fold the panels length wise so that the unseamed portion (front) is on top of the seamed (back) (See Diagram B). The front of the cardigan should be slightly shorter than the back.
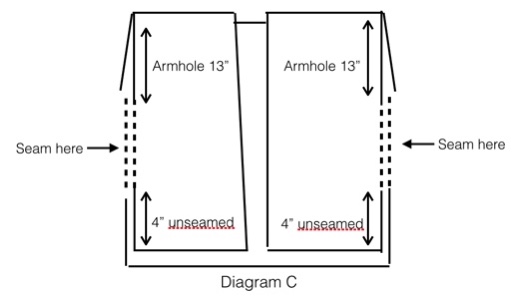
Step 4: Place a stitch marker 13” from the top of each shoulder to mark the armhole (feel free to adjust the armhole size as you like).
Step 5: Starting about 4 – 5 inches from the bottom, use the mattress stitch to seam up to the stitch marker at the armhole (See Diagram C).
Fasten off and weave in ends.
Attaching Pockets
I recommend using a whip stitch to attach the pockets.
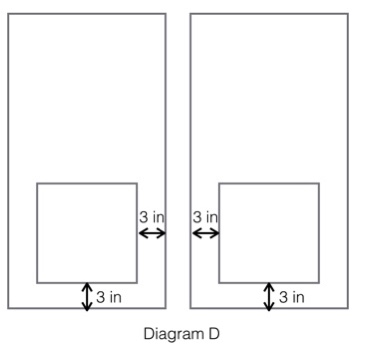
Step 1: Align each pocket on the front panels of the cardigan as shown (See Diagram D). Optional: Use stitch markers or pins to hold pocket in place while you sew.

Step 2: Beginning at the corner of the top edging, use a whip stitch to sew around the side, bottom, and side of the pocket (don’t forget to leave the top open!). Fasten off each corner and secure tightly. Repeat for the second pocket and you’re done!
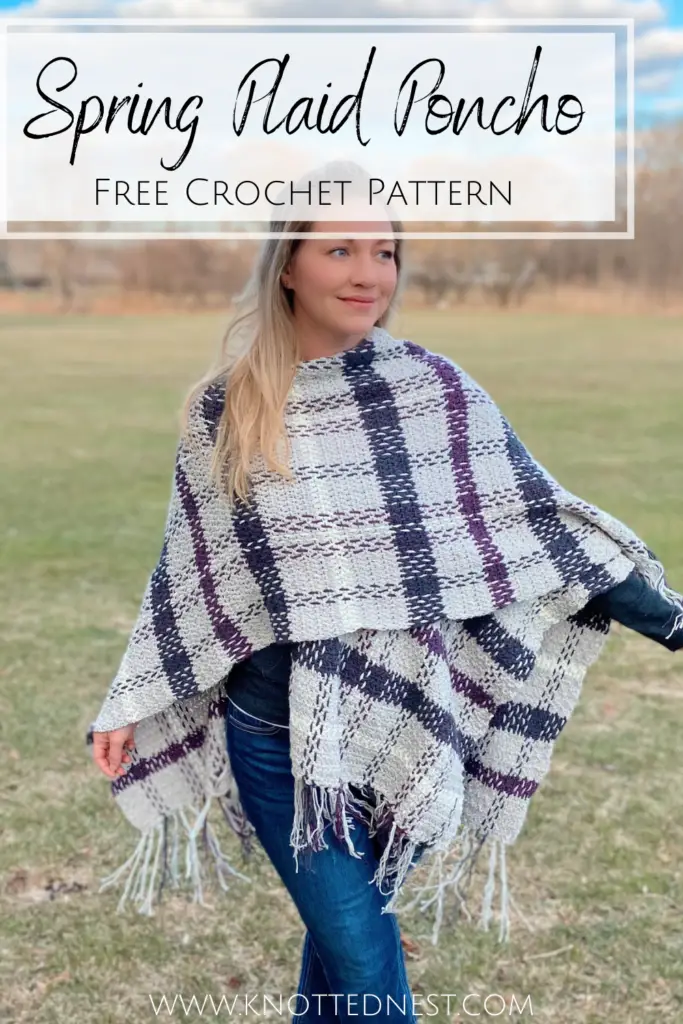
If you’re in the market for more easy garment patterns, check out the Spring Plaid Poncho pattern here on the blog. It’s a bit more heavy duty, but just as easy to make!
I hope you enjoyed this pattern! Tag me on Instagram @theknottednest and use the hashtag #magnoliasummercardigan to share your project! Also, be sure to subscribe to my email list for exclusive updates and discounts on future patterns! For more free patterns from The Knotted Nest, check out the free patterns category here on the blog.
Happy making!
Nikki

