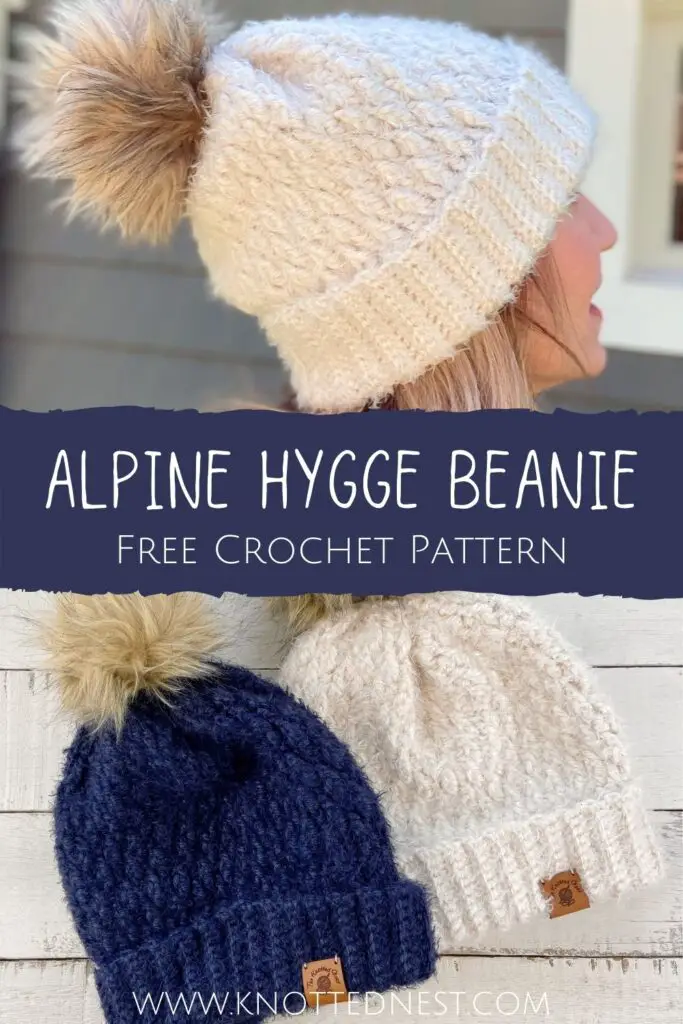
Alpine Hygge Beanie Free Chunky Crochet Hat Pattern
If you’re looking for a warm, slouchy, chunky crochet hat, look no further! The Alpine Hygge Beanie will have you feeling cozy all winter!
Click here to Pin this pattern for later!
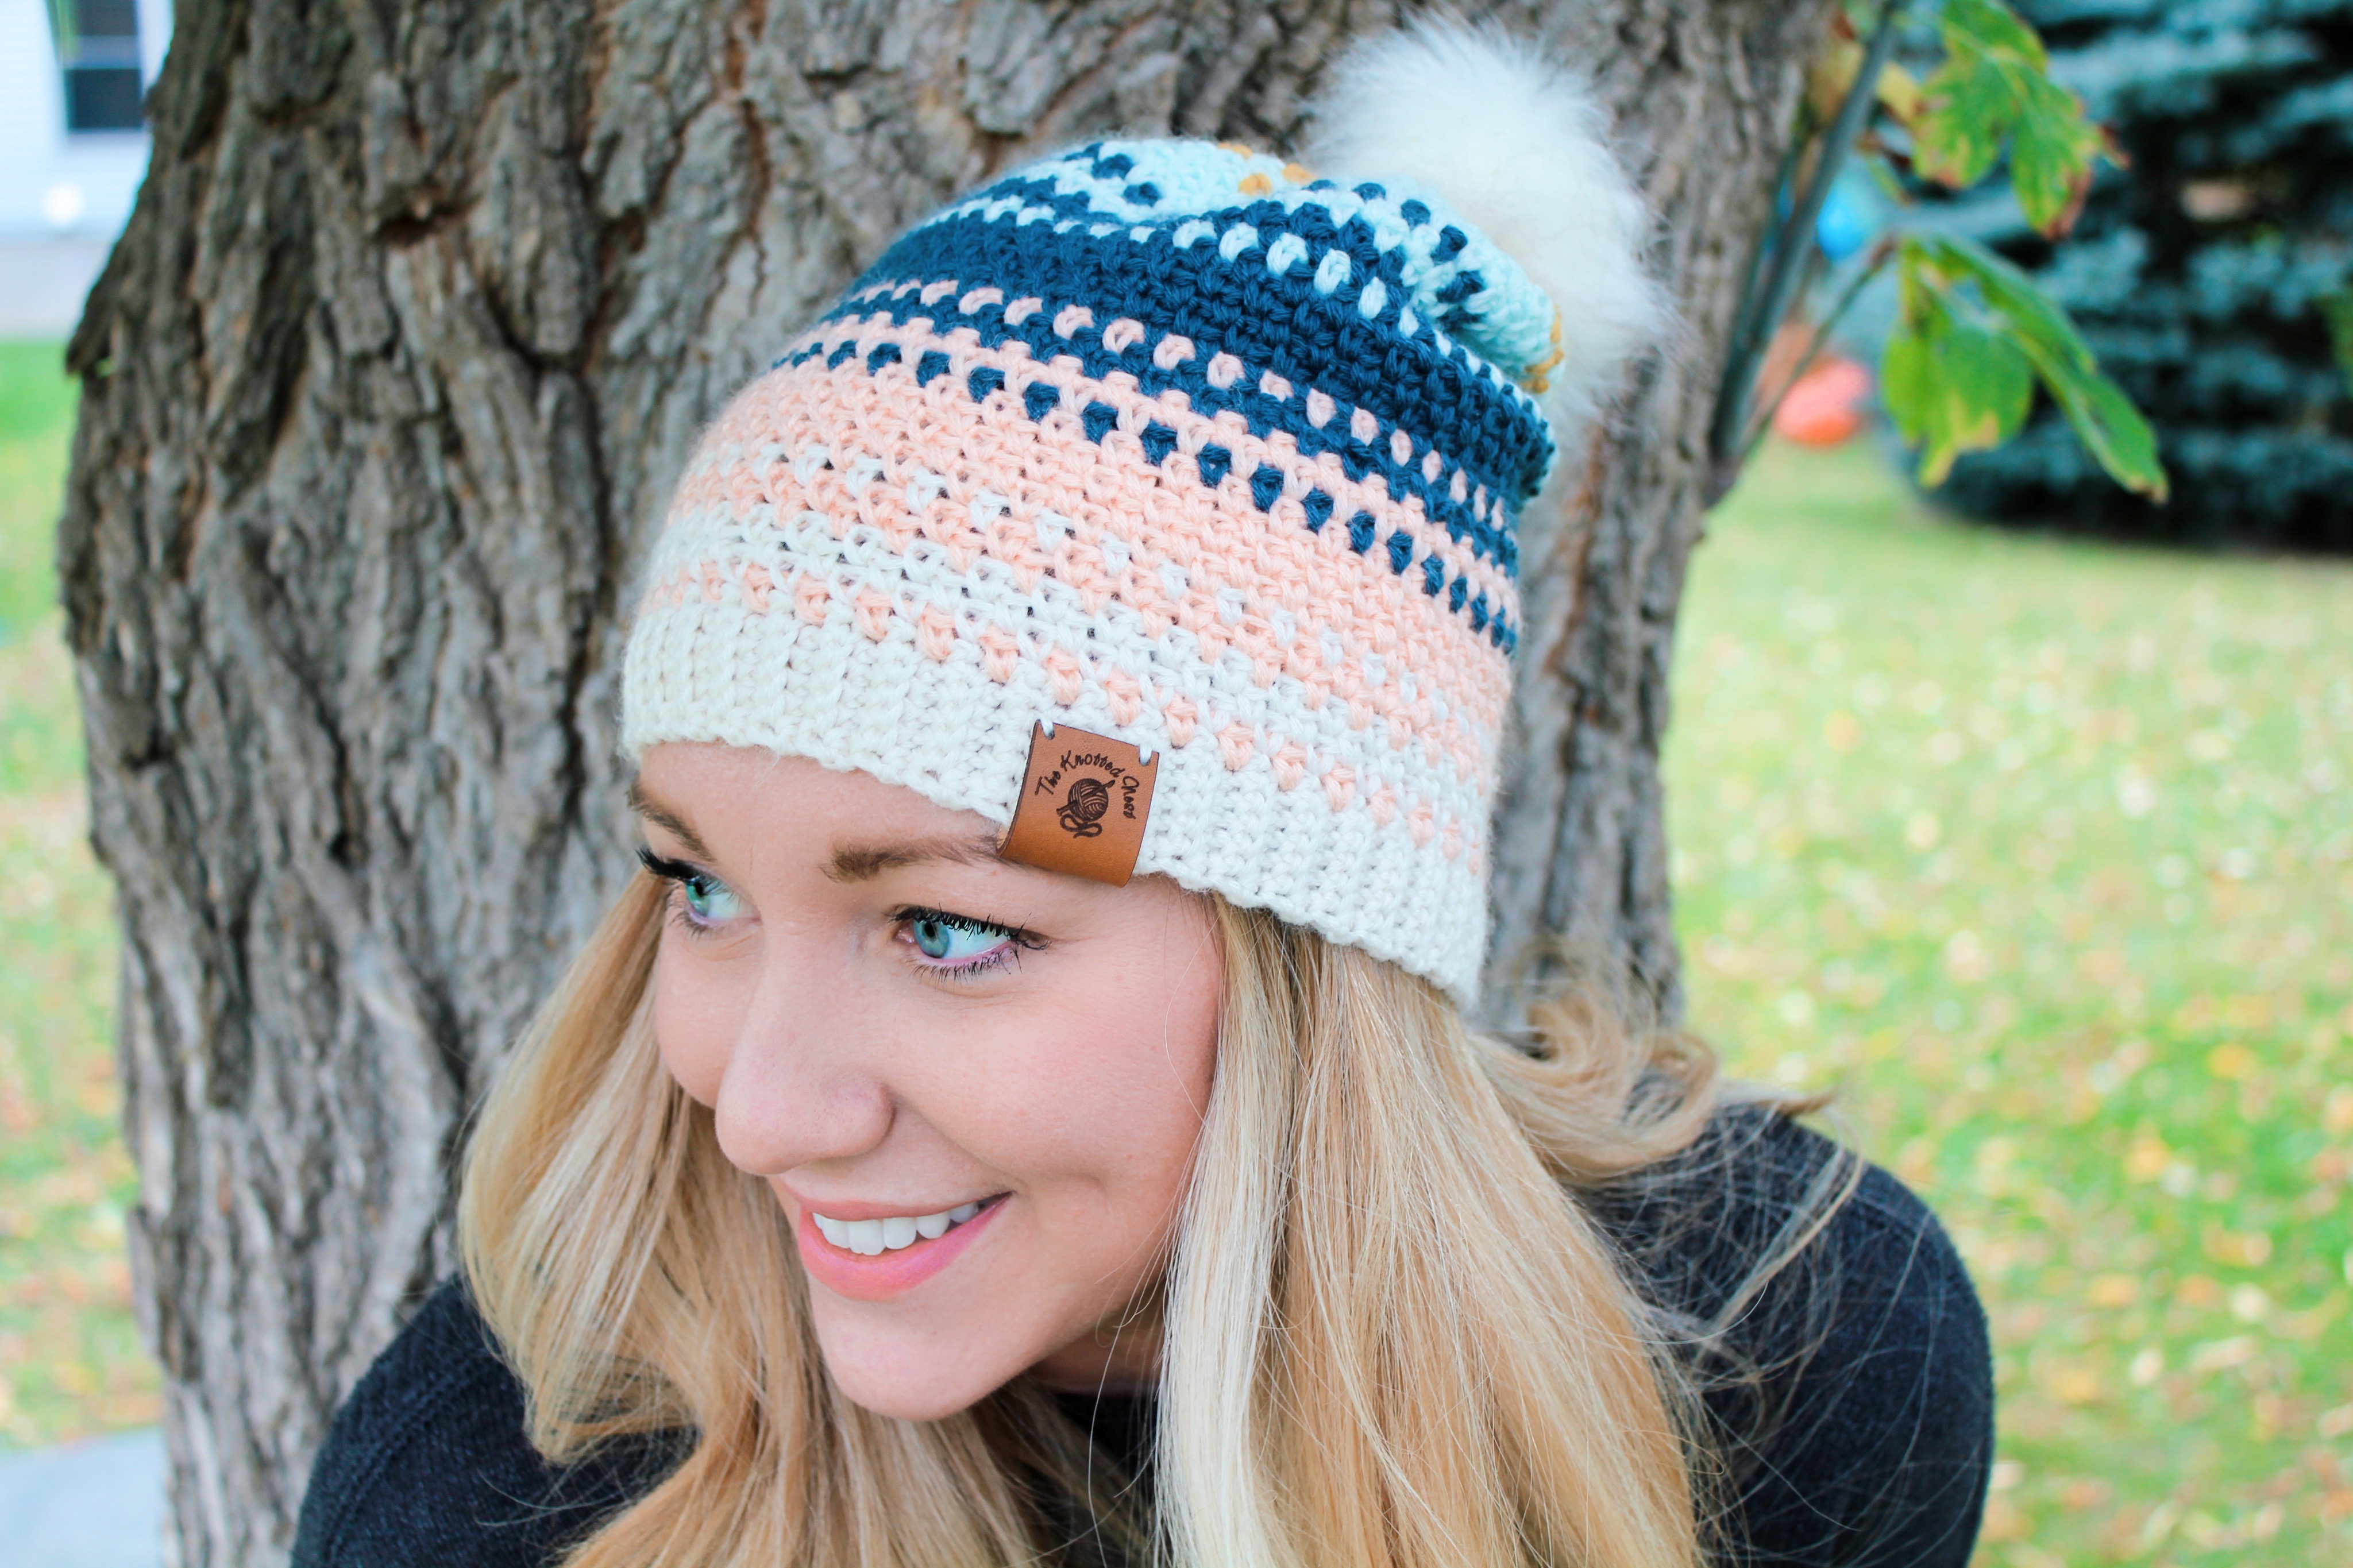
Woo hoo! My first published pattern! This super soft, deliciously squishy beanie matches a fun textured stitch with a simple rectangle construction, making it an enjoyable project for advanced beginners or seasoned crocheters! I first heard of Red Heart Hygge yarn over a year ago when I found the pattern for the Give Me a Hygge Scarf from Heart Hook Home. The second I picked up that first skein of Hygge yarn I knew I had to make All. The. Things. with it.
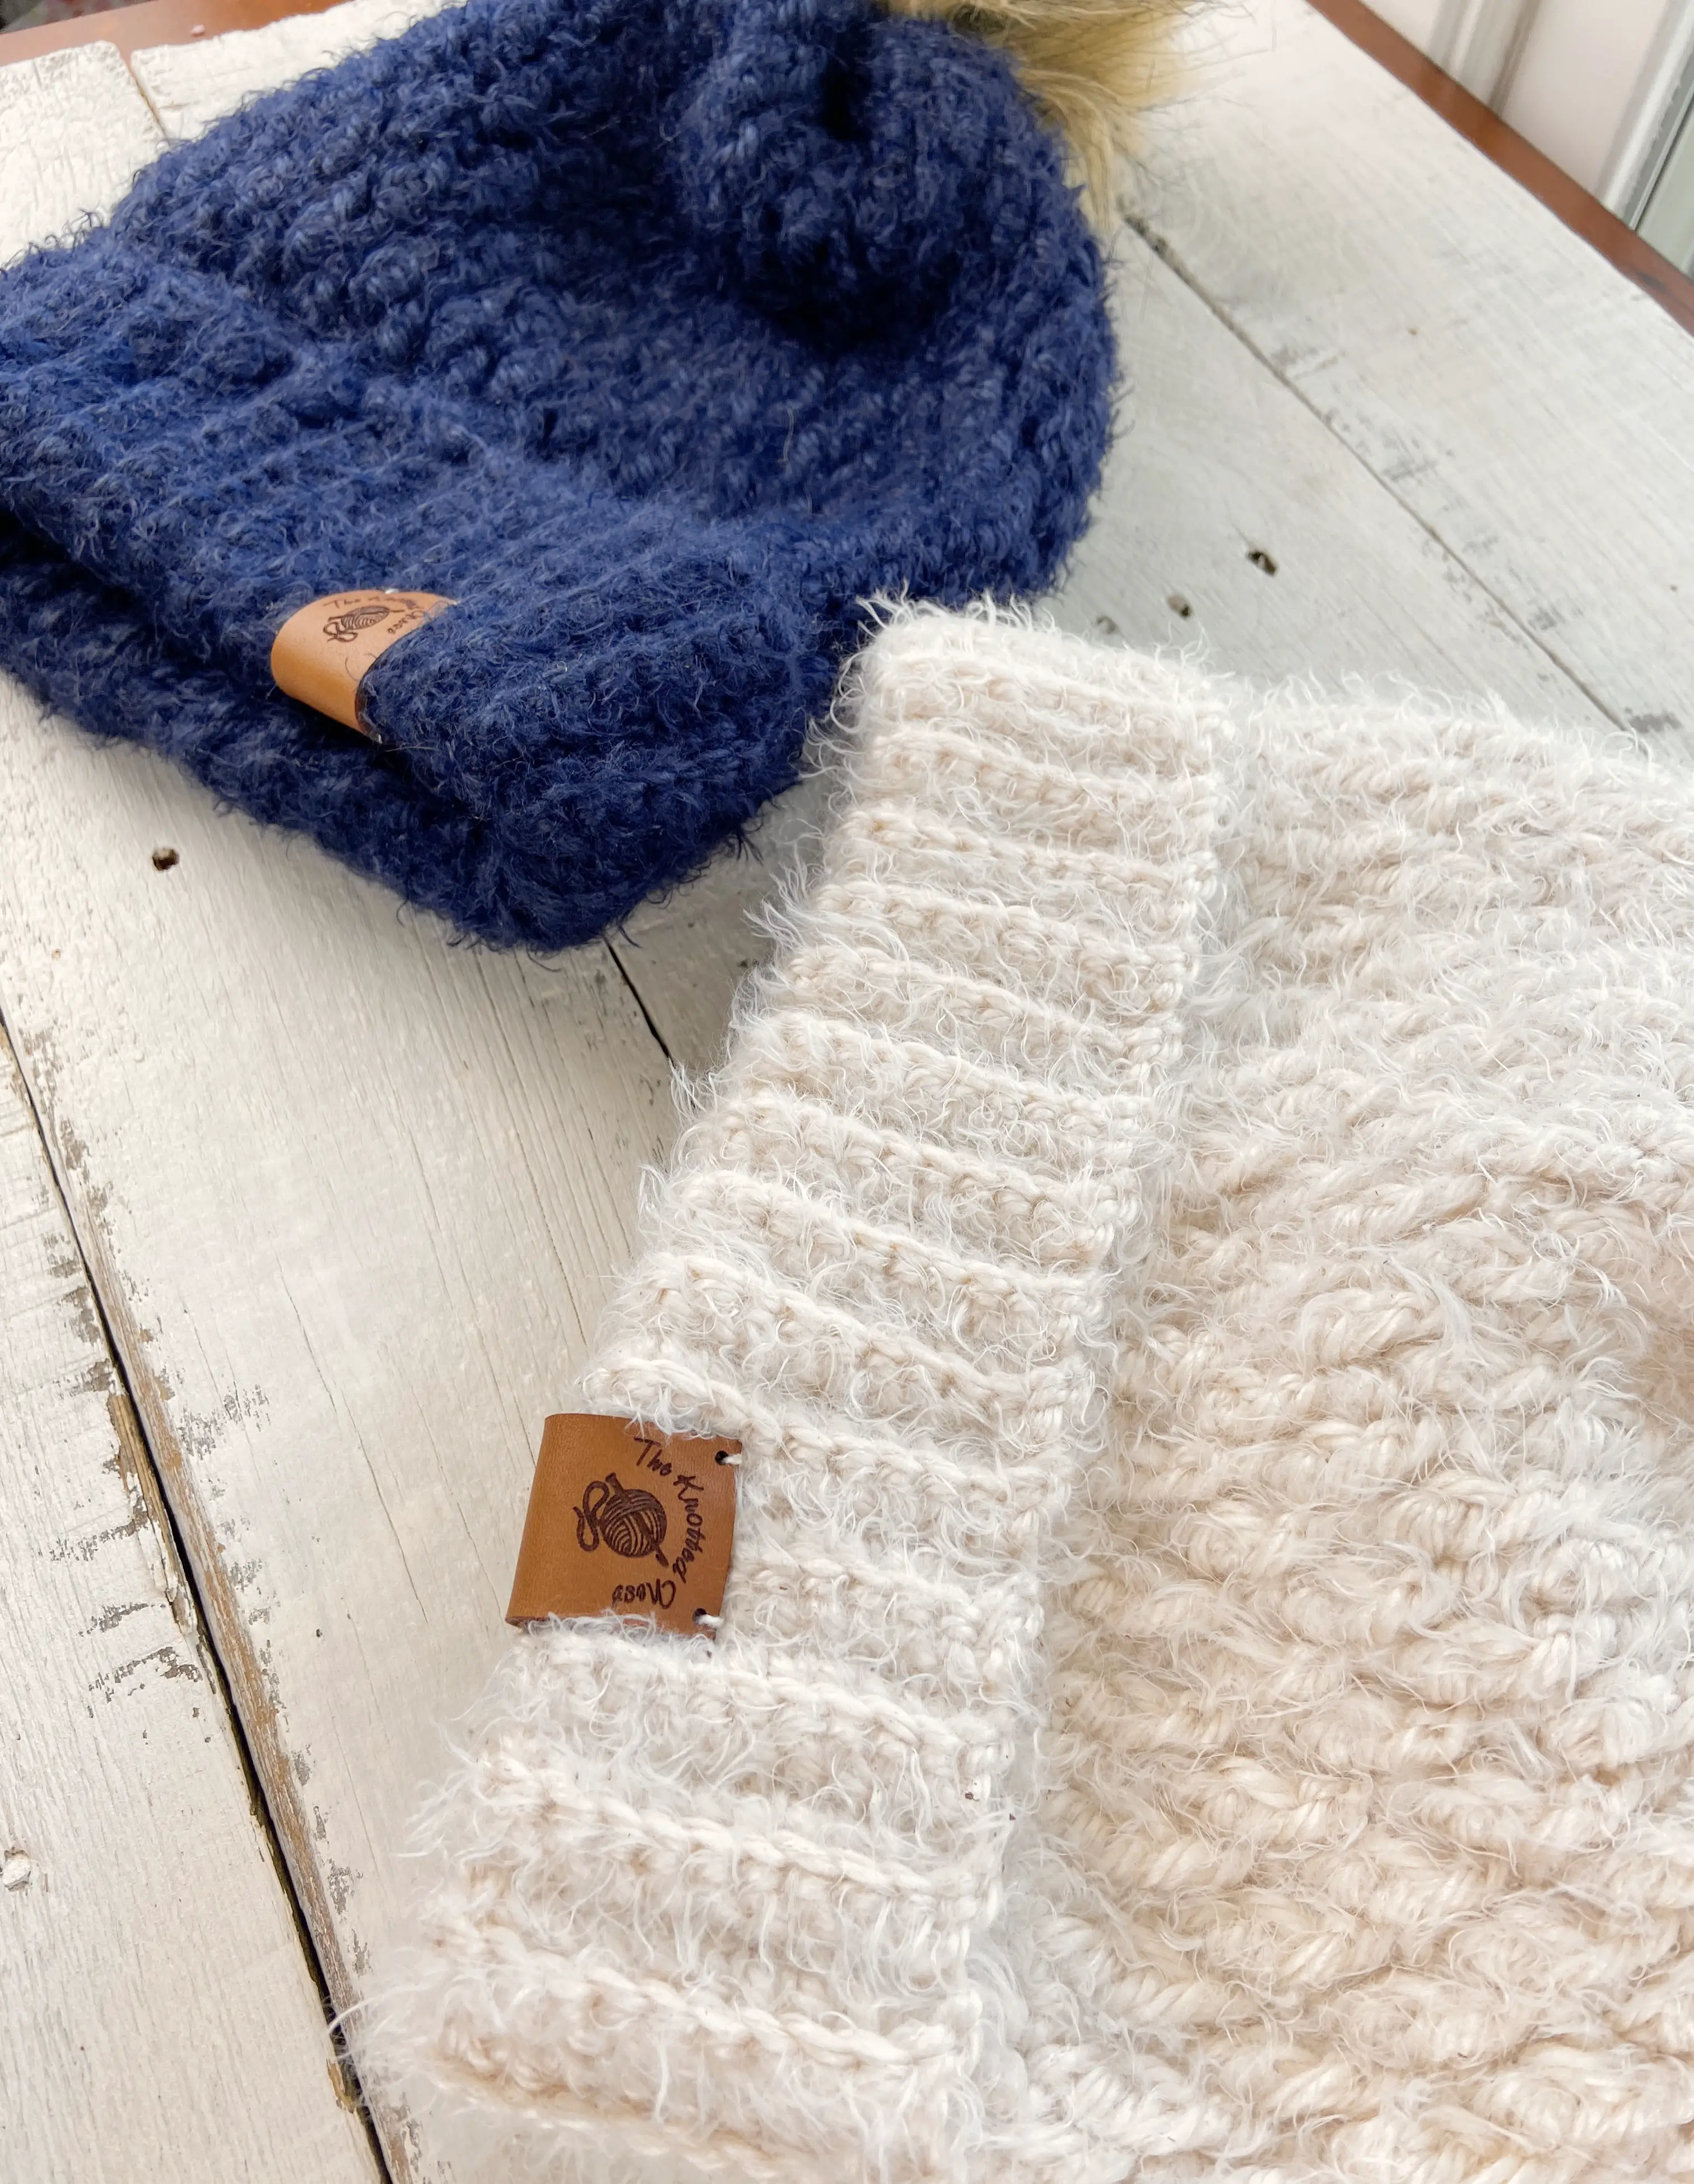
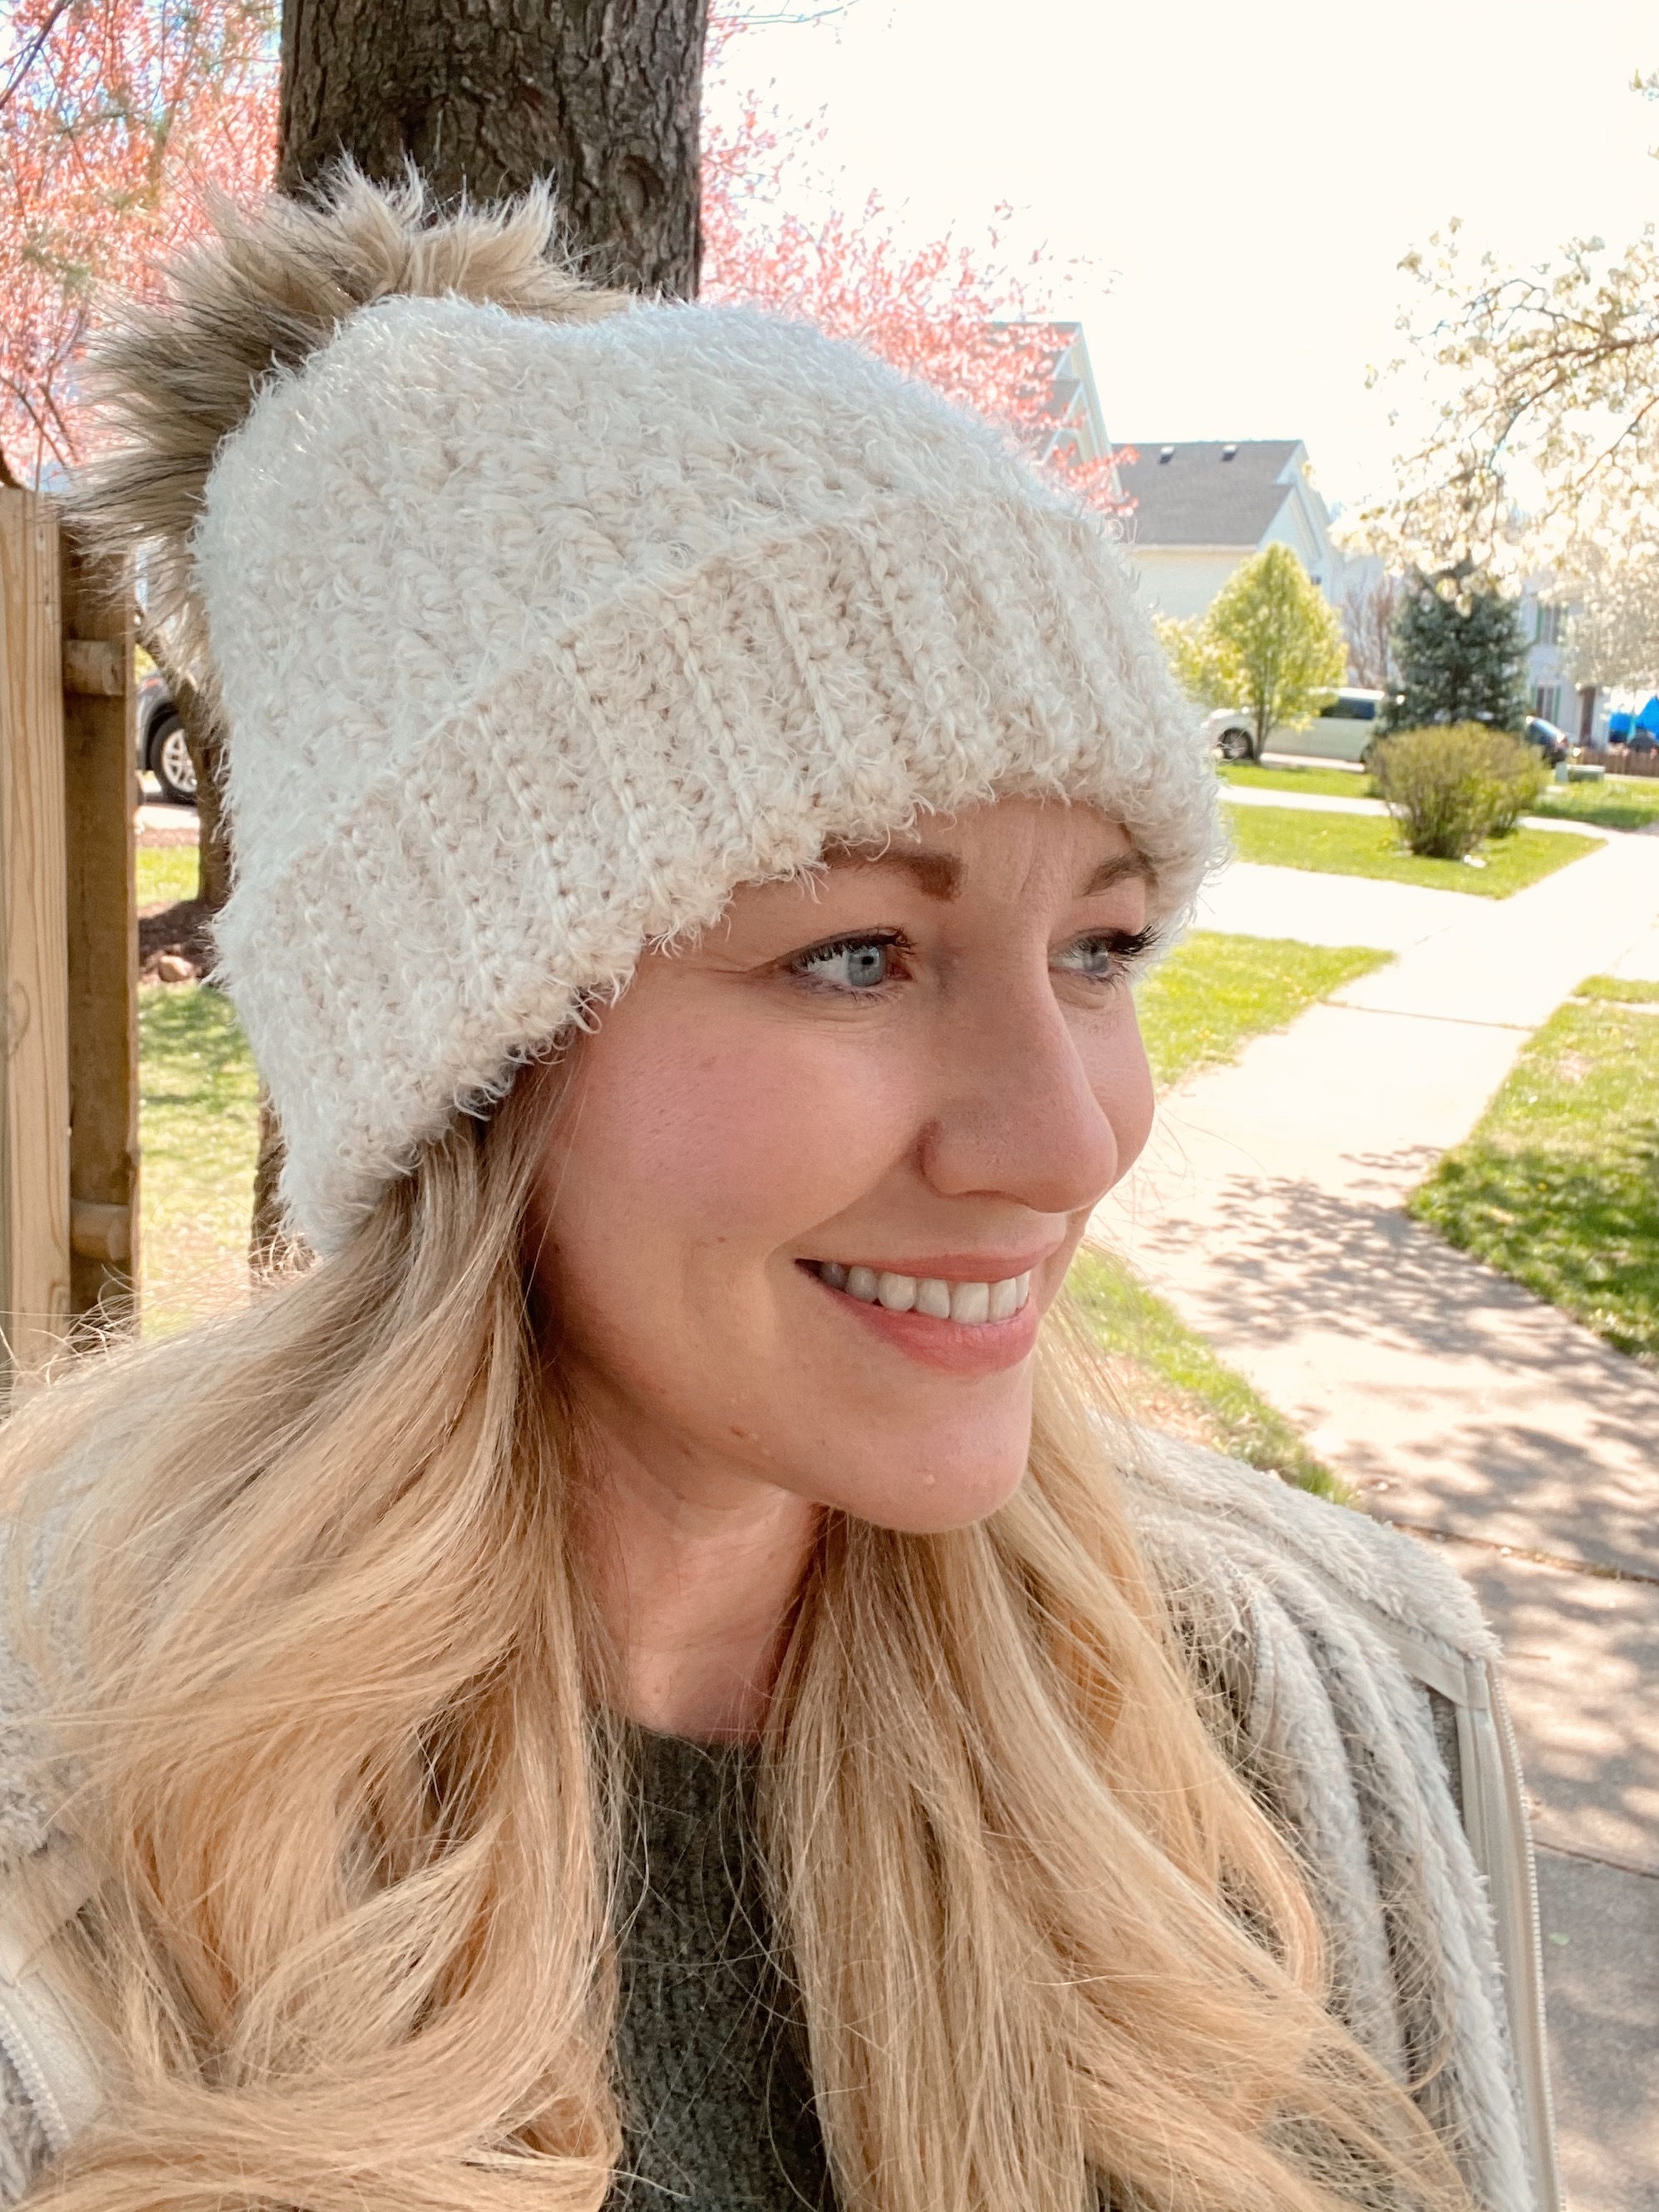
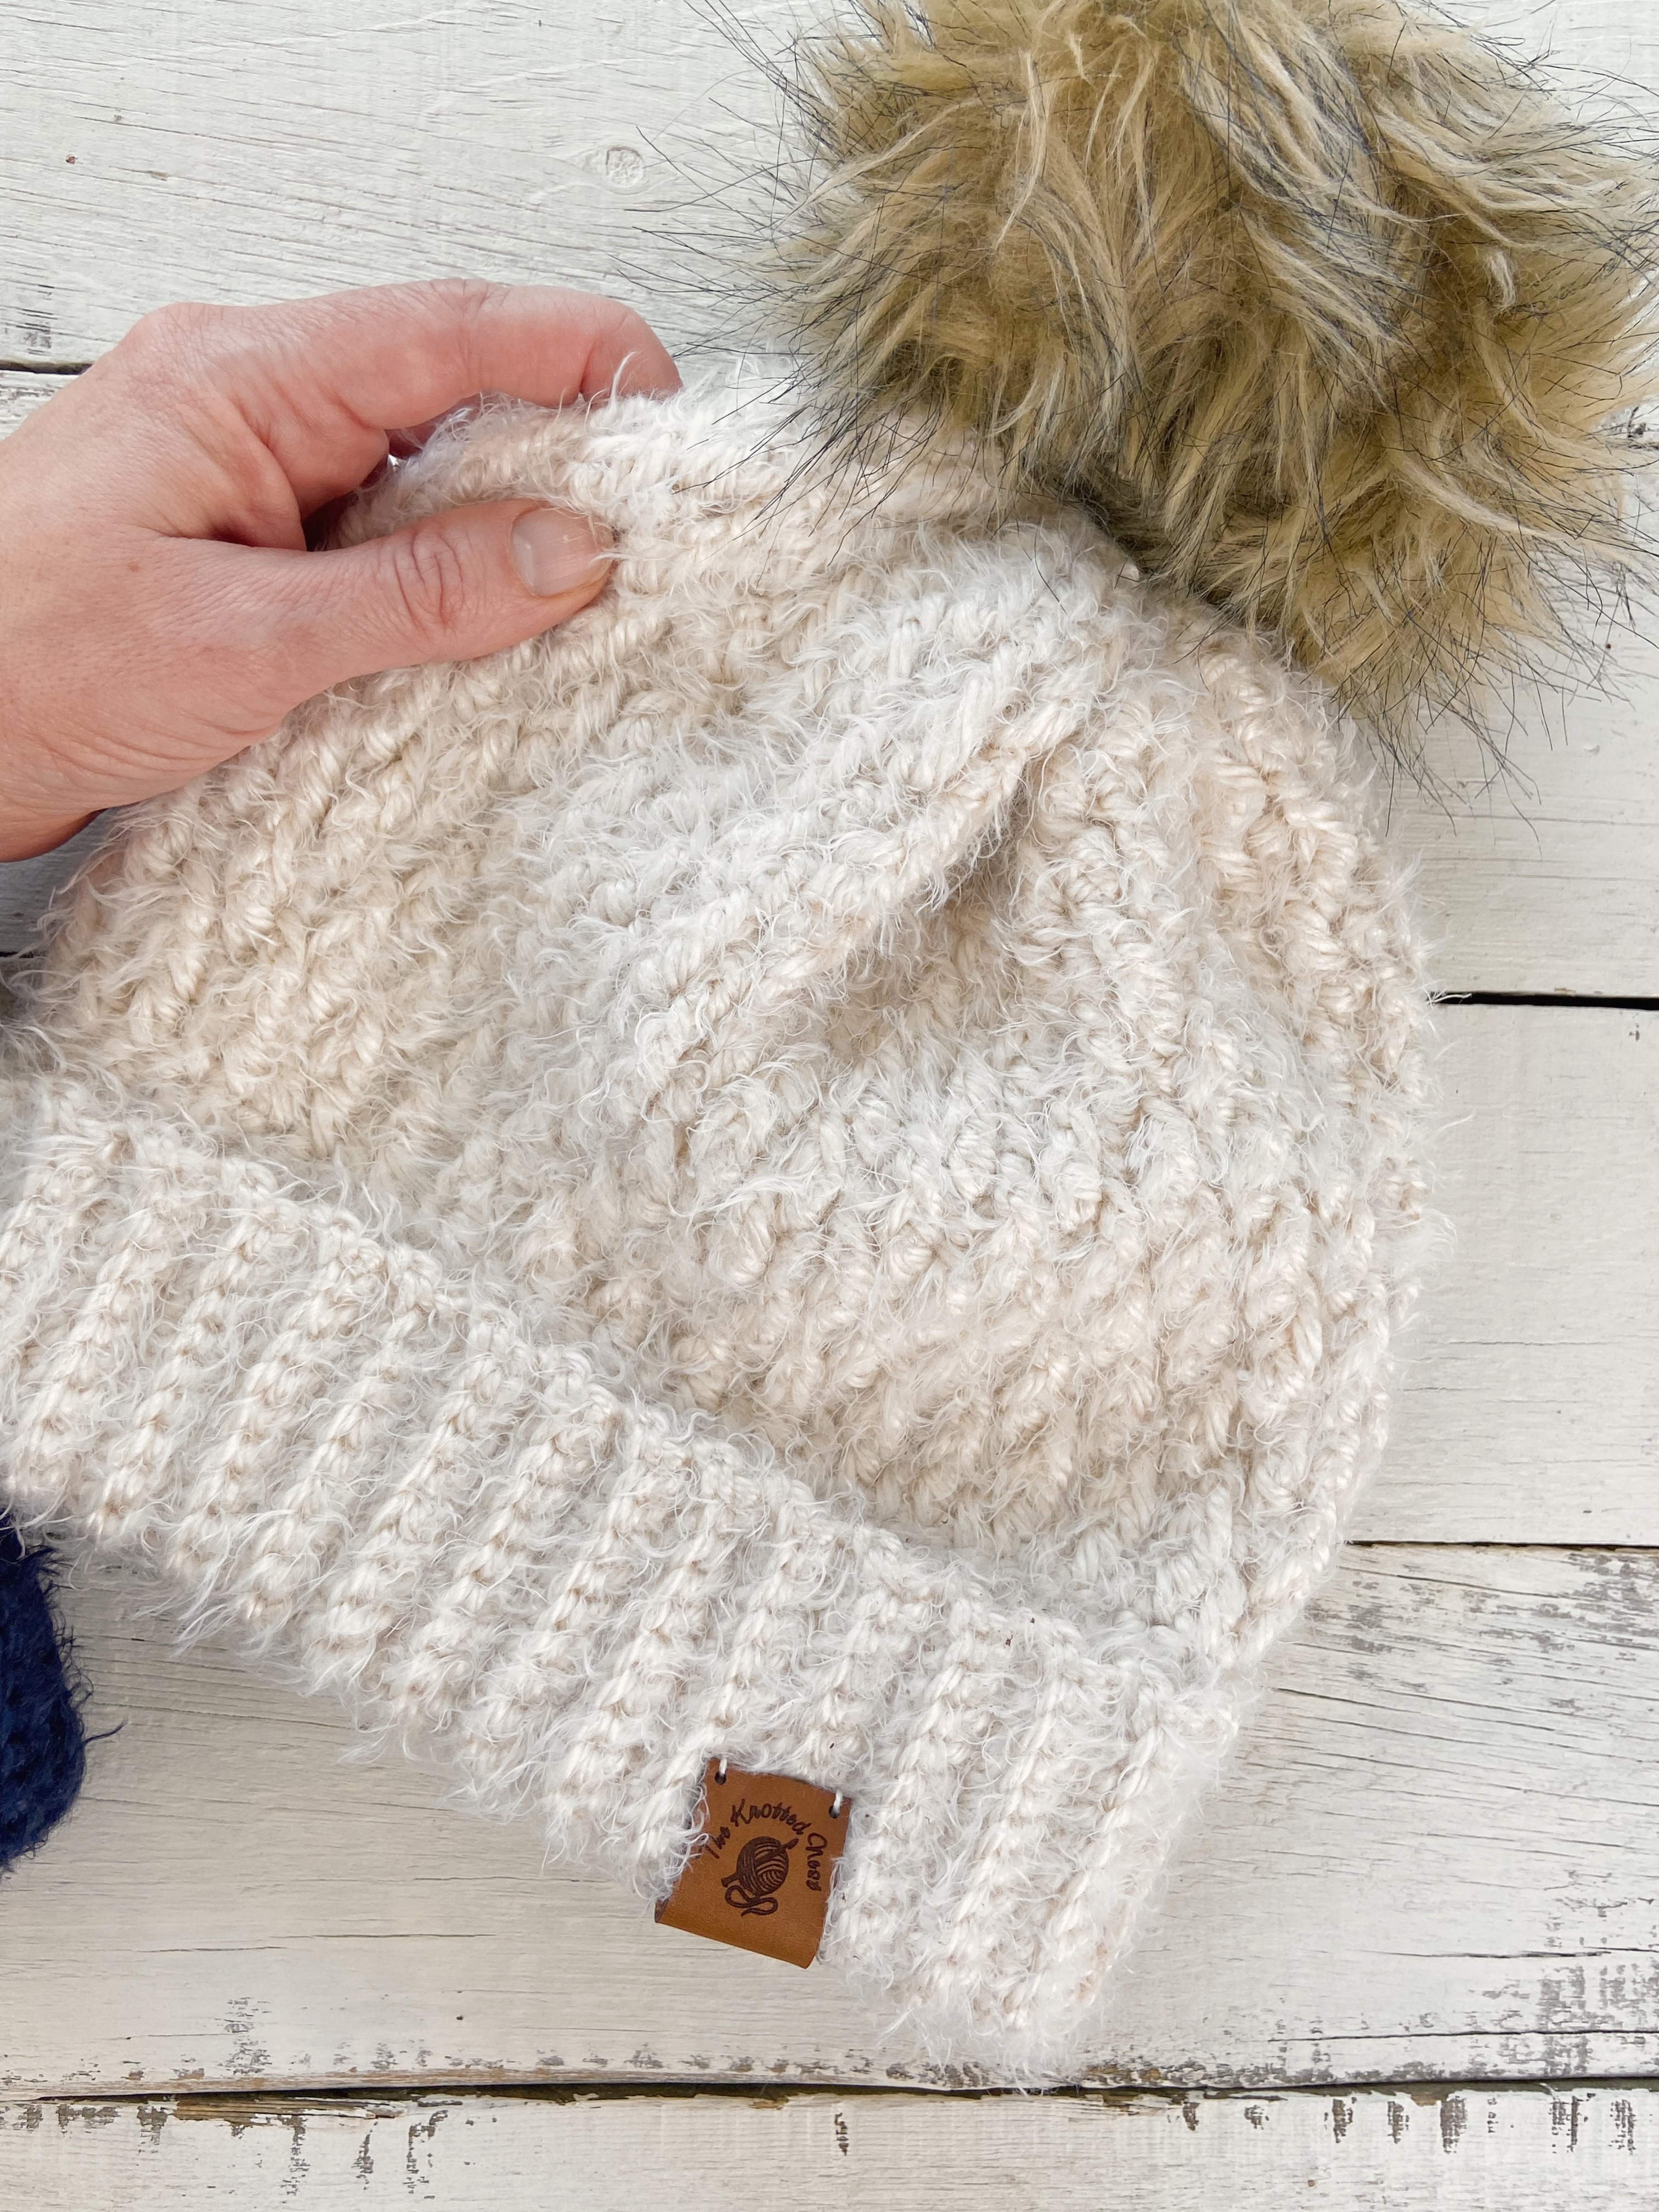
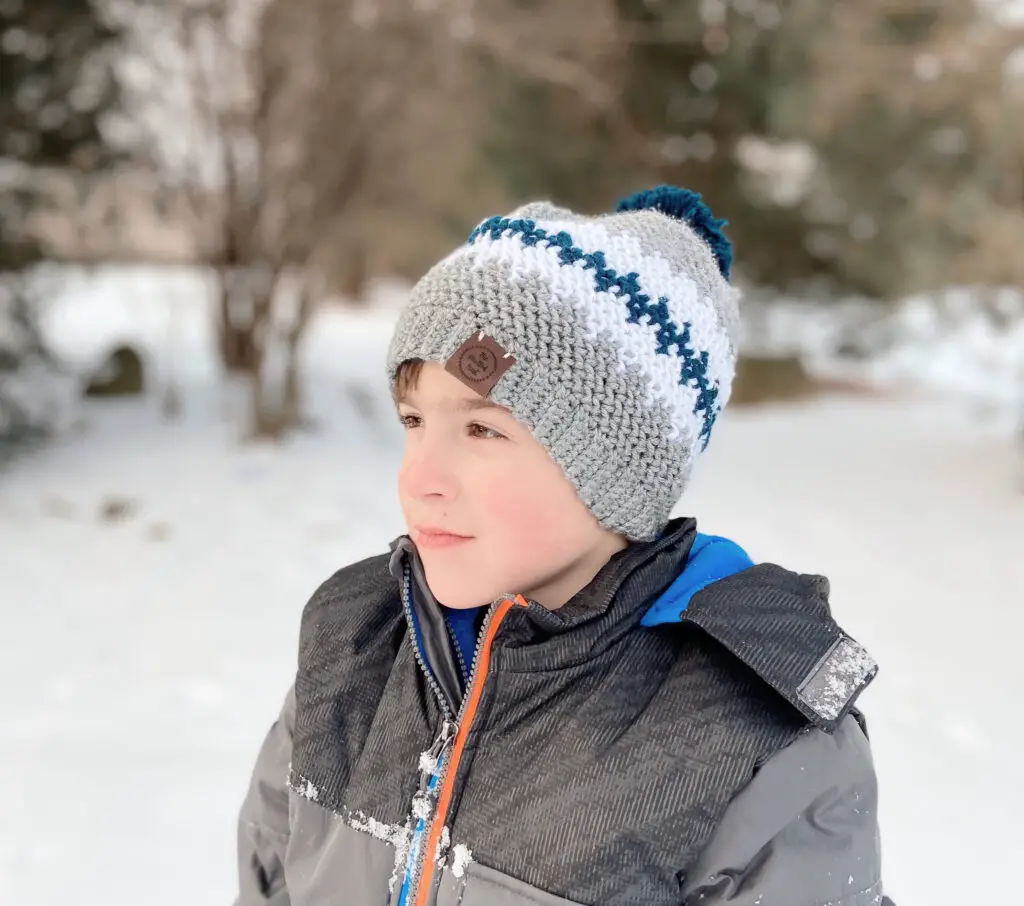
Hygge is a Danish word for a feeling of coziness and comfort and that is exactly with this chunky crochet hat delivers! The drapey texture gives it the perfect slouch and the double brim adds style and warmth. Top it off with an easy peasy faux fur pom pom and it’s the perfect winter accessory!
An inexpensive, printable, ad-free PDF version of this chunky crochet hat pattern is available on Etsy here or Ravelry here.
Alpine Hygge Beanie Free Chunky Crochet Hat Pattern

SKILL LEVEL
Intermediate. Knowledge of Front Post double crochet and crocheting in back loop only is necessary in this pattern.
MATERIALS
For hat:
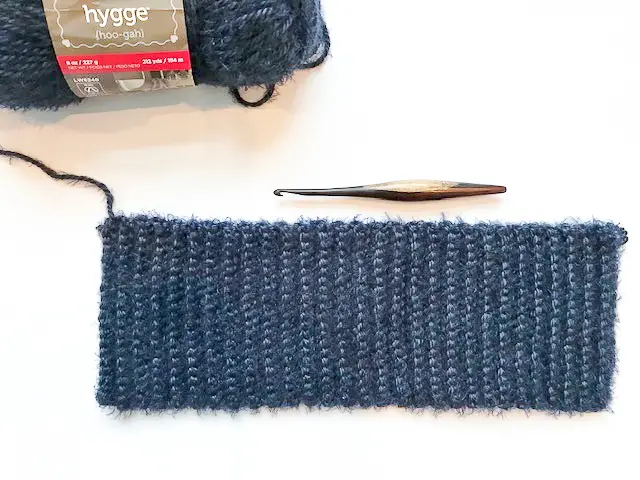
- One Skein Red Heart Hygge Yarn (70% acrylic, 30% nylon; 8oz (227g) / 212yds (194m)), pictured in Pearl and Indigo.
- Size J (6.00mm) crochet hook.
- Scissors, Yarn needle
For faux fur pom:
- 6-8” circle of faux fur material
- Polyfil or other stuffing material
- 30” length cotton yarn
- Large embroidery needle (pointed tip)
SIZE
As written, fits average adult (approx. 21 inch circumference), but can be easily modified for any size by adjusting the number of Brim rows.
GAUGE
- Brim of hat should measure 5” wide by 19” long (unstretched). If modifying, the length of the finished brim should be 1.5 – 2” smaller than head circumference.
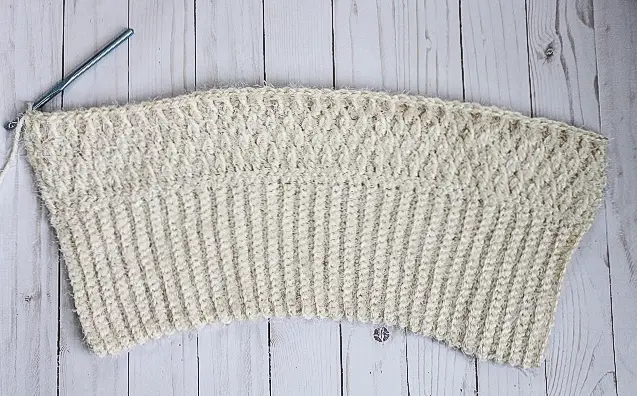
- Completed rectangle should measure approximately 19” wide by 14” tall.
SPECIAL STITCHES
- This pattern uses the Alpine stitch, also known as the Ripple Stitch.
- The Alpine Stitch is basically a repeat of two rows: a row of single crochet, then a row of alternating double crochet and front post double crochet (which is worked around the dc post two rows below). This creates beautifully raised, staggered stitches. See pattern for detailed instructions and chart below for a visual.

NOTES
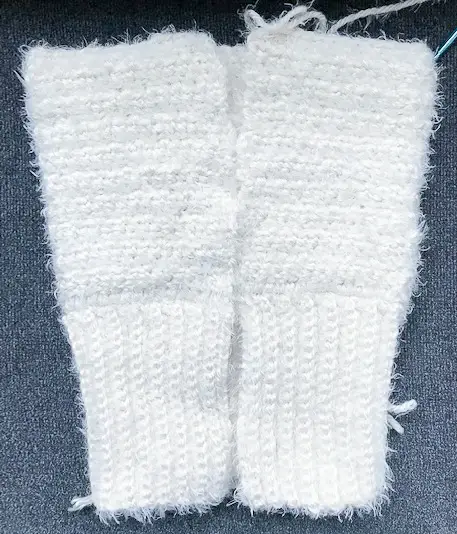
- The basic shape of this hat is a rectangle which is seamed together to form a tube, then gathered at the top. The brim of the hat is worked first. Once the desired length/circumference of the brim is reached, you will crochet down the sides of the brim rows to begin creating the body of the hat.
- All terms are US crochet terminology.
- Turning chains DO NOT count as stitches.
- Technique used for seaming:
- Mattress stitch – Line up the rows/stitches of the two pieces to be seamed. Using a yarn needle and corresponding color of yarn, insert needle into the first stitch from the inside/bottom of the seam out. Pull through. Then insert into the corresponding stitch on the 2nd piece from the inside out. Continue sewing in this way as if you were lacing a shoe. Give your yarn a tug every inch or so to keep the seam tight. See a video of this technique here.
- Abbreviations
- BLO = back loop only
- Ch = chain
- DC = double crochet
- FPdc = front post double crochet
- SC = single crochet
- St = stitch
PATTERN
Brim
Chain 21
Row 1: SC in second chain from hook and in each chain. Ch 1, turn. <20SC>
Row 2: SC in BLO in each st. Ch 1, turn. <20SC>
Repeat Row 2 until you reach a total of 59 rows. Hat size can be modified by working as many rows as needed to fit around head (should be 1.5 – 2 inches shorter than circumference of head, if modifying size), just be sure to end with an odd number of rows. Do not finish off.
Hat Body
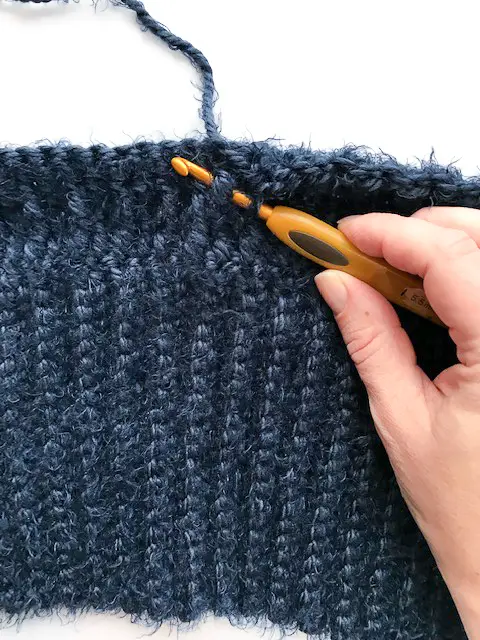
At the end of Row 59 (or desired number of brim rows), Ch 1 and turn work so that you are working down the side of the brim rows.

Row 1: Work 1 SC at the end of each row, evenly spaced so that you end up with 59 SCs (or desired number for custom size). Ch 2, turn. <59 SC >
Row 2: DC in each stitch across. Ch 1, turn. <59 DC>
Row 3: SC in each st. Ch 2, turn. <59 SC>
Row 4: DC in first st. FPdc (loosely) around the post of the next DC st from 2 rows below (DC row). *NOTE: There will be an unworked SC behind each FPdc.* Repeat across row, finishing with a regular DC. Ch 1, turn. <30DC, 29FPdc>
Row 5: SC in each st. Ch 2, turn. <59 SC>
Row 6: Work 1 DC in each of the first two stitches.* FPdc around the post of the next DC st from two rows below. DC in next stitch.* Repeat from * until last stitch. DC in last st. Ch 1, turn. <31DC, 28FPdc>
Tip: You should always be making the FPdc of your current row IN BETWEEN the FPdcs of the previous row. This is how you get the staggered stitch pattern!
Repeat Rows 3 – 6 four more times or until rectangle measures approximately 14” tall from the bottom of the brim.
Note: If making for a child, only repeat three times.
You should now have a rectangle that measures approximately 19” x 14” if following the pattern as written.
Seaming
Fasten off, but leave a long tail for sewing (approx. 30”). With the wrong side facing out, fold the rectangle so that the two sides of the hat line up (see picture). Use a tapestry needle to sew the two sides together (I used a mattress stitch), forming a tube.
Using another length of yarn (approx. 20”), weave the needle through every other stitch at the top of the tube, cinching as you go. Carefully pull the yarn tight, sew back and forth a few times over the closure, and tie the two ends together to secure.
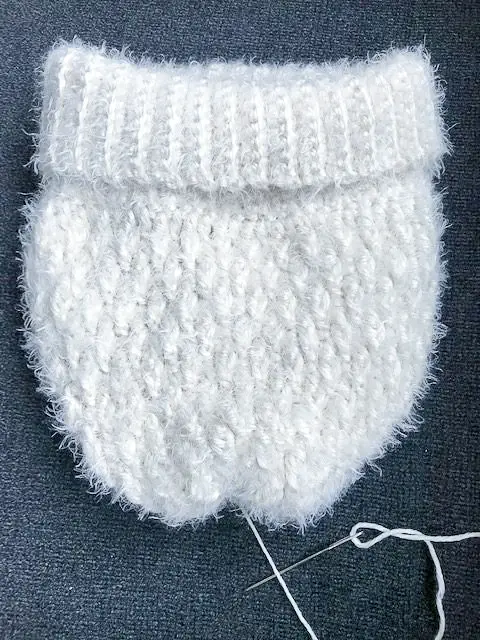
With the hat turned right side out, fold brim up and use a few pieces of yarn (I used a similar color of cotton yarn, the hygge yarn was a bit too slippery) to evenly place 3 to 4 tack stitches to secure the top of the brim.
Weave in the ends and you’re done with your chunky crochet hat! Attach a pre-made faux fur pom pom or make your own with the instructions below.
Faux Fur Pom
Using the pointed embroidery needle and cotton yarn, weave in and out of the faux fur fabric circle about ¼” from the edge. The fabric will begin to curl in, forming a sphere. Before cinching the pom closed, stuff with polyfil, and pull thread taught to close.
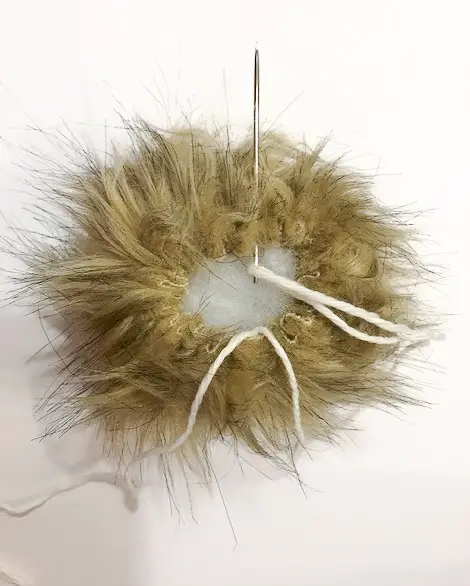
Tip: sew the working end of the yarn back across to the side of the closure opposite the tail so the two ends can easily be tied together.
Use the tails to tie the pom to the top of the hat. That’s it!
I hope you enjoyed this pattern! Tag me on Instagram @theknottednest to share your project!
Find more “bottom up” crochet hat patterns like the Color Fade Beanie, The Cozy Bean Hat, and the Buddy Beanie here on the blog or check out the Patterns section for lots of project inspo!
Happy Making!