Top 5 Tips to Become a Better Crocheter
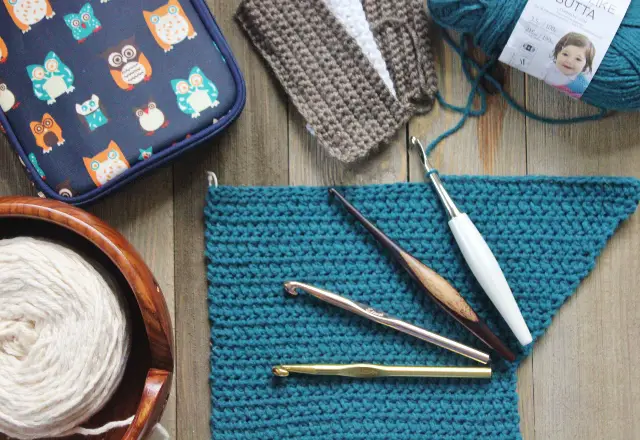
I first picked up a crochet hook as part of a get-to-know-you event in my dorm freshman year of college. I was instantly hooked (whomp, whomp.), but this was the Dark Ages – aka pre-YouTube video tutorials – and the resources I had available were much slimmer than they are today. As a result, I puttered along, picking up bits of information and guidance here and there, but ultimately churning out items that were misshapen, sized wrong, or just plain not what I was shooting for. It’s been nearly 20 years since I started my first project (a not-quite symmetrical scarf) and I’ve learned a thing or two about the art of crochet. Looking back, I can pinpoint a few nuggets of wisdom that I wish someone had told me way back when I picked up that first hook:
- Learn the Anatomy of a Stitch
- Understand Gauge
- Get in the Habit of Counting
- Learn How to Choose the Right Yarn and Hook for Your Project
- Get Organized
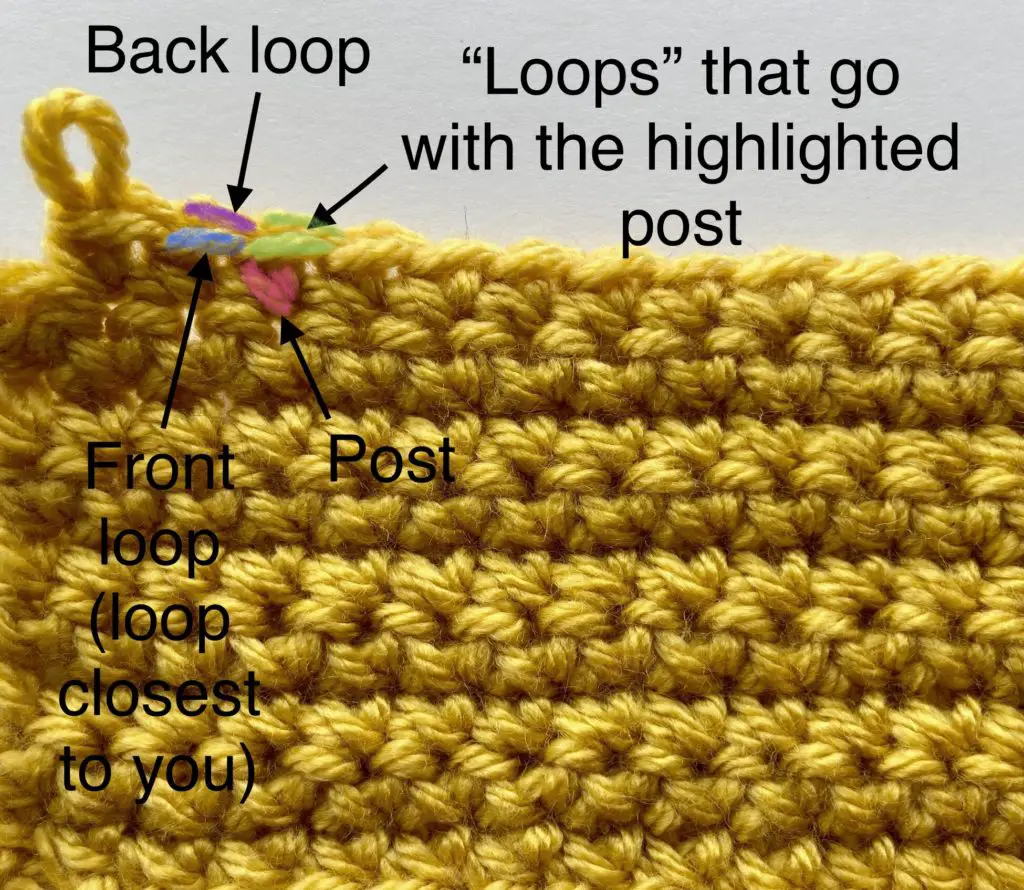
1. The Anatomy of a Stitch
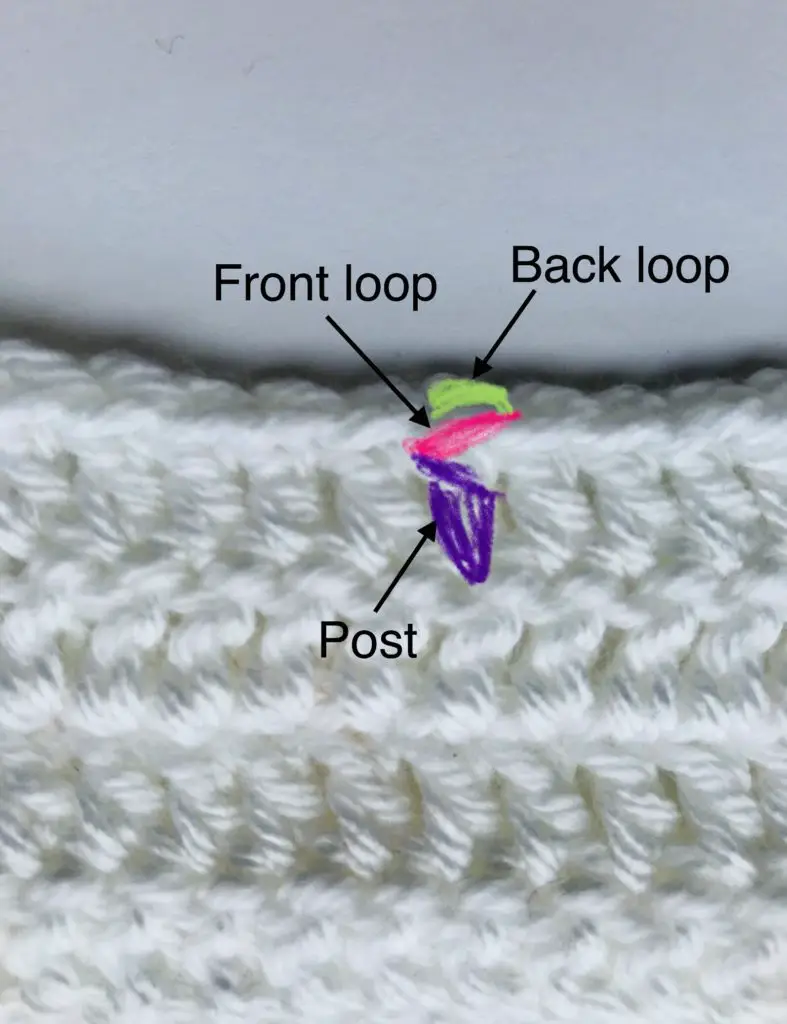
Knowing the parts of a crochet stitch is number one on this list because, while it is ESSENTIAL for upping your crochet game, it is also one of the most common sources of confusion. Knowing the parts of a stitch means you know where to place your hook and THAT is the key to taking your crochet to the next level!
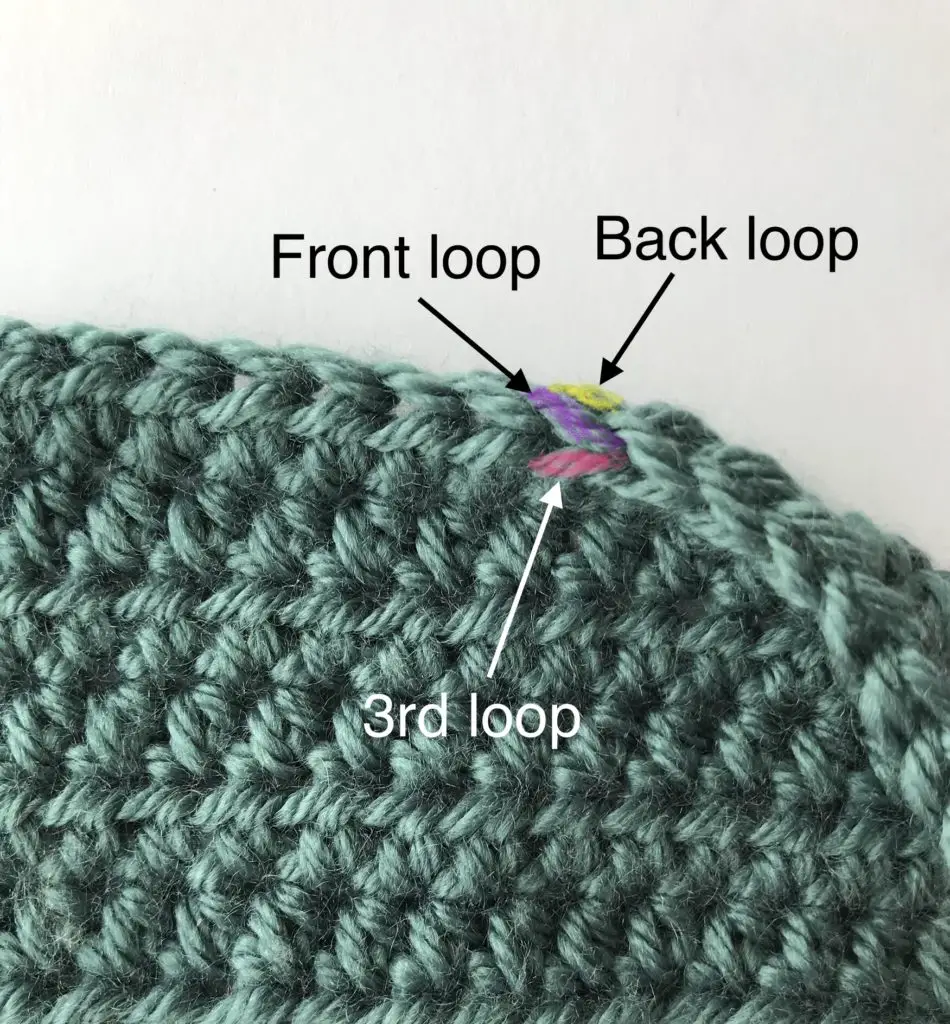
I’m a teensy bit embarrassed to admit that I thought you were only supposed to stitch into one loop (i.e. under one loop of the “V”) for the first year or so after I learned. 🙈 Generally speaking, you want to put your hook under both loops for most stitches. I also remember being frustrated when a pattern I wanted to make included FPdc/BPdc because I had NO clue what the heck a “post” was. Truly understanding the anatomy of a stitch can open up a whole new world of patterns and projects and will definitely help take your crochet to the next level. I hope the diagrams below help you figure it out a little sooner than I did!
Single crochet
Half-double crochet
Double crochet
2. Understand Gauge
Even tension takes time and practice, but it can make all the difference in cranking out projects that are actually the size you set out to make! The other key to correct sizing is the dreaded G-word: GAUGE! I promise, it’s not as technical as it sounds. But it IS important!
One of the first garments I tried to crochet was a kimono style sweater for my first baby. I was following the pattern for newborn size, but it ended up being more like Barbie sized. Oops!
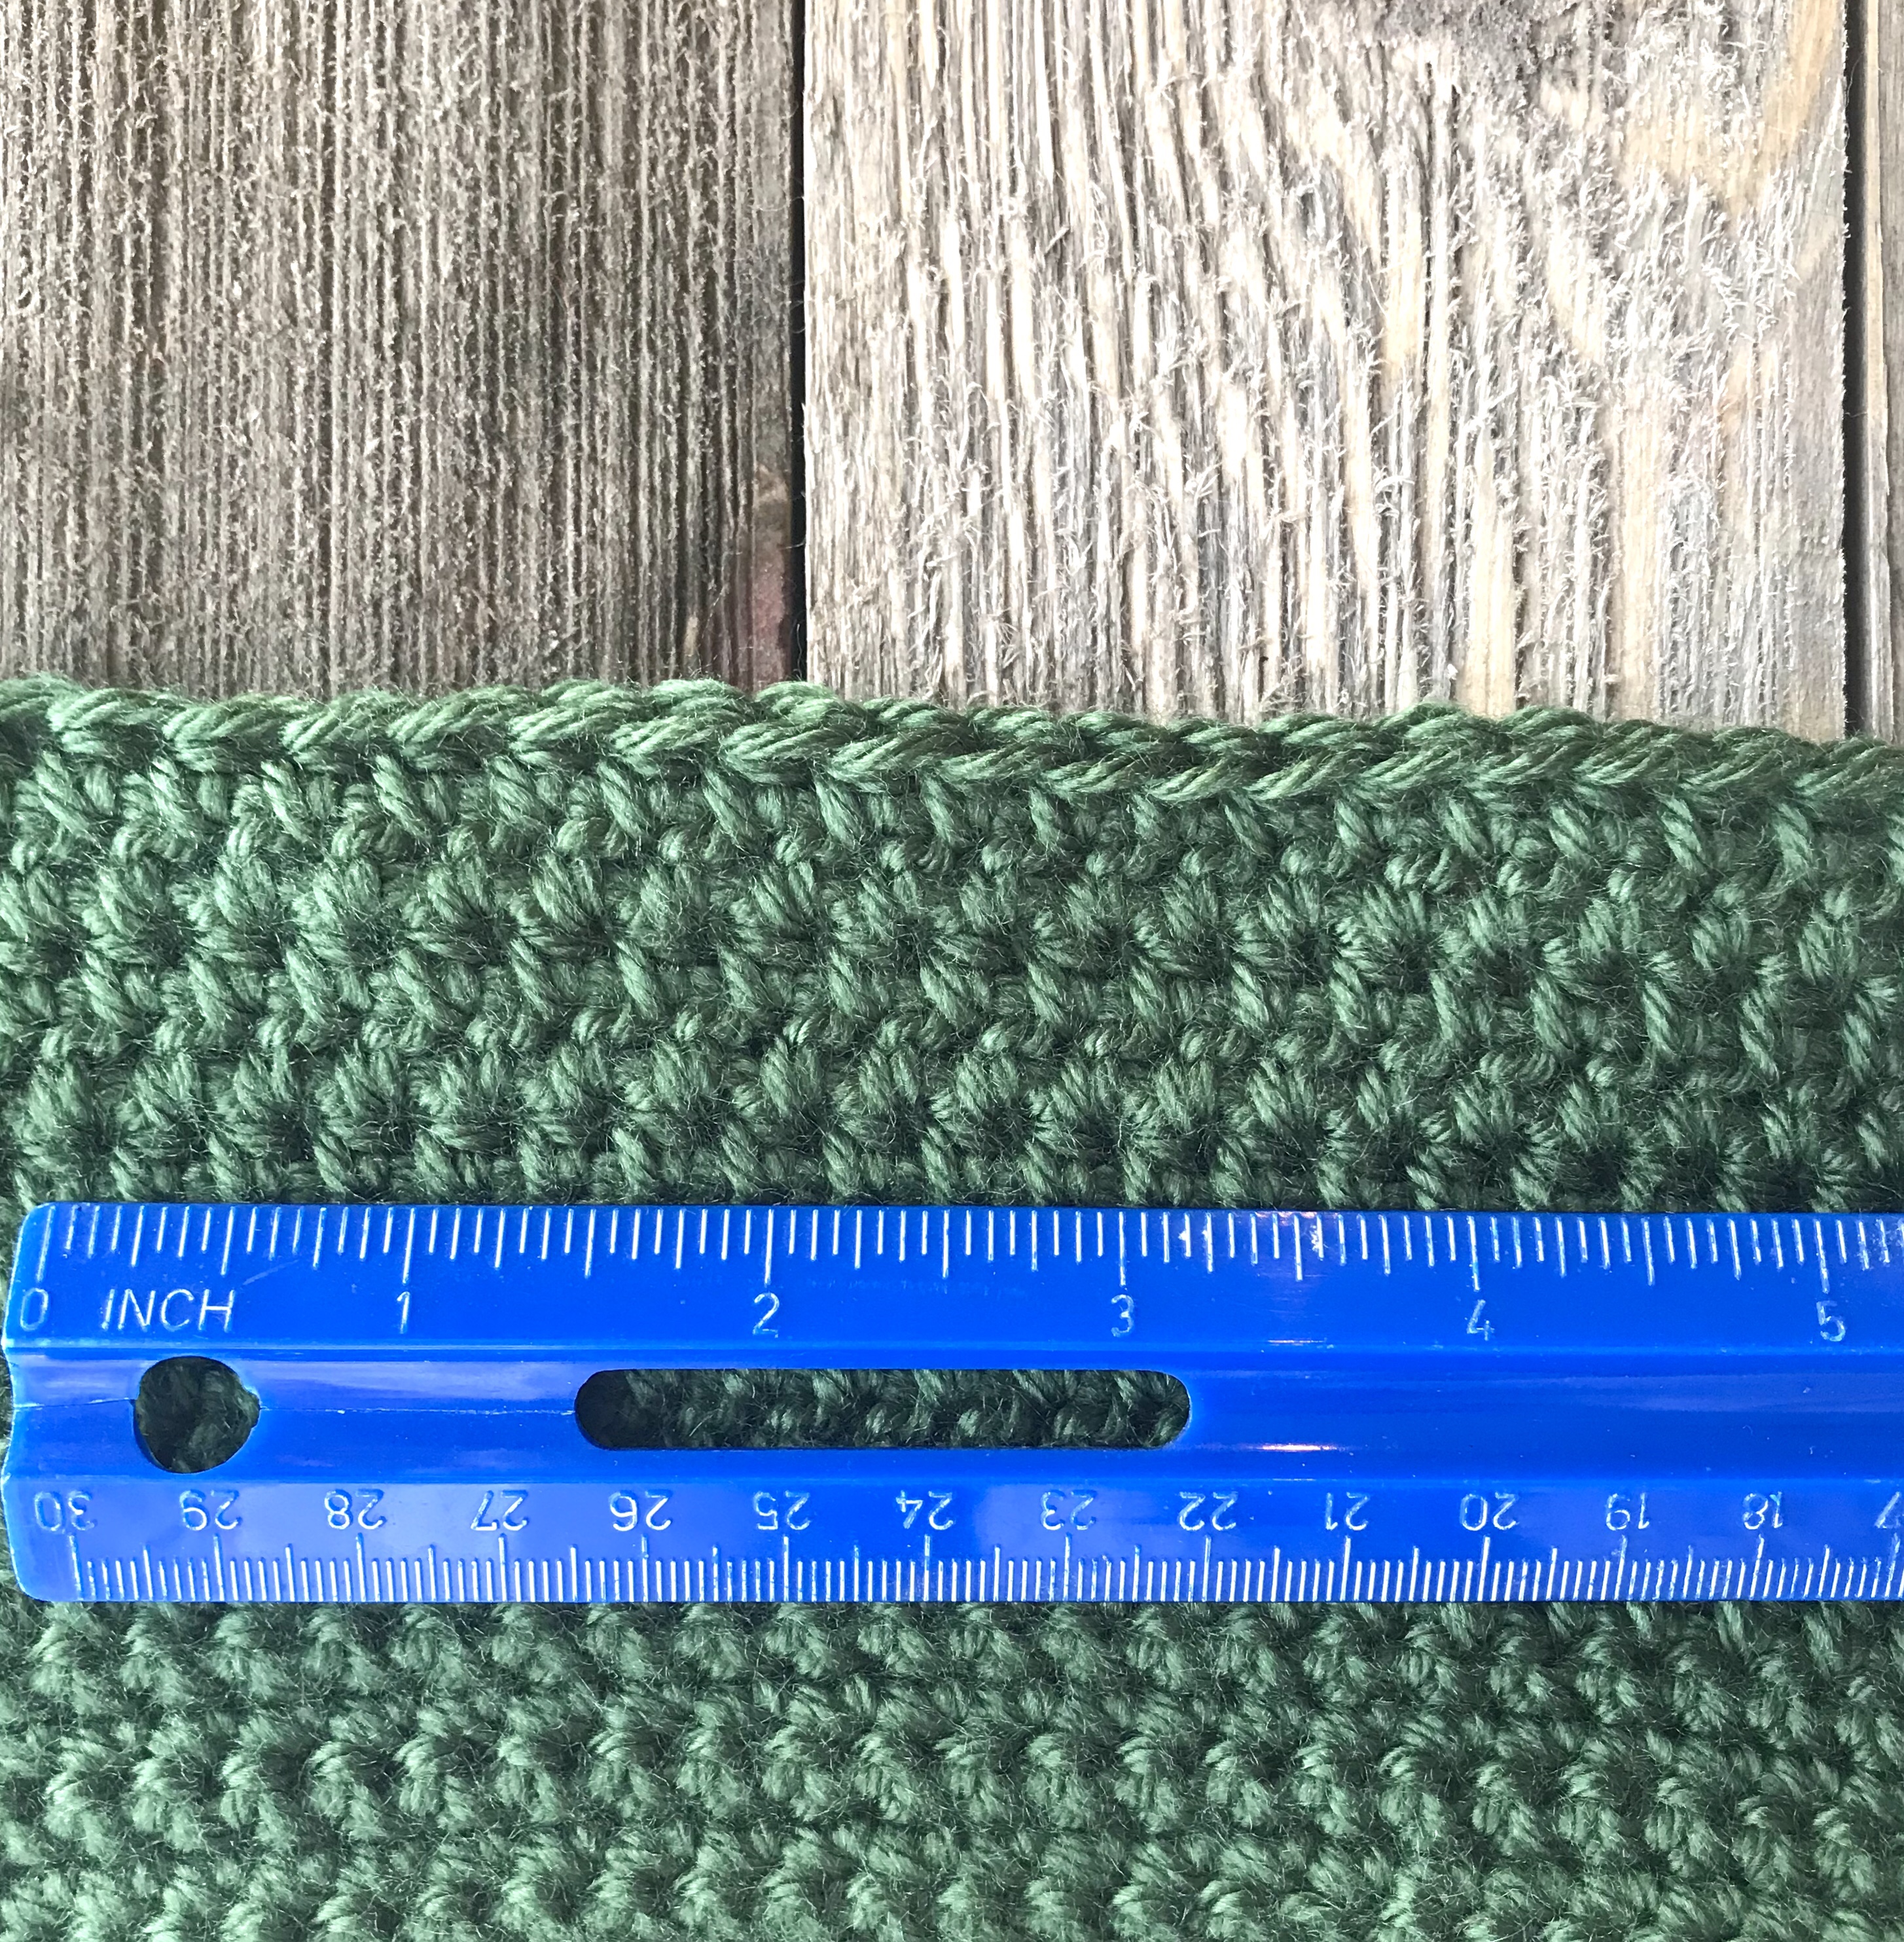
I had committed the crochet cardinal sin of skipping the gauge swatch (I didn’t really understand what it was yet). Simply put, gauge is how you can be sure that your finished product will end up being the right size. Even if you follow a pattern step by step, your tension is likely different from the designer’s and so your project will likely turn out a different size than intended … unless you match your tension to the designer’s first using the gauge swatch!
The theory behind gauge is simple: the designer will state the number of stitches and rows in their swatch (often a 4×4 square) and you need to match those numbers in your swatch. This can usually be achieved by changing tension, hook size, or even yarn. The theory behind gauge is simple, but getting it right is not always cut and dry. It really deserves its own blog post, but for now, know that mastering gauge will level-up your crochet game by leaps and bounds.
3. Get in the Habit of Counting
I know, I know. It’s annoying, it’s tedious, but sometimes you just gotta do it. Especially when you’re new to following patterns. It’s not always easy to spot a missed stitch until you’re rows and rows past it. That could be hours of work lost, depending on the size of your project.
I’ll admit, some crocheters say count as you go, but I don’t have the attention span for that! I find that stitch markers can be incredibly helpful in making the counting process a little easier. One option is to place a marker at intervals (say every 10 or 20 stitches, depending on size of the project). If that sounds like too much of an interruption to your flow, try placing a marker at the beginning of each row. The row ends are where stitches often get added or dropped so highlighting where that end stitch belongs can keep your numbers in check.
See the Bonus tip at the end of this list for more help with counting!
4. Learn How to Choose the Right Yarn and Hook for Your Project.
Picture this: you’re at the yarn store looking for supplies for your next project. The choices are overwhelming, but you finally settle on a soft, fluffy little number. You get home and dive in only to discover that all that lovely fluff is a nightmare to work with for your stitch pattern. And you didn’t buy enough anyway. Sound familiar?
I learned this tip the hard way when I tried to use a black wavy eyelash yarn for my second ever crochet project. Not good. It rests in my WIP graveyard to this day…
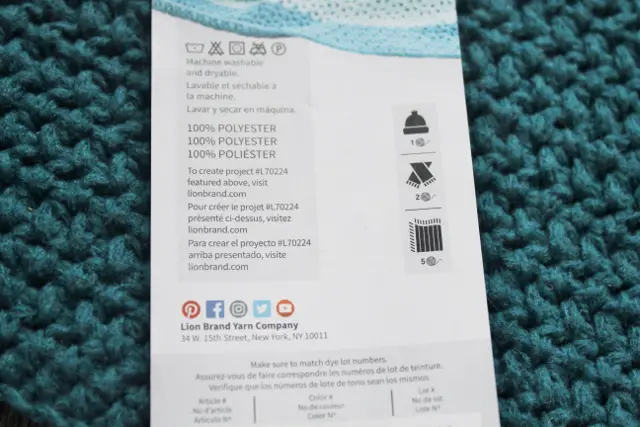
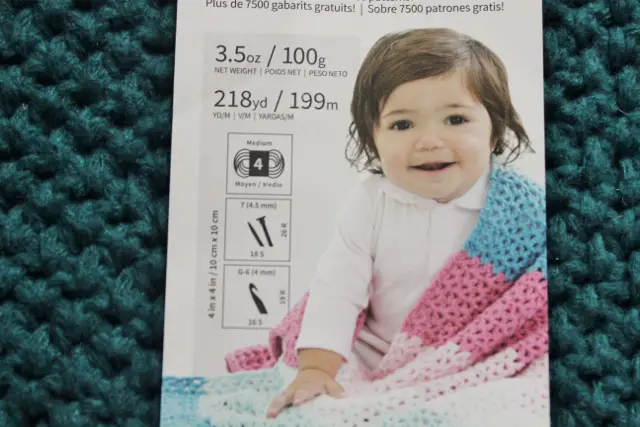
While learning to choose the right yarn/hook combo for your project will undoubtedly get easier with time and practice, there are some helpful tools at your fingertips to speed up the process. For tons of helpful info, look no further than your handy yarn label!
Here you will find the yarn weight, suggested hook (or knitting needle) size, fiber content, care instructions, yardage, and some (like this Lion Brand Feels Like Butta) even include how much you will need to buy for suggested projects.
All these tidbits come in handy when you’re trying to decide what kind of drape you want your project to have, or if you need the material to be washable, or how chunky you want your finished product to be, or even if you own the right sized hook for the yarn you want to use. Everything you need to know is right there on the label!
5. Get Organzied
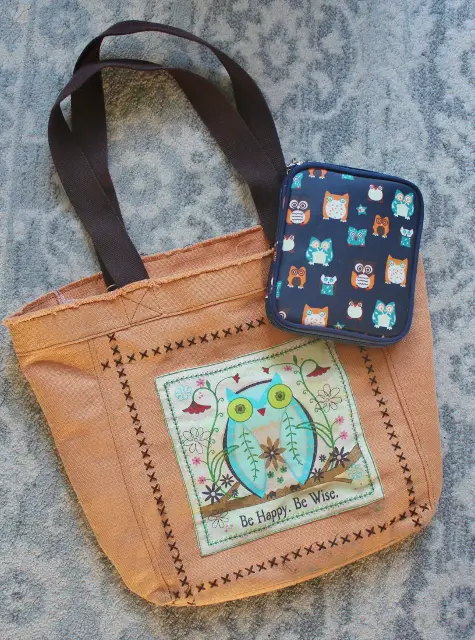
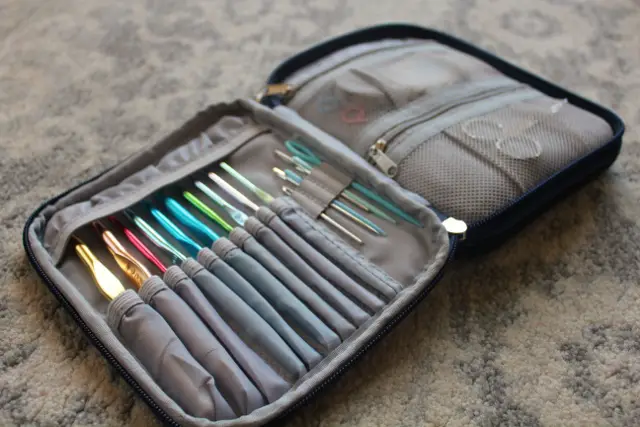
For many years, I stored my hooks and notions in a Ziploc and carried my WIPs around in a plastic grocery bag. Projects were constantly getting tangled and hooks were lost, it was a mess. When I finally got my act together and got organized, it made a world of difference! It doesn’t have to be fancy – just functional! These days I have a collection of reusable tote bags to sort my WIPs into and a neat little case for storing hooks and notions. It seems like a small thing, but keeping your supplies untangled and organized leaves more time to practice crochet!
Bonus Tip: Learn when the turning chain counts as a stitch! In general and unless otherwise stated in the pattern:
- For Single Crochet (SC), chain 1 to turn and DO NOT count the chain as a stitch.
- For Half Double Crochet (HDC), chain 2 and DO count as a stitch.
- For Double Crochet (DC), chain 2 or 3 and DO count as a stitch.
- For Triple Crochet (TR), chain 4 and DO count as a stitch
- And so on…
I hope you found these tips helpful on your journey to improving your craft! What tips would you add? Comment below!
