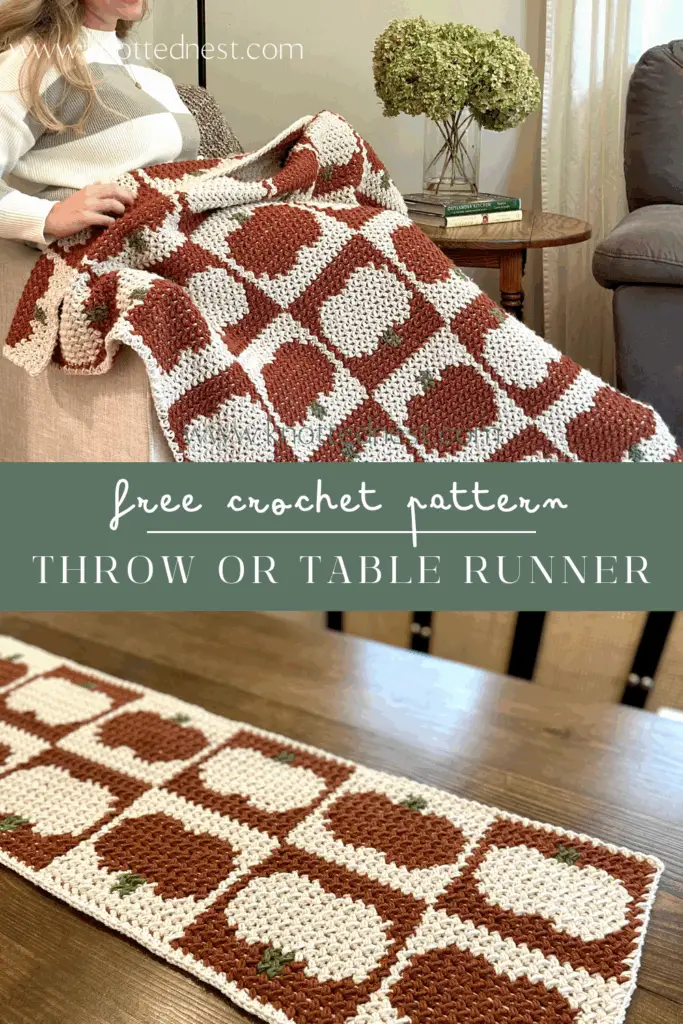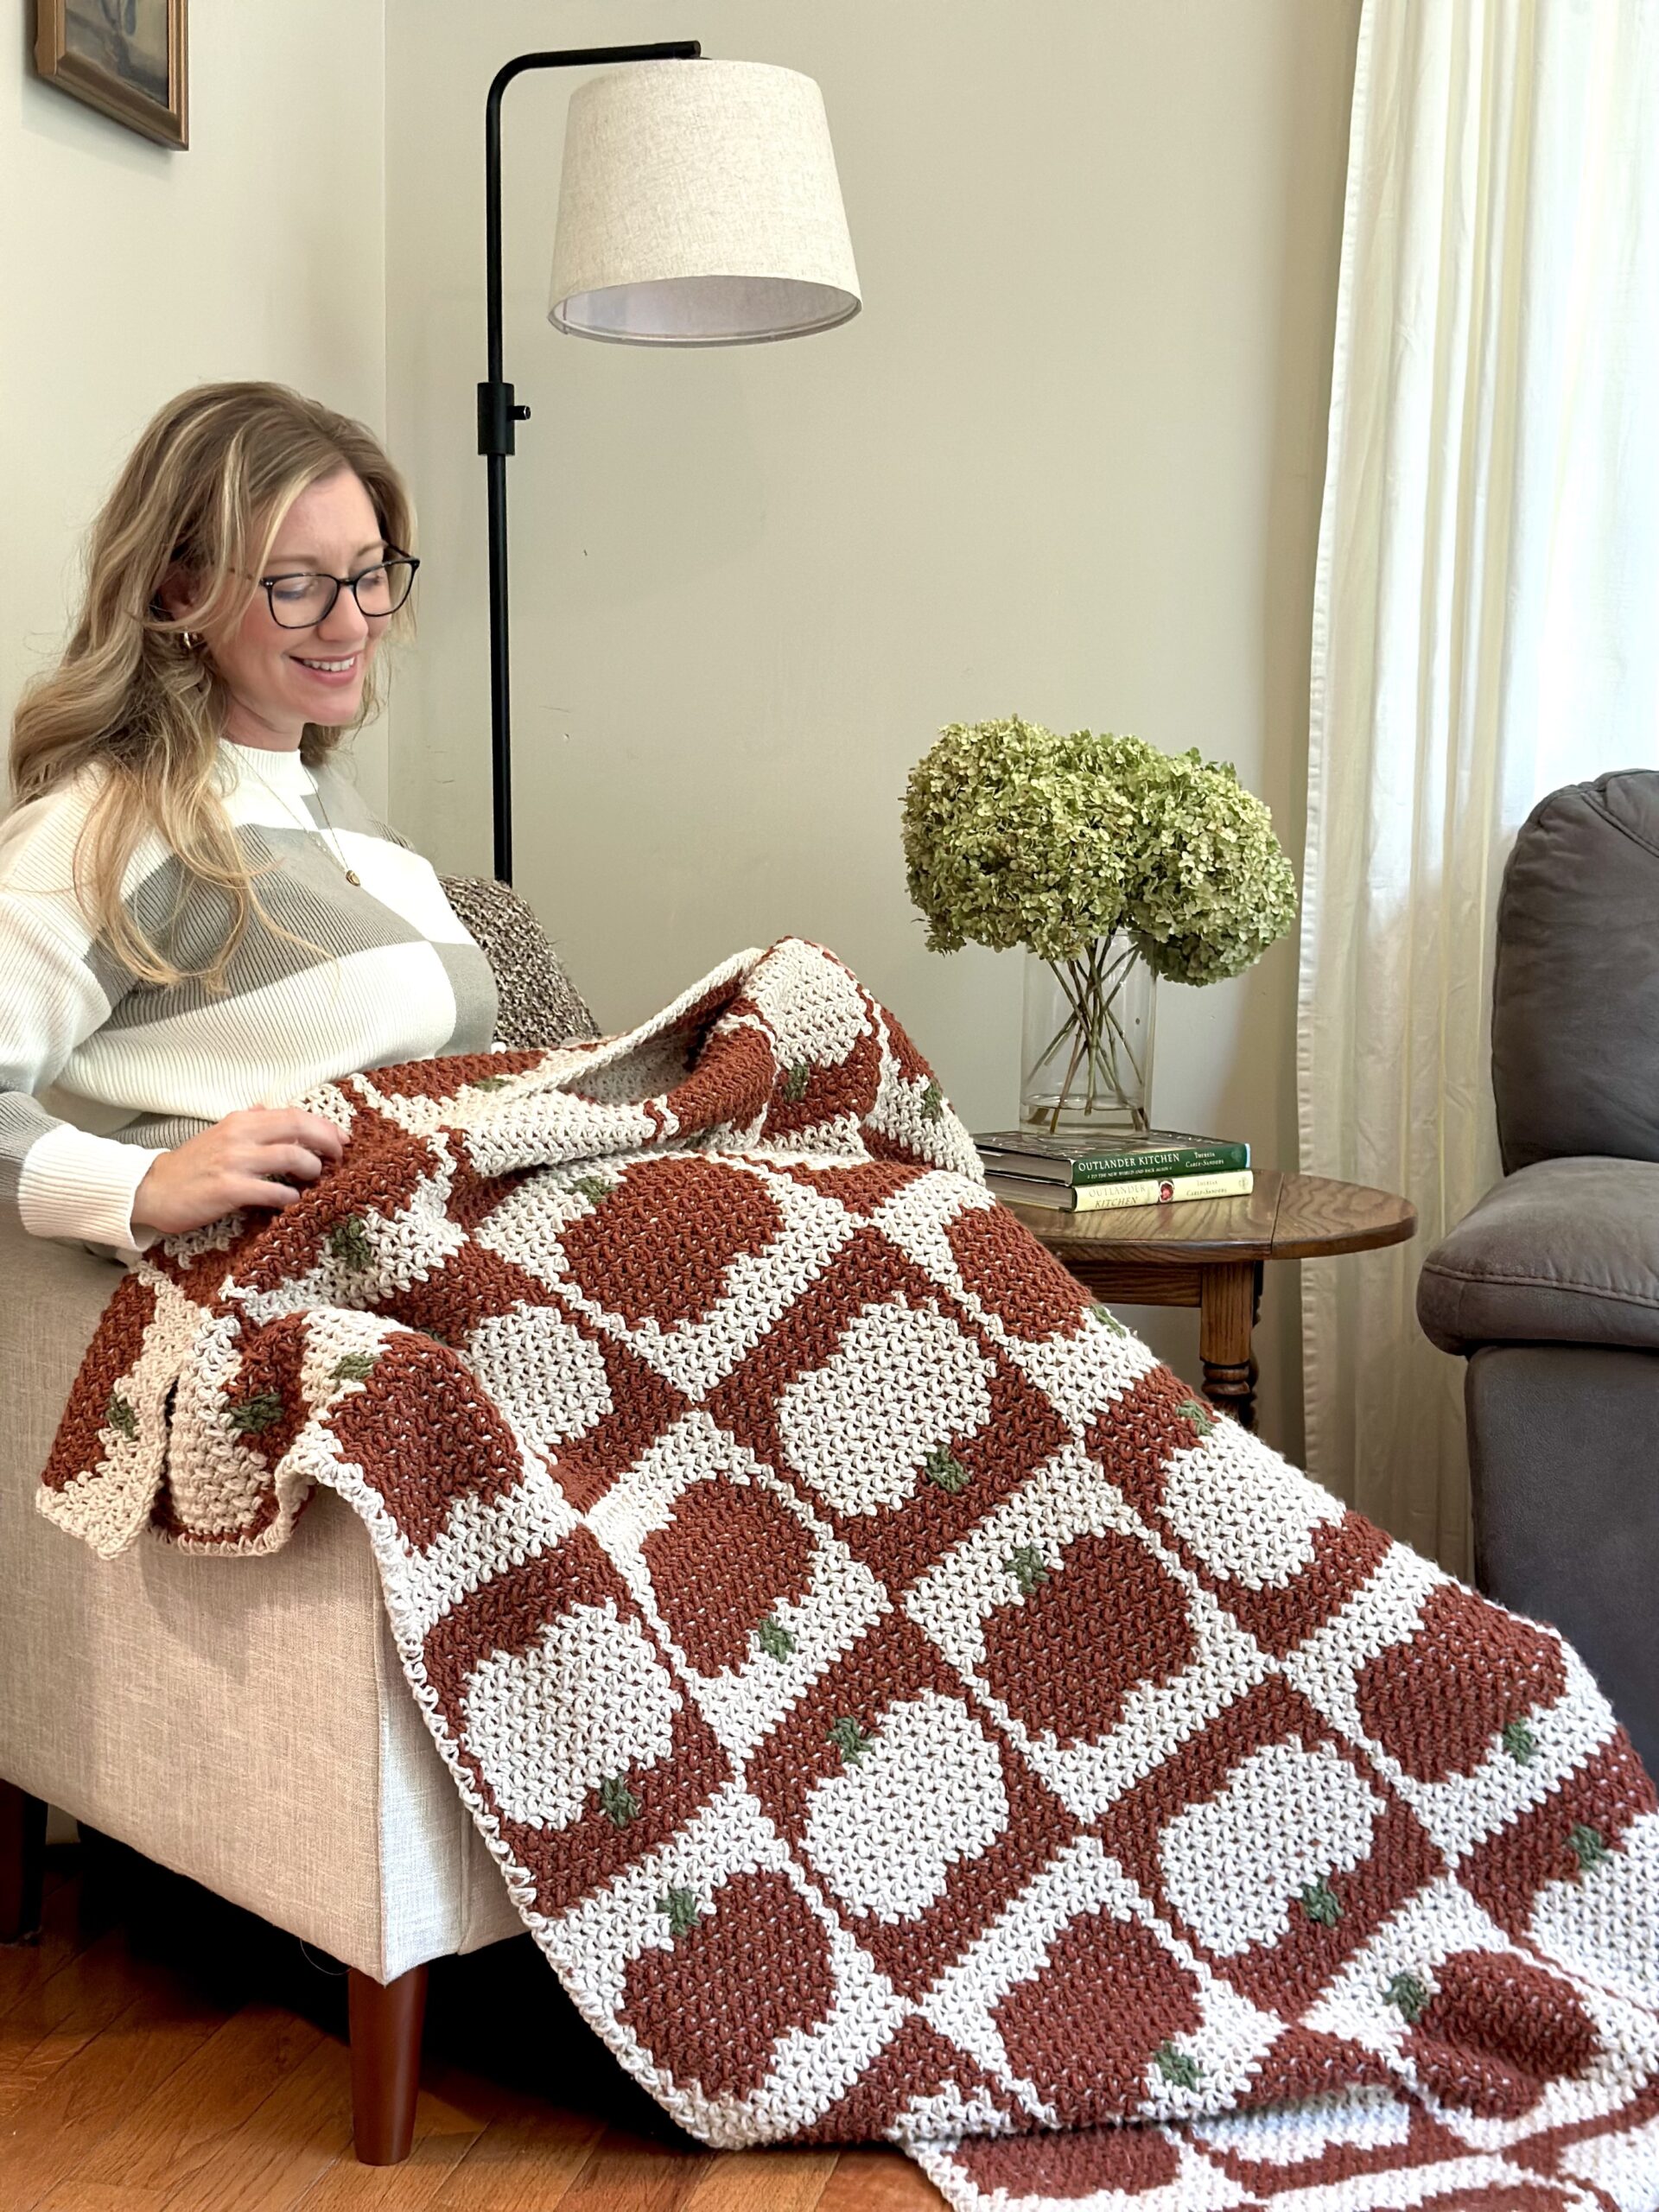
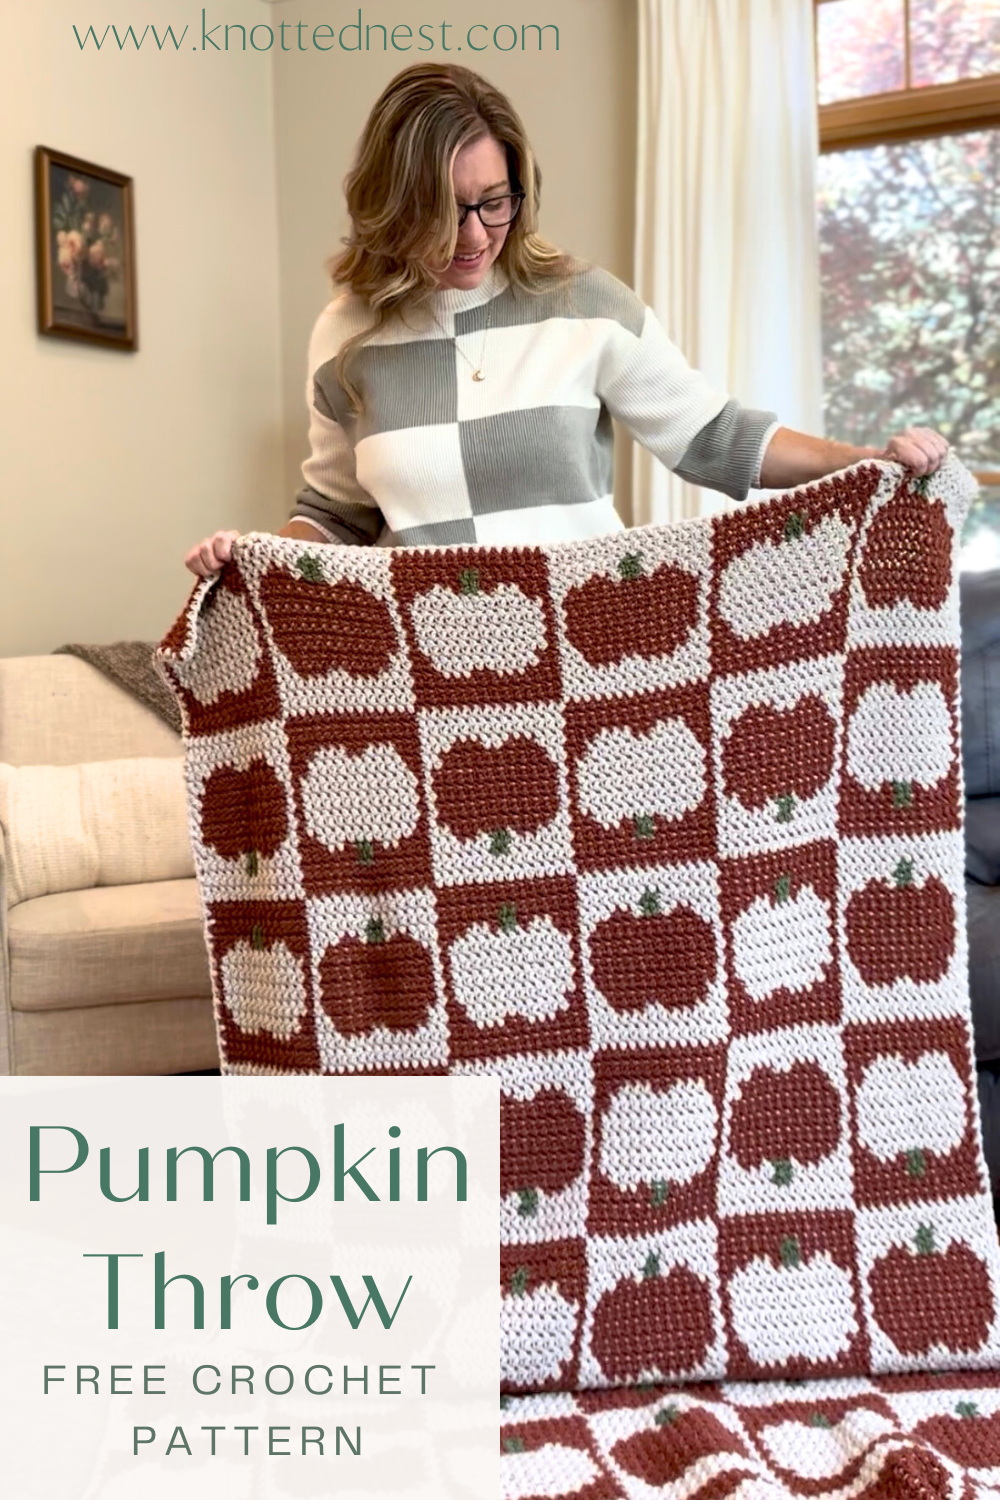
Free Crochet Pumpkin Blanket Pattern – The Pumpkin Squares Throw
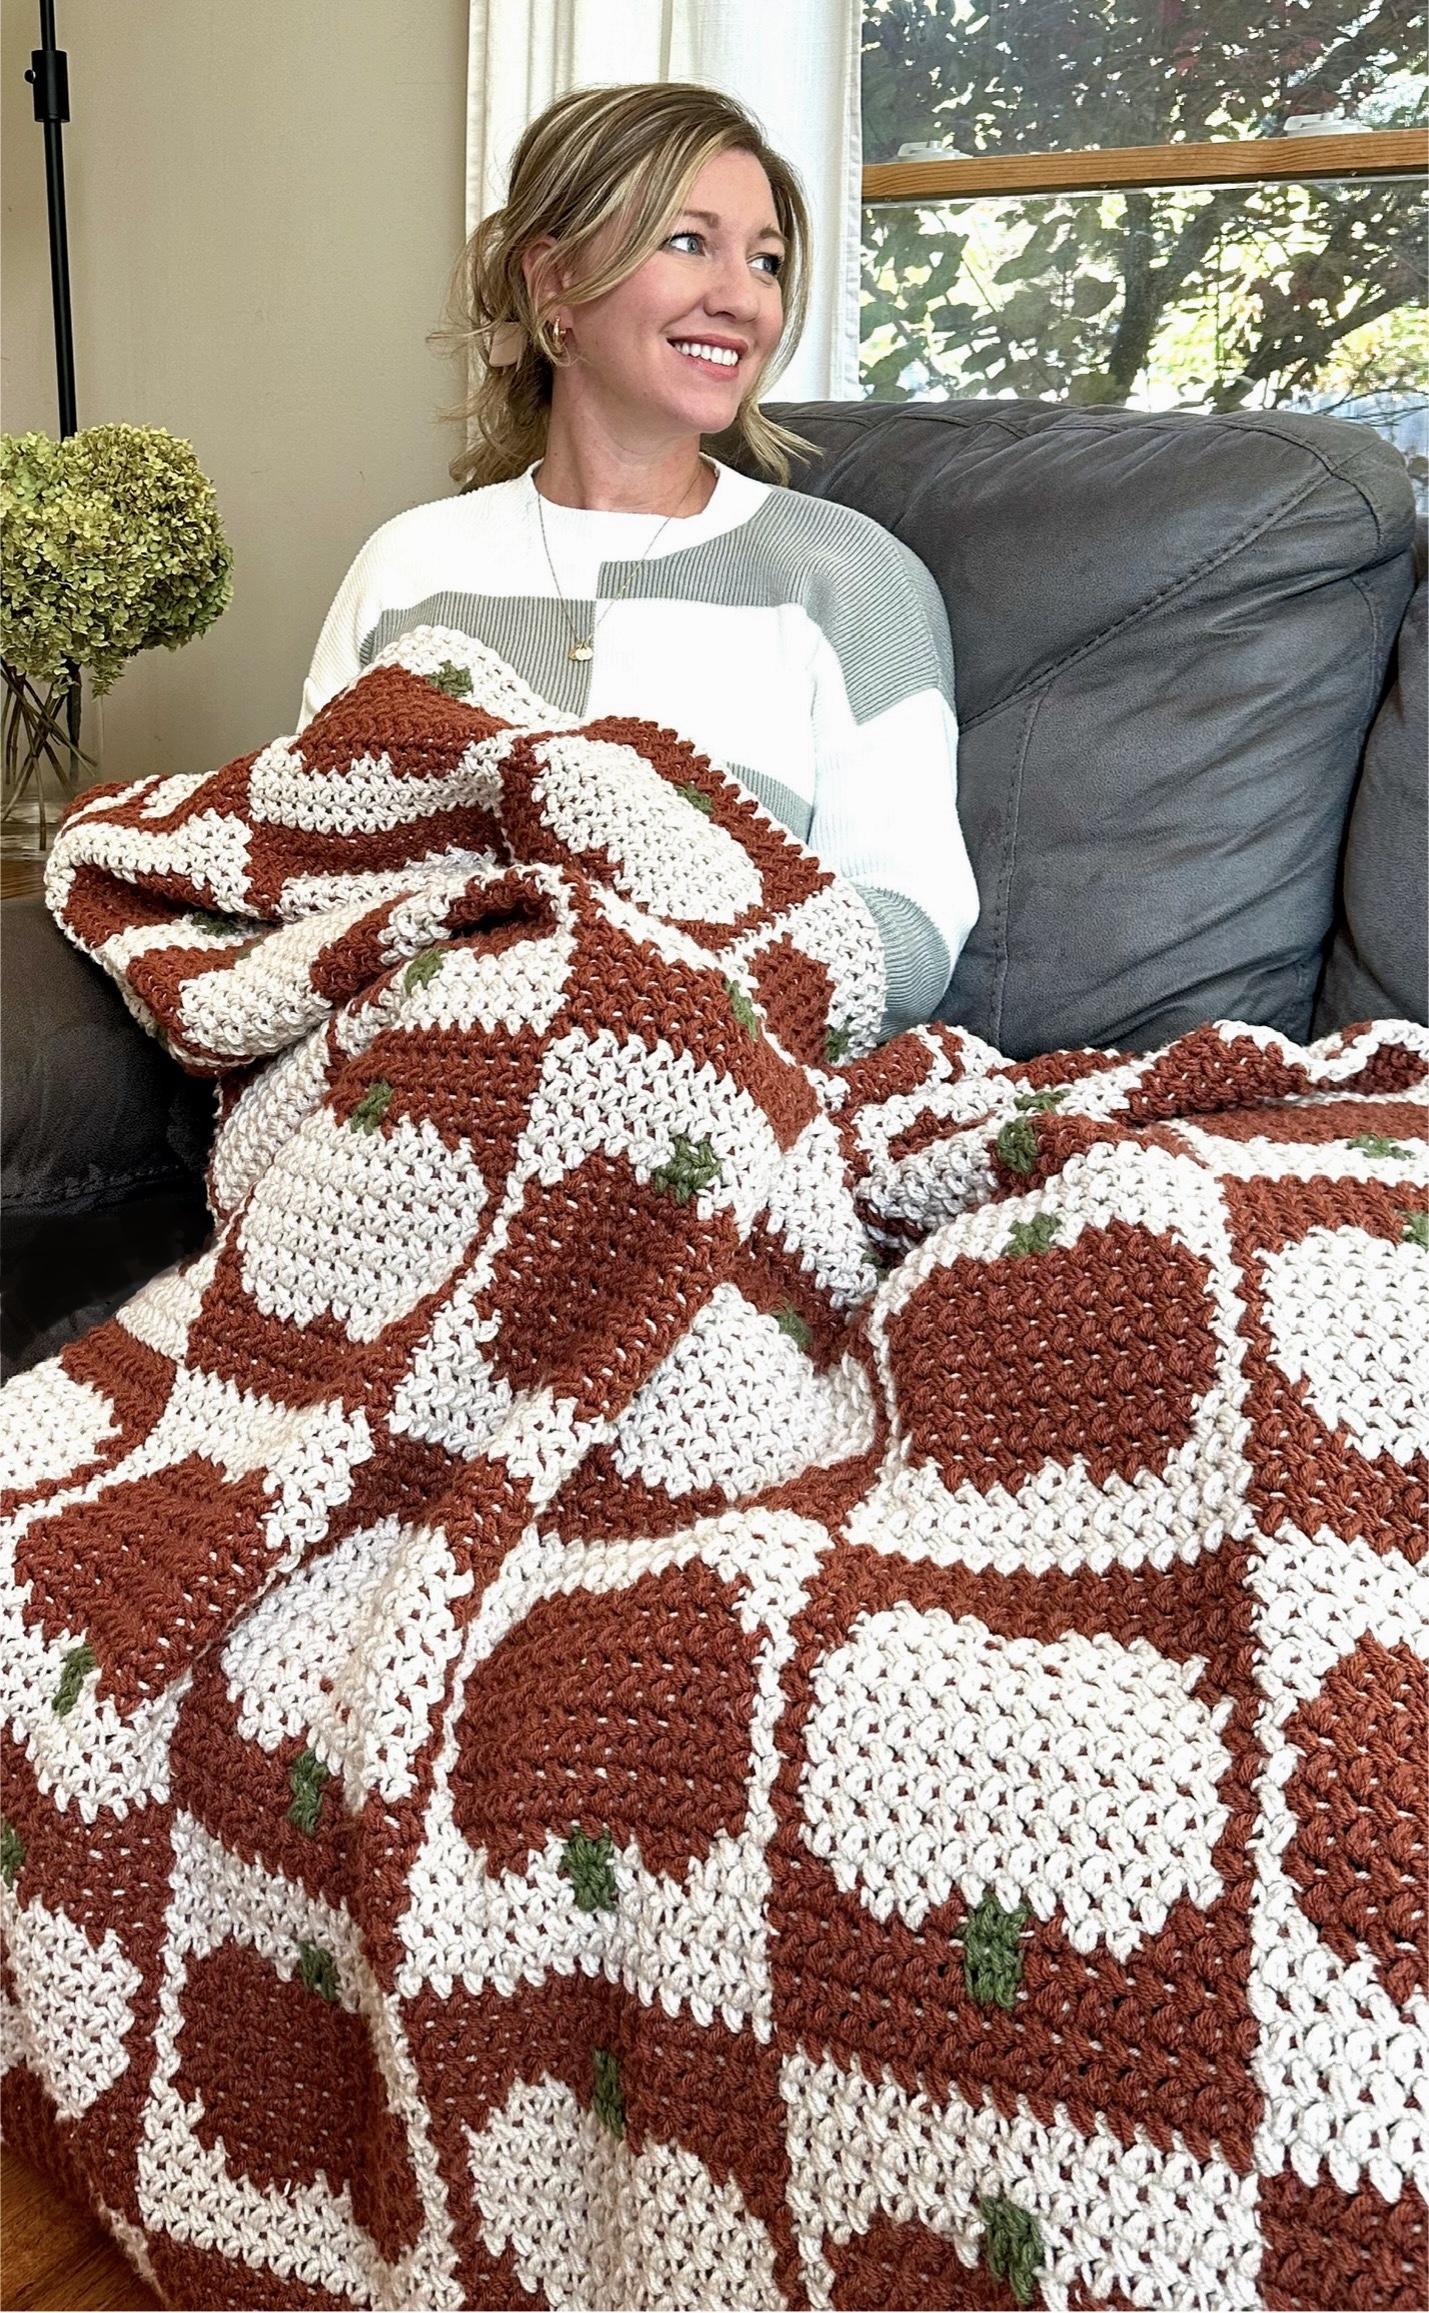
This crocheted Pumpkin blanket is coziest fall throw you’ve ever seen! This mega-textured throw blanket is crocheted using the simple but gorgeous mini bean stitch. The sizing can be adjusted to make any size blanket or even a stunning fall table runner. Scroll down (or click here) for the free pattern or click to purchase an ad-free printable version from my Etsy or Ravelry shops.
Don’t have time to make it now? Pin this pattern for later!
This pattern may contain affiliate links, which means I may receive a small commission, at no extra cost to you, when you make a purchase. Please read my affiliate disclosure for more details.
About the Pumpkin Squares Throw Blanket
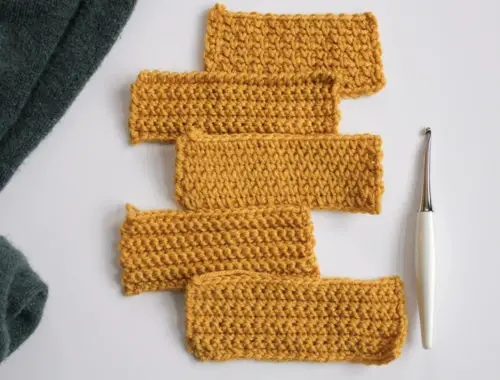
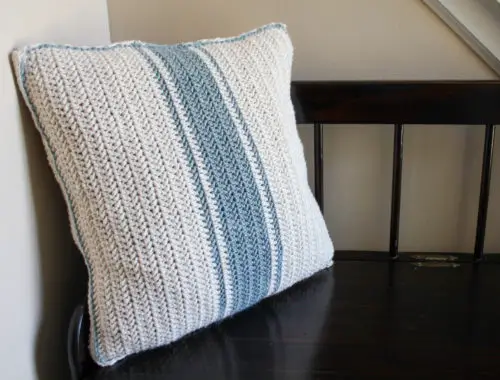
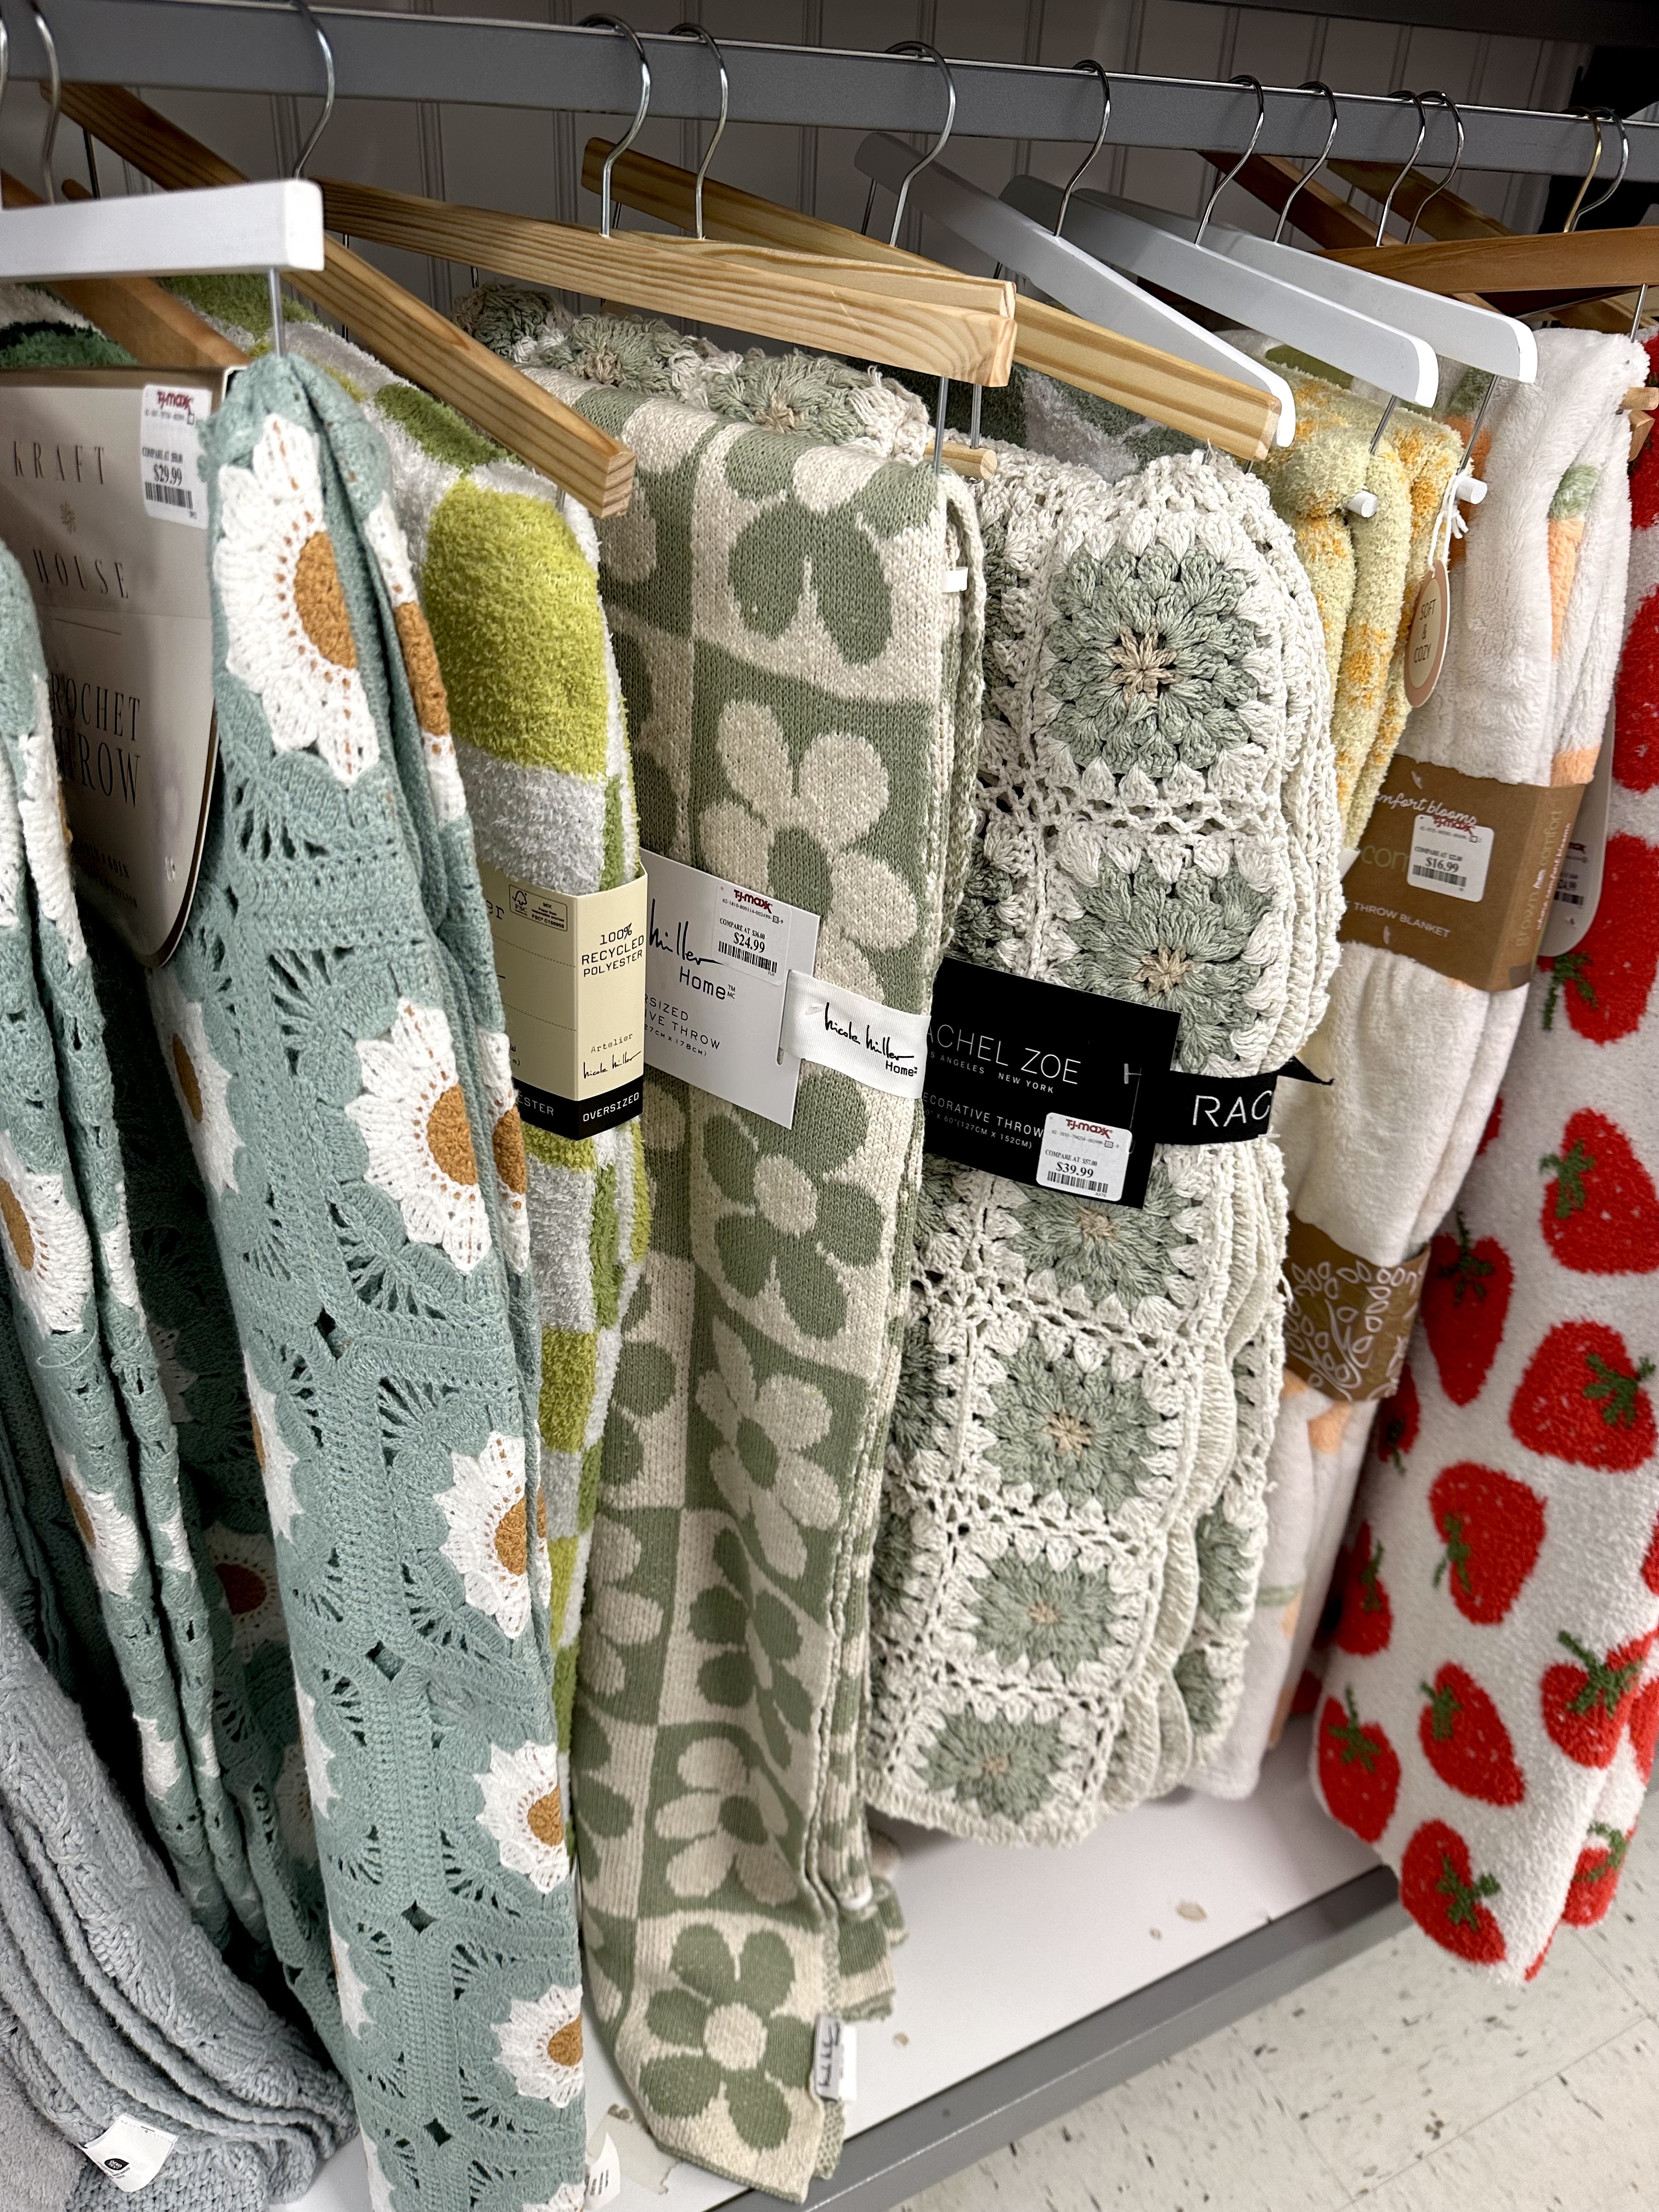
I always say that inspiration comes from the most random places and the inspo for this crocheted pumpkin blanket was no exception. A few months ago and I ran in to TJMaxx to get a few summer clothes for the kiddos when I saw the cutest block checkered flower throw blanket (see pic below). I loved the geometric look, but because my project planning mind was already in Fall mode, I thought… yes, but make it pumpkins! That night, I pulled out some white and orange stash yarn and set to swatching. I tried a bunch of different stitches before finally landing on one of my all time favorites – the mini bean stitch.
I love the mini bean stitch so much that I designed a whole winter accessories set around you (you can check out those free patterns here). If you’ve never used the mini bean (aka Elizabeth) stitch, it’s very simple to do, but produces the most gorgeously textured fabric without being too bulky. I love it!
Pumpkin Squares Blanket- Construction
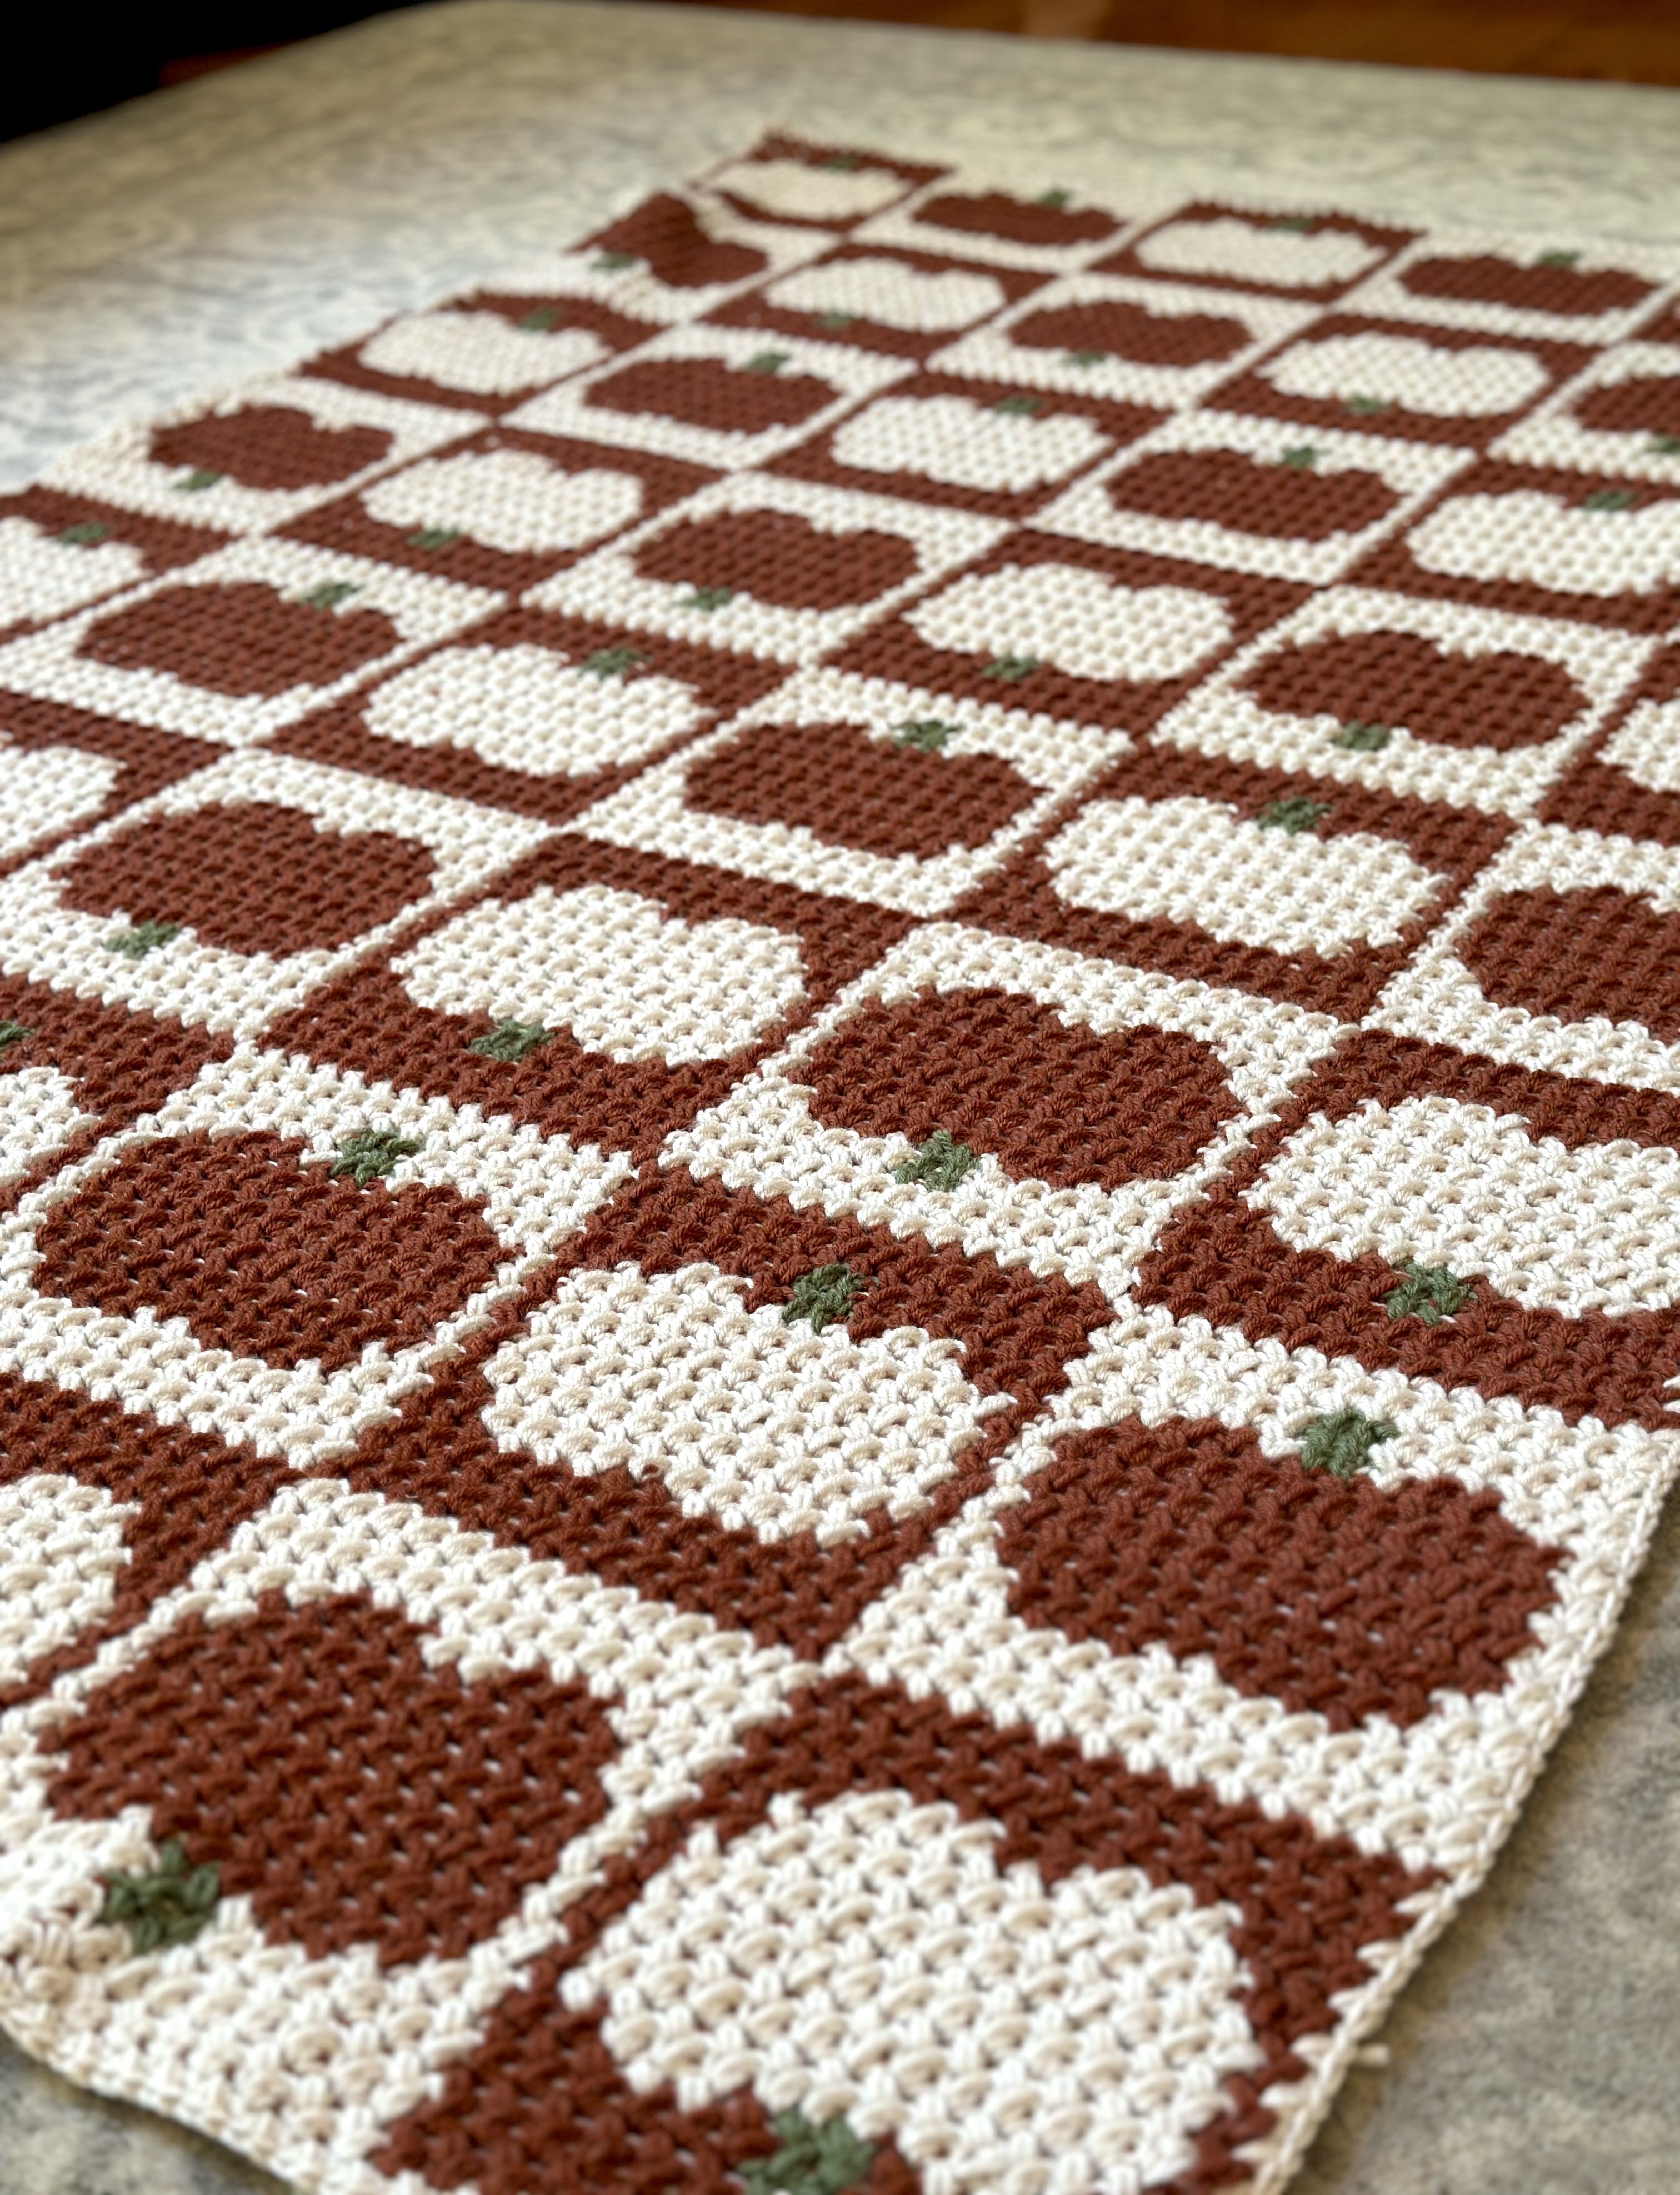
This blanket is made entirely using the mini bean stitch, including a mini bean border. You will need to do a hefty amount of color changes though, which is why I rated it as a Level 2 pattern. The two main colors – white and orange – are both used in every row so you will carry (aka crochet over) whichever is the unused color at the time. You do slightly see the carried color through the work, but since it is uniform throughout the blanket, I think it works! I also HIGHLY recommend keeping one color skein to the front of you work and the other color skein to the back. This basically eliminates your yarn getting tangled.
Using Bobbins
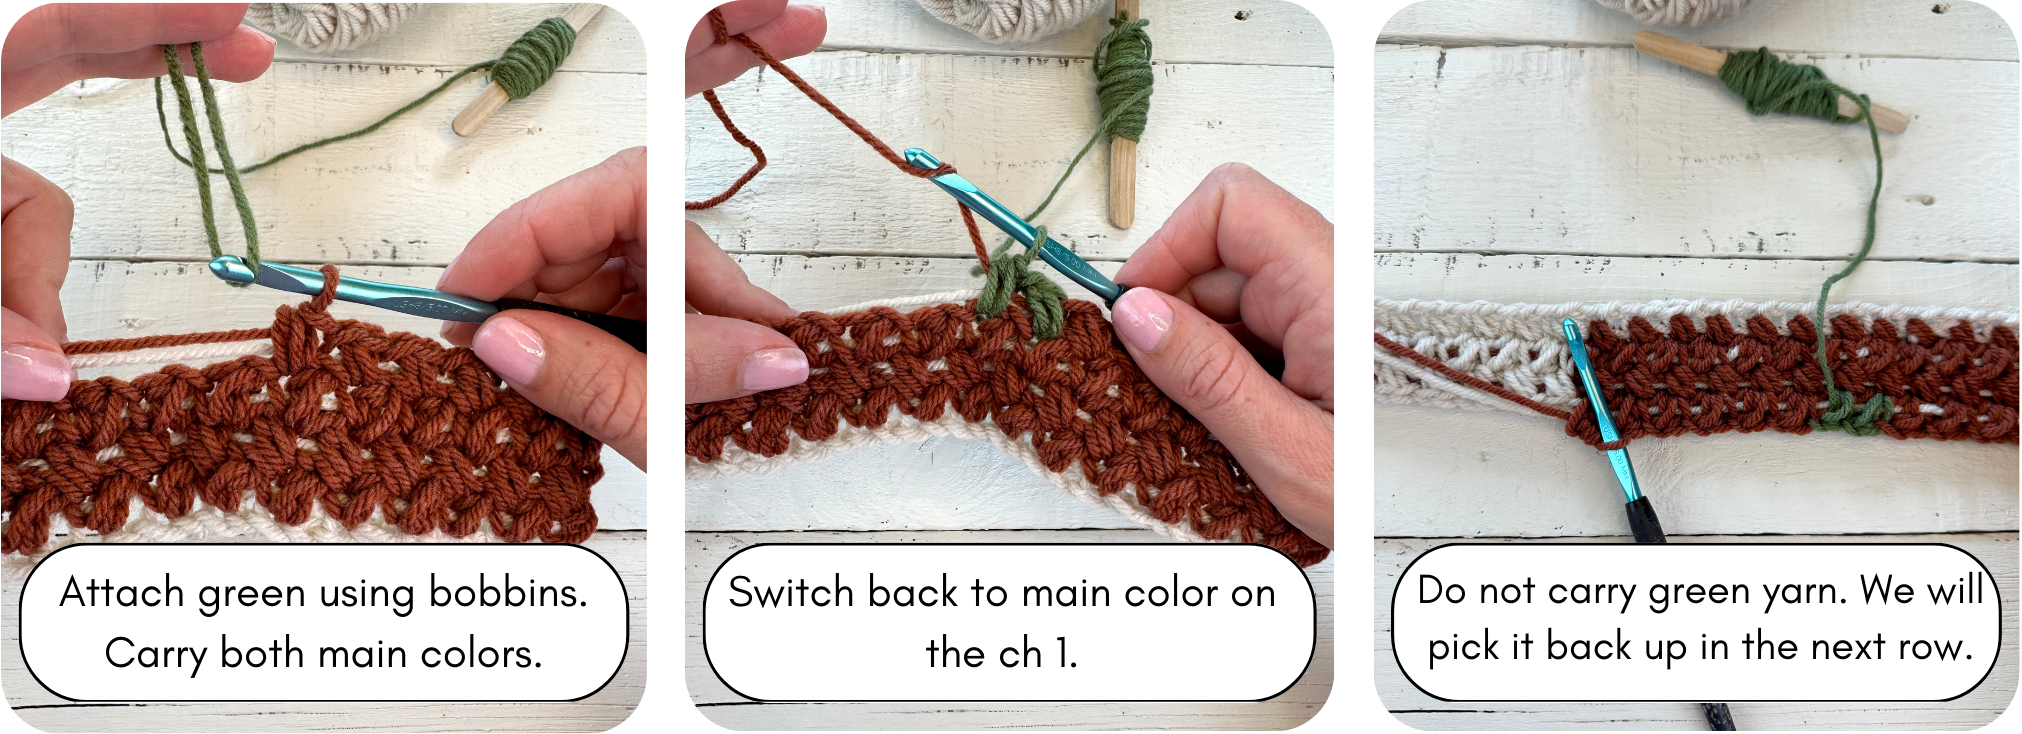
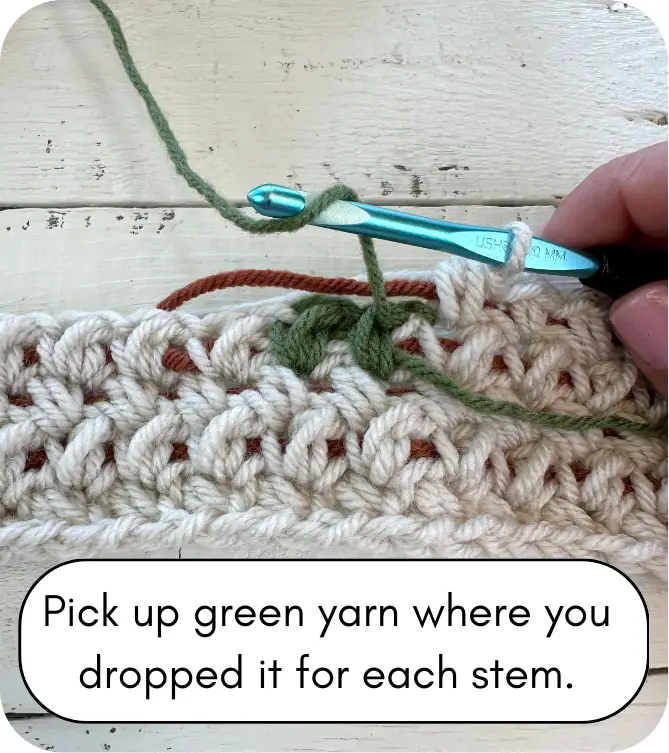
Initially, I was going to make the pumpkin stems the same color as the pumpkins (which you could still do if you like!), but ultimately, I loved the little pop of color the green stems add. Since we only need green in small sections, bobbins are the best way to go. If you’ve never used bobbins before, it’s just creating small individual balls of yarn, one for each area of that color. As shown, this blanket is 6 pumpkins wide, so I made 6 bobbins. I like to wrap mine around popsicle sticks and lay the whole project out on the floor or table for the bobbin rows. This helps prevent tangles. To use them, attach a bobbin when you start the stem stitches, then leave it dangle there until you get to that same point in the next row. Then you simply grab it again. After you finish a stem, you can cut the green yarn and set the bobbin aside until the next stems.
Crochet Pumpkin Blanket – Adjusting the Sizing
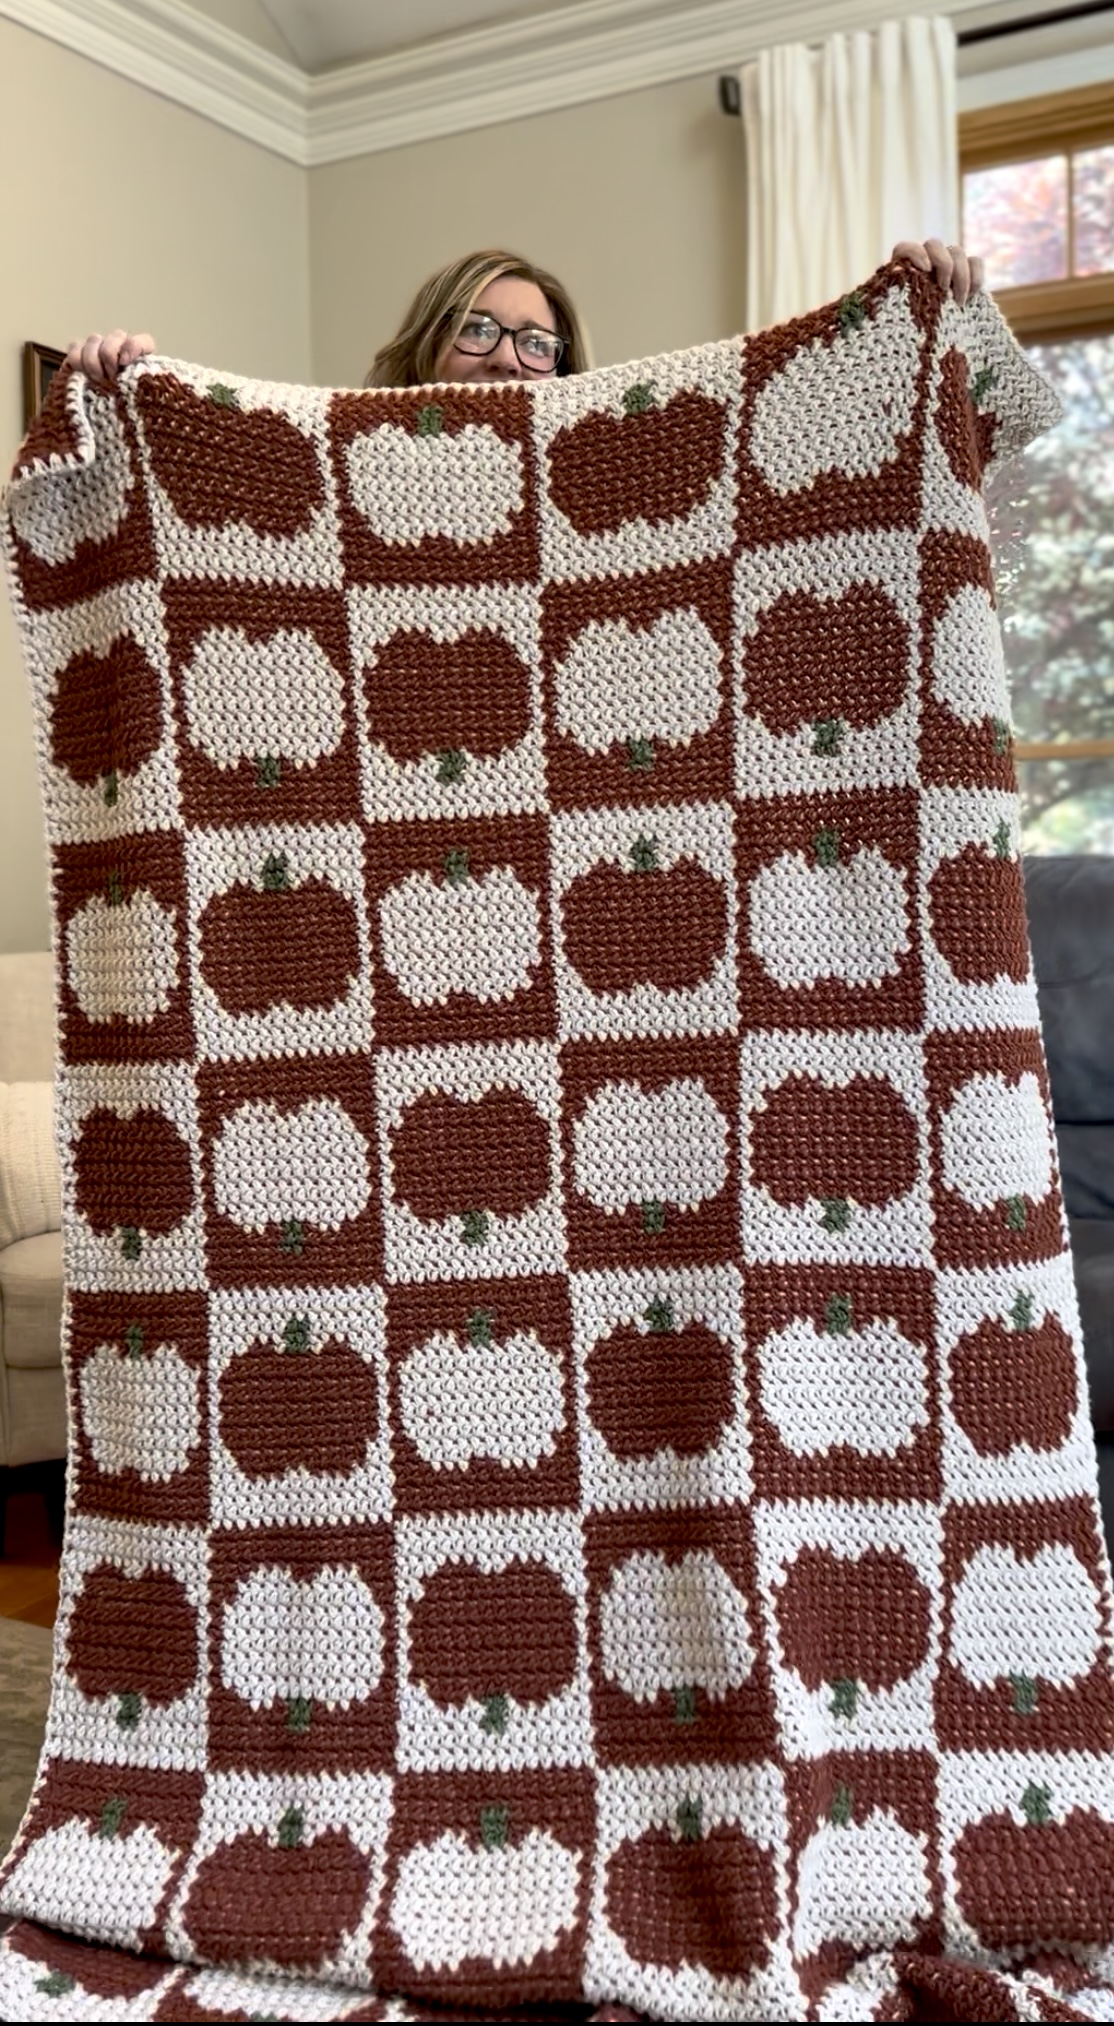
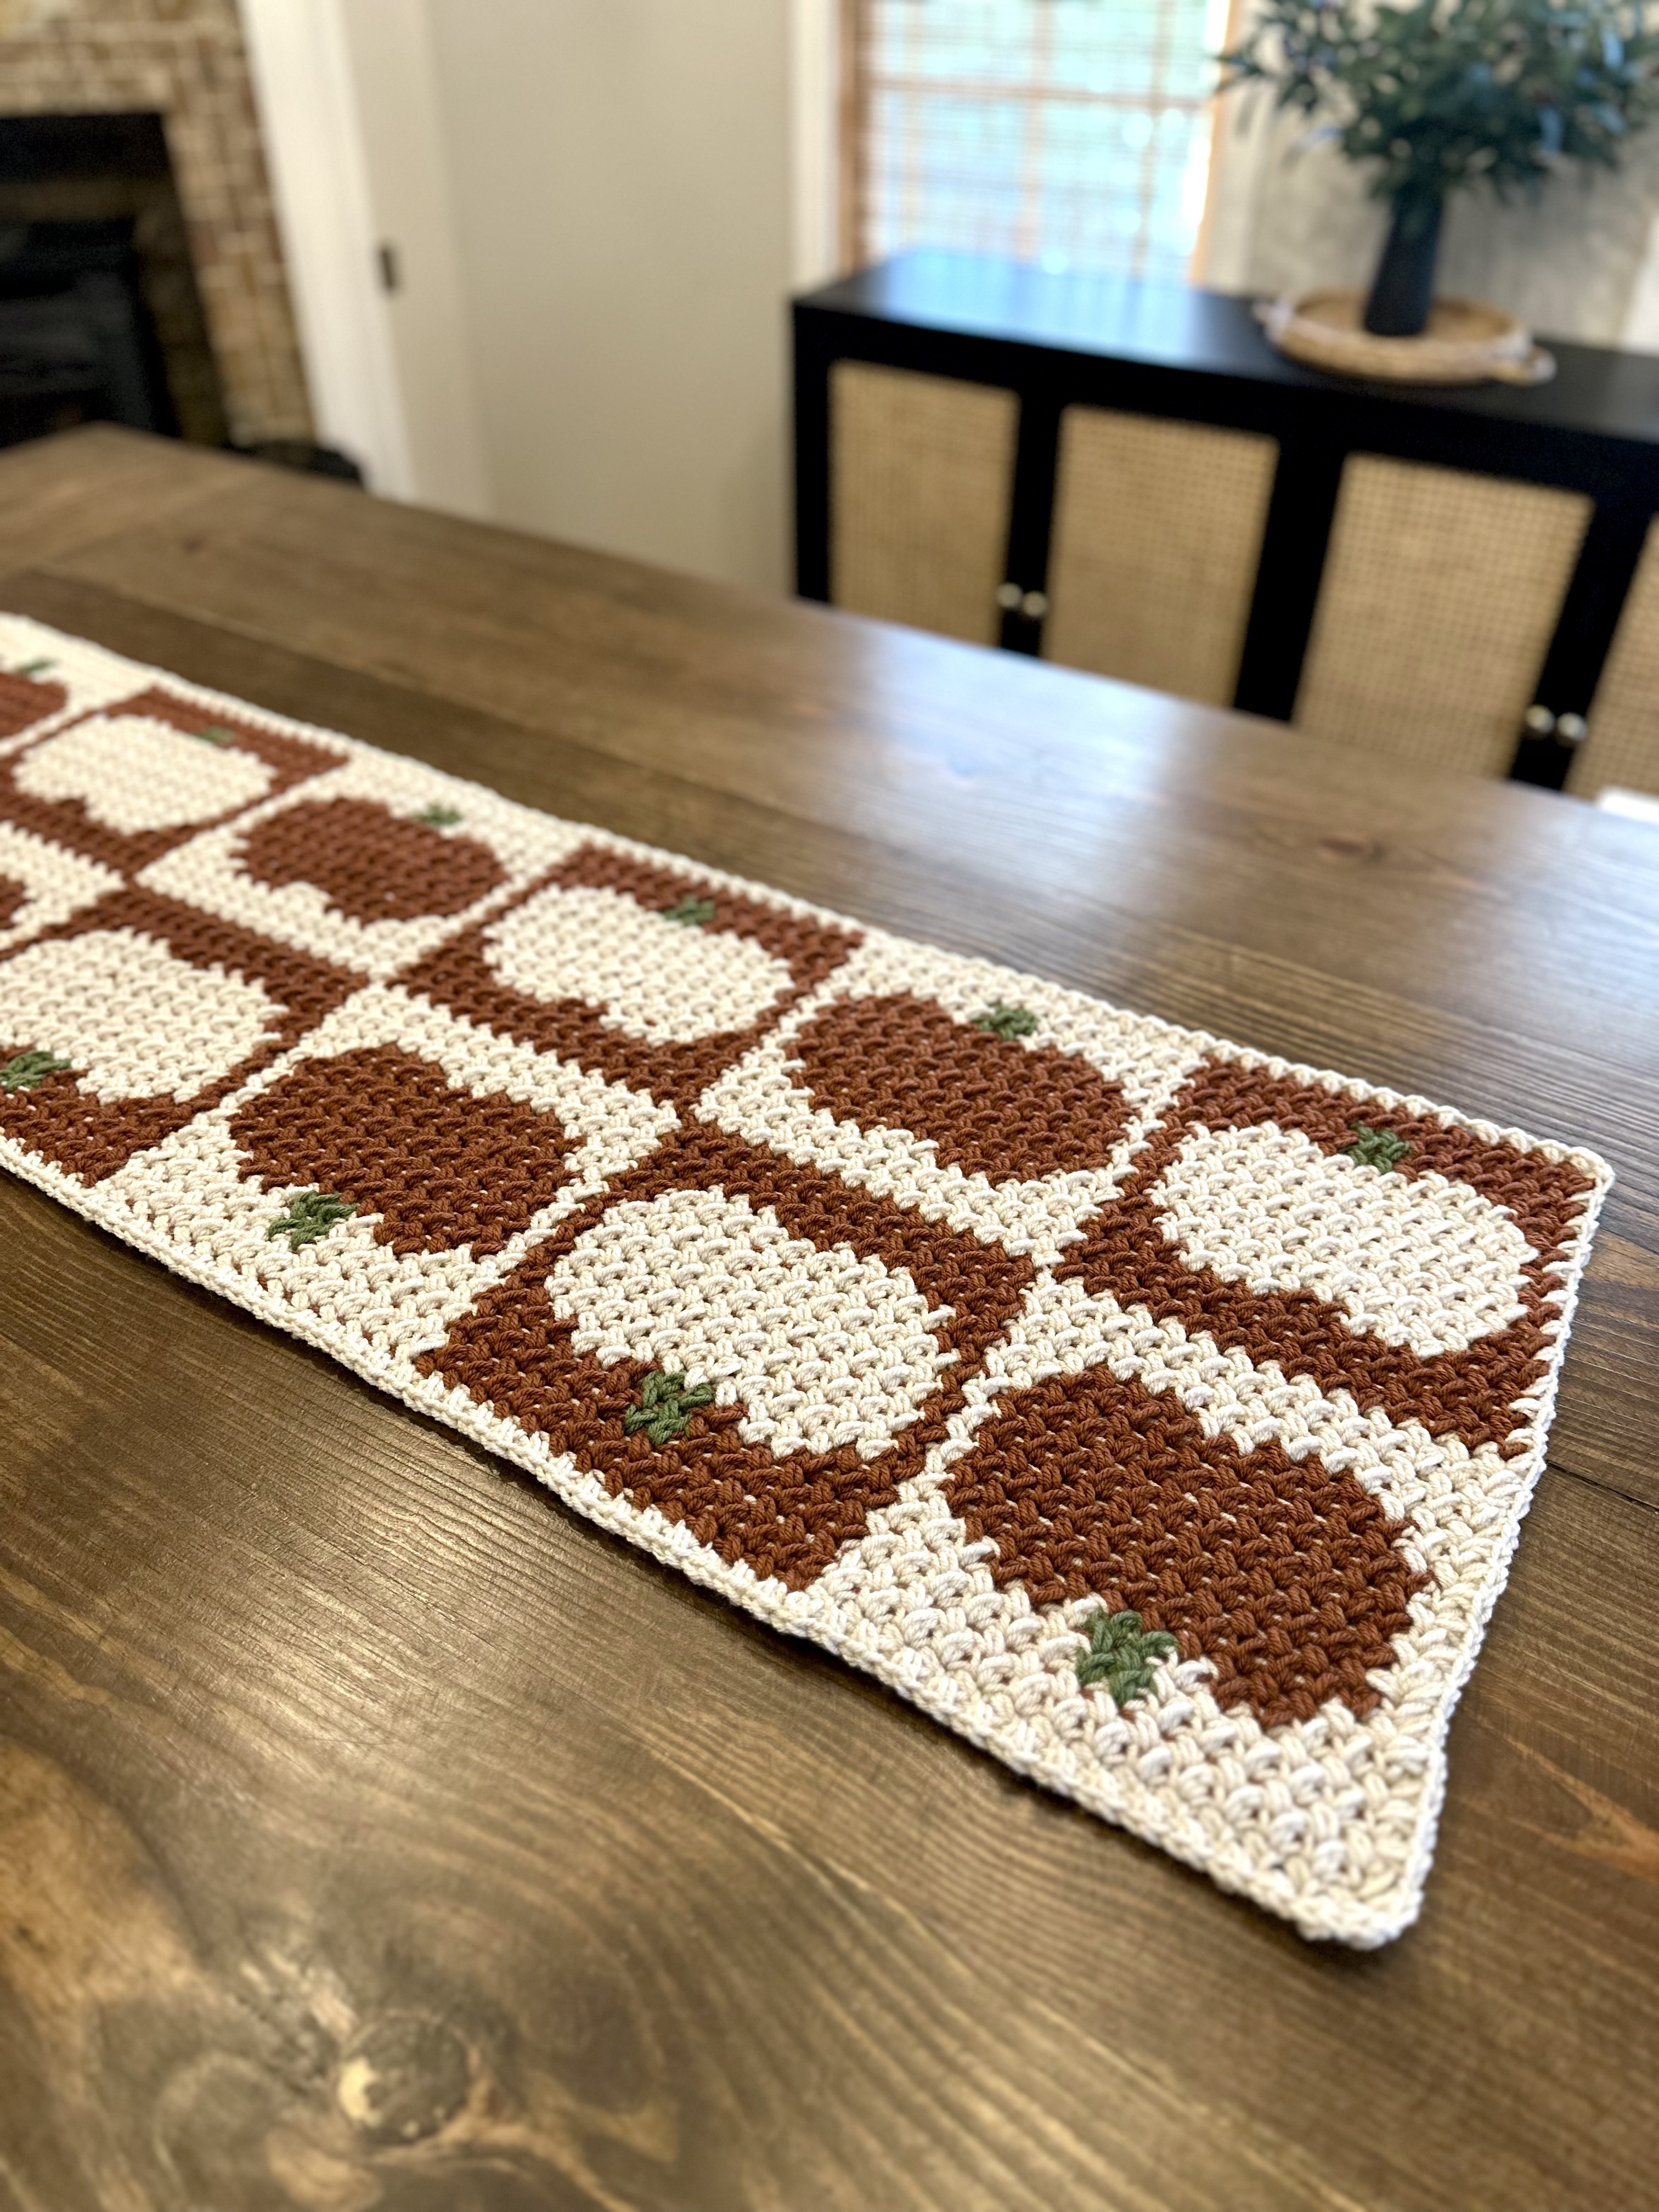
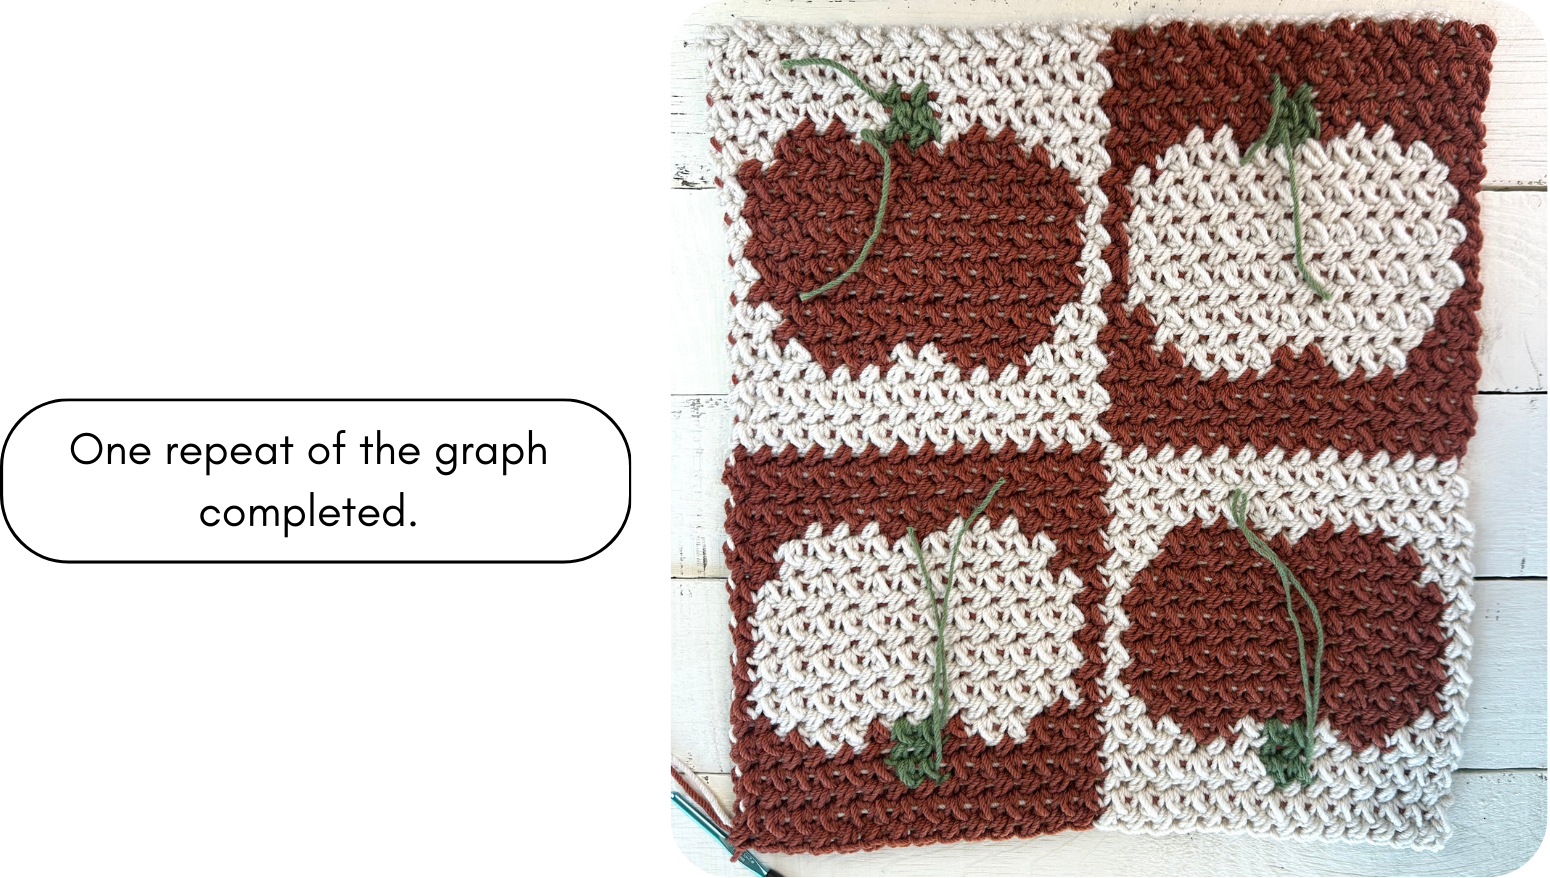
This crochet pumpkin blanket pattern is written for a 46″ x 66″ throw, but instructions are given for adjusting to whatever size you would like. In its simplest form, this design is just a 4 square section (see graph) that you can repeat as many times as you need. For the throw shown, I just repeated the graph 3 times side-to-side for the width and 4 times bottom-to-top for the length. (My aunt pointed out to me that you could also just repeat the graph 5 or 6 times for width and make a beautiful fall table runner! ) The written instructions in this pattern give the stitch counts for making the 46″ x 66″ throw, but feel free to use the graph to adjust to your needs.
Purchase an ad-free Printer friendly version of this pattern in my Etsy shop or Ravelry shop.
Crochet Pumpkin Throw Blanket – Free Pattern
Skill Level
Easy Level 2 – this pattern is worked entirely in the mini bean stitch. You will need to change colors and carry the unused color yarn. Bobbins are used for the stems. Written instructions and a graph showing the color changes are both included in this pattern. Detailed instructions are given for all special stitches and techniques.
Materials
For a 46″ x 66″ throw blanket:
- Yarn
- About 1770 yards of worsted weight (size 4) yarn for color A (white). I used 5 skeins of “I Love This Yarn” (100% acrylic, 7oz (199g)/355yds (325m) in the color Linen.
- About 1700 yards of worsted weight (size 4) yarn for color B (orange). I used 7 skeins of Yarn Bee “Yarn ID” (100% acrylic, 5oz (142g)/252yds (230m) in the color Red Brick.
- About 120 yards of worsted weight (size 4) yarn for color C (green). I used scrap yarn.
- Hook: US size H/8 (5.00mm)
- 6 large craft sticks or similar sized cardboard pieces for winding bobbins.
- Yarn needle, scissors.
Size
Throw blanket measures 46″ x 66″.
Gauge
7 sts x 10 rows = 4″ square using MB.
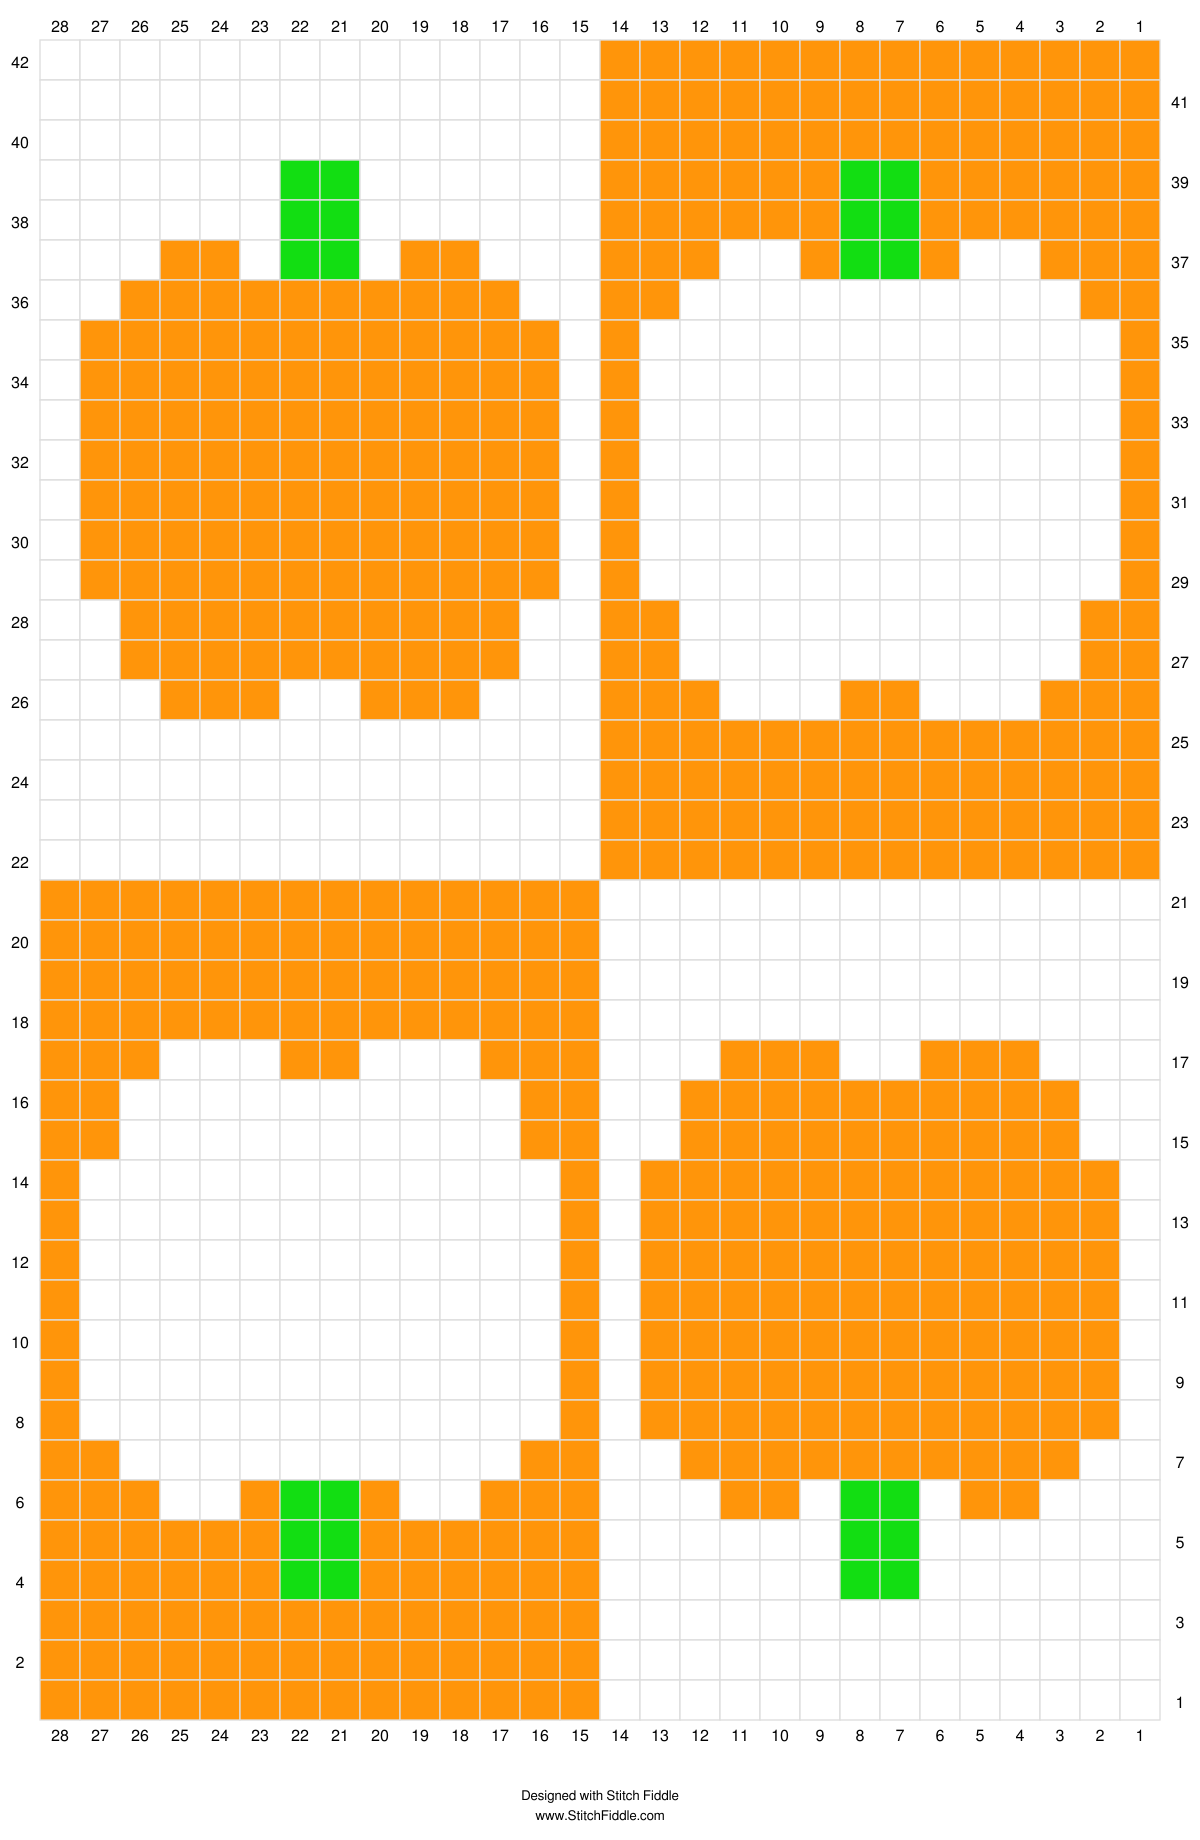
Graph
The pattern includes written instructions for each row, but you can also follow the graph below for color changes. Start at the bottom right corner. Odd numbered rows are read right to left. Even numbered rows are read left to right. 1 square = 1 MB stitch.
Adjusting the Size
As shown/written, this throw blanket is made by repeating the graph 3 times side-to-side and 4 times bottom-to-top.
To adjust the width, chain any multiple of 56 + 1. Every 56 chains equals one side-to-side repeat of the graph (i.e. two squares wide).
To adjust the height, repeat the graph bottom-to-top as many times as you would like.
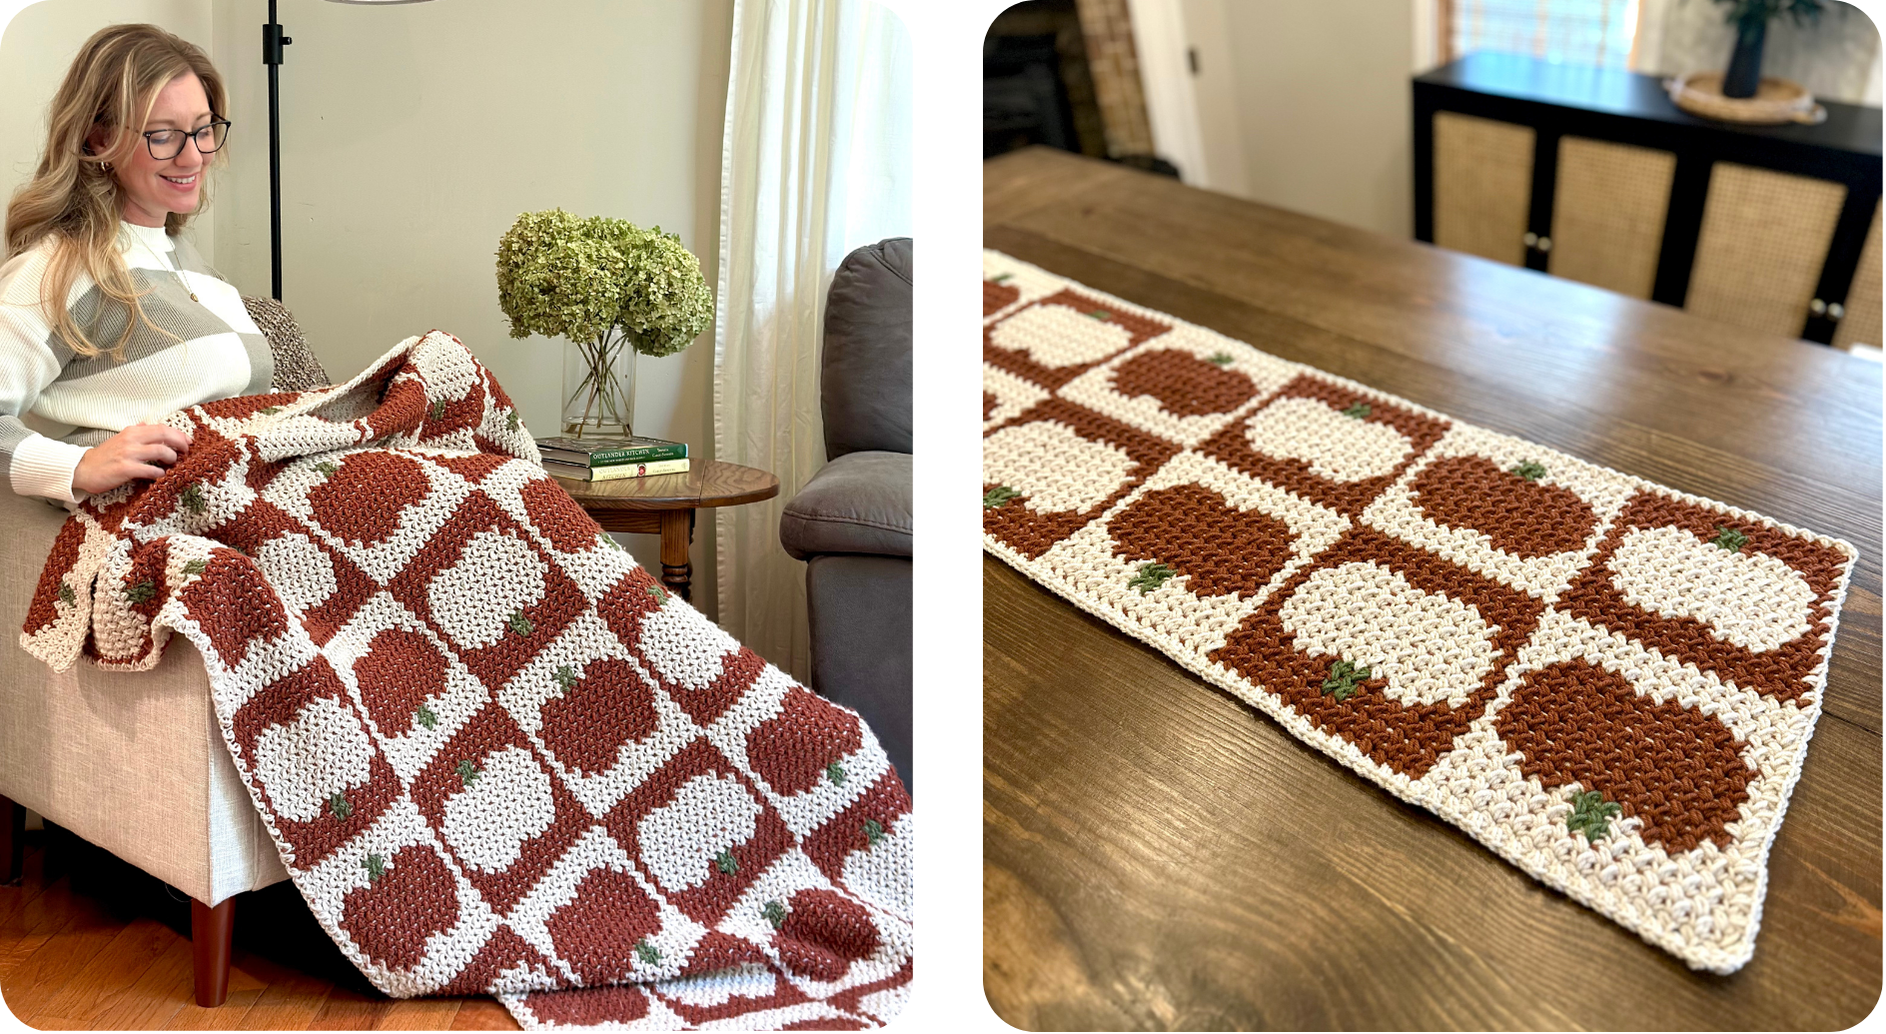
Table Runner: To make a 60″ x 16″ table runner instead of a throw blanket, chain 280 + 1. Repeat the graph side-to-side 5 times and only work it once bottom-to-top.
Notes
- This pattern is written for a 46″ x 66″ throw blanket. See the “Adjusting the Size” section to make a different size blanket or a table runner. NOTE: the photo tutorial included in the pattern only shows one repeat of the graph just for ease of photographing.
- The complete pattern is written out in the Pattern section, but a color change graph is also included on page 5 to use as a guide. See the Graph section for more info.
- This blanket is worked entirely using the mini bean stitch. For the main colors (white and orange) the unused yarn is carried. For the green stems, the yarn is attached when needed using bobbins and is not carried. A mini bean border is added at the end.
- Carry the yarn color you aren’t using by laying it on top of the row you are working into then crocheting over it.
- Tip 1 – always keep the orange skein of yarn to the front of your work and the white skein to the back (or vice versa) to reduce tangles.
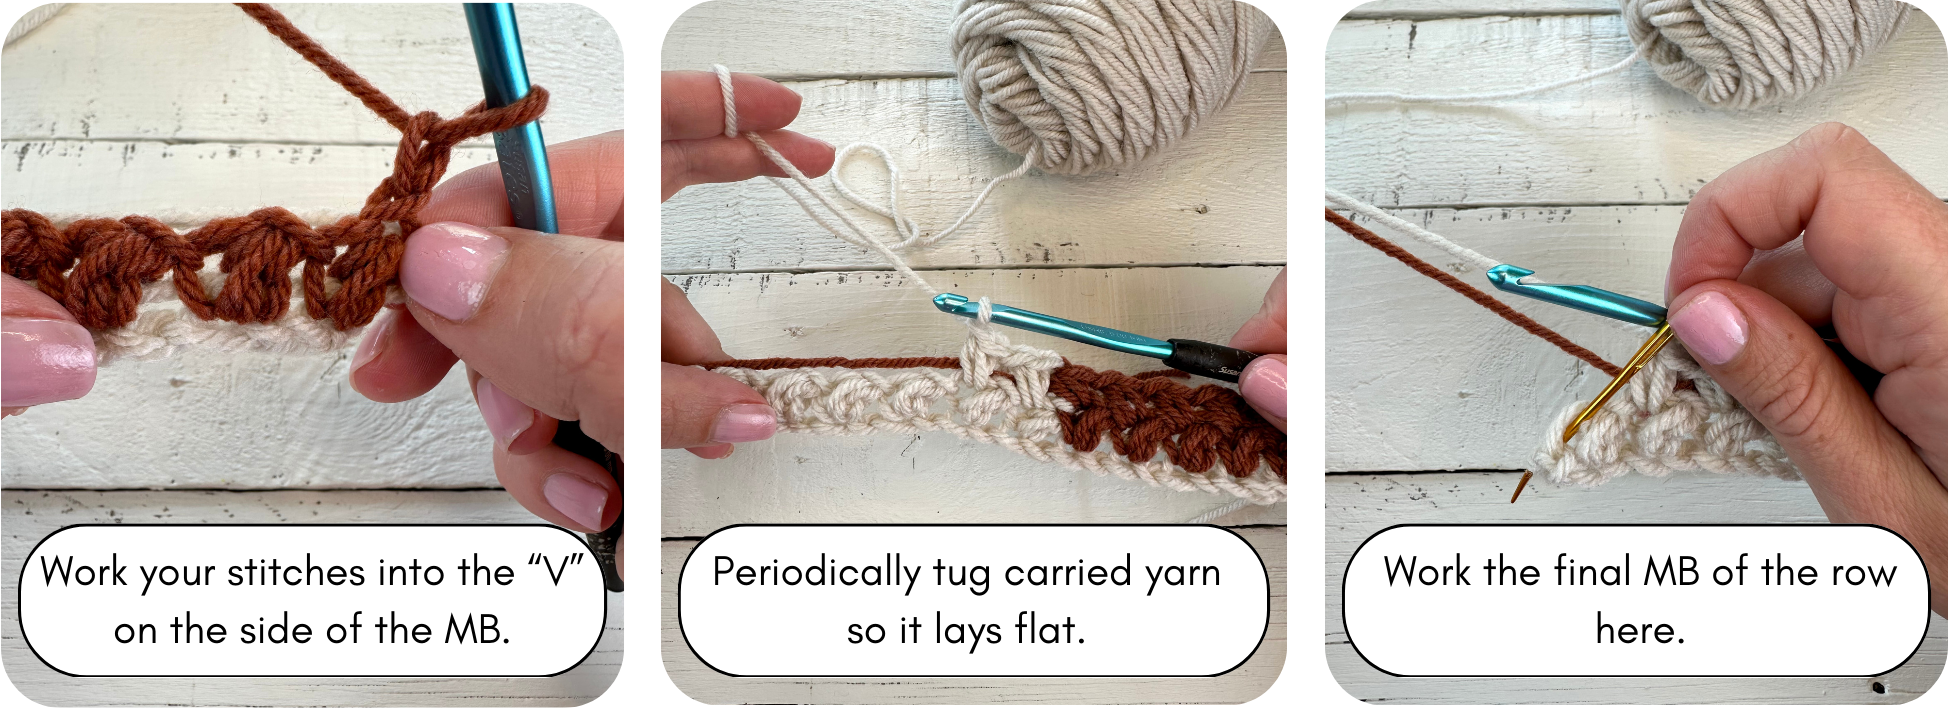
- Tip 2 – periodically give the carried yarn a tug to be sure it’s laying flat. It’s normal to see some of the carried color through the work, but you don’t want it bunched or poking out. Just be sure you aren’t pulling too tight or your blanket may pucker.
- Make a stem bobbin by wrapping about 20 yards of green yarn around a craft stick (or similar). Make 6.
- To work in the back bump of the chain, flip the chain over and work into the single bump on the back of the chain rather than in the two V-shaped loops on the front. More info here.
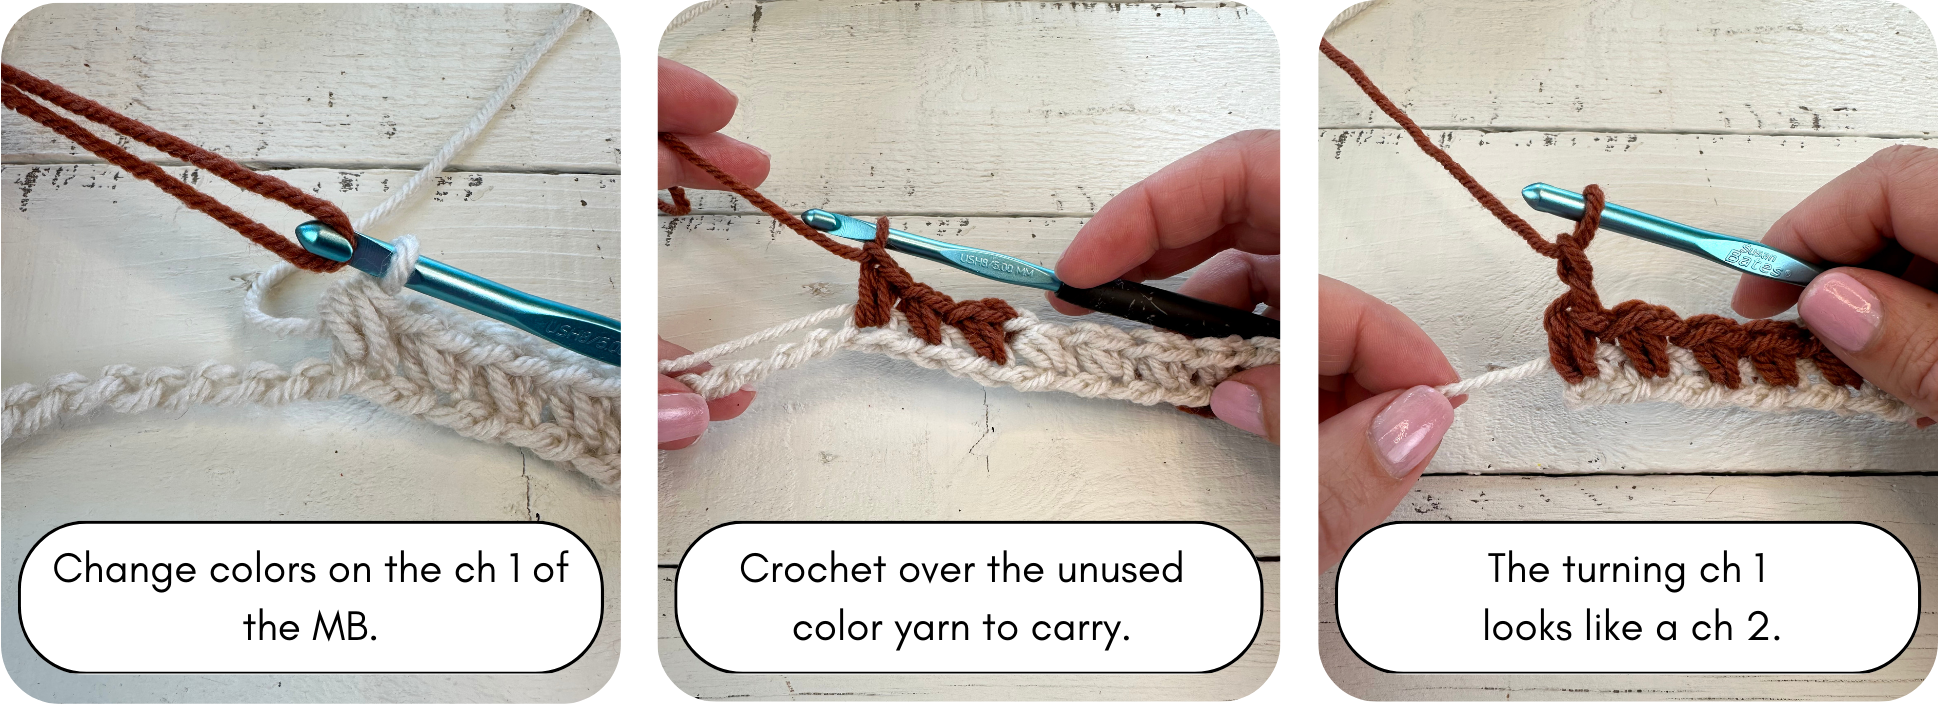
- For all color changes: work the mini bean (see Special Stitches) with the “old” color through the “pull through all 4 loops” step, then drop the old color and do the “ch 1 to close” with the “new” color.
- The ch 1 at the end of each row does not count as a stitch.
- Pattern is written in US crochet terms.
Special Stitches
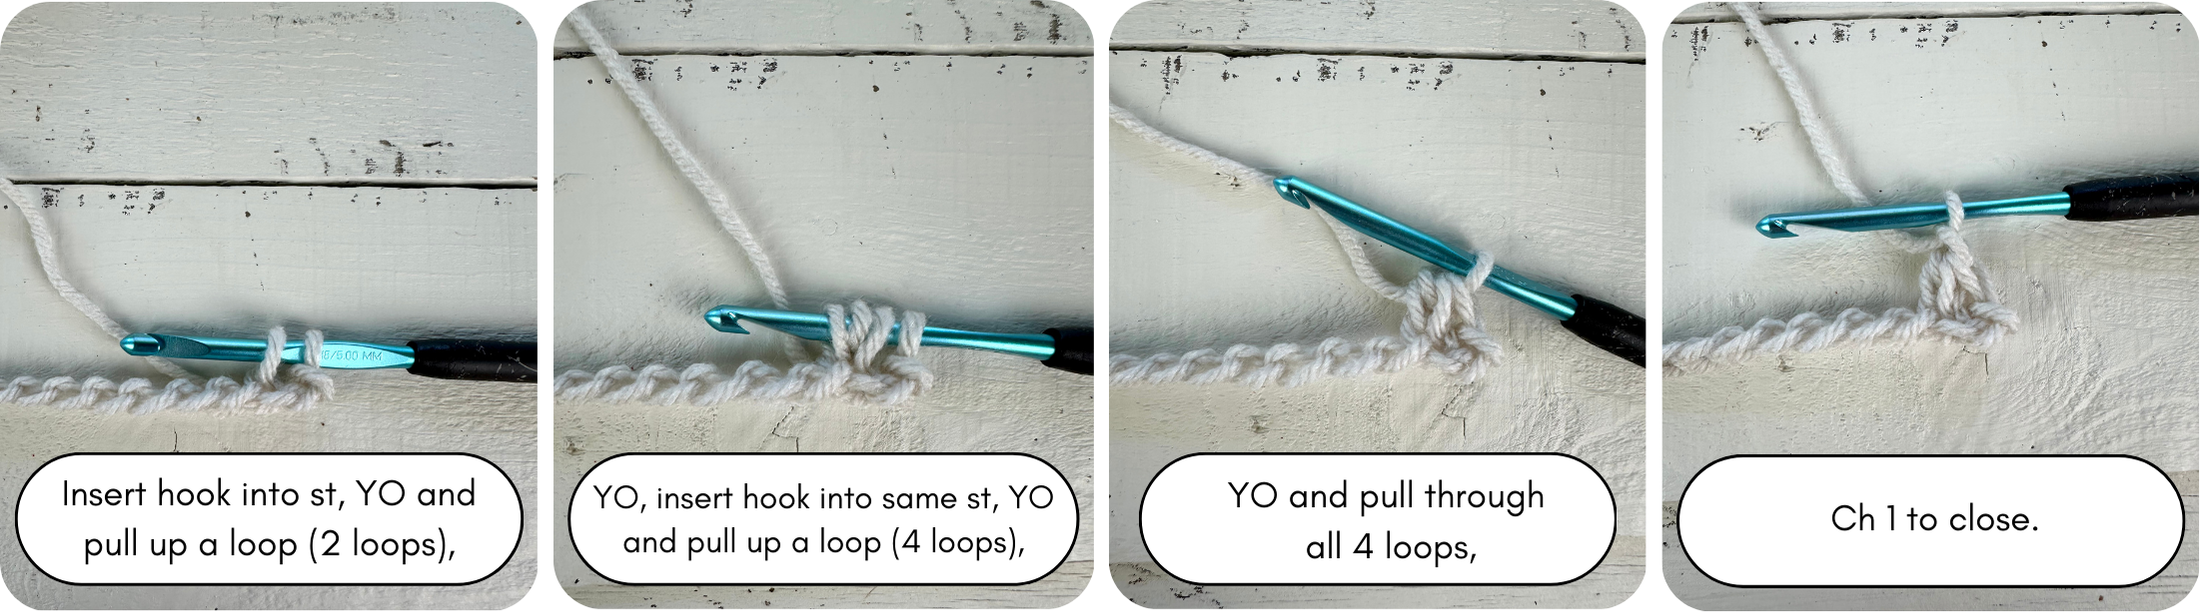
Mini bean stitch (MB) – (do not yo) insert hook into stitch, yo and pull up a loop (2 loops on hook), yo, insert hook into the same stitch, yo and pull up another loop (4 loops on hook), yo and pull through all 4 loops, ch 1 to close the stitch.
Abbreviations
- ch(s) = chain(s)
- MB = mini bean
- rep = repeat
- sk = skip
- sl st =slip stitch
- st(s) = stitch(es)
- yo = yarn over
Crochet Pumpkin Throw Blanket Pattern
For a 46″ x 66″ throw blanket, repeat the graph 3 times side-to-side and 4 times bottom-to-top.
With color A (white), chain 169.
Row 1: (Working in the back bump of the chain) MB in the 3rd ch from the hook, *sk 1 ch, MB in next ch, rep from * across with the following color changes (carry unused color yarn as you go): next 12 MBs are white (total of 14), 14 orange, 14 white, 14 orange, 14 white, 14 orange. Ch 1 (this will look like ch 2 because of the ch 1 that is part of the MB), turn. (84 MB)
Row 2: (Starting with orange and carrying the white) MB in the 1st st,
Tip: you will insert your hook into the the little “V” that is formed on the side of the mini bean (i.e. under the ch-1 that is the last step of the mini bean stitch),
MB in each st across with the following color changes: next 13 MBs orange (total of 14), 14 white, 14 orange, 14 white, 14 orange, 14 white. Ch 1, turn. (84 MB)
Going forward, all sts will be MB and all rows will end with ch 1, turn. I will just indicated color changes. All rows will have a stitch count of 84.
Row 3: 14 white, 14 orange, 14 white, 14 orange, 14 white, 14 orange.
To make things easier to read, the colors changes for each square are written in [].
Row 4: [6 orange, (attach 1st green bobbin) 2 green (drop green yarn, do not carry it. We will pick it back up when we need it for the next row), 6 orange],
[6 white, (attach 2nd green bobbin), 2 green, 6 white],
[6 orange, (attach 3rd green bobbin), 2 green, 6 orange],
[6 white, (attach 4th green bobbin), 2 green, 6 white],
[6 orange, (attach 5th green bobbin), 2 green, 6 orange],
[6 white, (attach 6th green bobbin), 2 green, 6 white].
Row 5: [6 white, 2 green, 6 white],
[6 orange, 2 green, 6 orange],
[6 white, 2 green, 6 white],
[6 orange, 2 green, 6 orange],
[6 white, 2 green, 6 white],
[6 orange, 2 green, 6 orange].
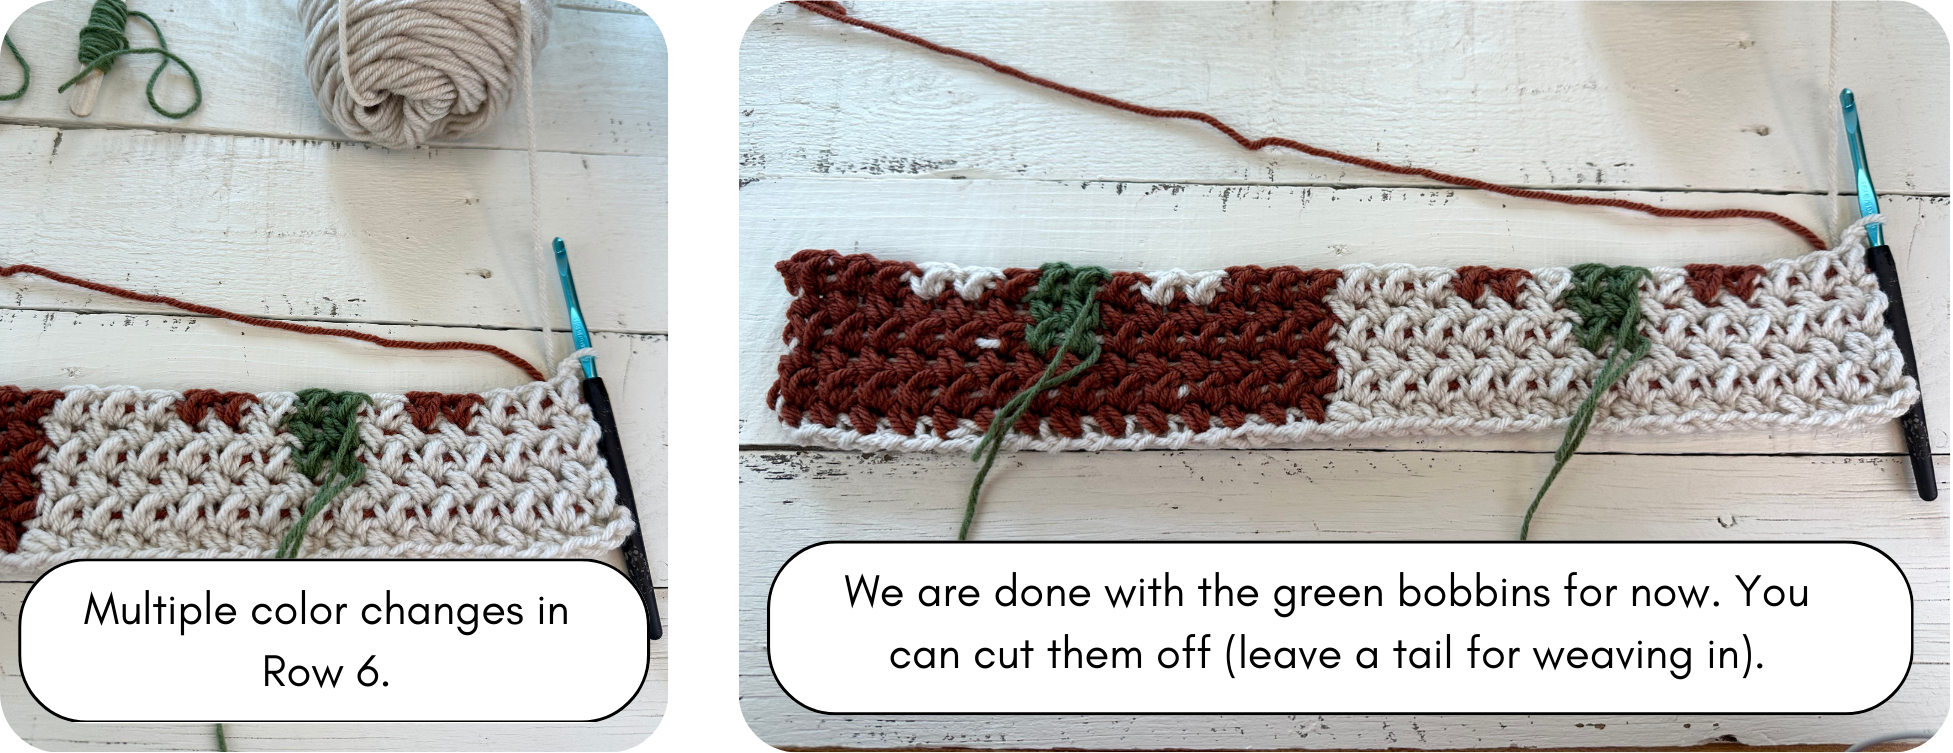
Row 6: [3 orange, 2 white, 1 orange, 2 green, 1 orange, 2 white, 3 orange],
[3 white, 2 orange, 1 white, 2 green, 1 white, 2 orange, 3 white],
[3 orange, 2 white, 1 orange, 2 green, 1 orange, 2 white, 3 orange],
[3 white, 2 orange, 1 white, 2 green, 1 white, 2 orange, 3 white],
[3 orange, 2 white, 1 orange, 2 green, 1 orange, 2 white, 3 orange],
[3 white, 2 orange, 1 white, 2 green, 1 white, 2 orange, 3 white].
Cut green yarn after completing each stem. You can weave in the green ends.
Row 7: [2 white, 10 orange, 2 white],
[2 orange, 10 white, 2 orange],
[2 white, 10 orange, 2 white],
[2 orange, 10 white, 2 orange],
[2 white, 10 orange, 2 white],
[2 orange, 10 white, 2 orange].
Row 8: [1 orange, 12 white, 1 orange],
[1 white, 12 orange, 1 white],
[1 orange, 12 white, 1 orange],
[1 white, 12 orange, 1 white],
[1 orange, 12 white, 1 orange],
[1 white, 12 orange, 1 white].
Row 9: [1 white, 12 orange, 1 white],
[1 orange, 12 white, 1 orange],
[1 white, 12 orange, 1 white],
[1 orange, 12 white, 1 orange],
[1 white, 12 orange, 1 white],
[1 orange, 12 white, 1 orange].
Rows 10 – 14: Rep Rows 8 and 9 ending with a Row 8.

Row 15: [2 white, 10 orange, 2 white],
[2 orange, 10 white, 2 orange],
[2 white, 10 orange, 2 white],
[2 orange, 10 white, 2 orange],
[2 white, 10 orange, 2 white],
[2 orange, 10 white, 2 orange].
Row 16: [2 orange, 10 white, 2 orange],
[2 white, 10 orange, 2 white],
[2 orange, 10 white, 2 orange],
[2 white, 10 orange, 2 white],
[2 orange, 10 white, 2 orange],
[2 white, 10 orange, 2 white].
Row 17: [3 white, 3 orange, 2 white, 3 orange, 3 white],
[3 orange, 3 white, 2 orange, 3 white, 3 orange],
[3 white, 3 orange, 2 white, 3 orange, 3 white],
[3 orange, 3 white, 2 orange, 3 white, 3 orange],
[3 white, 3 orange, 2 white, 3 orange, 3 white],
[3 orange, 3 white, 2 orange, 3 white, 3 orange].
Row 18: 14 orange, 14 white, 14 orange, 14 white, 14 orange, 14 white.
Row 19: 14 white, 14 orange, 14 white, 14 orange, 14 white, 14 orange.
Row 20: 14 orange, 14 white, 14 orange, 14 white, 14 orange, 14 white.
Row 21: 14 white, 14 orange, 14 white, 14 orange, 14 white, 14 orange.
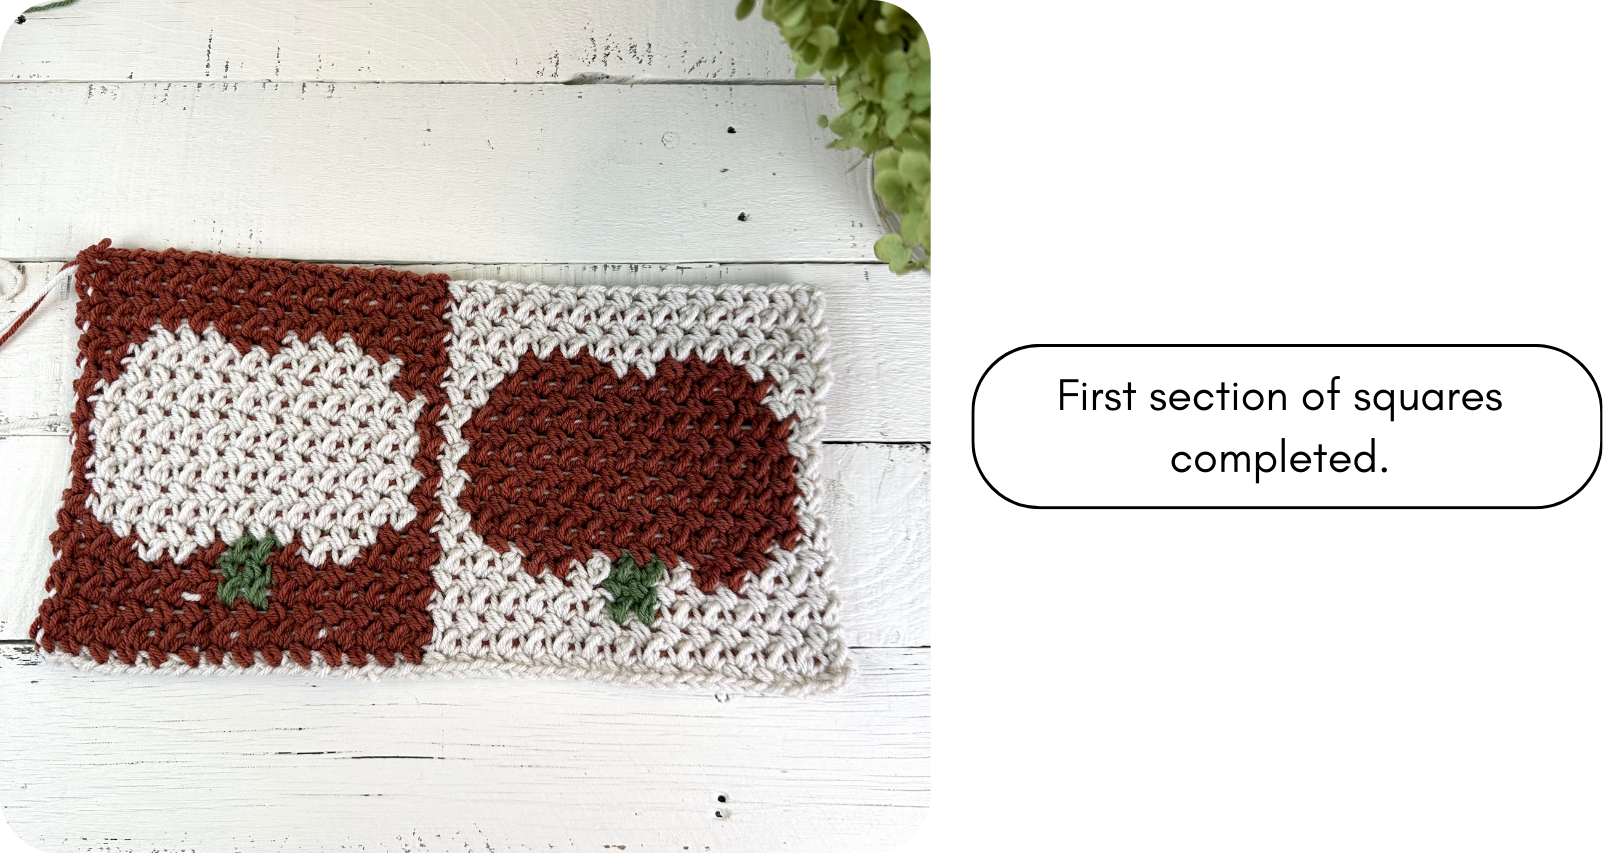
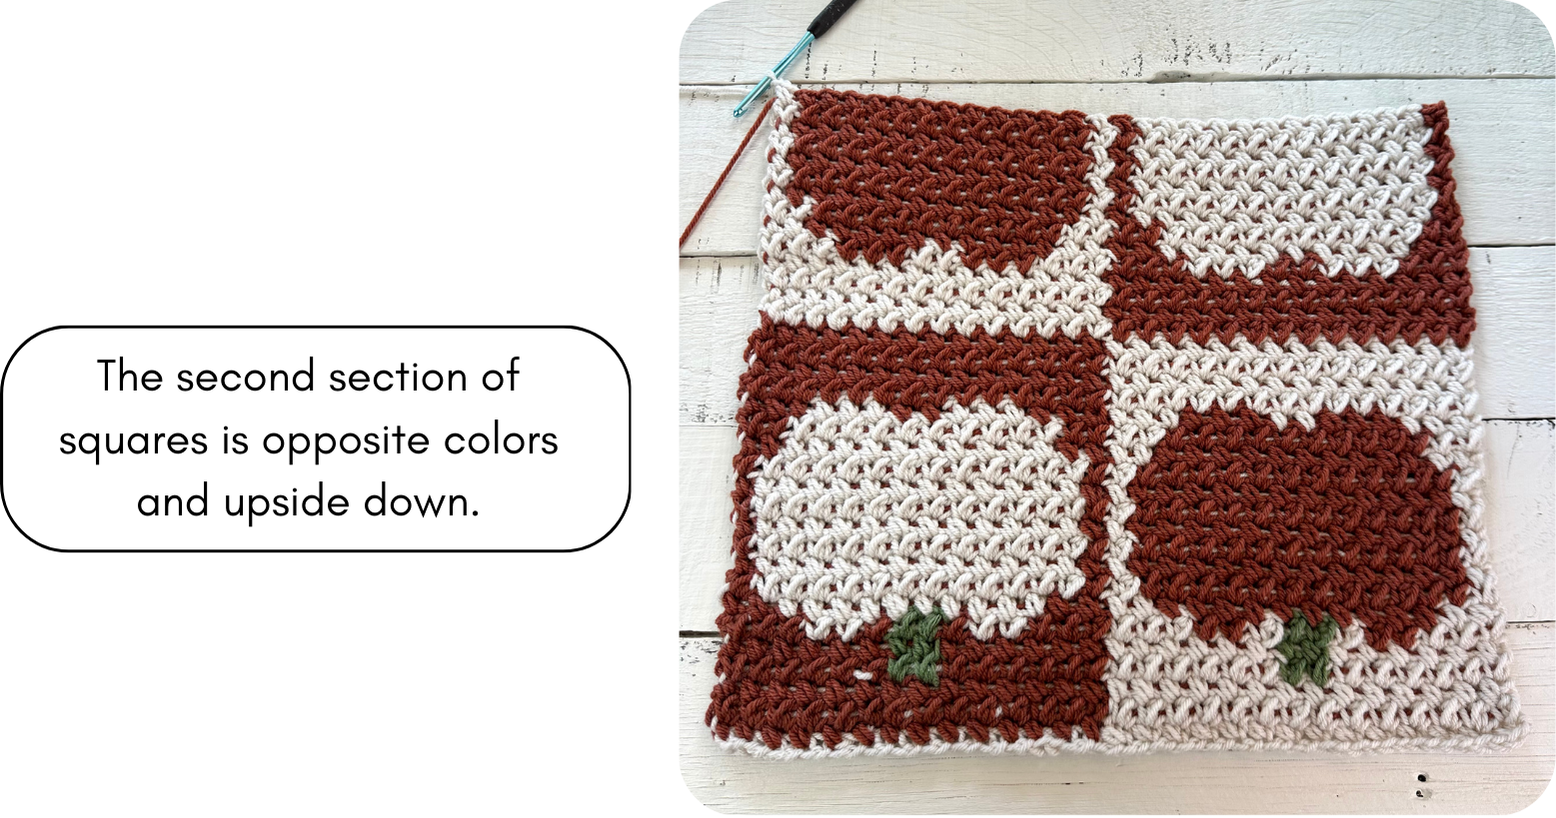
This is the end of the first section of squares. The next section will be worked upside down and with opposite colors.
Row 22: 14 white, 14 orange, 14 white, 14 orange, 14 white, 14 orange.
Row 23: 14 orange, 14 white, 14 orange, 14 white, 14 orange, 14 white.
Row 24: 14 white, 14 orange, 14 white, 14 orange, 14 white, 14 orange.
Row 25: 14 orange, 14 white, 14 orange, 14 white, 14 orange, 14 white.
Row 26: [3 white, 3 orange, 2 white, 3 orange, 3 white],
[3 orange, 3 white, 2 orange, 3 white, 3 orange],
[3 white, 3 orange, 2 white, 3 orange, 3 white],
[3 orange, 3 white, 2 orange, 3 white, 3 orange],
[3 white, 3 orange, 2 white, 3 orange, 3 white],
[3 orange, 3 white, 2 orange, 3 white, 3 orange].
Row 27: [2 orange, 10 white, 2 orange],
[2 white, 10 orange, 2 white],
[2 orange, 10 white, 2 orange],
[2 white, 10 orange, 2 white],
[2 orange, 10 white, 2 orange],
[2 white, 10 orange, 2 white].
Row 28: [2 white, 10 orange, 2 white],
[2 orange, 10 white, 2 orange],
[2 white, 10 orange, 2 white],
[2 orange, 10 white, 2 orange],
[2 white, 10 orange, 2 white],
[2 orange, 10 white, 2 orange].
Row 29: [1 orange, 12 white, 1 orange],
[1 white, 12 orange, 1 white],
[1 orange, 12 white, 1 orange],
[1 white, 12 orange, 1 white],
[1 orange, 12 white, 1 orange],
[1 white, 12 orange, 1 white].
Row 30: [1 white, 12 orange, 1 white],
[1 orange, 12 white, 1 orange],
[1 white, 12 orange, 1 white],
[1 orange, 12 white, 1 orange],
[1 white, 12 orange, 1 white],
[1 orange, 12 white, 1 orange].
Rows 31 – 35: Rep Rows 29 and 30 ending with a Row 29.
Row 36: [2 white, 10 orange, 2 white],
[2 orange, 10 white, 2 orange],
[2 white, 10 orange, 2 white],
[2 orange, 10 white, 2 orange],
[2 white, 10 orange, 2 white],
[2 orange, 10 white, 2 orange].
Row 37: [3 orange, 2 white, 1 orange, (attach green bobbin) 2 green, 1 orange, 2 white, 3 orange],
[3 white, 2 orange, 1 white, (attach green) 2 green, 1 white, 2 orange, 3 white],
[3 orange, 2 white, 1 orange, (attach green) 2 green, 1 orange, 2 white, 3 orange],
[3 white, 2 orange, 1 white, (attach green)2 green, 1 white, 2 orange, 3 white],
[3 orange, 2 white, 1 orange, (attach green) 2 green, 1 orange, 2 white, 3 orange],
[3 white, 2 orange, 1 white, (attach green) 2 green, 1 white, 2 orange, 3 white].
Row 38: [6 white, 2 green, 6 white],
[6 orange, 2 green, 6 orange],
[6 white, 2 green, 6 white],
[6 orange, 2 green, 6 orange],
[6 white, 2 green, 6 white],
[6 orange, 2 green, 6 orange].
Row 39: [6 orange, 2 green, 6 orange],
[6 white, 2 green, 6 white],
[6 orange, 2 green, 6 orange],
[6 white, 2 green, 6 white],
[6 orange, 2 green, 6 orange],
[6 white, 2 green, 6 white].
Cut green yarn after completing each stem. You can weave in the green ends.
Row 40: 14 white, 14 orange, 14 white, 14 orange, 14 white, 14 orange.
Row 41: 14 orange, 14 white, 14 orange, 14 white, 14 orange, 14 white.
Row 42: 14 white, 14 orange, 14 white, 14 orange, 14 white, 14 orange.
Rows 43 – 168: Rep Rows 1 through 42.
Fasten off and weave in ends.
Border:
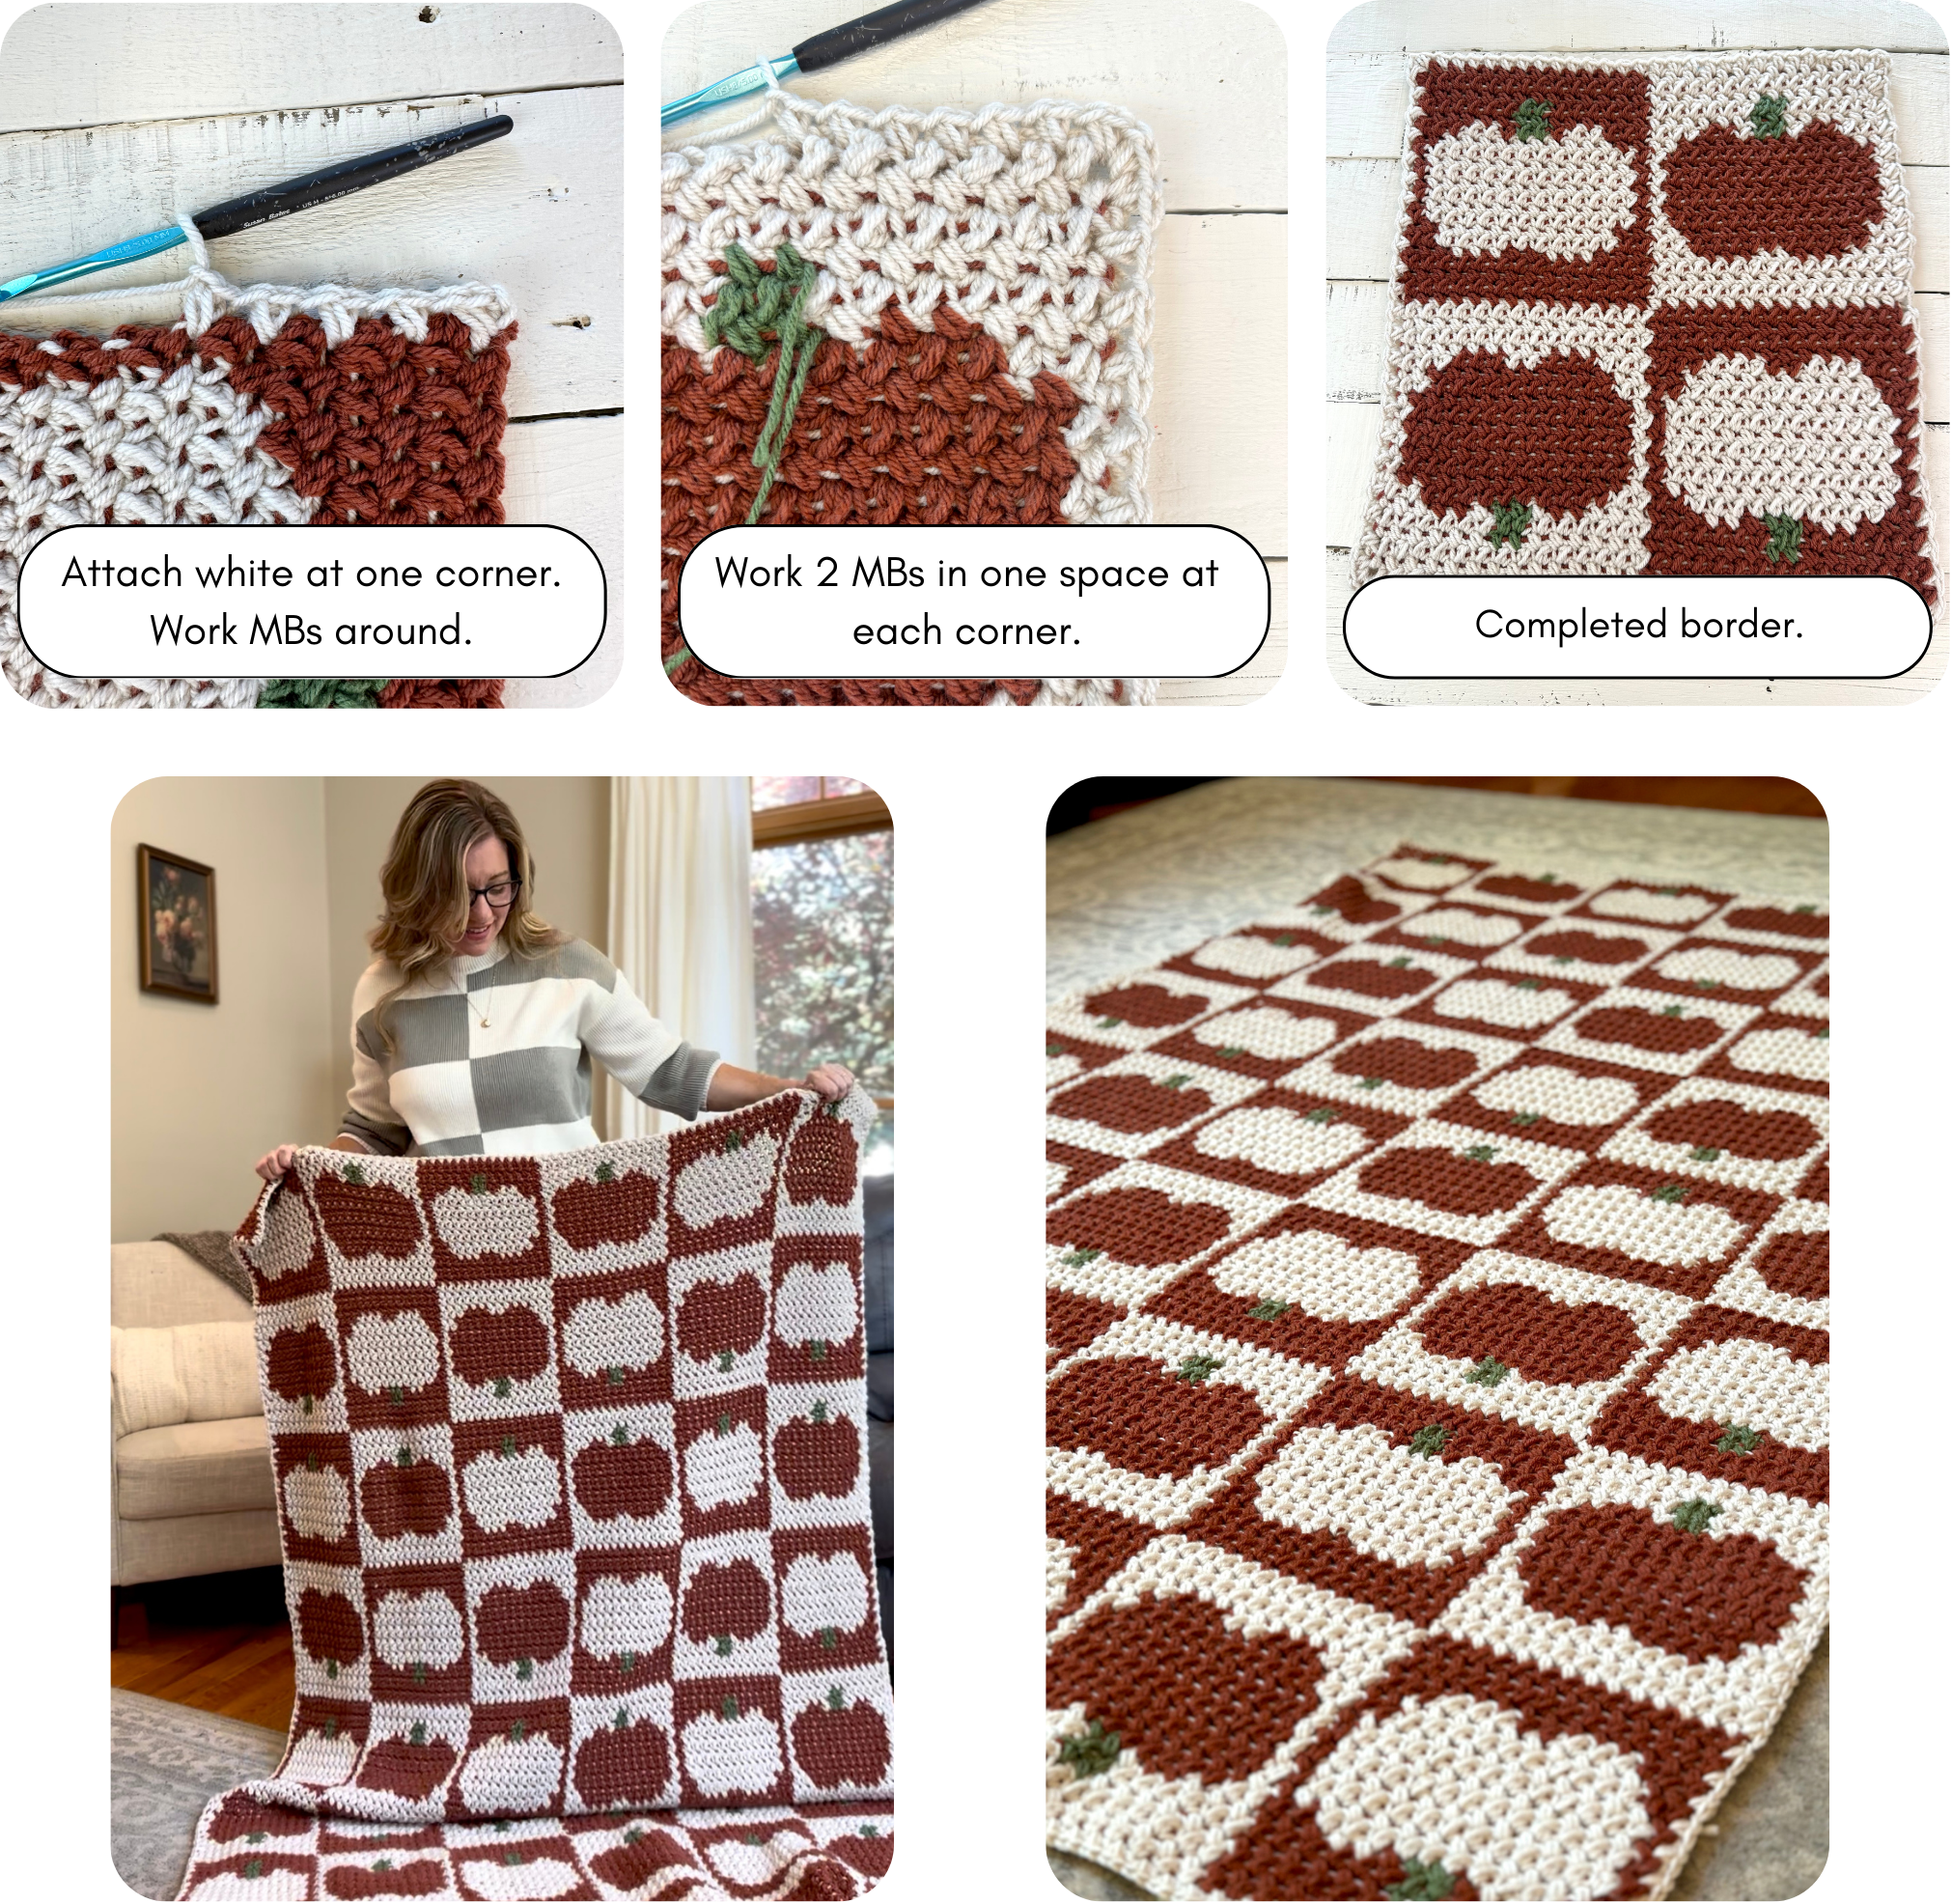
Attach white yarn at one corner with a sl st. Work MBs around the edge of the blanket with 1 MB in every st across the bottom and top and 1 MB per every other row end on the sides (or wherever works for you – just don’t make them too close together or your blanket will pucker). Work 2 MBs in one space at each corner. Sl st to the 1st MB and fasten off. Weave in ends and you’re finished!
I hope you enjoyed crocheting this Pumpkin Squares Throw Blanket! Tag me on Instagram @theknottednest to share your project. You can find more project ideas and patterns in the Patterns Section here on the blog.
Happy making!