
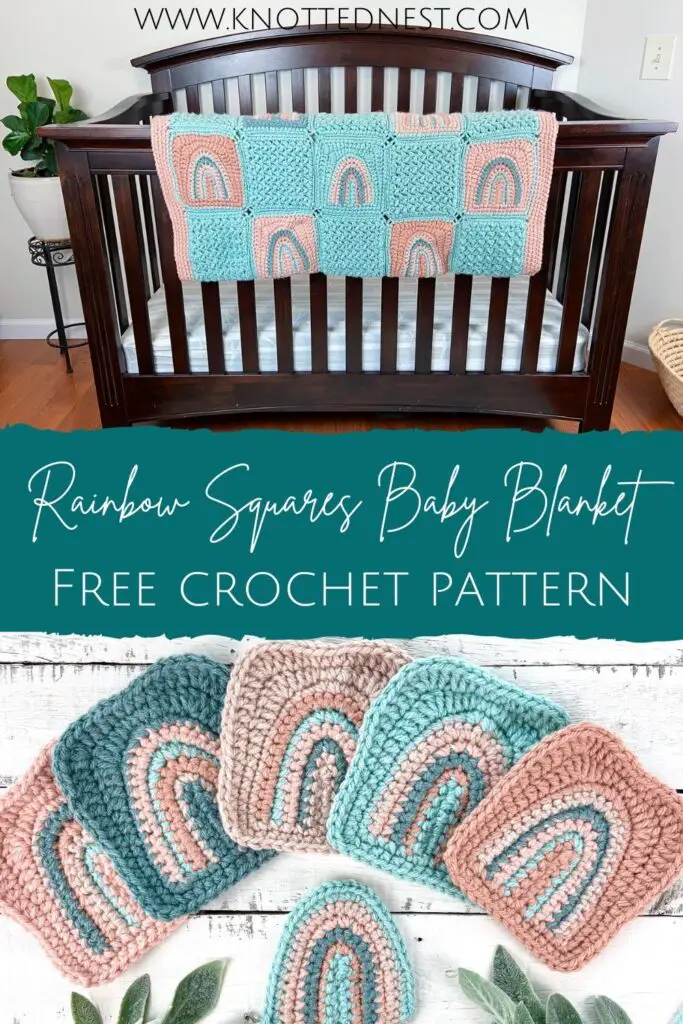
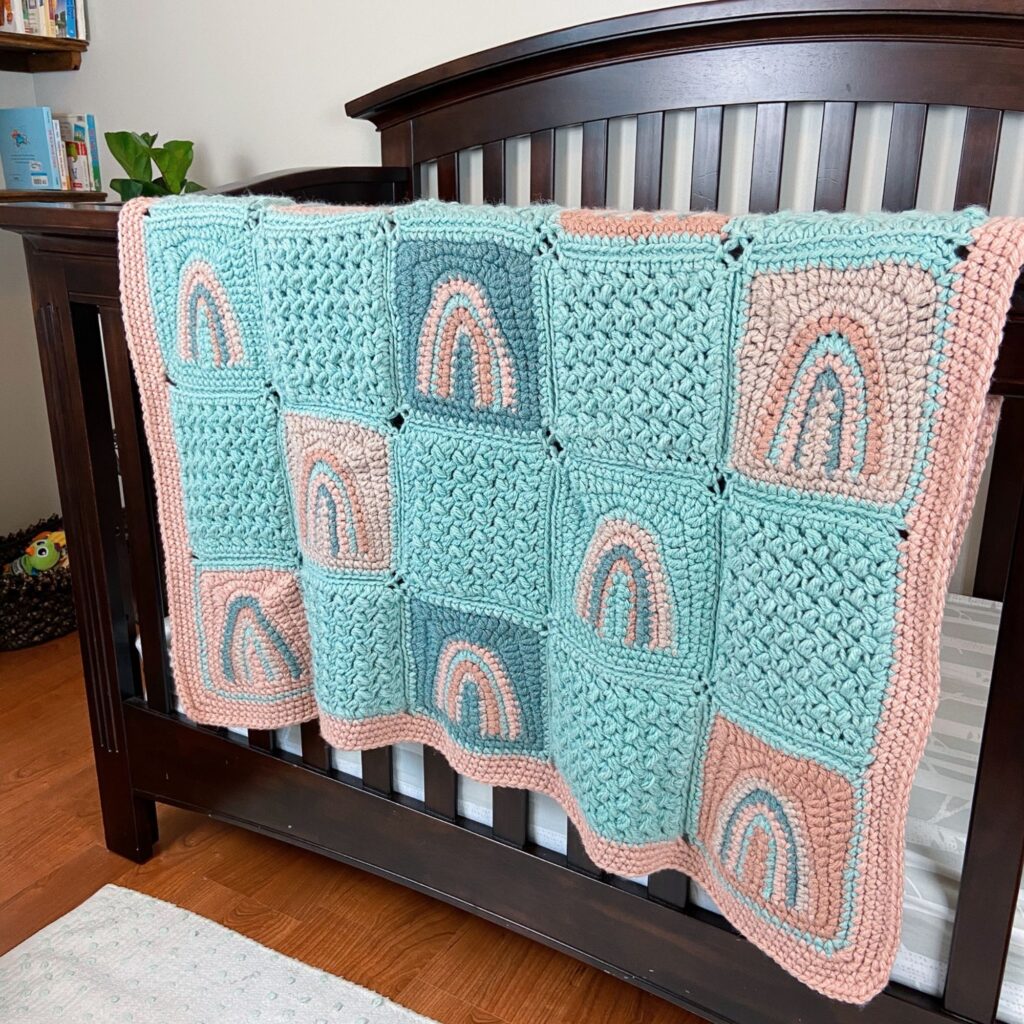
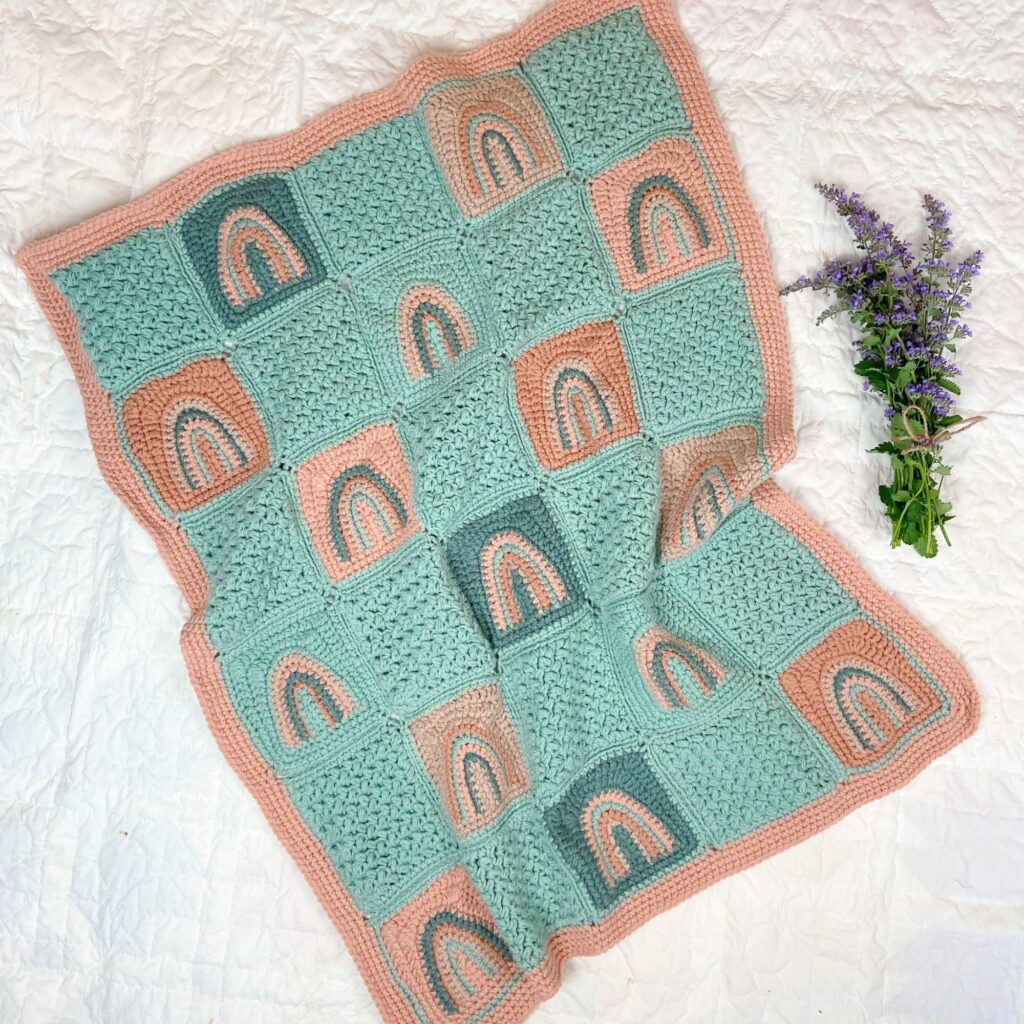
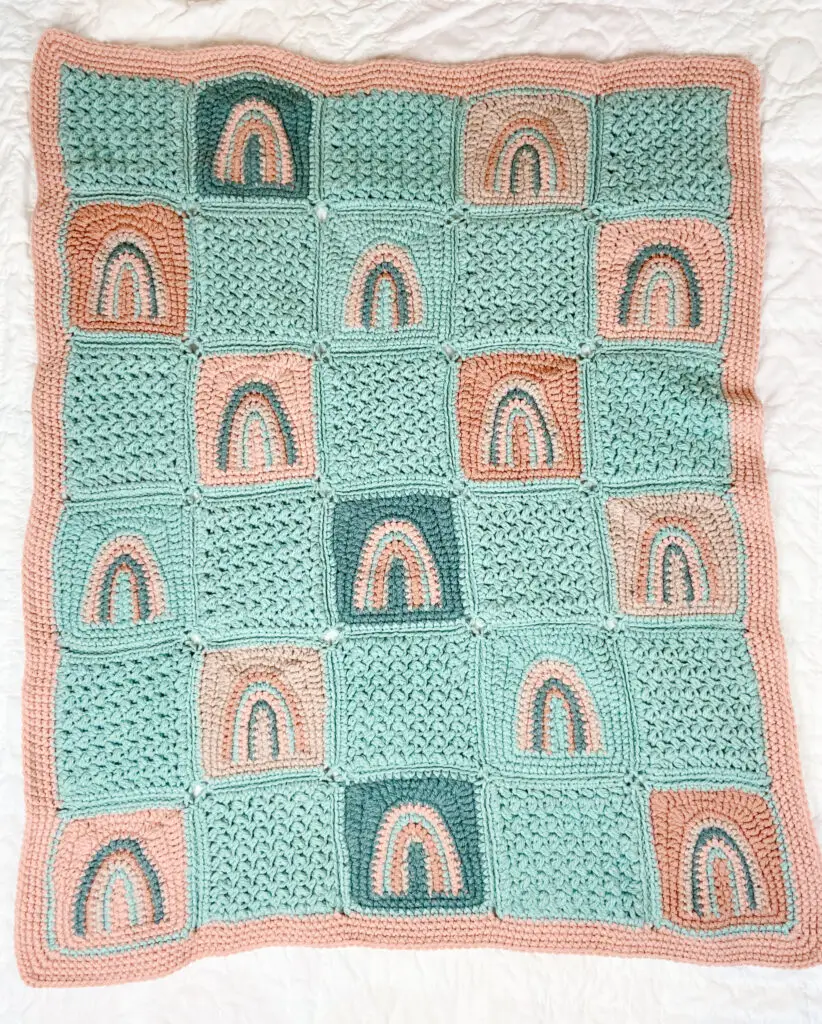
Rainbow Squares Crochet Baby Blanket Free Pattern
The Rainbow Squares Crochet Baby Blanket will add a sweet, cozy, slightly boho vibe to your baby’s nursery!
Click the picture to Pin this pattern for later!
Scroll down to get the free pattern or read on to learn more about the inspiration, construction, and the materials you’ll need for this fun crochet baby blanket.
The Inspiration
Whew! The Rainbow Squares Crochet Baby Blanket was truly a labor of love. A lot of trial, error, and frogging went into this one, but I am THRILLED with the end result!!
When I found out that my cousin was expecting her first baby (a girl!), my first thought was (of course) what can I crochet for her?? My cousin is very much an Earth mama so I knew I wanted something with an earthy, boho feel, I just wasn’t sure what that might be.
Once I settled on the idea of a crochet baby blanket, I began sketching out some ideas for a geometric squares blanket….but then I couldn’t decide on a color. So I did what any normal person would do and ordered ALL of the color options I was considering, lol! After I had the yarn in front of me though, the geometric idea just wasn’t cutting it. Back to the drawing board.
Naturally, with all those gorgeous colors at my fingertips, a new idea started to materialize – Rainbows! And it took off from there!
The Construction
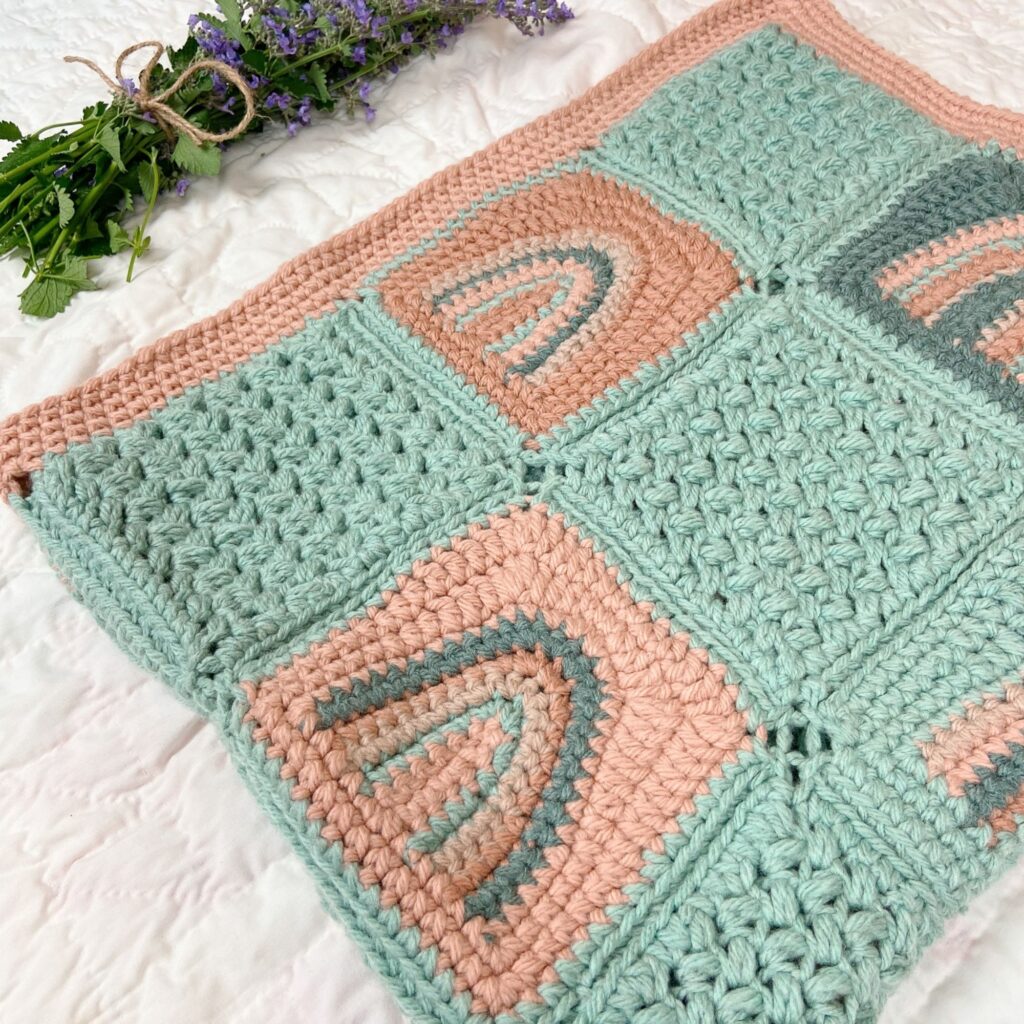
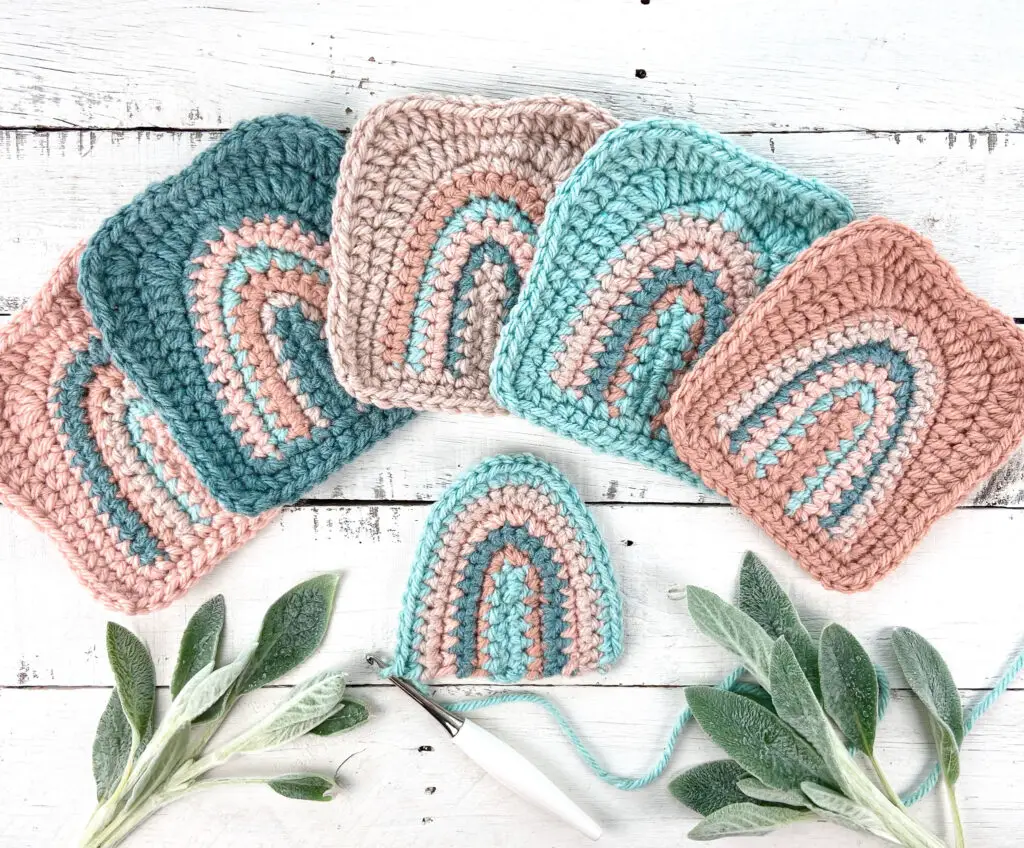
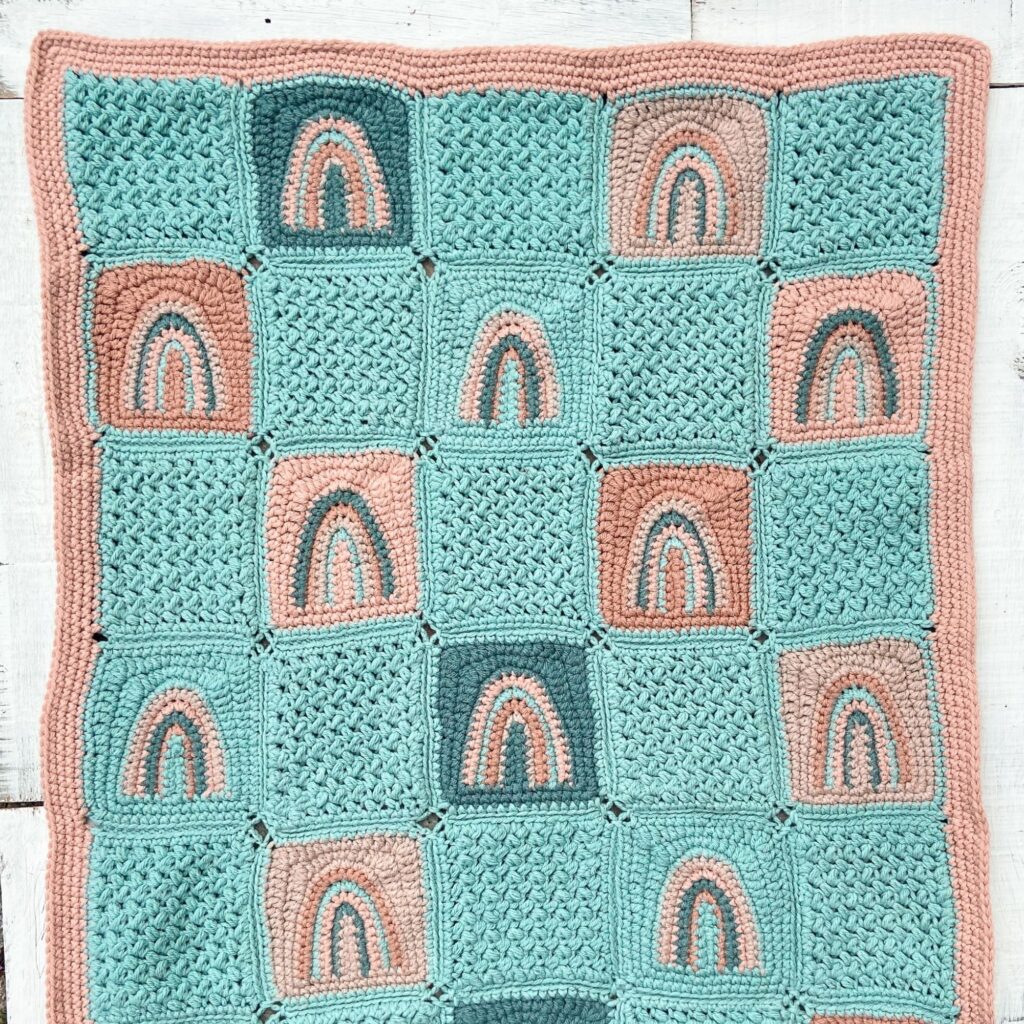
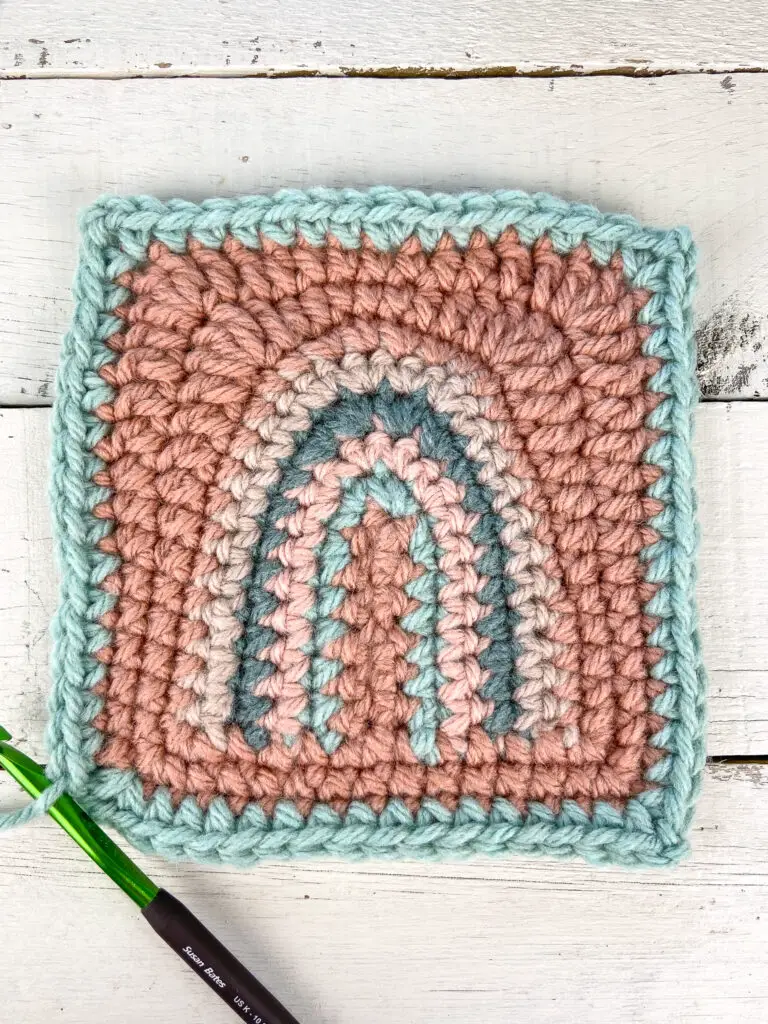
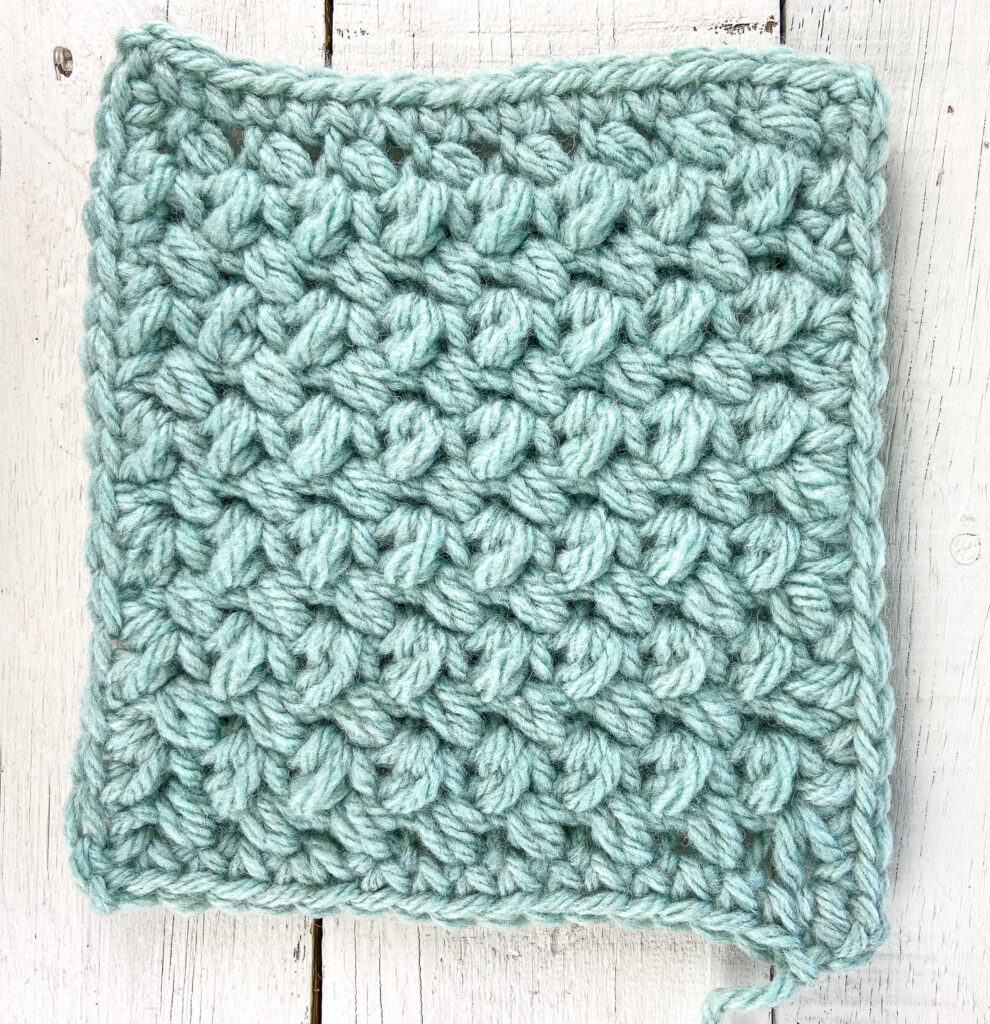
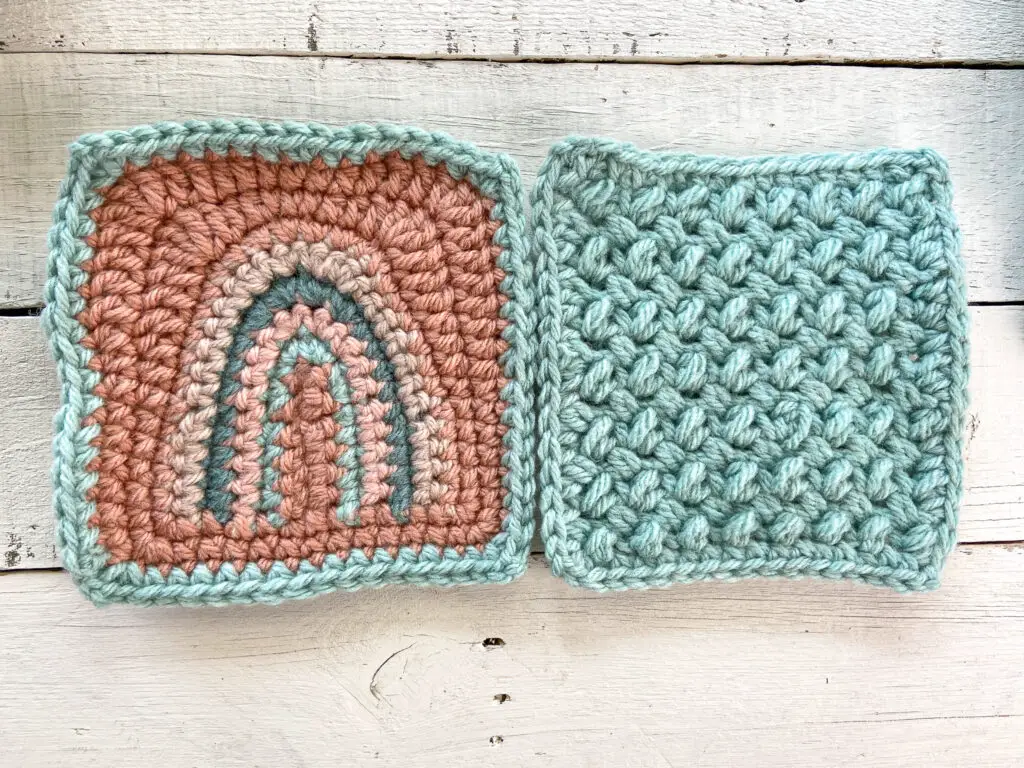
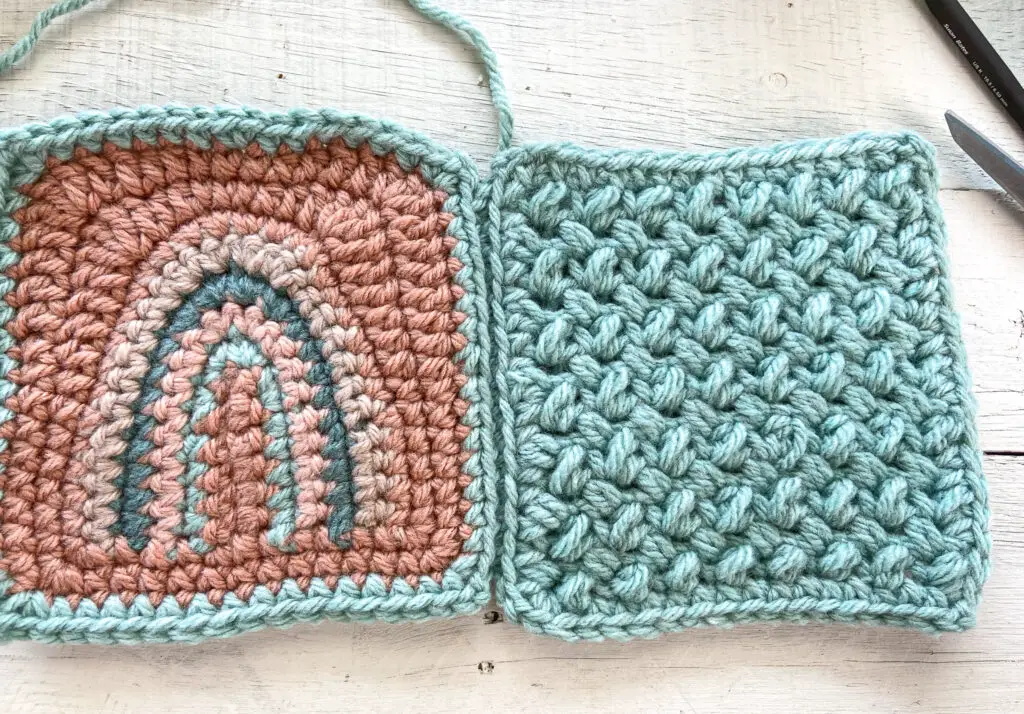
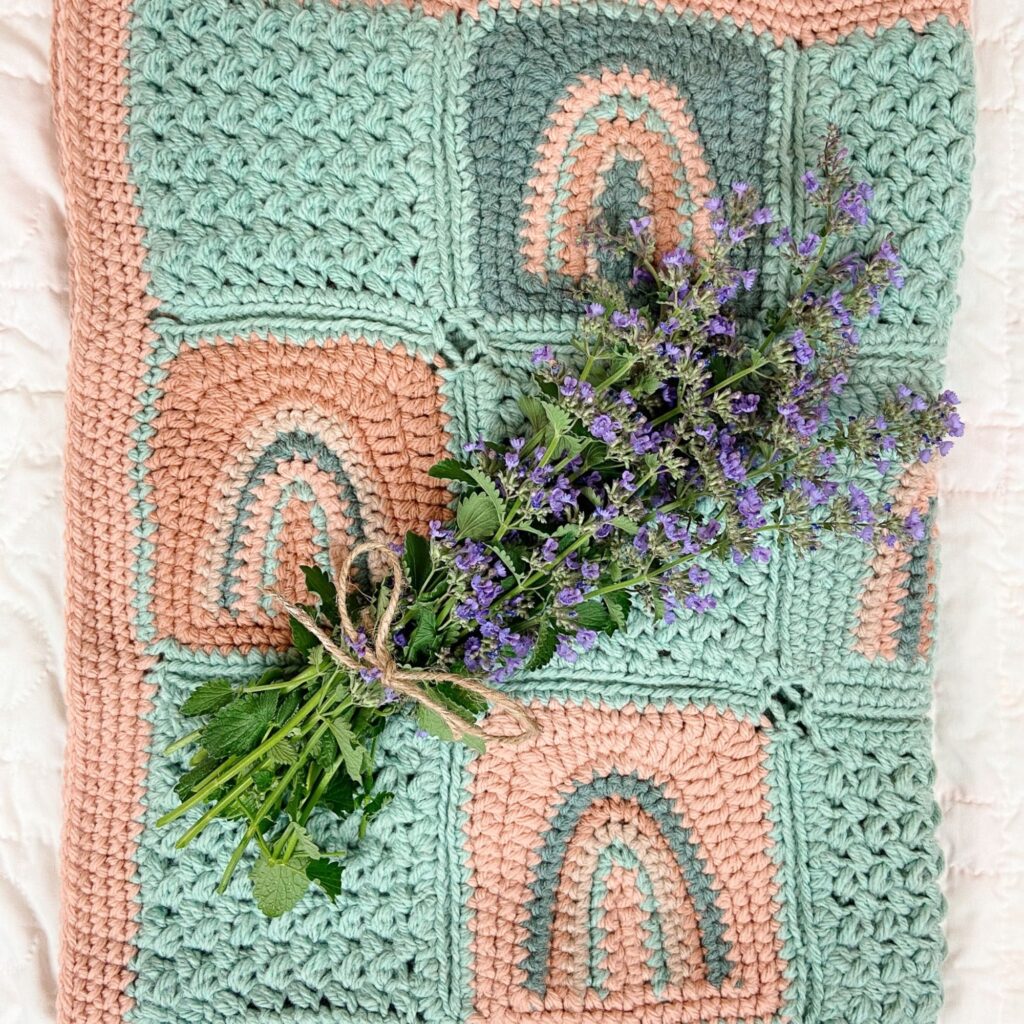
The Rainbow Squares crochet baby blanket is made up of a total of 30 squares – 15 rainbow and 15 solid squares done in the mini bean stitch (Side note: if you’ve followed me for a bit, you could probably guess that this is one of my favorite stitches. I did a whole winter accessories collection using the mini bean stitch!)

I used a basic slip stitch technique to join the squares and then added a simple single crochet boarder to finish it off. It does take some time to join the squares, but thanks to the bulky yarn and the quick-to-bang-out mini bean squares, this crochet baby blanket is actually a fairly fast project.
I rated this pattern at an intermediate level, but don’t let that scare you! An advanced beginner could absolutely tackle it. The rainbow squares are made using basic stitches and simple color changes, and the mini bean squares are easy-peasy once you get going. The assembly can be a little tricky to maneuver when the blanket starts to grow, but it’s really nothing more complicated than slip stitching.
The Materials
While you can use any bulky weight yarn for this crochet baby blanket, I wholeheartedly recommend the gorgeous Hue + Me yarn collection from Lion Brand and Alexandra of Two of Wands. This wool blend yarn (80% wool/20% acrylic) is soft, warm, and comes in an amazing range of colors. The best part (especially when you’re planning to make a rainbow!) is that all of the colors have been curated to coordinate perfectly with one another!
You’ll also need size K crochet hook for this project.
Totally optional, but I definitely recommend blocking this project, so blocking mats, pins and maybe even a steamer are all helpful to have.
Ok, on to the pattern!
Grab a printable, ad-free PDF version of this crochet baby blanket pattern on Etsy or Ravelry.
Rainbow Squares Crochet Baby Blanket Free Pattern
SKILL LEVEL
Intermediate. A variety of stitches and techniques are used. This pattern requires color changes, joining squares, and edging.
MATERIALS
- About 1,600 yards of bulky weight (5) yarn in 5 colors. I used Lion Brand’s Hue + Me collection (80% acrylic/20% wool, 137yds (125m)/4.4oz (125g)), in the following quantities:
- Sea Glass – 6 skeins (I used this for the rainbow squares, the solid squares and as the joining color for all of the squares).
- Rose Water – 2 skeins (this was used for the rainbow squares and for the blanket border).
- Agave – 1 skein (rainbow squares)
- Bellini – 1 skein (rainbow squares)
- Desert – 1 skein (rainbow squares)
- Size K (6.50mm) crochet hook.
- Scissors, Yarn needle
DIMENSIONS
Each square measures approximately 6.5” x 6.5”, and the finished blanket measures 36” x 44”.
GAUGE
- 11 sc x 11 rows = 4” square using single crochet.
- 5.5 MB x 9 rows = 4” square using the mini bean stitch.
NOTES
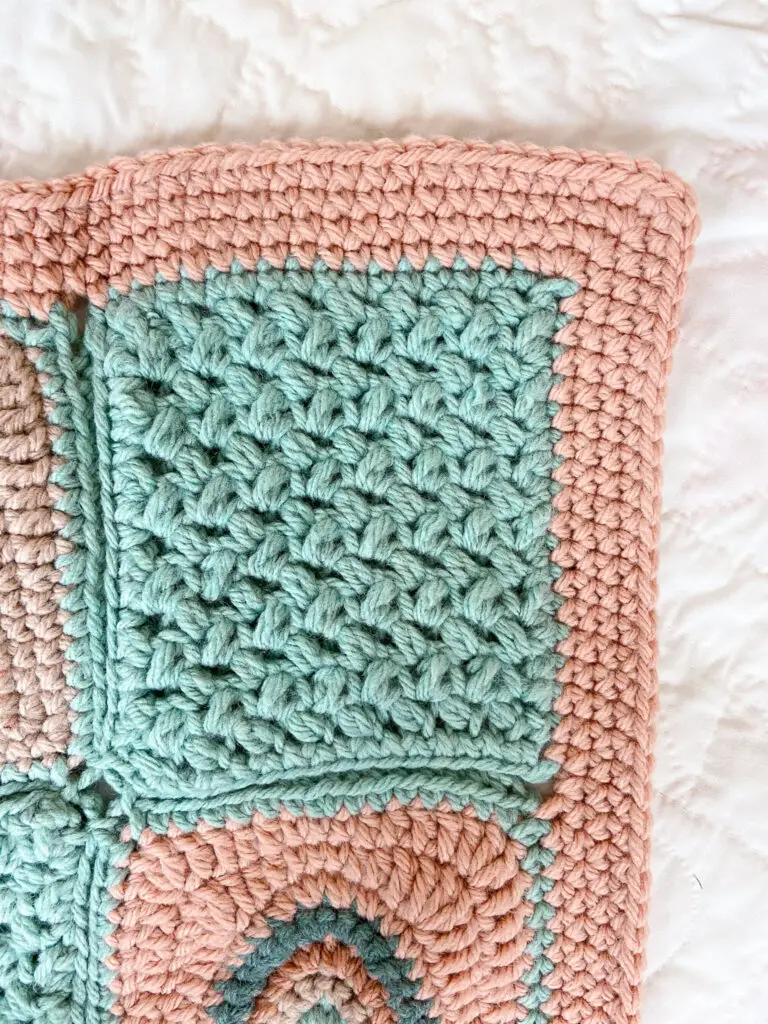
- This baby blanket is made using a total of 30 crochet squares – 15 rainbow squares and 15 solid squares – which are joined using a slip stitch method. A single crochet edge is added after the squares are joined.
- The blanket is reversible (meaning that it is finished on both sides), but due to the seaming technique used, it does look slightly different on each side.
- I recommend blocking the finished blanket to get a nice drape and even edges. You can find a tutorial for wet blocking here.
- All turning chains DO NOT count as stitches.
- All terms are US crochet terminology.
- Abbreviations
- Ch = chain
- Dc = double crochet
- Hdc = half double crochet
- MB = mini bean stitch
- Sc = single crochet
- Sc dec = single crochet decrease
- Sl st = slip stitch
- Sp = space
- St = stitch
- Special stitches:
- Mini Bean (MB) (aka Elizabeth Stitch): Insert hook into next st, yo and pull up a loop, yo and insert hook into same st, yo and pull up a loop (you should now have four loops on your hook), yo and pull through all four loops on hook. Ch 1 to close the stitch. This ch counts as part of the stitch, not a separate chain. See a helpful video tutorial of this stitch here.
PATTERN
Rainbow Squares (make 15):
Note: I used each of the 5 colors as the “main color” for three squares. I then used the remaining 4 colors to make the rainbows for each square.
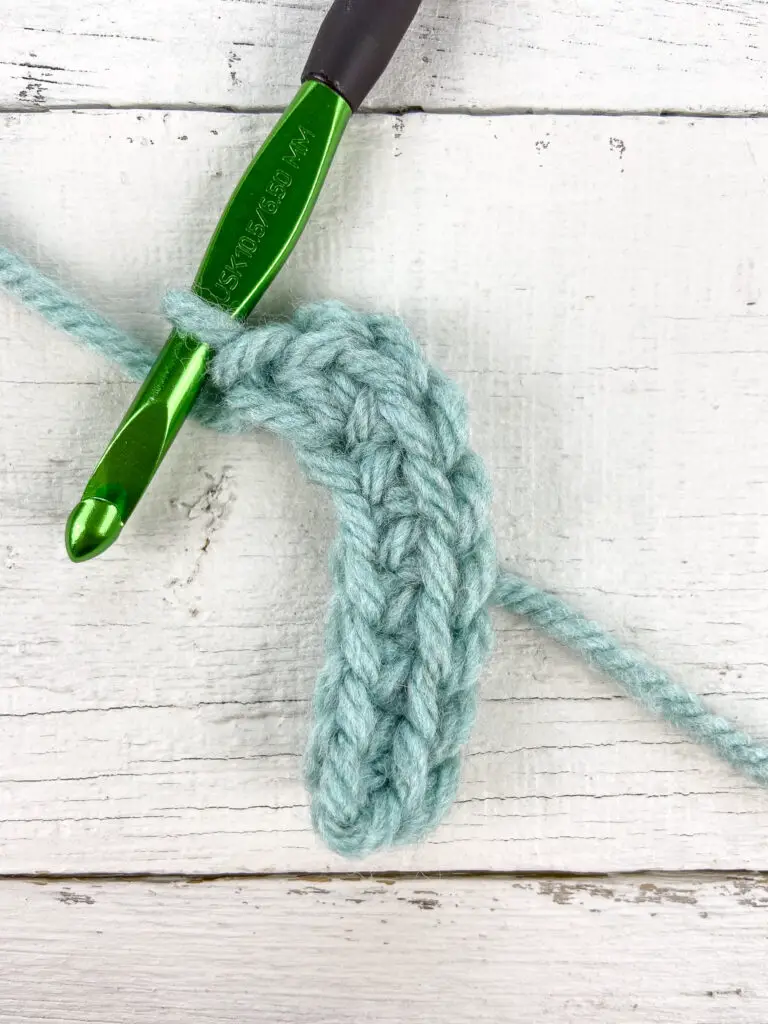
Chain 7 with Main Color (MC).
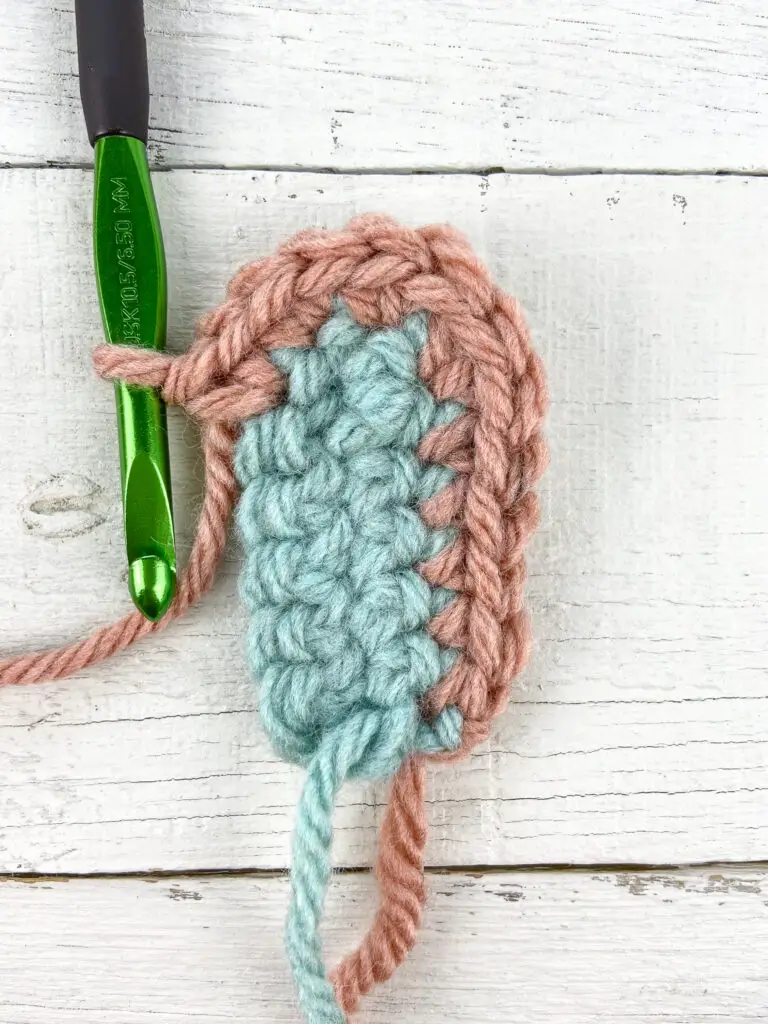
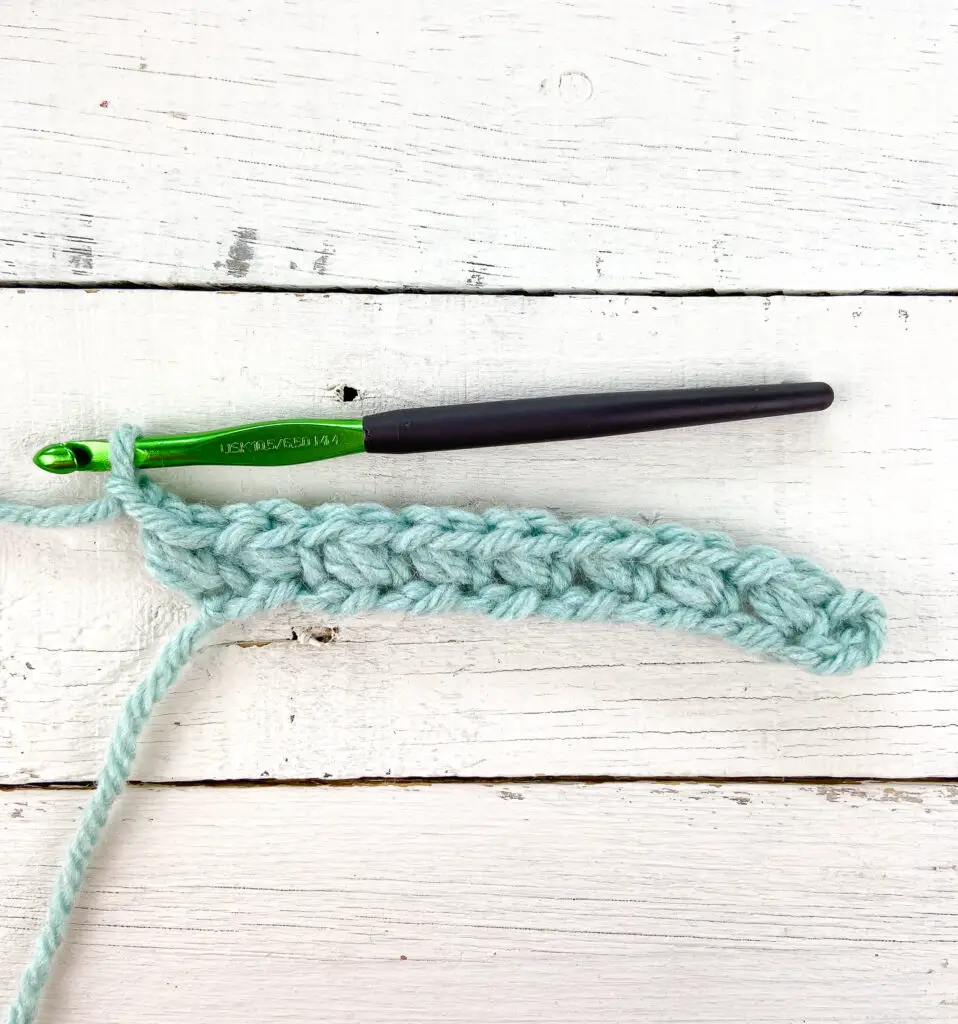
Row 1: 1 sc in the second chain from hook (Tip: work into the back bump of the ch) and in each of the next 4 chs, 4 sc in the last ch,
- Rotate work so you are now working down the other side of the starting chain –
1 sc in the next chain and in each ch until you are back at the starting slip knot. On the last sc, stop with two loops on your hook and pull through with Color A. Cut main color (all tails will be sewn in later). Turn. <14 sc>
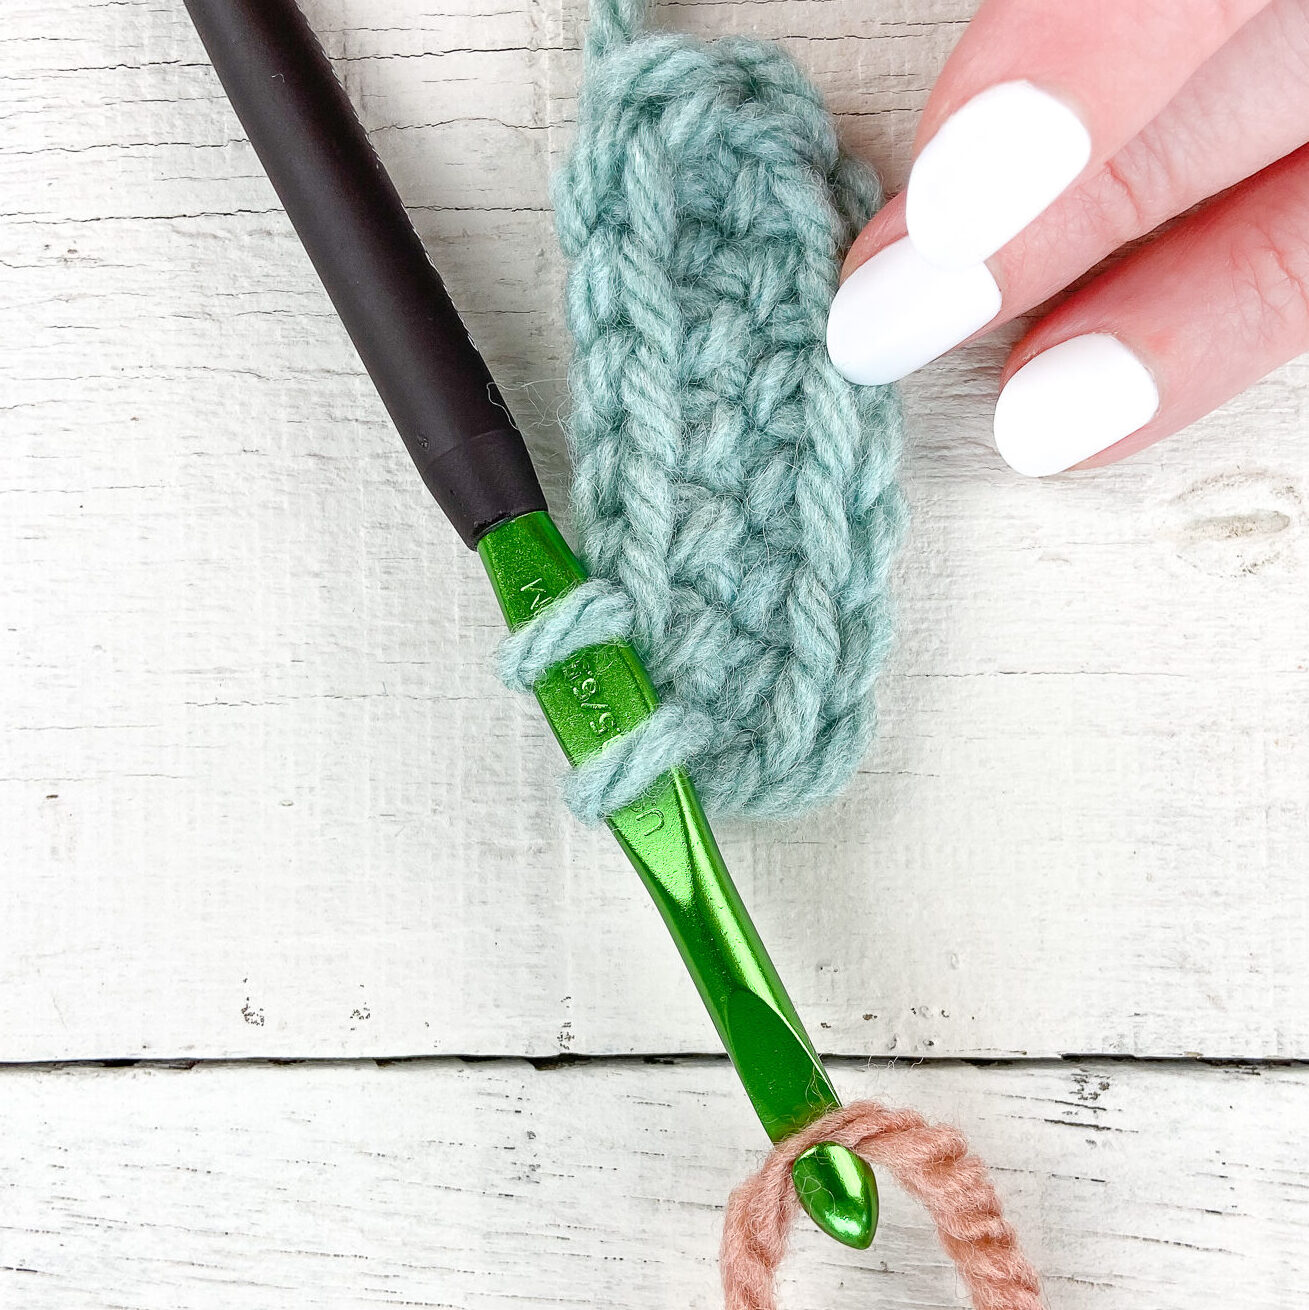
Row 2: (Using Color A) Ch 1, 1 sc in first 5 sts, 2 sc in next 4 sts, 1 sc in last 5 sts. Switch to Color B on the last sc. Turn. <18 sc>
Row 3: (Using Color B) Ch 1, 1 sc in first 7 sts, 2 sc in next 4 sts, 1 sc in last 7 sts. Switch to Color C on the last sc. Turn. <22 sc>
Row 4: (Using Color C) Ch 1, 1 sc in first 9 sts, 2 sc in next 4 sts, 1 sc in last 9 sts. Switch to Color D on the last sc. Turn. <26 sc>
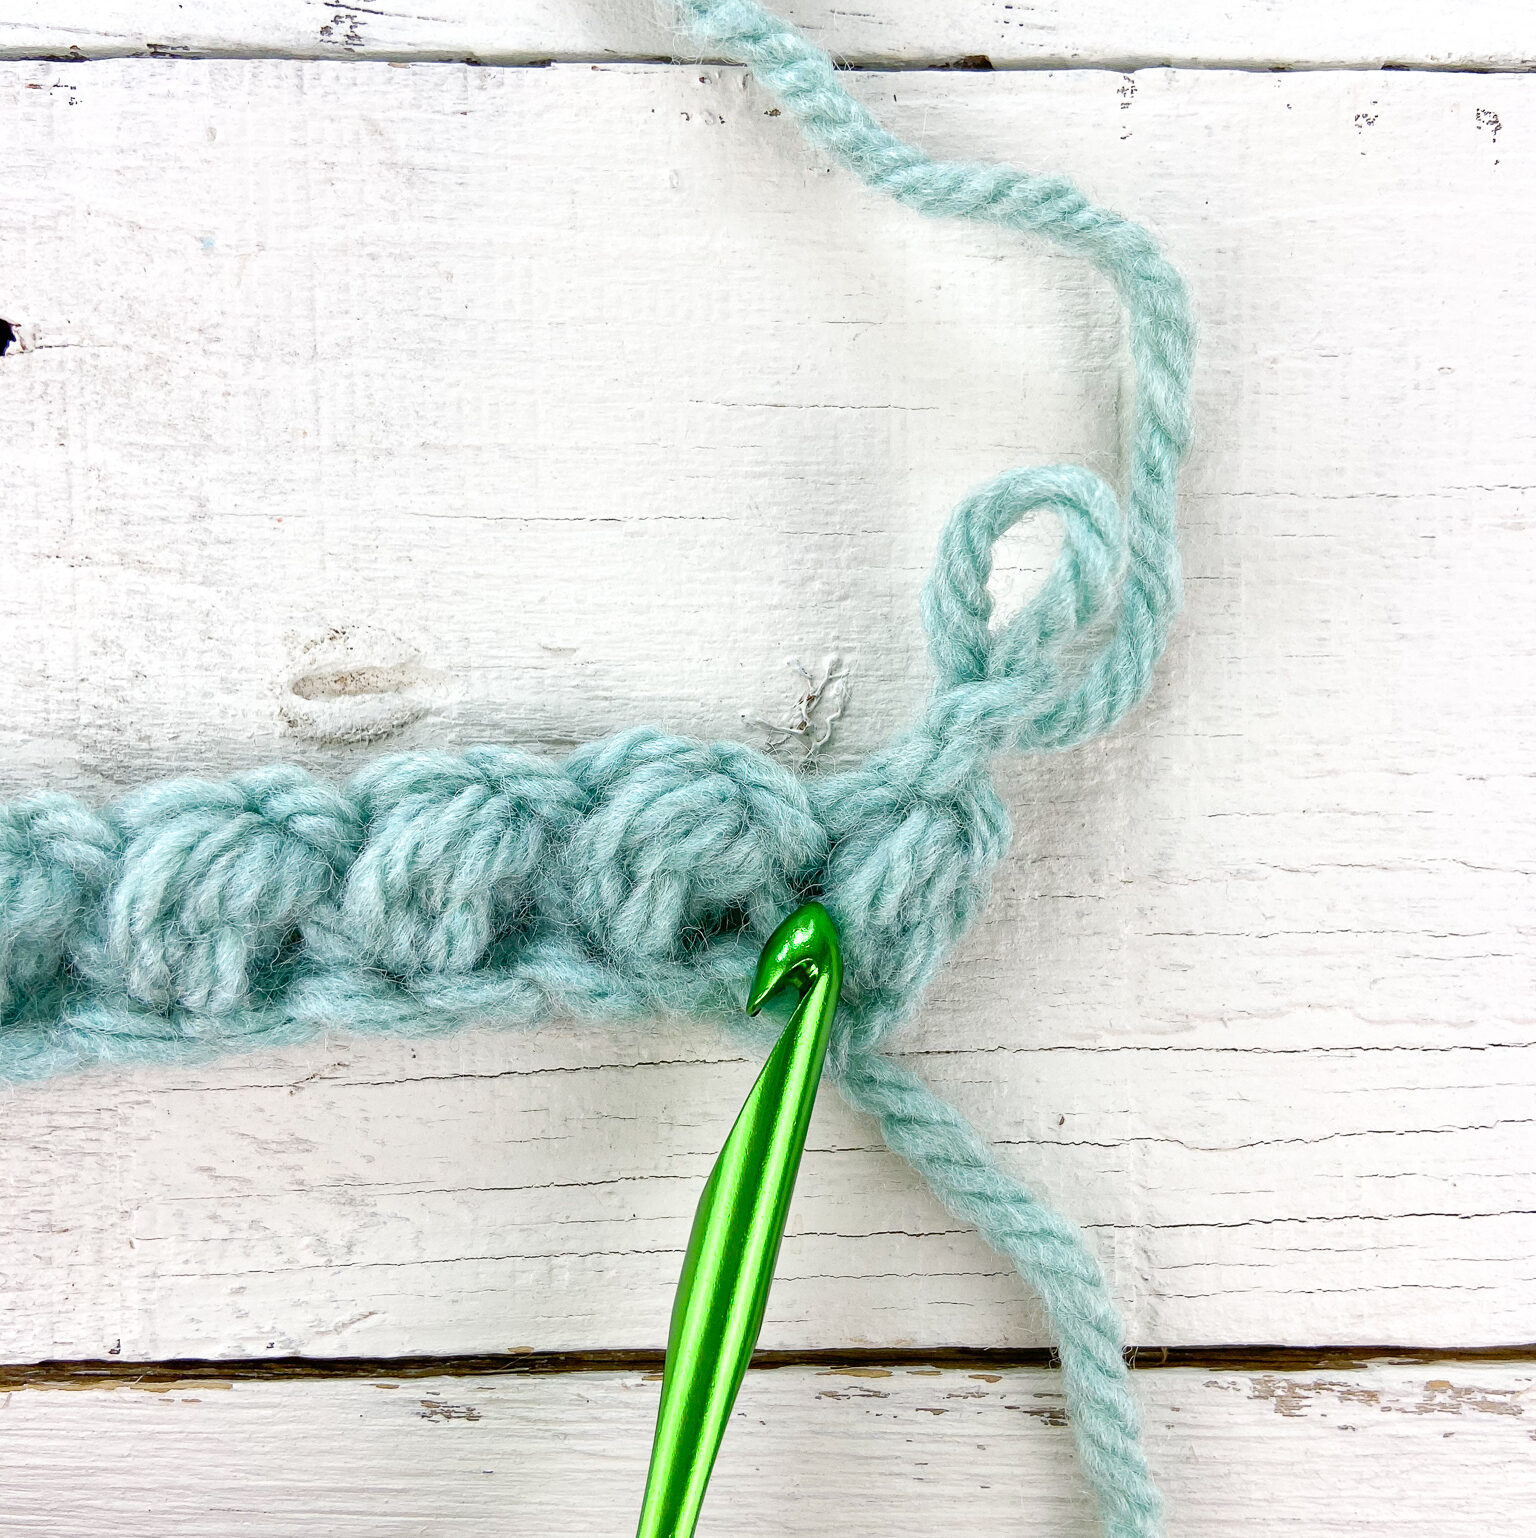
Row 5: (Using Color D) Ch 1, 1 sc in first 11 sts, 2 sc in next 4 sts, 1 sc in last 11 sts. Switch to MC on the last sc. Turn. <30 sc>
Row 6: (Using MC) Ch 1, 1 sc in first 13 sts, 2 sc in next 4 sts, 1 sc in the next 12 sts, 3 sc in the last st (this will form one bottom corner),
- Stop here and weave in all ends before moving on to the next row –
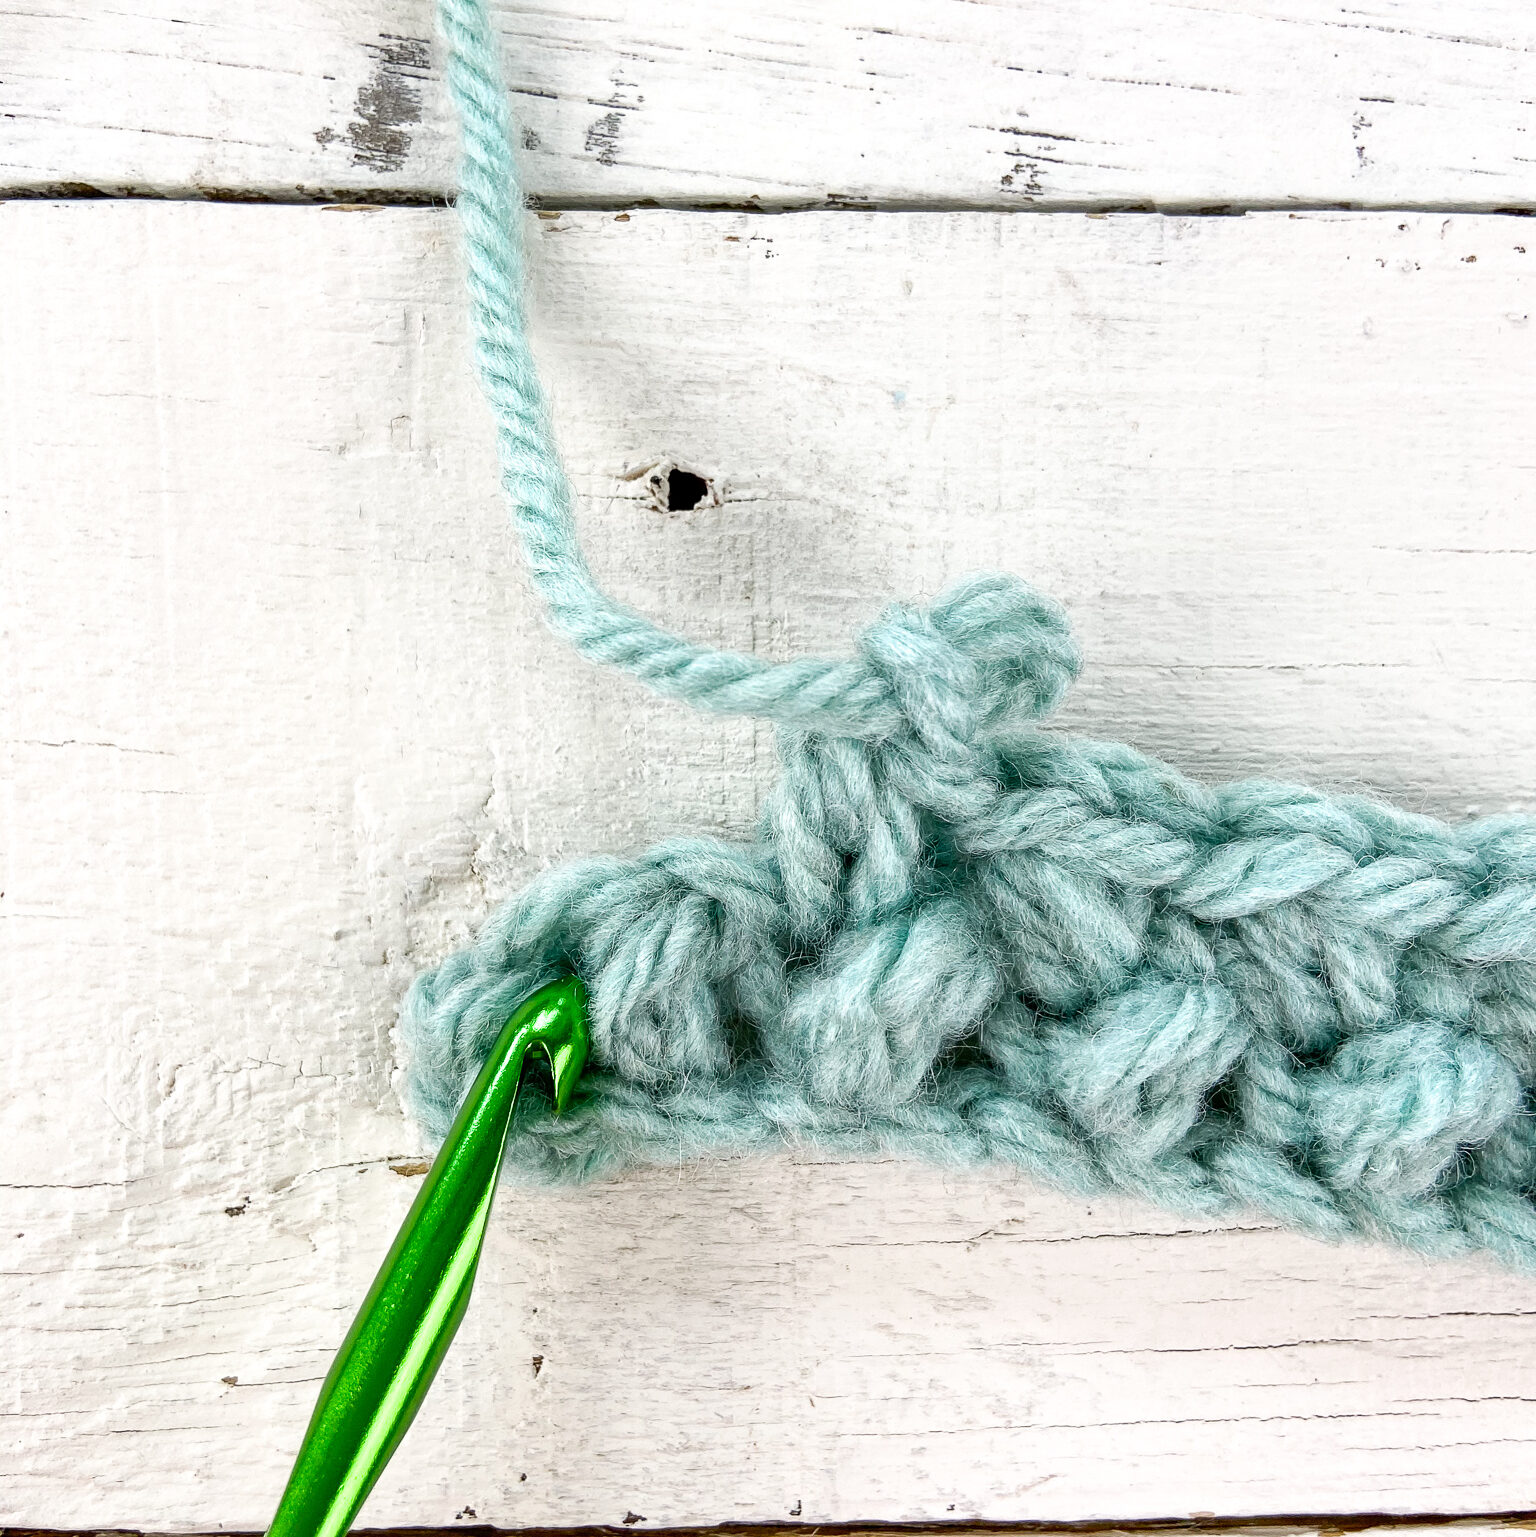
- Rotate work so that you are working across the bottom of the rainbow –
Work 10 sc evenly spaced across the bottom of the rainbow. Do NOT turn. <46 sc>
- Rotate work so that you are working back up the side of the rainbow (you should be back at the start of Row 6) –
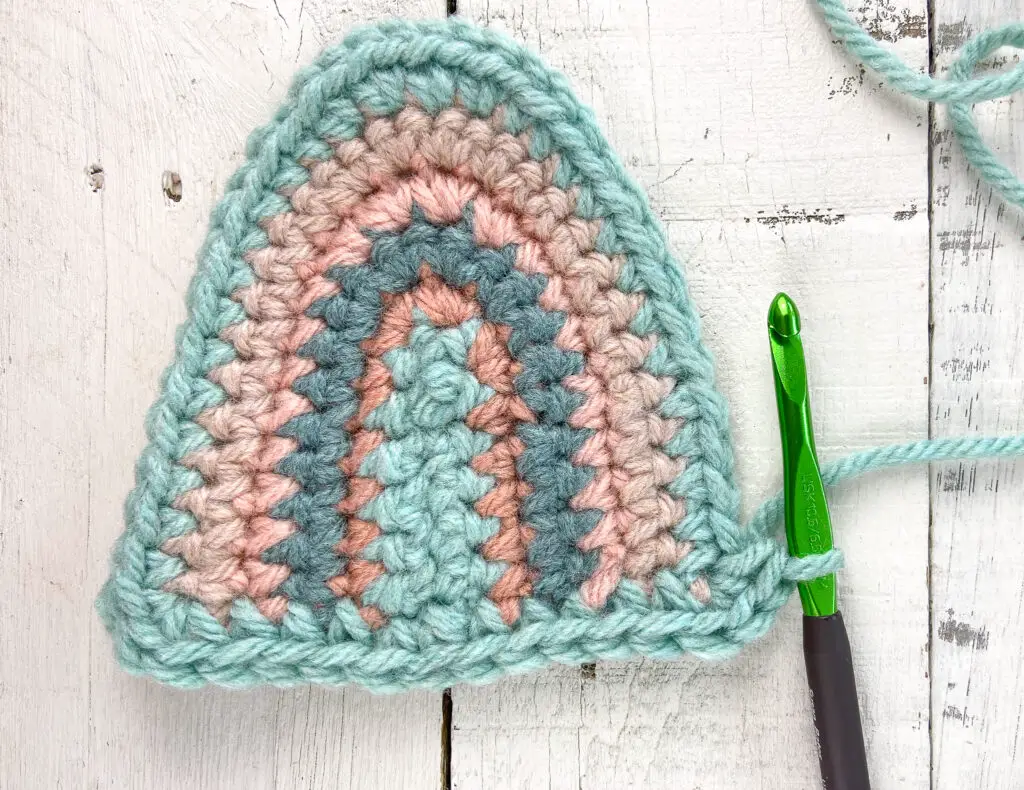
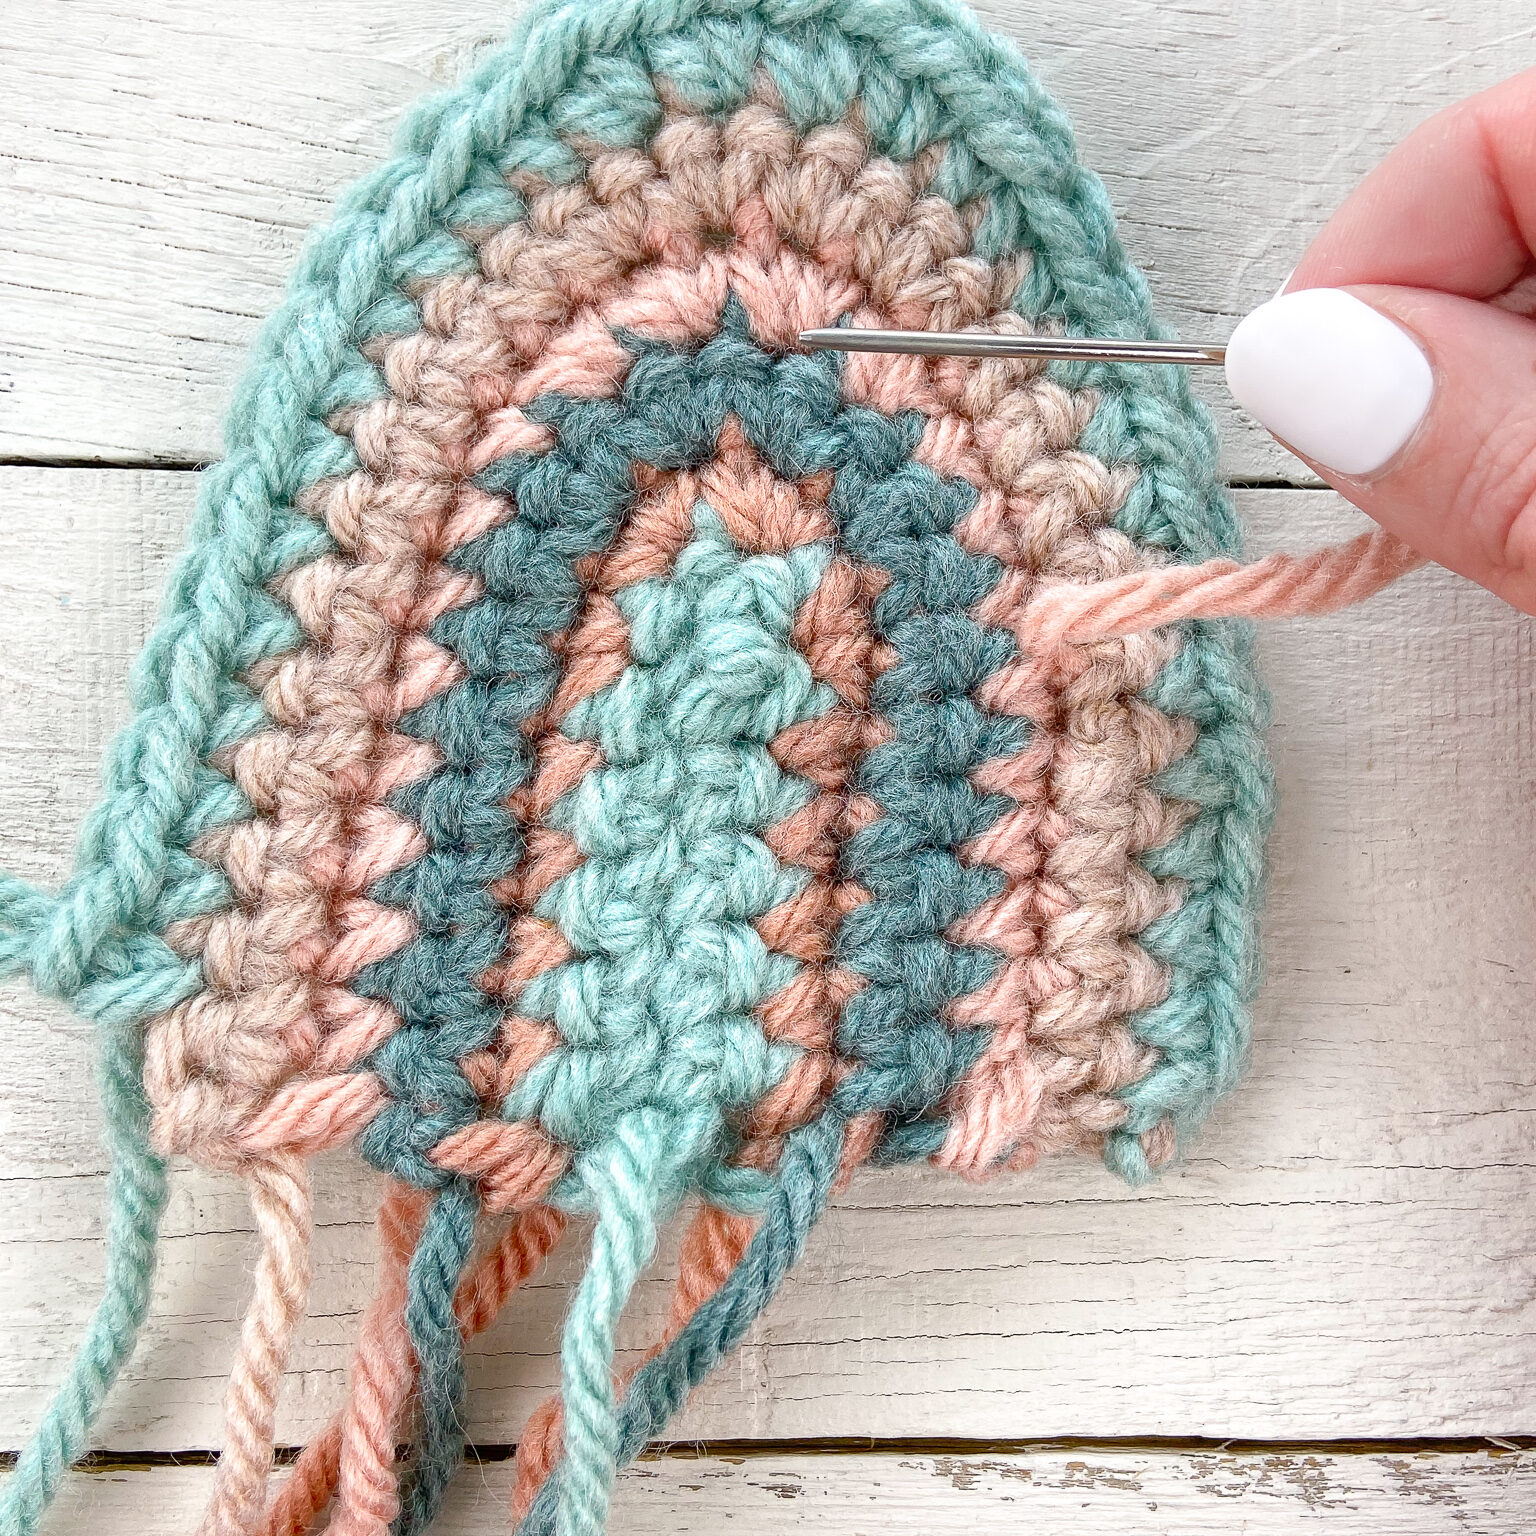
Round 7: (Still using MC) Do NOT ch. Work 3 sc in first st (this will form the other bottom corner), 1 sc in next 5 sts, 1 hdc in next 3 sts, 1 dc in next 3 sts, 3 dc in next st, 1 dc in next st, 1 hdc in next 2 sts, 1 sc in next 3 sts,
1 hdc in next 2 sts, 1 dc in next st, 3 dc in next st, 1 dc in next 3 sts, 1 hdc in next 3 sts, 1 sc in next 5 sts, 3 sc in next st (corner),

- Rotate square to work along the bottom –
1 sc in next 12 sts. Do NOT turn.
- Rotate square so that you are working up the side again –
Round 8: (Still using MC) Do NOT ch. Work 3 sc in first st , 1 sc in next 6 sts, 1 hdc in next 3 sts, 1 dc in next 4 sts, 3 dc in next st, 1 dc in next 2 sts, 1 hdc in next 2 sts, 1 sc in next 3 sts,
1 hdc in next 2 sts, 1 dc in next 2 sts, 3 dc in next st, 1 dc in next 4 sts, 1 hdc in next 3 sts, 1 sc in next 6 sts, pulling through with the joining color (JC) on the last sc.
- The next Round will even out the sides of each square and define the corners to make assembly easier. –
Round 9: With JC, ch 1, (1 sc, ch 2, 1 sc) in next st, 1 sc in next 14 sts, (1 sc, ch 2, 1 sc) in next st, 1 sc in next 6 sts, sec dec over next two sts, 1 sc in next 7 sts, (1 sc, ch 2, 1 sc) in next st, 1 sc in next 6 sts, 2 sc in next st, 1 sc in next 6 sts, (1 sc, ch 2, 1 sc), 1 sc in the next 14 sts, sl st to the first st of the row. Fasten off and weave in ends. Rainbow square complete.
Note: due to the bulky yarn and tight stitch, these squares can pucker/curl a bit. Blocking will correct this. You can block each square individually if you prefer, but I found that blocking the finished blanket was sufficient.
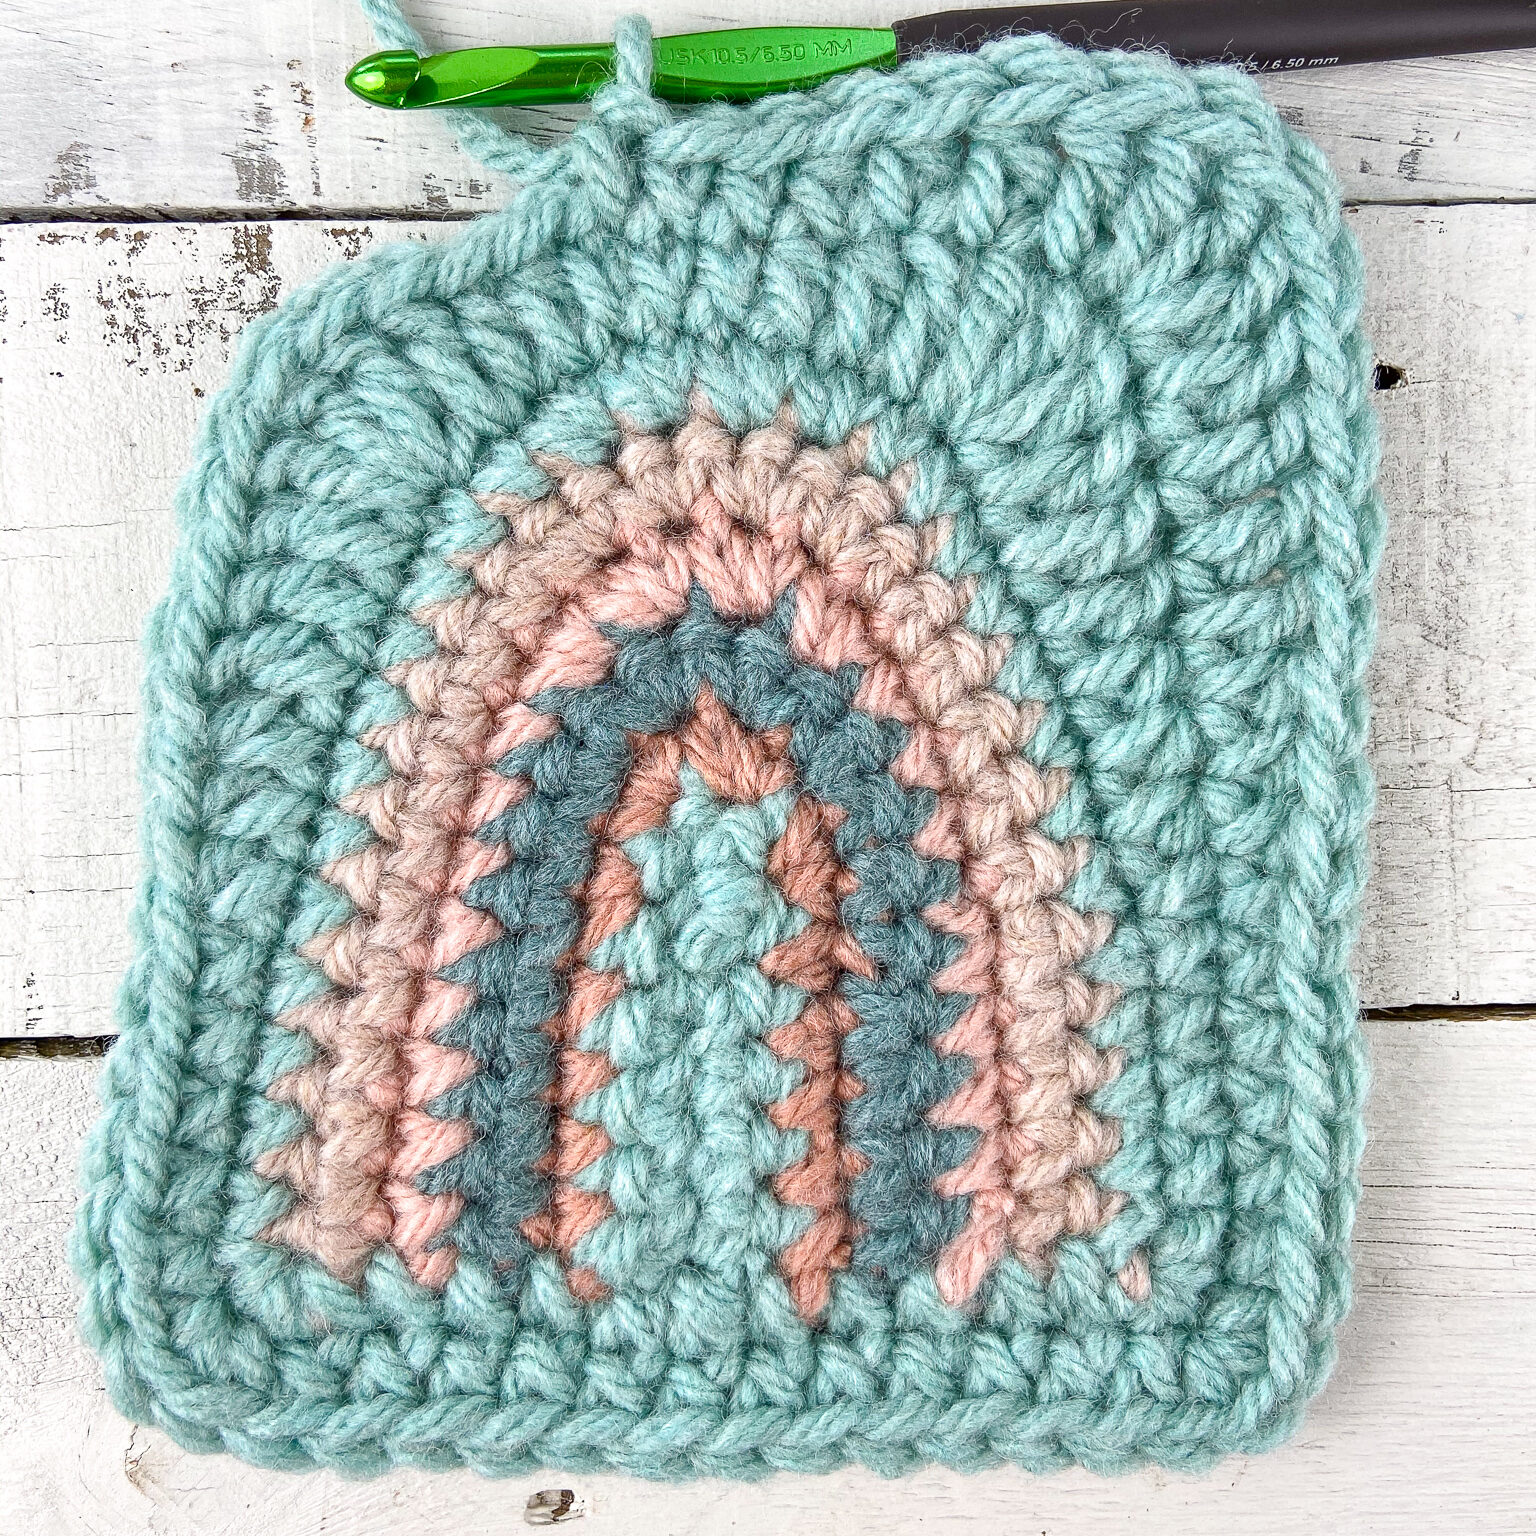
Mini Bean Solid Squares (make 15)
With color of choice, chain 17.
Row 1: MB in the 3rd ch from hook, [sk next ch, MB in next], repeat inside [ ] across chain, ending with a MB in last ch. Turn. <8 MB>
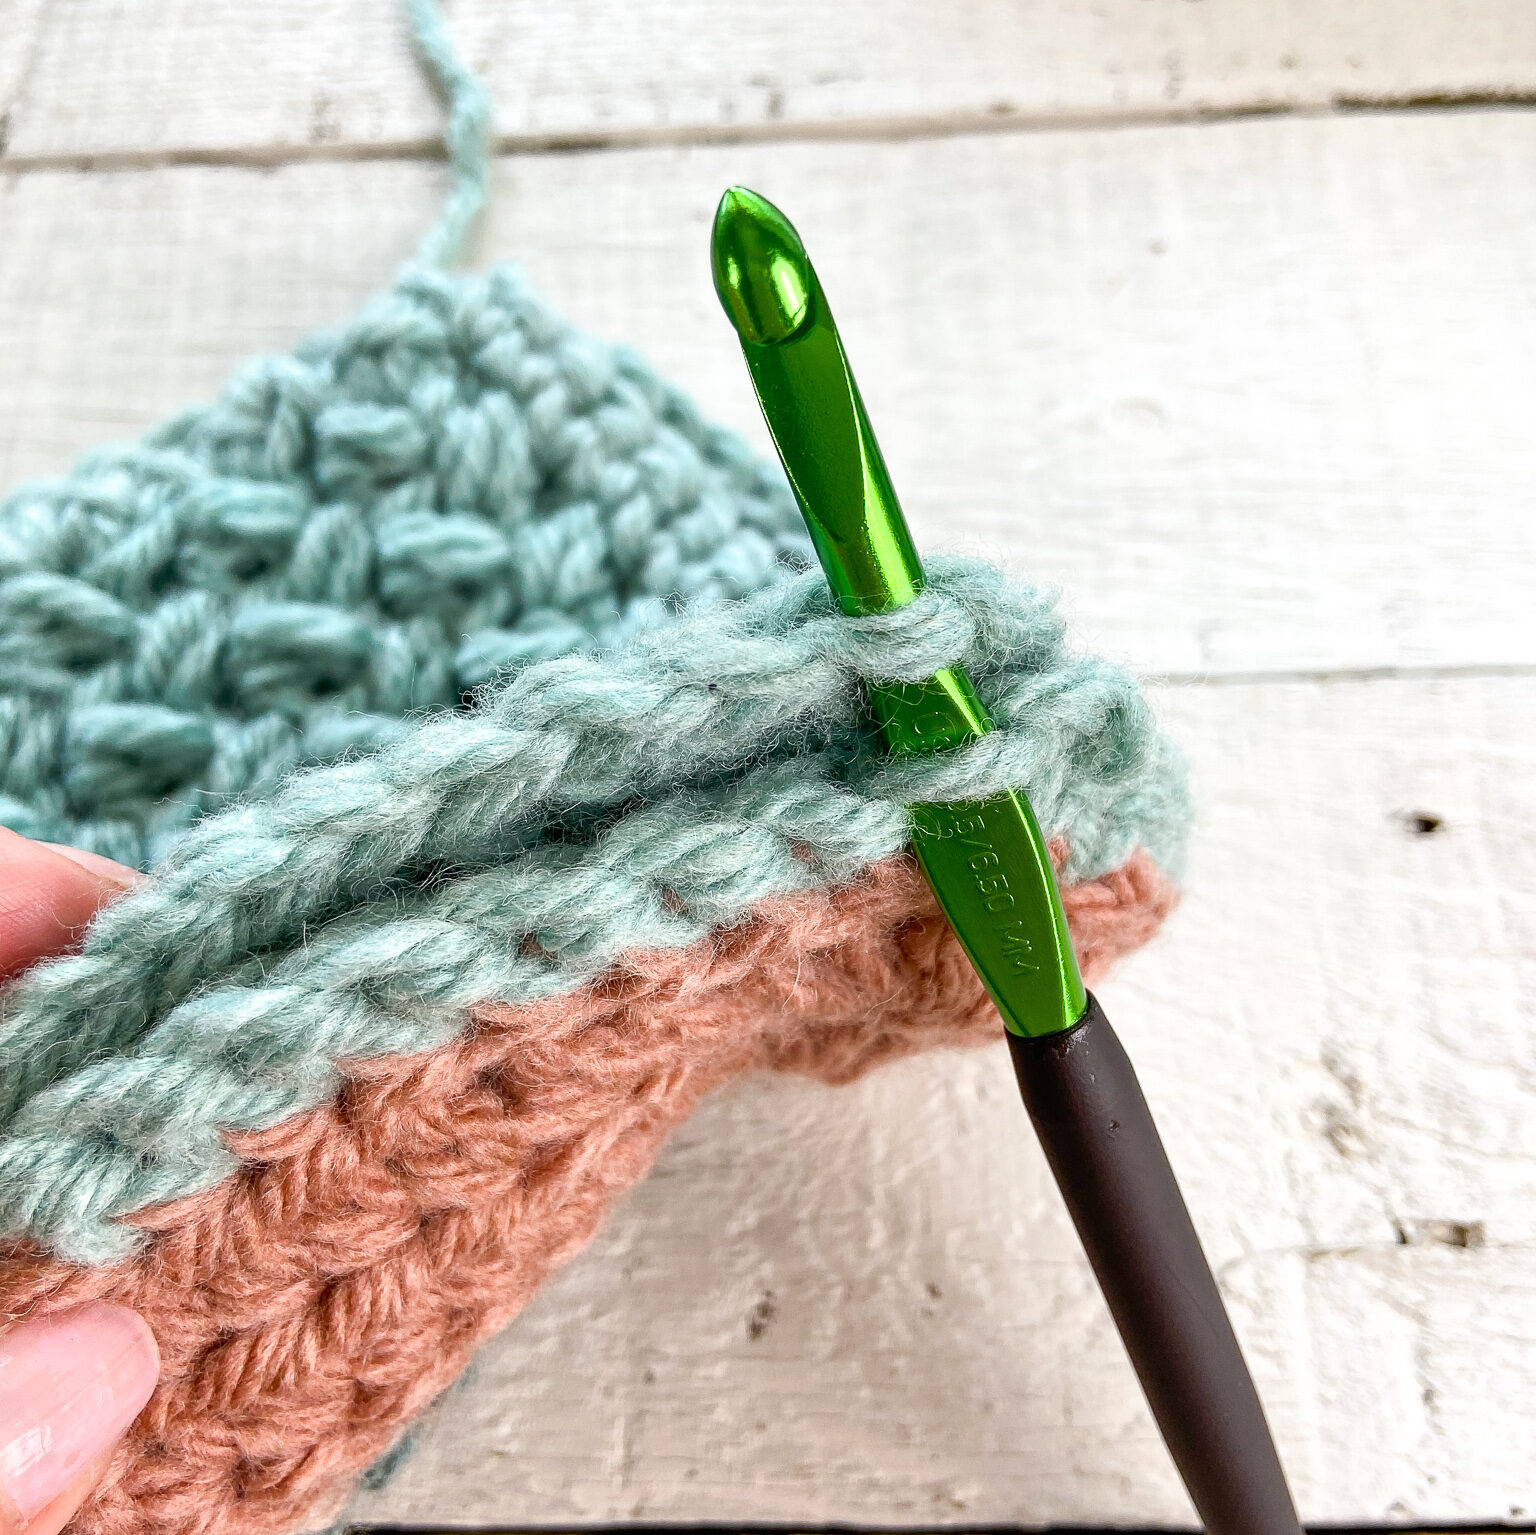
Row 2: Ch 1 (this will look like a ch 2 because of the ch 1 used to close the last MB). MB in the first stitch (You will insert your hook into the little “V” that is naturally formed on the side of the MB in the row below. See picture for help with where to insert your hook),
and MB in each st across the row. The final MB should be worked in the top of the last MB from the row below (see picture). Turn. <8 MB>
Rows 3 – 13: Repeat Row 2. At the end of Row 13, rotate work so you will be working down the sides of the mini bean rows.
- The next Round will even out the sides of each square and define the corners to make assembly easier. –
Round 14: Ch 1, evenly space 14 scs down the sides of the rows, ( I tried to work these stitches in the natural spaces formed by the MB stitches, but occasionally I had to work into the MB stitch itself in order to space the stitches evenly.),
(1 sc, ch 2, 1 sc) in the corner, rotate to work across the bottom, 1 sc in the next 14 sts (I worked one st in the top of the MB and one in the space in between sts), (1 sc, ch 2, 1 sc) in the next st,
rotate piece to work back up the sides of the MB rows and evenly space 14 scs along this side, (1 sc, ch 2, 1 sc) in the next st, 1 sc in the next 14 sts, (1 sc, ch 2, 1 sc) in the last st, sl to the first sc of the round to join. Fasten off and weave in ends. Solid square complete.
Assembly:
Arrange your squares in an alternating pattern of Rainbow Squares and Solid Squares in a 6 x 5 layout.
I used a basic slip stitch method for joining the squares (see a video here), but feel free to use any joining method you prefer. Some other options for joining are a flat slip stitch (video here), join-as-you-go (video here) or a simple mattress stitch (video here). For the slip stitch method I used, you will:
- Sandwich the two squares to be joined one on top of the other with the right sides facing in. You will join one side at a time.
- Attach JC yarn at one corner (in the ch 2-sp) with a sl st, being sure to sl st through both squares.
- Insert hook under the front loop of the square closest to you and the back loop of the square farthest from you and sl st for all stitches across this side.
- Work a sl st in the second corner (in the ch 2-sp) and fasten off. Weave in ends.
- Continue joining the squares in this manner until all squares are attached. It can be a little tricky to maneuver the inner squares of the blanket, but the process is the same.
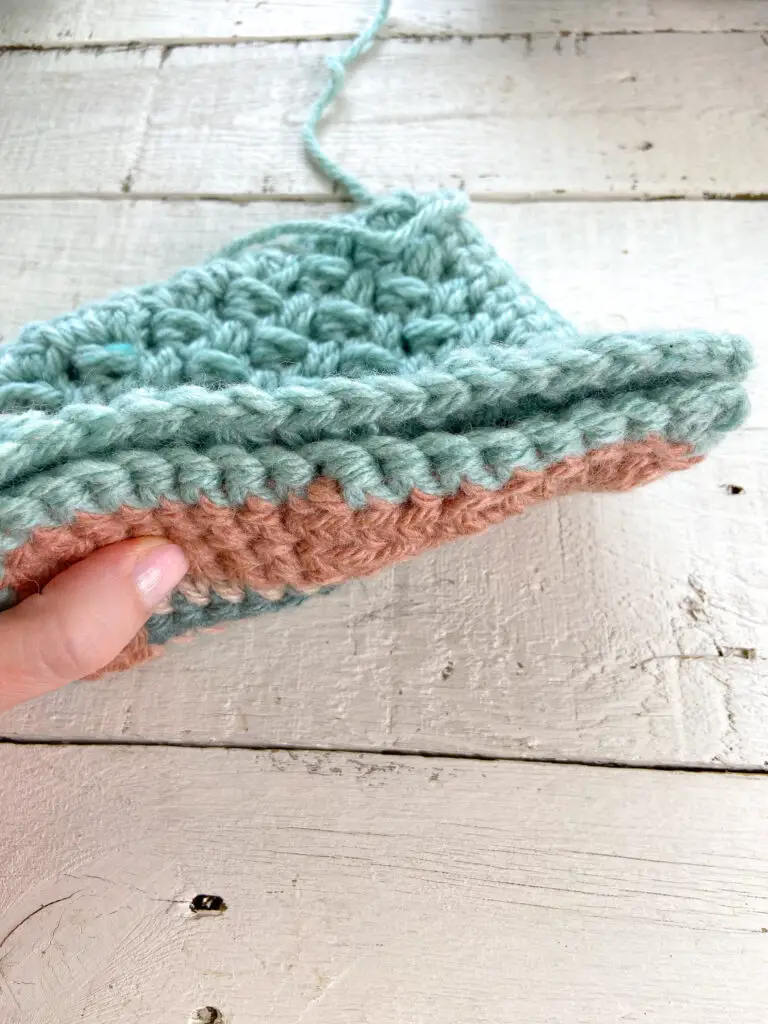
Edging:
Round 1: With the right side of the blanket facing you, attach yarn (in your color of choice) with a slip stitch at one corner. Ch 1 and work a single crochet in each stitch down the first side. Where two squares join, work a sc in the corner of each square. At each blanket corner, work 3 scs in the corner stitch. Continue single crocheting around until you get back to the first stitch. Sl st to the first stitch of the round to join. Do not turn.
Rounds 2 – 4: Ch 1, 1 sc in each st around, working 3 sc in each corner st. Sl st to the first st of the round to join. Do not turn. Fasten off at the end of Round 4 and weave in ends.
I recommend steam or wet blocking this blanket to smooth out any unevenness and you’re done! I hope you love your new blanket!
I hope you enjoyed this pattern! Tag me on Instagram @theknottednest and use the hashtag #rainbowbabyblanket to share your blanket! Find more project ideas in the Patterns section here on the blog.
Happy making,


One Comment
Pingback: