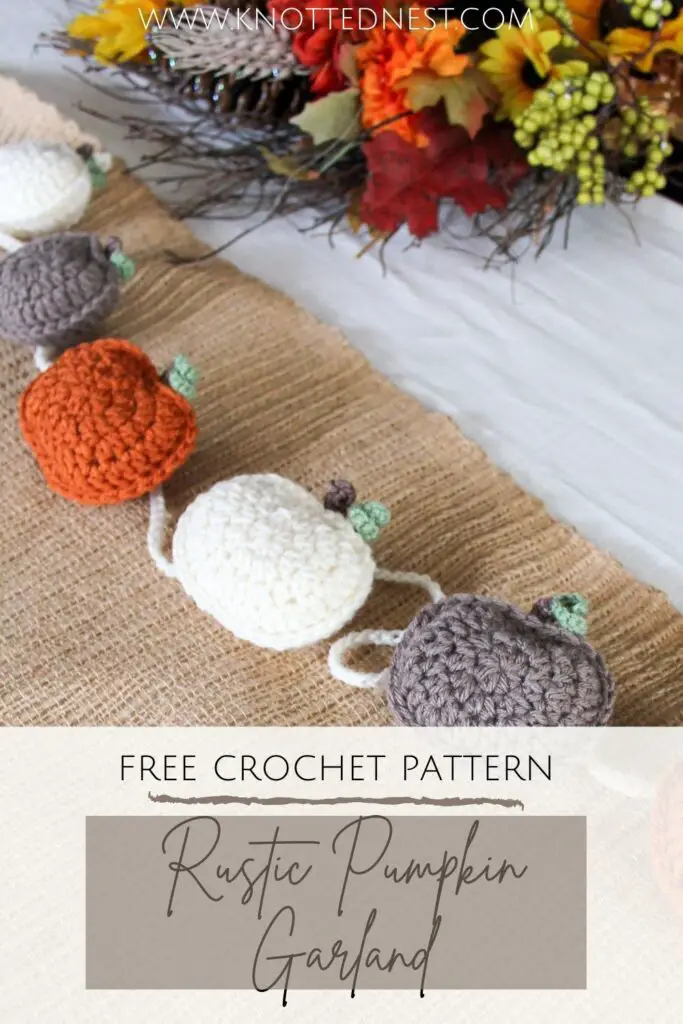
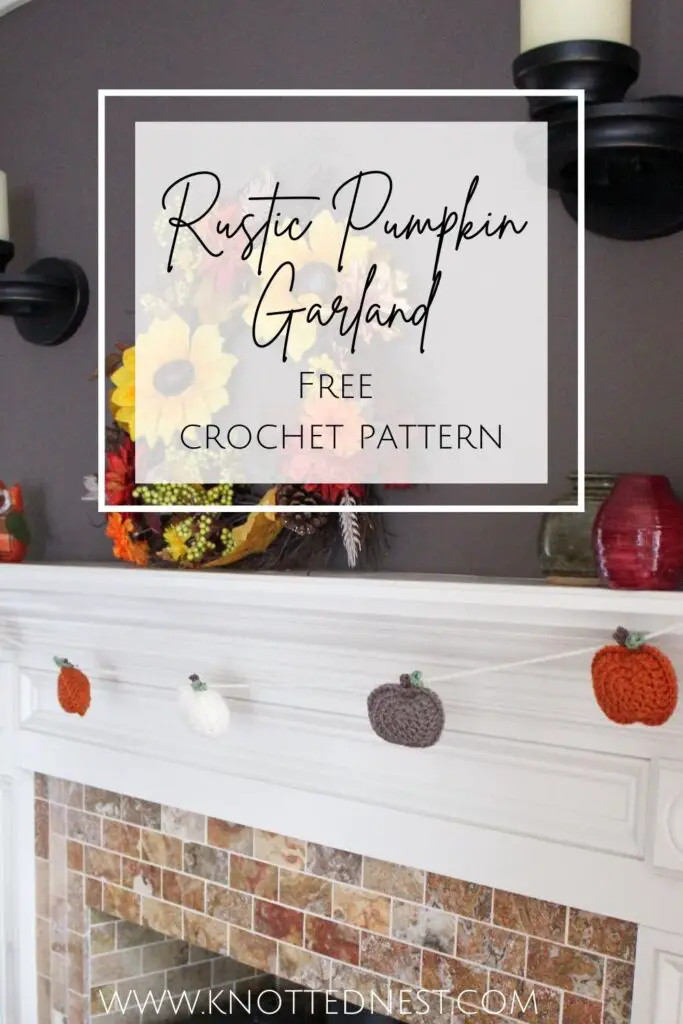
Rustic Crochet Pumpkin Garland Free Crochet Pattern
An easy fall decoration that you can use in a million different ways, my Rustic Crochet Pumpkin Garland, is a free pattern here on the blog! Read through my inspiration and decor suggestions or scroll on down for the free pattern.
The Inspiration
I am always looking for ways to incorporate crochet into my home decor. One of my favorite ways to work it in is with seasonal inspired crochet projects! Sooo, as the weather turns cooler here in upstate NY, I am jumping on the PUMPKIN bandwagon to up the fall-factor in our house.
This pattern was inspired by the Easter Bunny Garland pattern that I designed last spring. This rustic crochet pumpkin garland is made in the same 2D style (two flat panels, worked in the round, then joined and lightly stuffed), making it a fast and easy way to add some fall coziness to your home!
Now I’m thinking I might have to come up with a new crochet garland for every season! Maybe Christmas trees or snowmen for winter? Watermelon slices for summer? The wheels are turnin’!
UPDATE! I leaned waaaay into the crochet garland idea and I now have garlands for every season! You can check them all out in the Garlands section of my free patterns here on the blog!

Pin it for later!
Decor Ideas
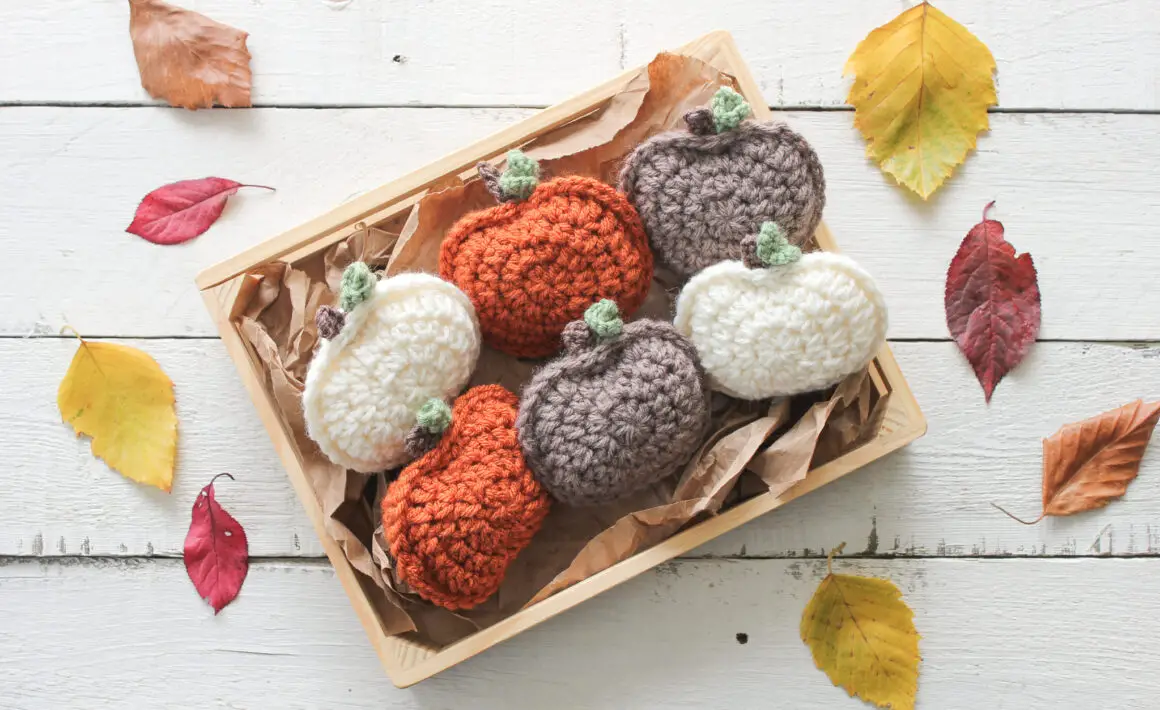
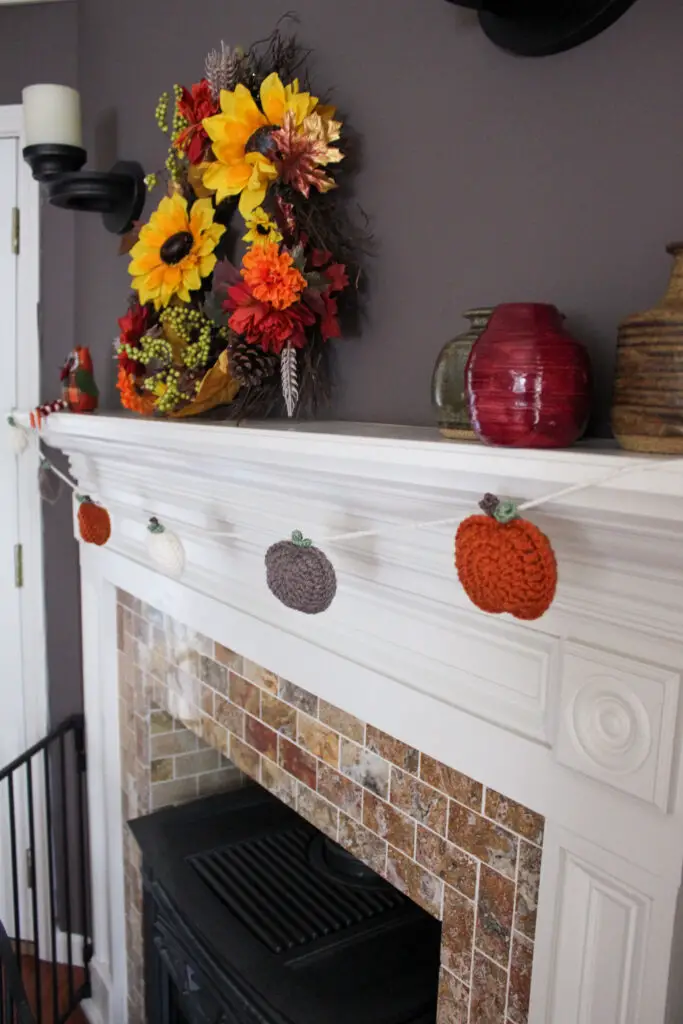
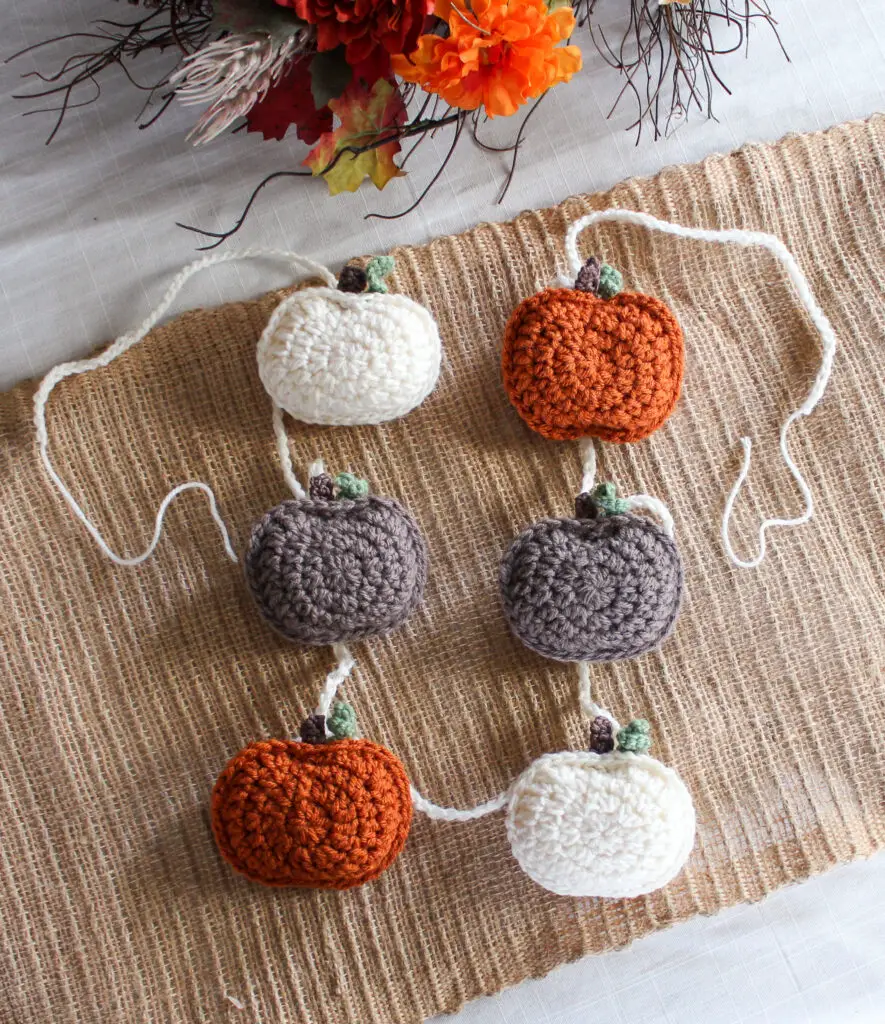
Since these cute pumpkins are fast and easy to make (AND only take a small amount of scrap yarn each!), you can whip up several to string together as a festive fall crochet pumpkin garland (instruction included in the pattern below).
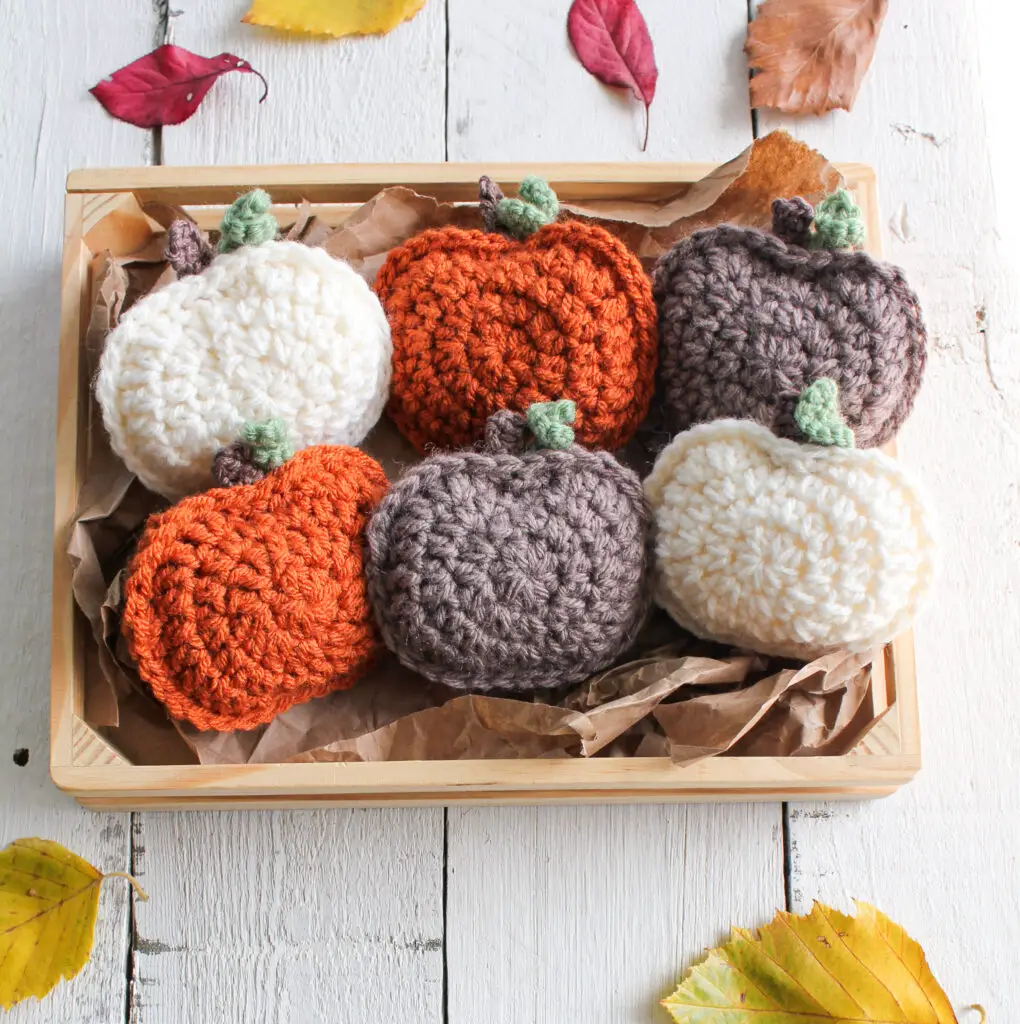
I also think they would look adorable arranged in a fall basket with gourds and leaves….
Or, when dinner parties are a thing again, how sweet would these pumpkins look as part of a place setting? Maybe with a little name tag added for each guest? Perfect for the Thanksgiving table! Find the free pattern below!
Find an ad-free, printable PDF of this pattern on Etsy and Ravelry!
Rustic Crochet Pumpkin Garland Pattern
SKILL LEVEL
Easy – Level 2. This pattern is beginner-friendly, but does require some knowledge of basic stitches and pattern reading.
MATERIALS
- Approximately 30 yards per pumpkin of worsted weight cotton yarn. For the pumpkin body, I used WeCrochet’s Brava Worsted yarn in Persimmon and Cream (also used for garland chain) and Lion Brands’s Pound of Love in Taupe. For the stems, I used Lion Brand 24/7 cotton in cafe au lait. For the vine spirals, I used Brava Worsted in Peapod.
- Size H (5.0 mm) hook (pumpkin body), D (3.125mm) hook (stem + spiral), and G (4.25) hook (garland chain).
- Fiber fill or other stuffing material
- Scissors, yarn needle
DIMENSIONS
Each pumpkin measures about 3.75” x 3” and finished garland (as written) measures about 68”.
GAUGE
Gauge is not super important, but my circle measured 2.5” after Round 3.
NOTES
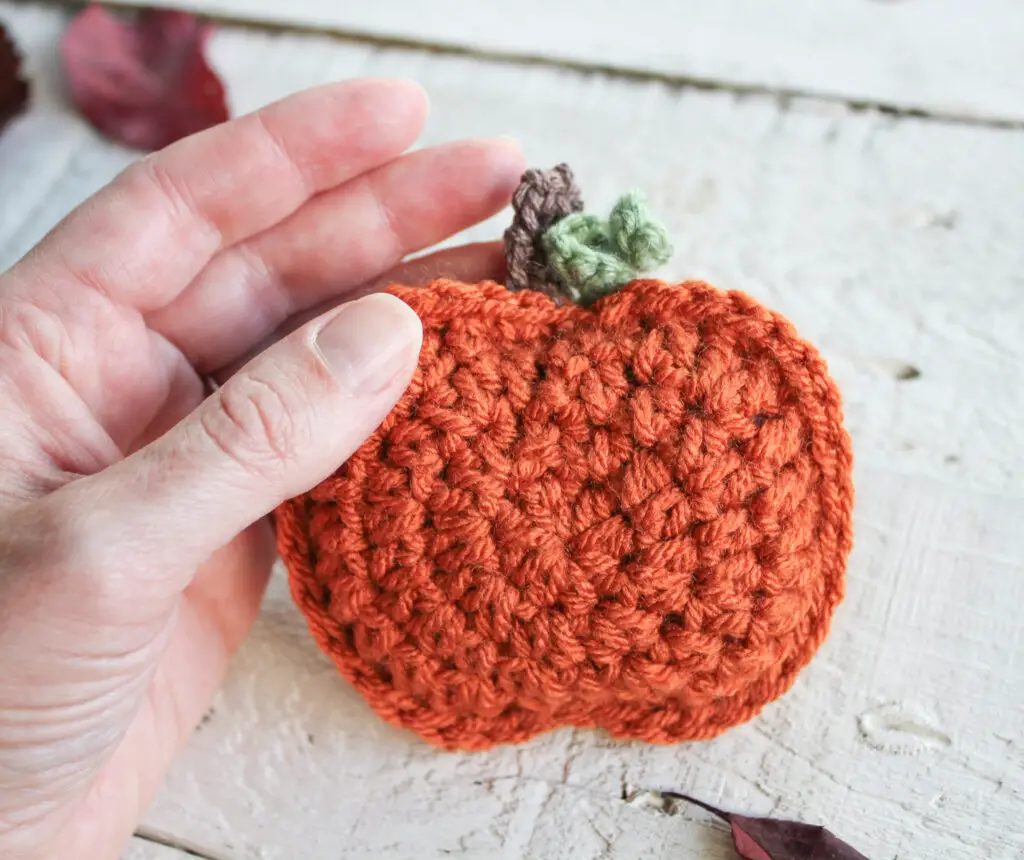
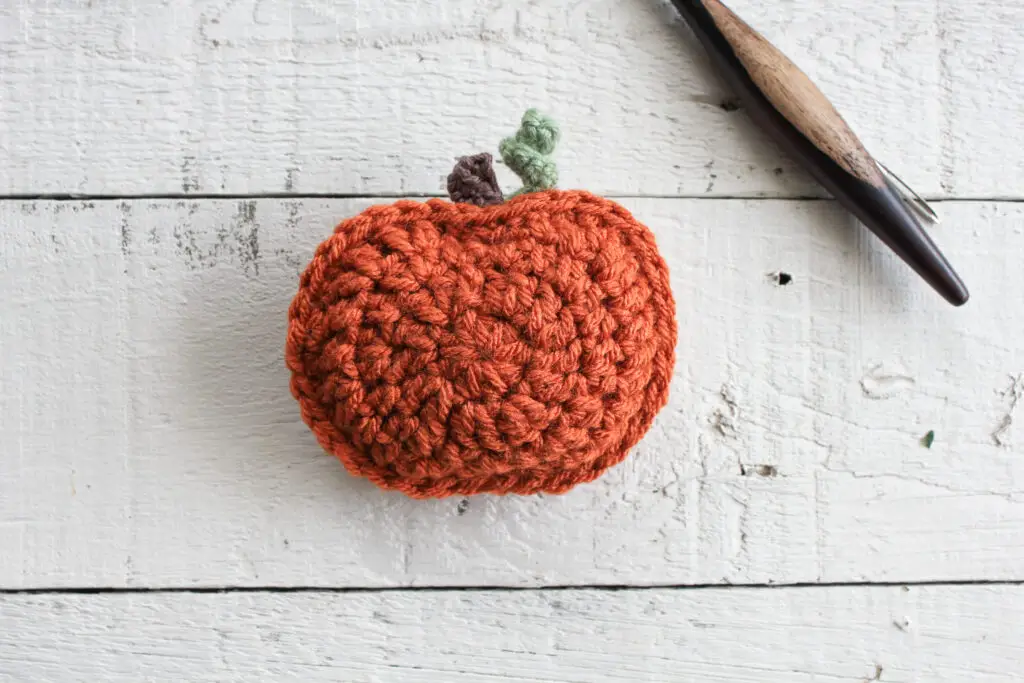
- The pumpkins are made of two flat panels, worked in the round, lightly stuffed and stitched together. The stem and vine spiral are sewn on.
- Pattern written in US terms.
- The ch 2 at the beginning of each round of the pumpkin body does NOT count as a stitch.
Abbreviations
- ch = chain
- dc = double crochet
- hdc = half double crochet
- sc = single crochet
- sl st = slip stitch
- st = stitch
PATTERN
Pumpkin Body Panel (Make 2 per pumpkin)
(using orange, taupe, cream or pumpkin color of choice and size H hook)
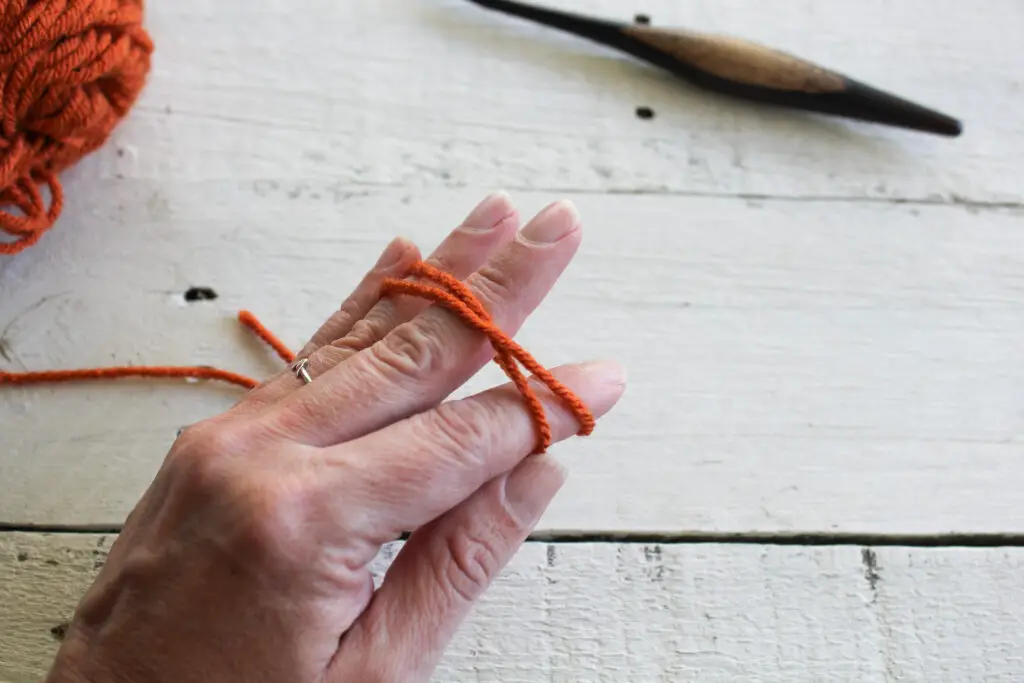
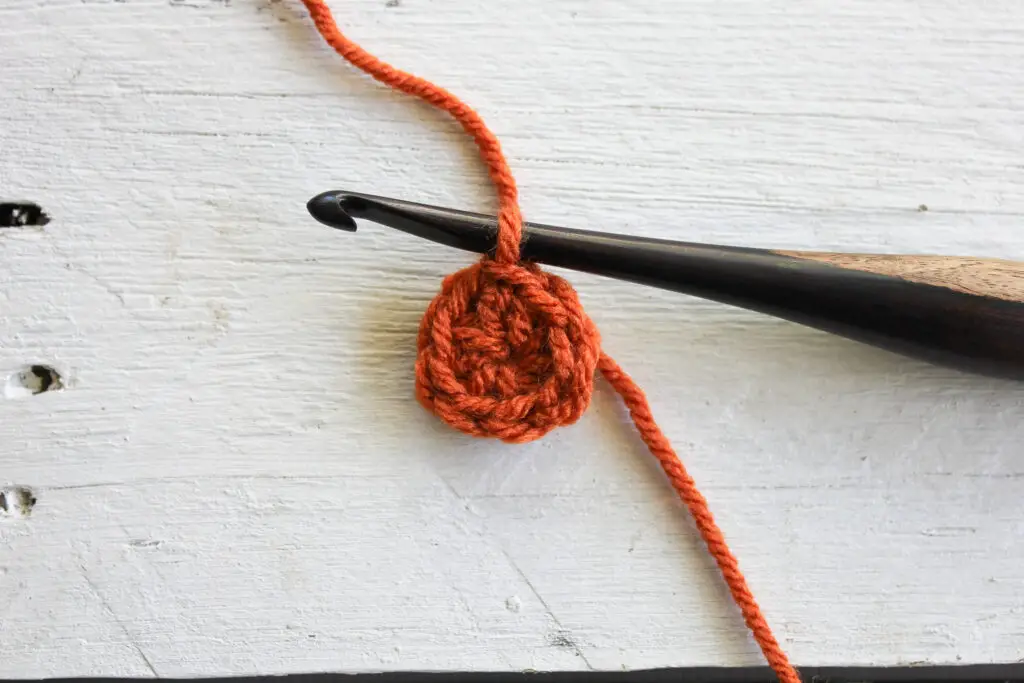
Make a Magic Circle.
Round 1: Ch 2. 8 hdc in magic circle. Sl st to 1st hdc to join. <8hdc >
Round 2: Ch 2. 2 hdc in first st and in each st around. Sl st to 1st hdc to join. <16 hdc>
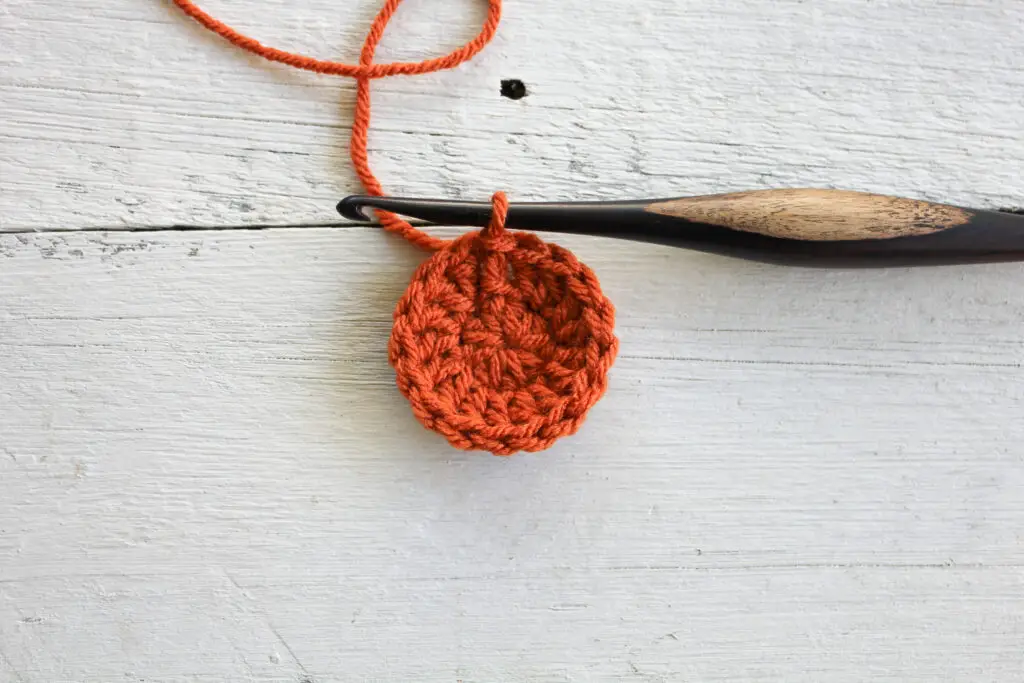
Round 3: Ch 2. [1 hdc in 1st st, 2 hdc in next], Repeat inside [] around. Sl st to join. <24 hdc>
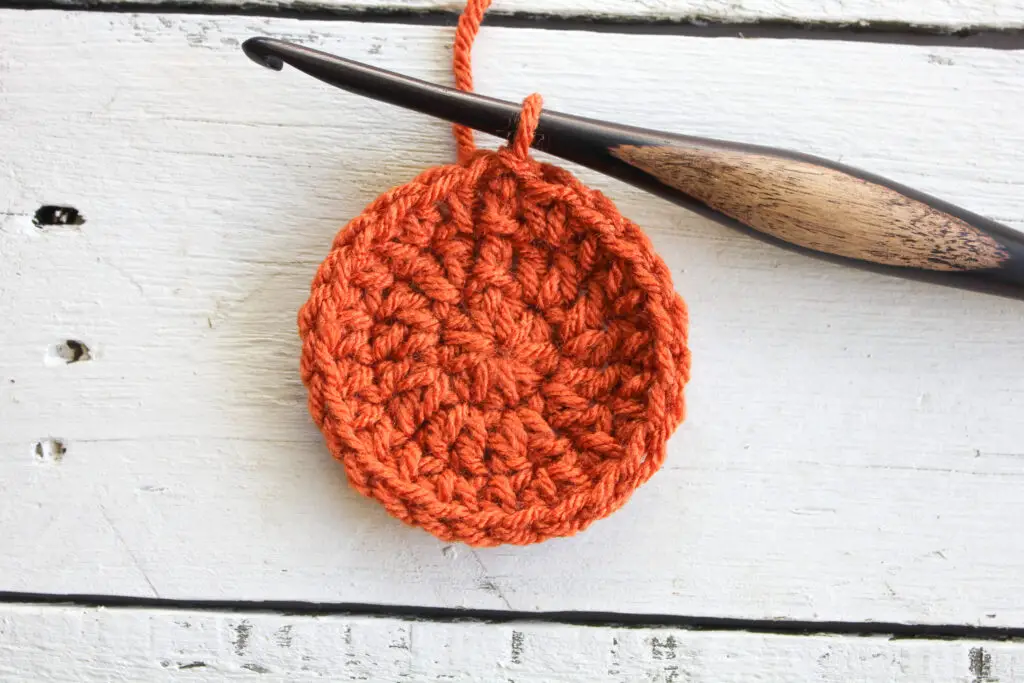
Round 4 : Do not chain. Sl st in the 1st st (this feels a little weird, but it will work!), 1 sc in the next st, 2 dc in the next st, 2 dc in the next st, 1 dc in the next 2 sts, 2 dc in the next st, 1 dc in the next 2 sts, 2 dc in the next st, 1 sc in the next st, sl st in the next 2 sts,
1 sc in the next st, 2 dc in the next st, 1 dc in the next 2 sts, 2 dc in the next st, 1 dc in the next 2 sts, 2 dc in the next st, 2 dc in the next st, 1 sc in the next st, sl st in the last st. Sl st to 1st stitch to join. <32 sts>
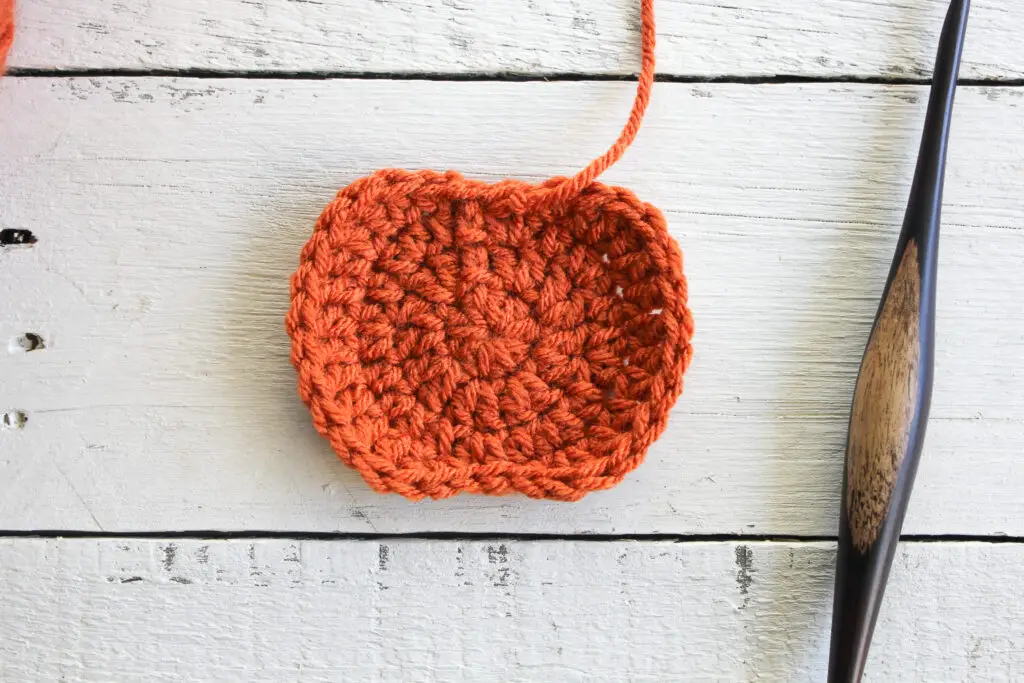
Fasten off and weave in ends.
Stem (using brown and size D hook)
Ch 3.
Row 1: Sc in 2nd ch from hook, sc in last ch. Do NOT ch, turn. <2sc>
Rows 2-4: Sc in next 2 sts. Do NOT ch, turn. <2sc>
Fasten off and weave in ends.
Vine Spiral (using green and size D hook)
Ch 10.
Row 1: 2 sc in 2nd ch from hook and in each ch. <18 sc>
Fasten off, weave in ends.
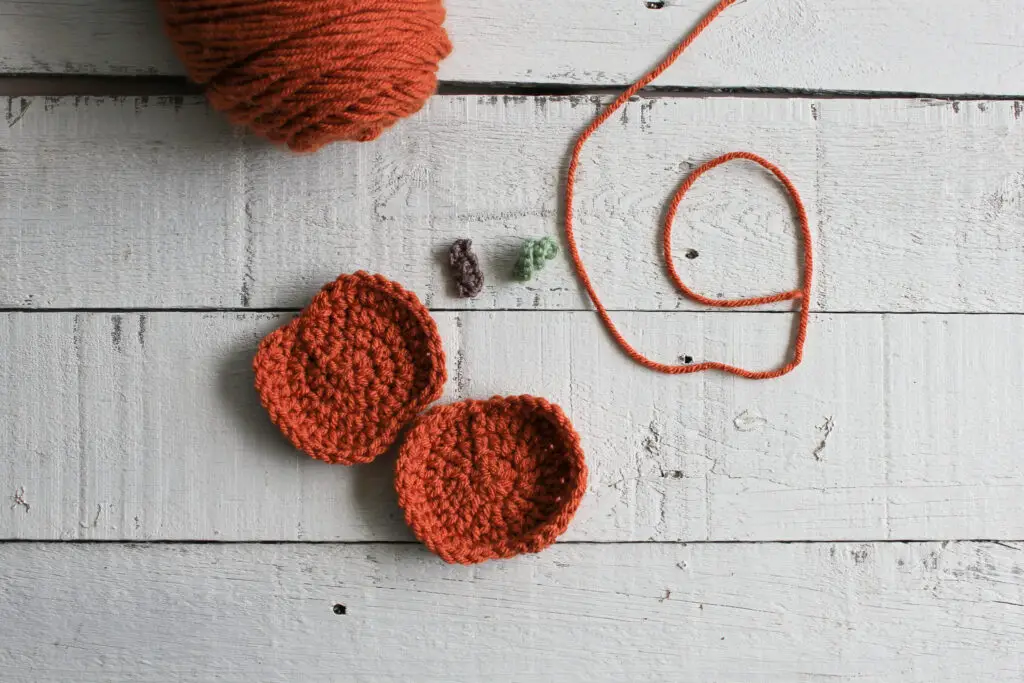
Assemble Pumpkins
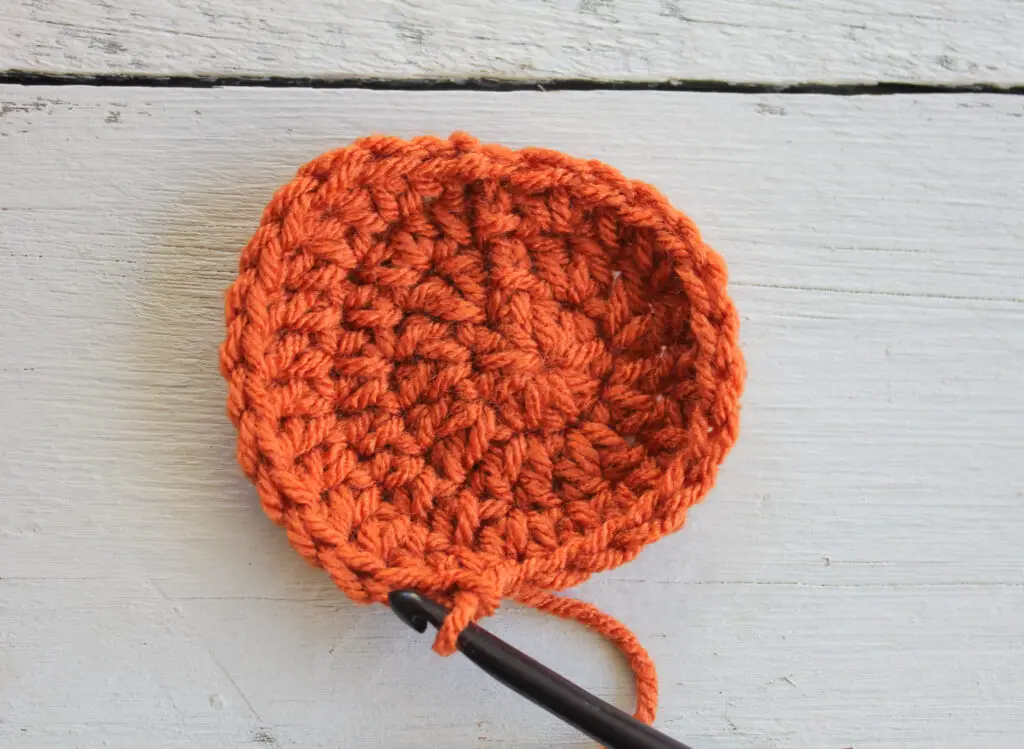
- Align the two pumpkin panels with the wrong sides facing in.
- Cut off a length of main color yarn about 6” long.
- The front of the pumpkin should be facing you.
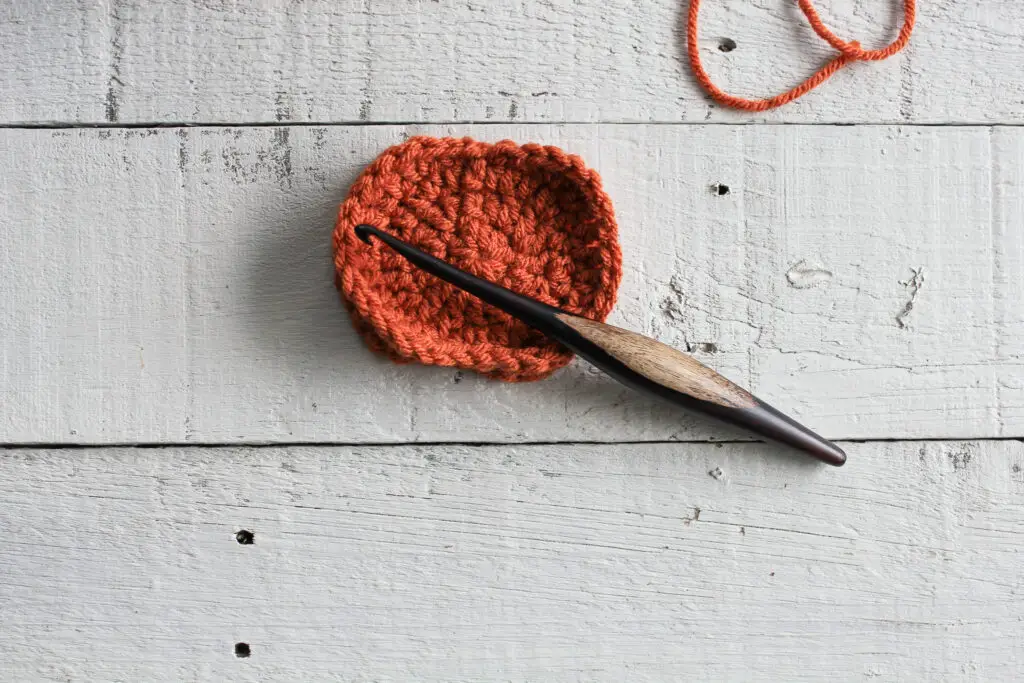
- Starting on the left side of the pumpkin in the middle, attach yarn with a sl st. Begin joining the panels together by chaining 1 and single crocheting around the outside of the panels.
- Crochet down and around the pumpkin and up the other side. Stop at the top and pull up a long loop to keep your stitches from unraveling.
- Lightly stuff pumpkin with fiber fill.
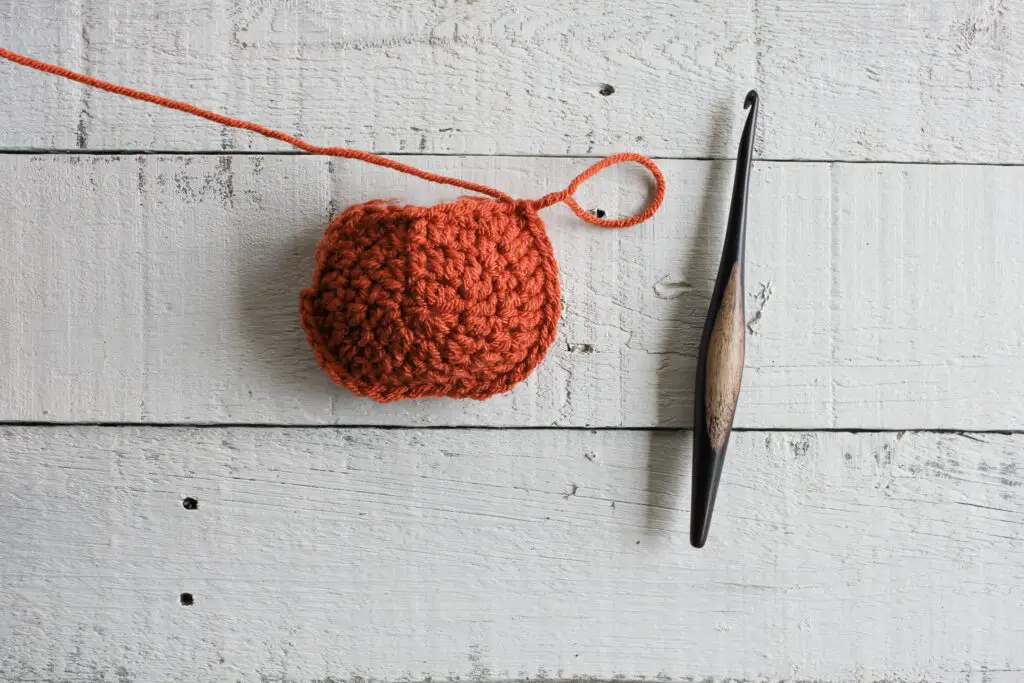
Attaching vine and stem
- Now we will attach the vine and stem. With a yarn needle and length of yarn you set aside earlier, place the spiral between the panels and attach it by sewing through all three pieces (front panel, spiral, back panel). Continue the same process with the stem.
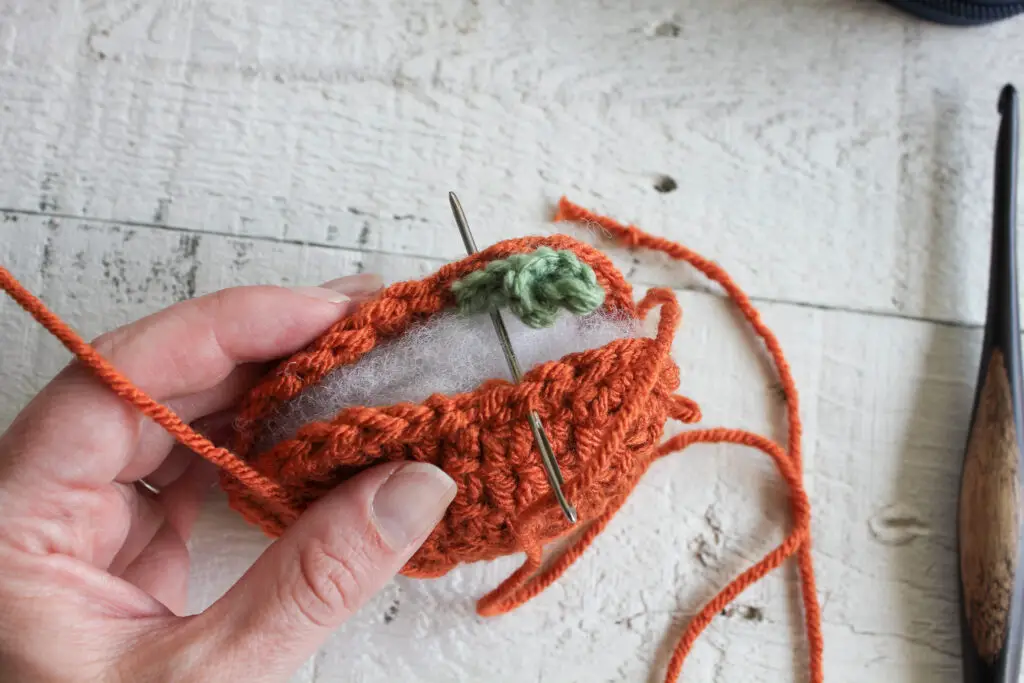
- After attaching the stem and vine, pass the needle straight down from the top of the pumpkin through the stuffing and out the back panel. Pull tight to cinch down the top of the pumpkin and give it a little contouring. Tie yarn to back panel to secure and tuck in end between panels.
- Picking up where you left off, continue single crocheting around the outside of the pumpkin. When you get to the vine and stem, sc in the stitches of the front panel only since this part is already sewn shut.
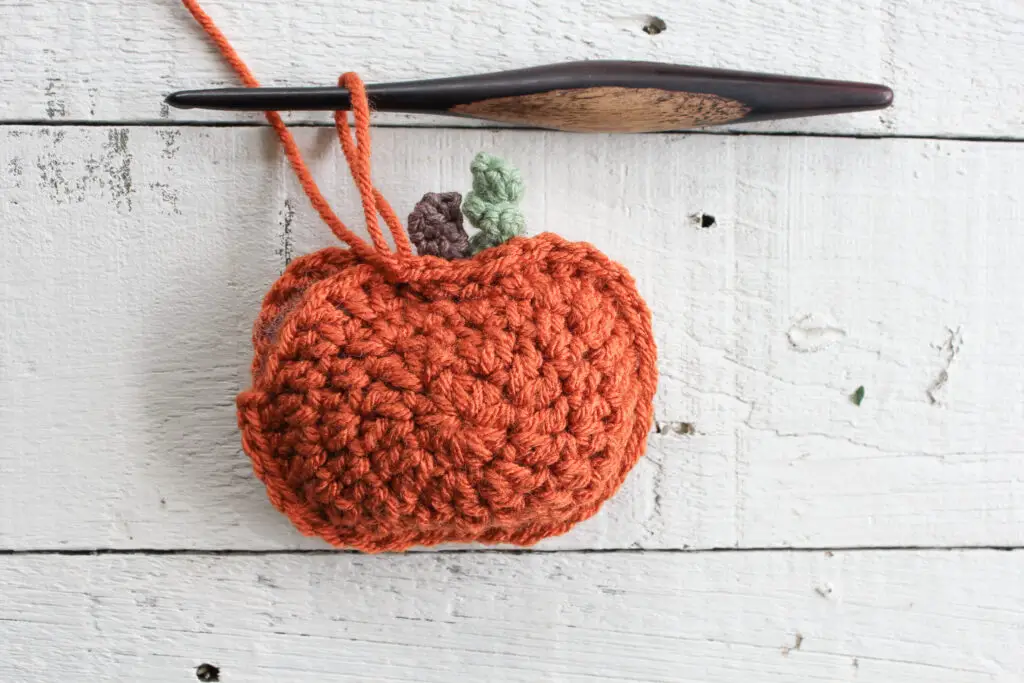
- Top off stuffing if needed.
- Continue sc around to join panels. Join to 1st sc with a sl st.
- Fasten off and weave in ends.
To Make Garland
- Make 6 pumpkins (or desired number).
- With coordinating yarn (I used cream) and size G hook, ch 250 and fasten off. Use small lengths of yarn to join pumpkins at even intervals.
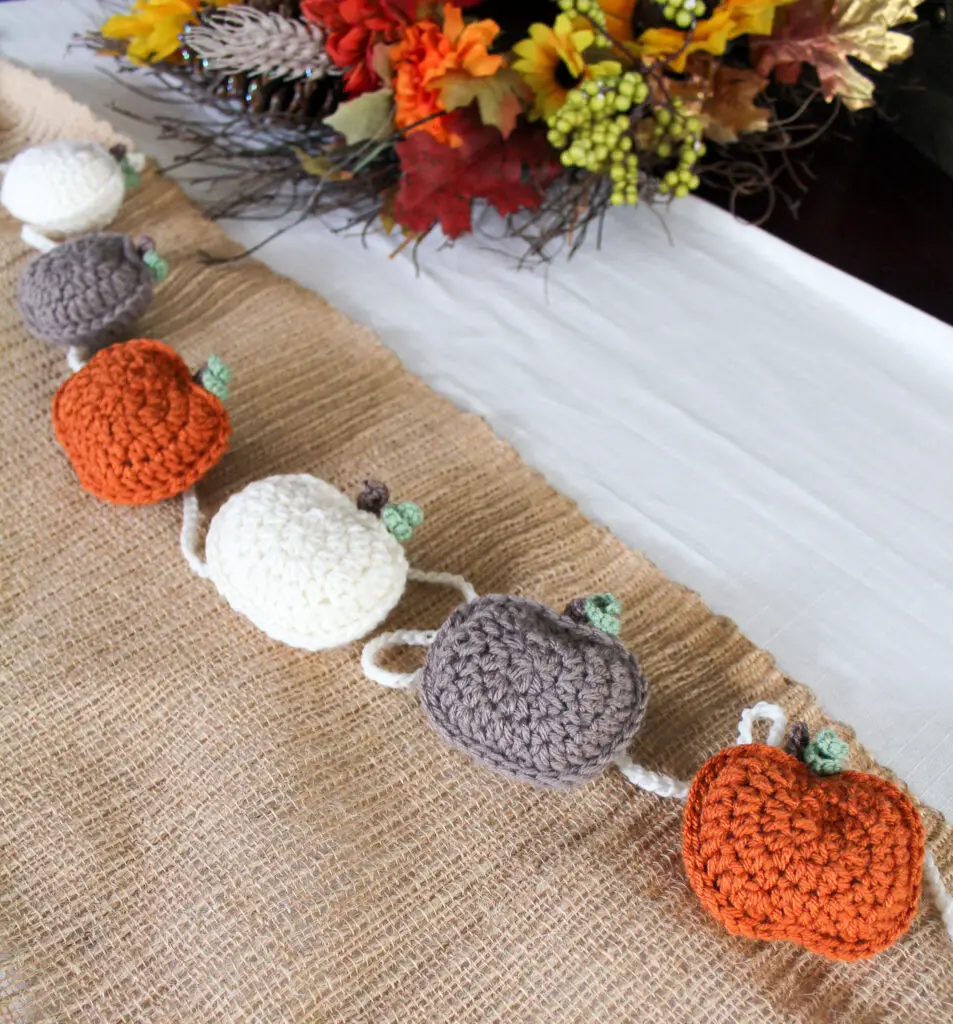
- You’re done! Happy Fall!
I hope you enjoyed this pattern! Tag me on Instagram @theknottednest and use the hashtag #rusticpumpkingarland to share your project!
Looking for more cozy fall patterns? Check out my Dreaming of Spring Triangle Scarf!

How to Naturally Dye Yarn with Mint