
Crochet Highland Cow Garland – Free Pattern
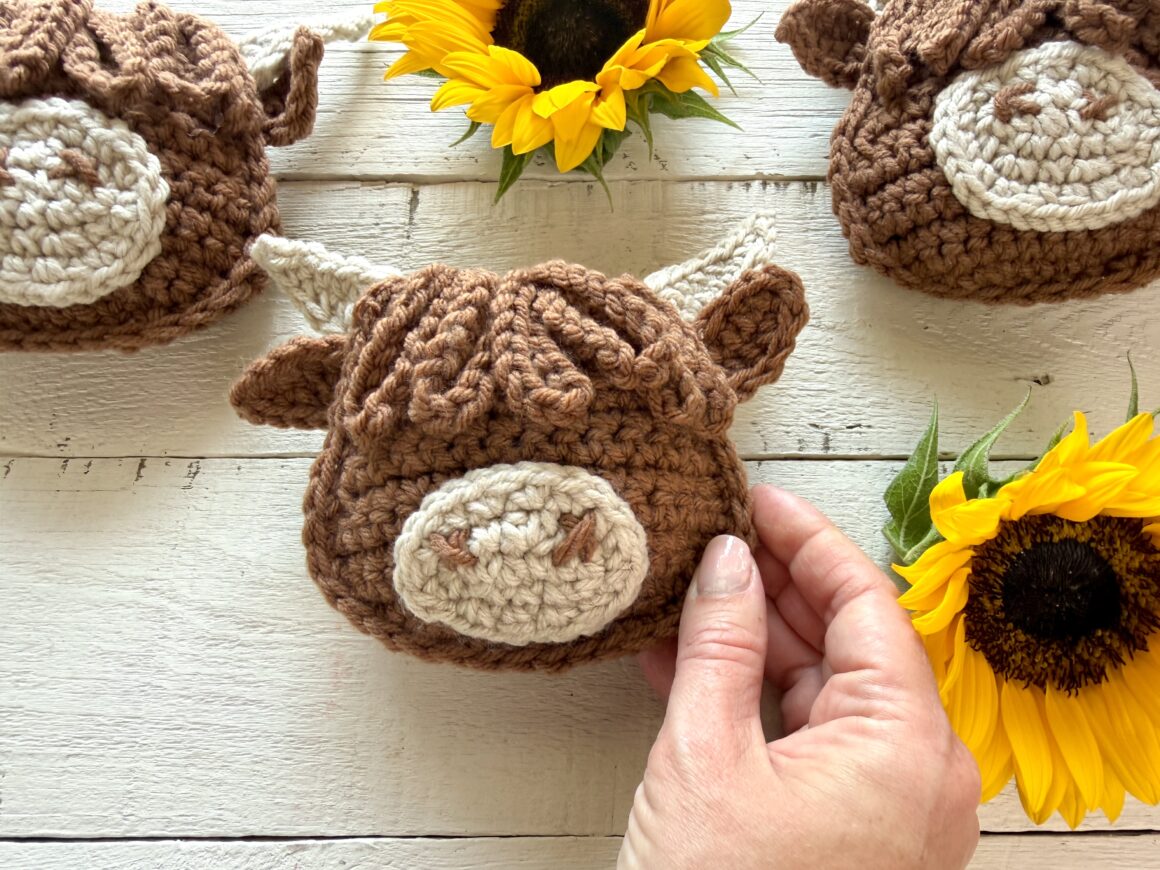
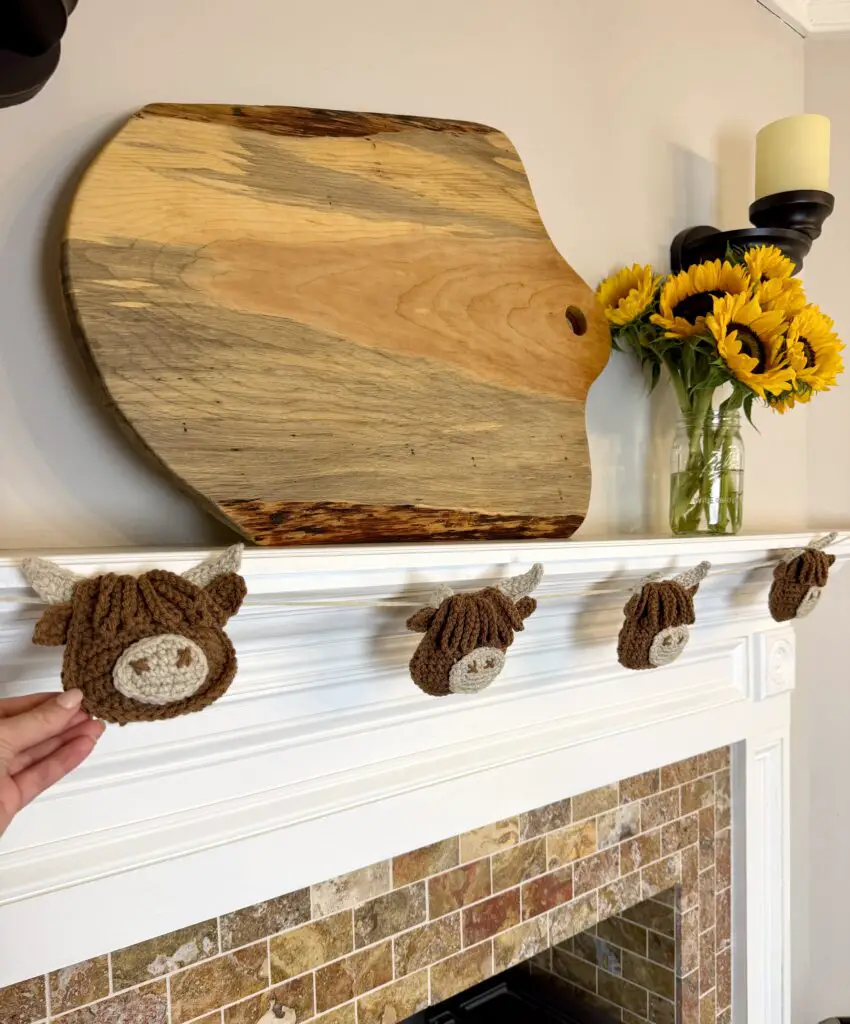
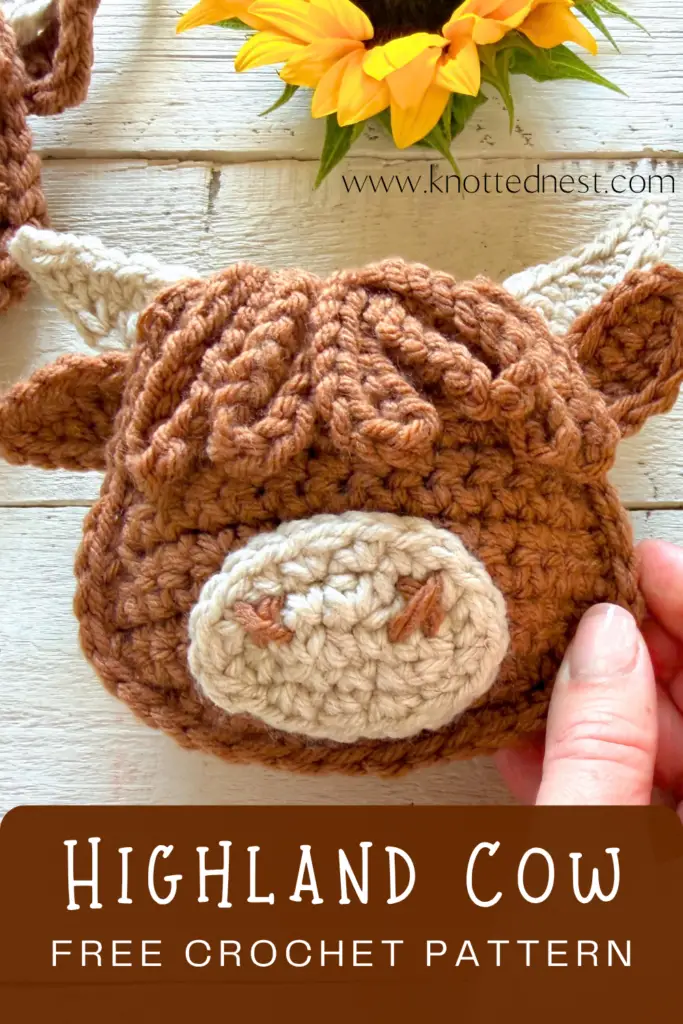
You can use these adorable crochet highland cows individually as nursery or baby shower decor or string several together to make a sweet farmhouse garland! The highland cows are fun to make and can be used in so many different ways! This pattern includes step-by-step instructions and a photo tutorial to create the 2D-style cows plus tips for assembling them into garland. Scroll down (or click here) for the free pattern or click to purchase an ad-free printable version from my Etsy or Ravelry shops.
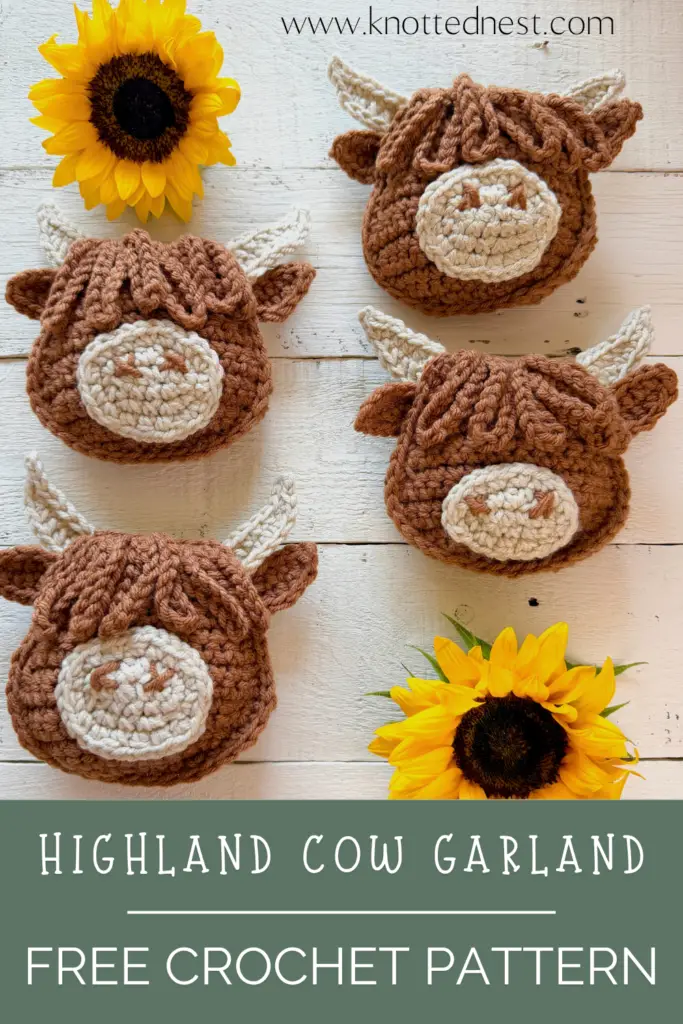
Don’t have time to make it now? Pin this pattern for later!
This pattern may contain affiliate links, which means I may receive a small commission, at no extra cost to you, when you make a purchase. Please read my affiliate disclosure for more details.
More Free Crochet Garlands
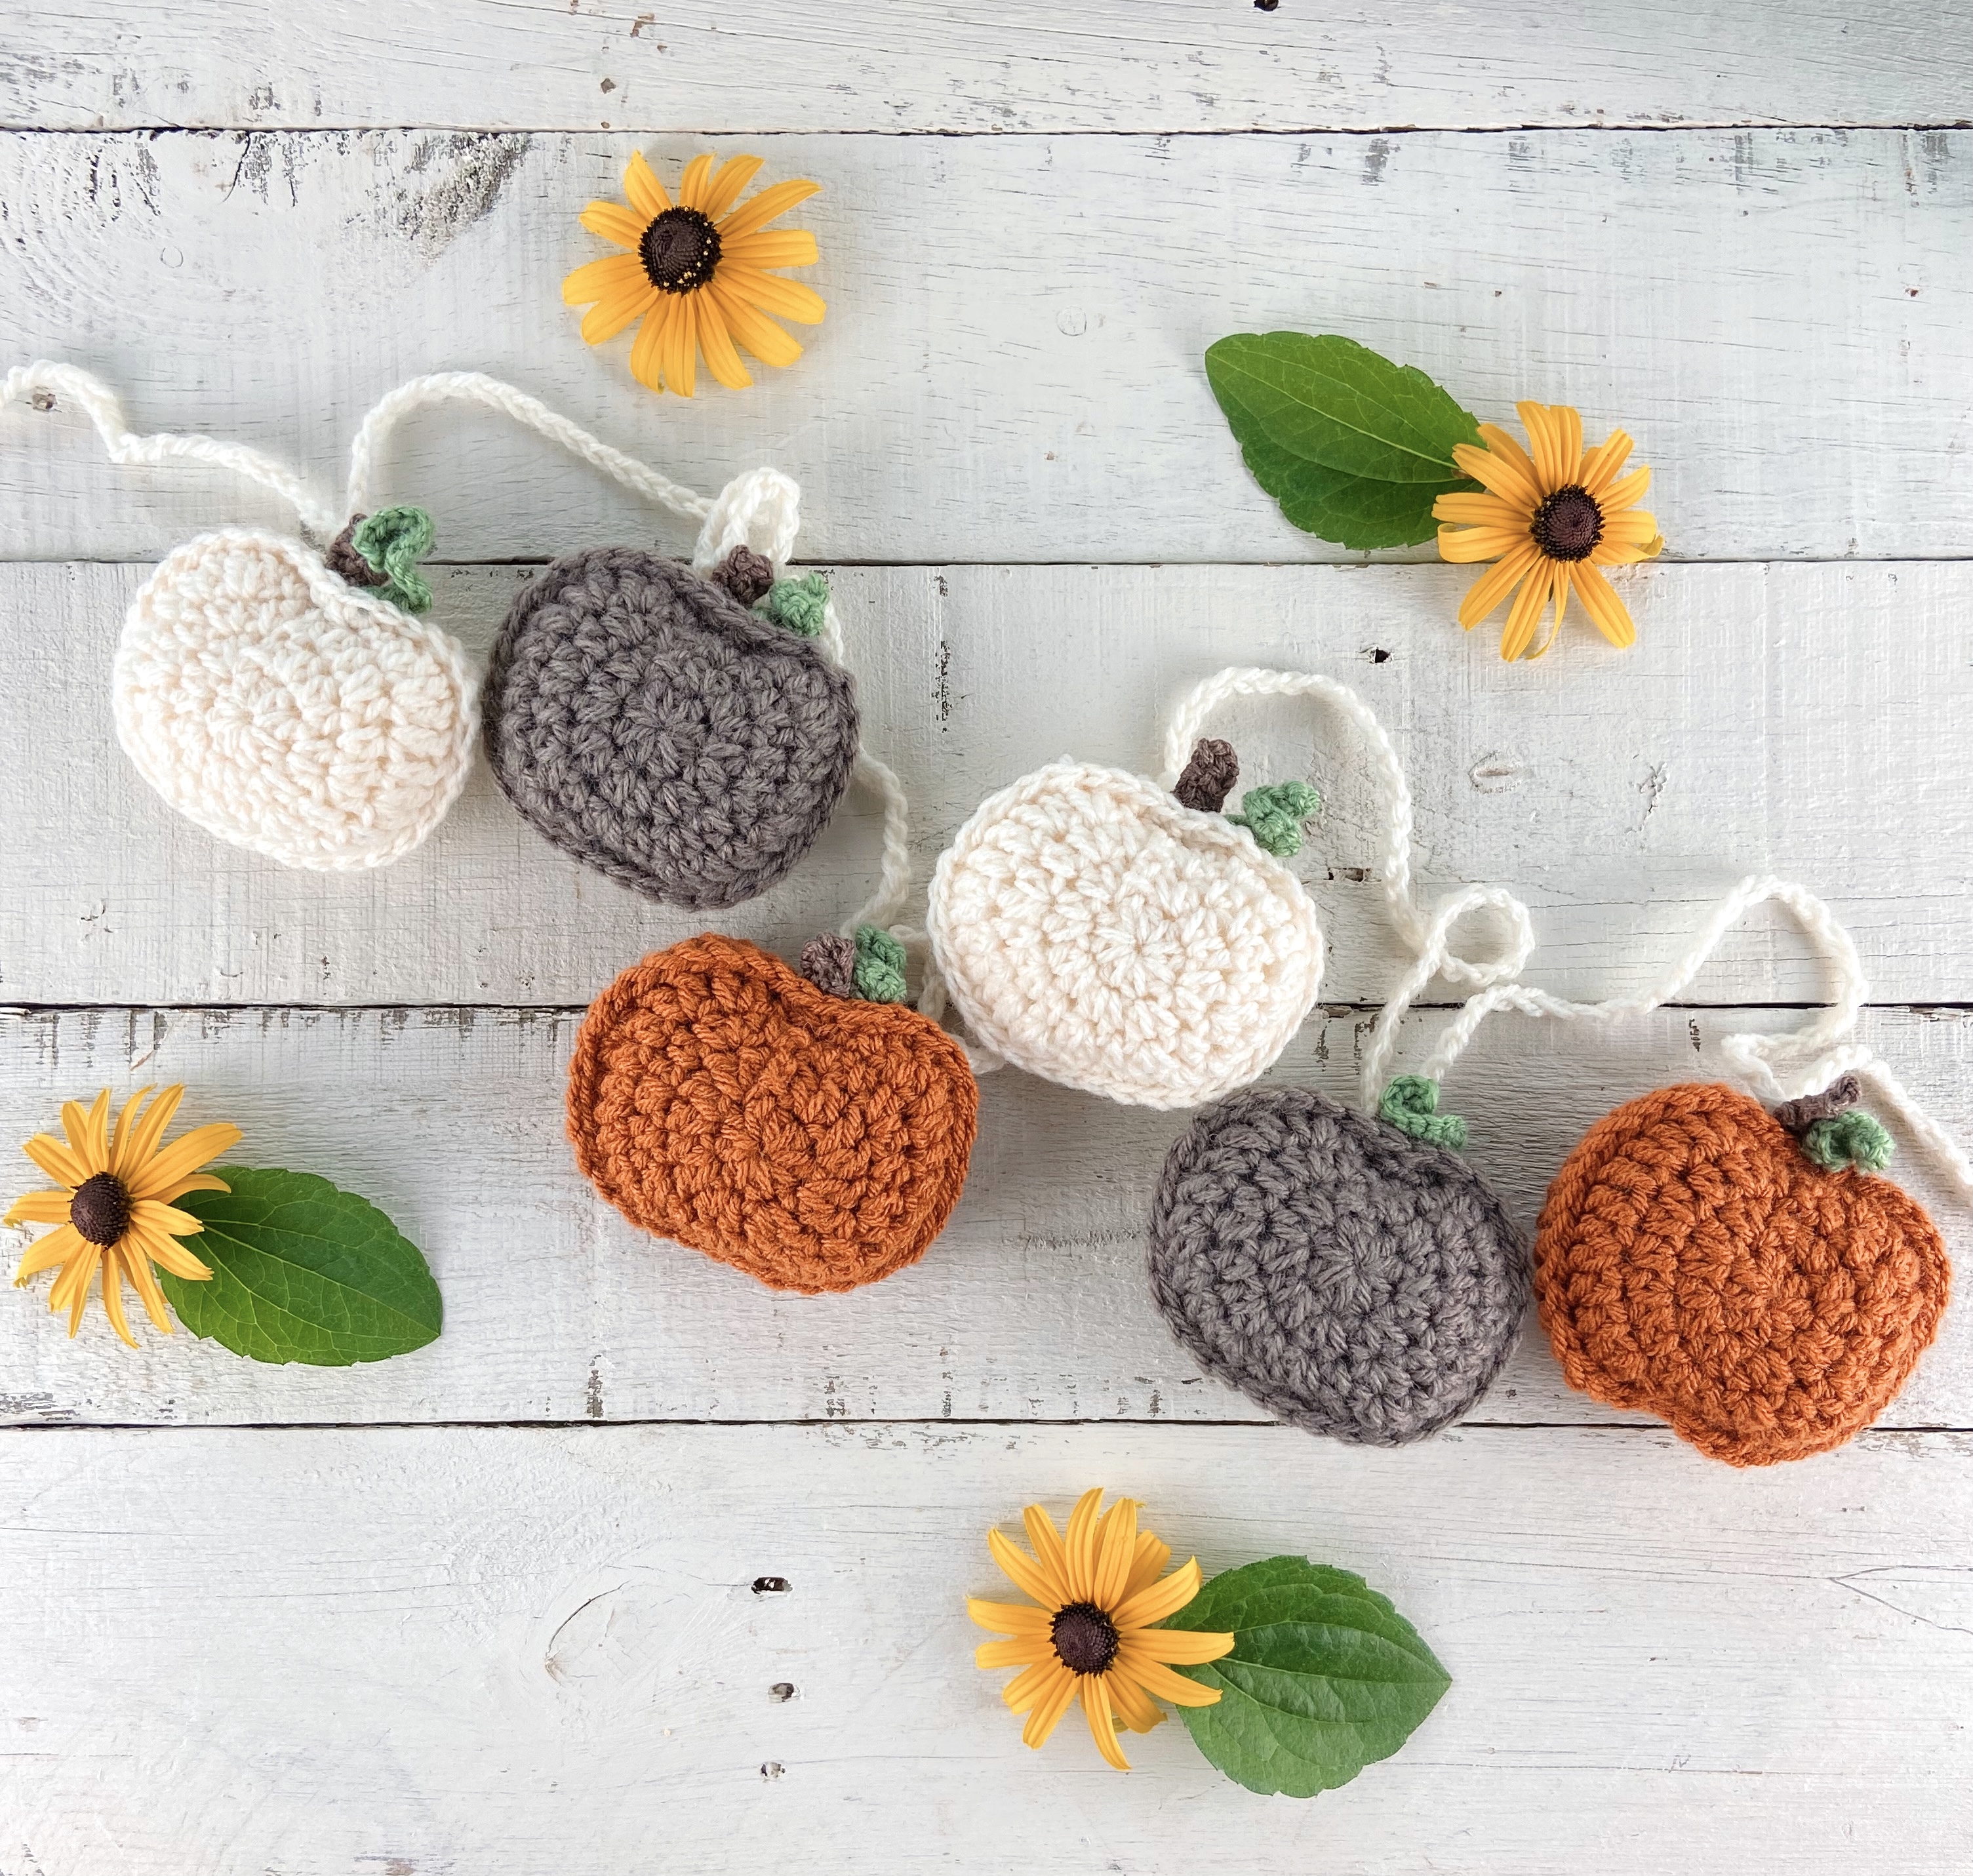
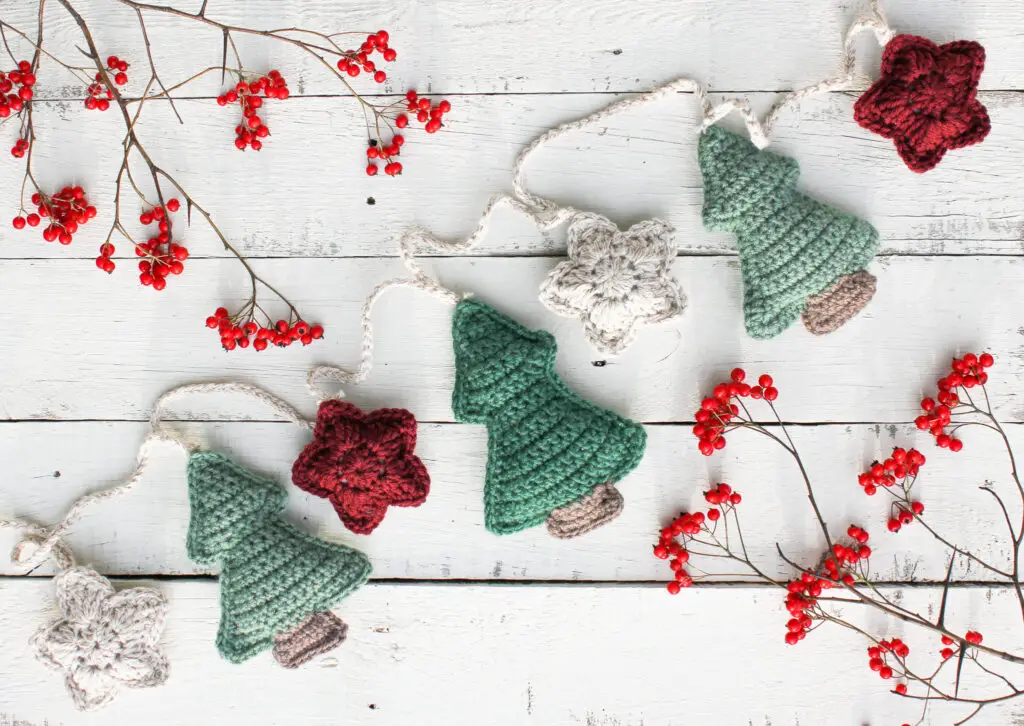
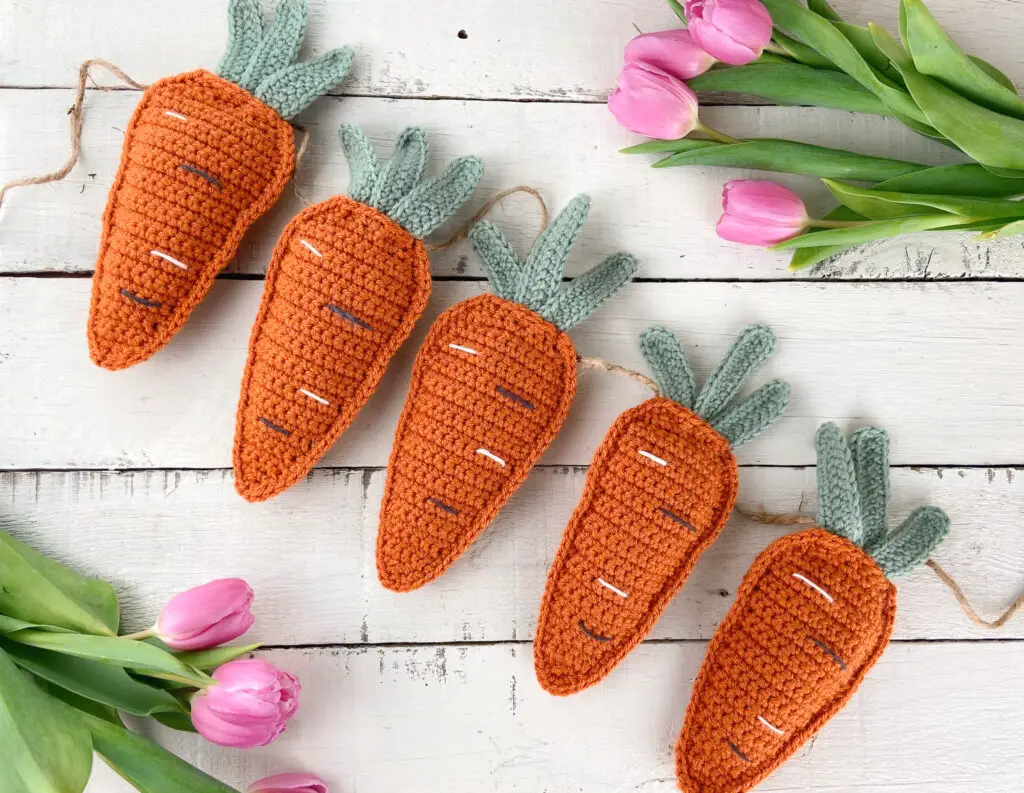
If you poke around on my blog a bit, you’ll probably notice that I have a thing for crochet garlands. I have no idea why, haha. They are just a quick and fun project that doesn’t use a lot of yarn and I like the challenge of trying to create a crocheted version of the picture I have in my mind. Plus they are just so darn cute! My kids love changing out the garlands on our fireplace for every season/holiday. Browse around the Garlands section here on the blog for tons of free patterns!
About the Crochet Highland Cows
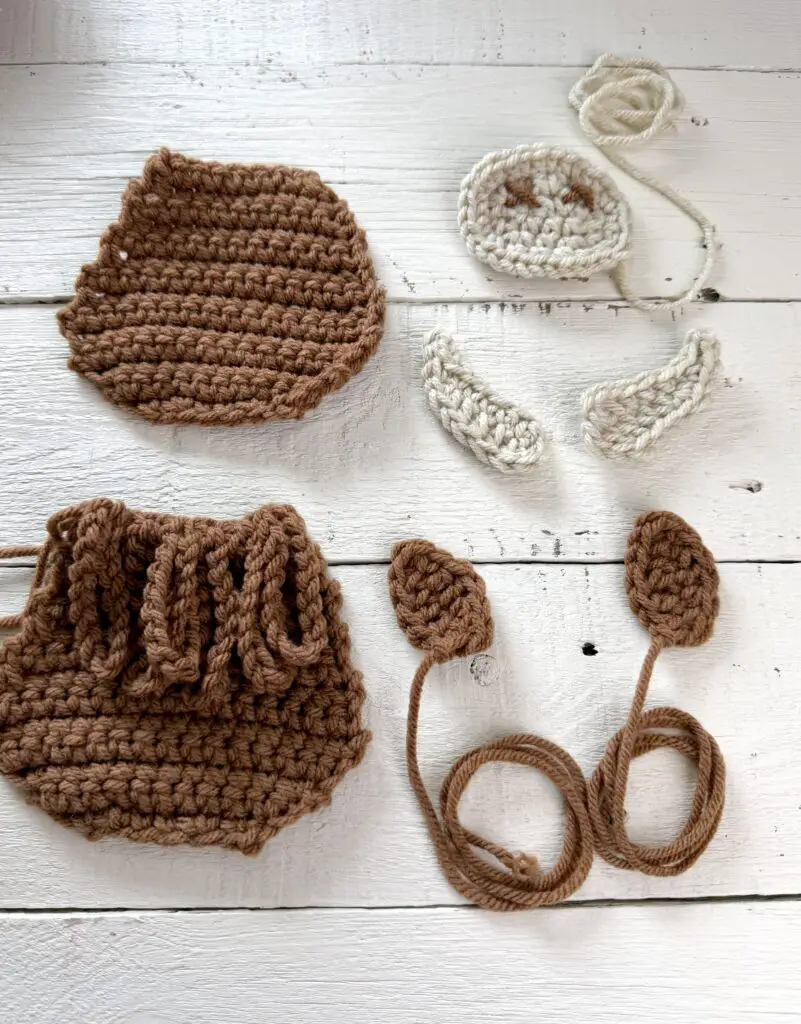
These crochet highland cows are made in my typical simple 2D “ragdoll” style, but they do require a bit more assembly than most of my other designs. The face panels are made in flat single crochet rows, but the ears horns and muzzle are made separately and sewn on. It takes a little more effort, but the each piece is quick to make and sew on and I really think that extra level of detail is worth it!
Crochet Highland Cow – Materials
Whether you string them as a garland or hang them individually, you won’t really need anything special to make the cow faces. Any worsted weight yarn will do. I used Yarn Bee (Hobby Lobby) Yarn ID in the colors Cafe Au Lait and Oats. If you want the slightly plump look that mine have, you will need some sort of stuffing material. I used polyfil, but any stuffing material will work, even dryer lint in a pinch (it only takes a small amount so definitely don’t buy a big bag of stuffing!). You’ll also need a size G(4.00mm) crochet hook and whatever string/yarn/twine you’d like to use to string the garland if you are making one.
Skill Level
I rated this pattern as Intermediate skill level. You will need to work in rows and rounds with some increasing and decreasing, and you will need to do some simple sewing. None of the individual parts of this pattern are very difficult, but it does use more than basic techniques. I would say advanced beginners and above would feel comfortable tackling this pattern.
Ok lets make some Highland Cows!
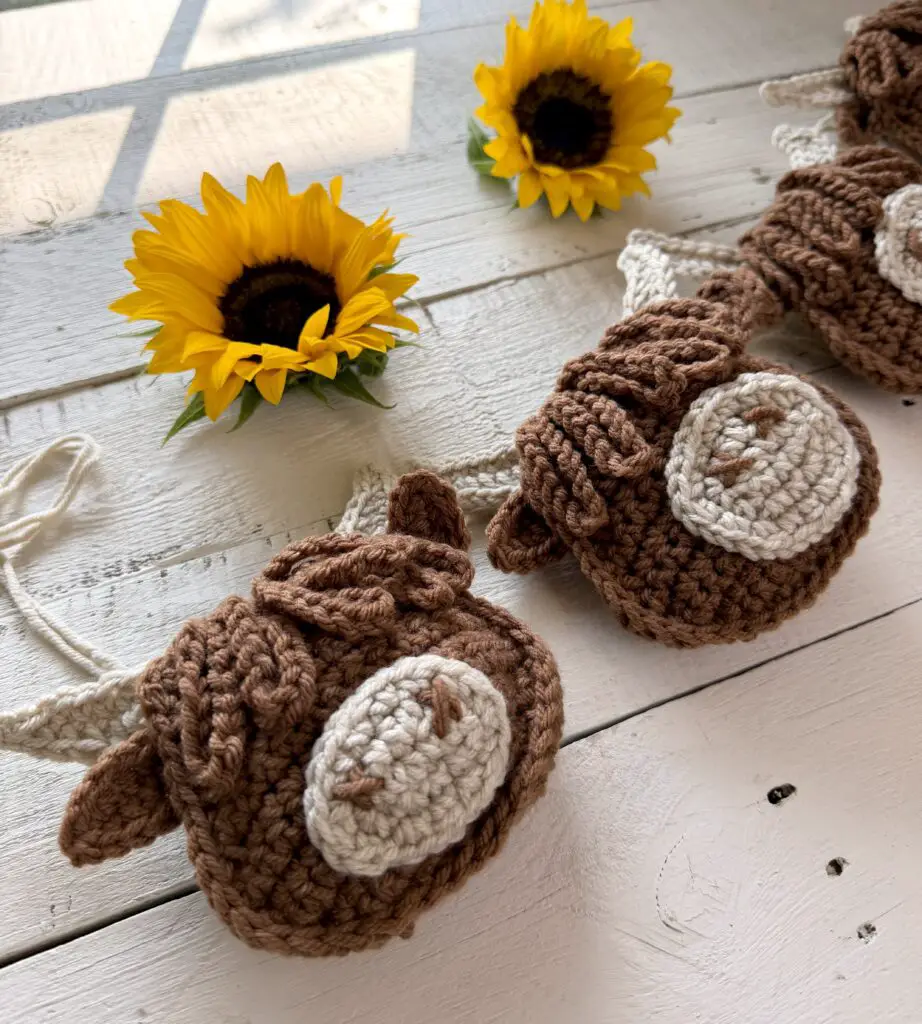
Crochet Highland Cows Garland Free Pattern
Skill Level
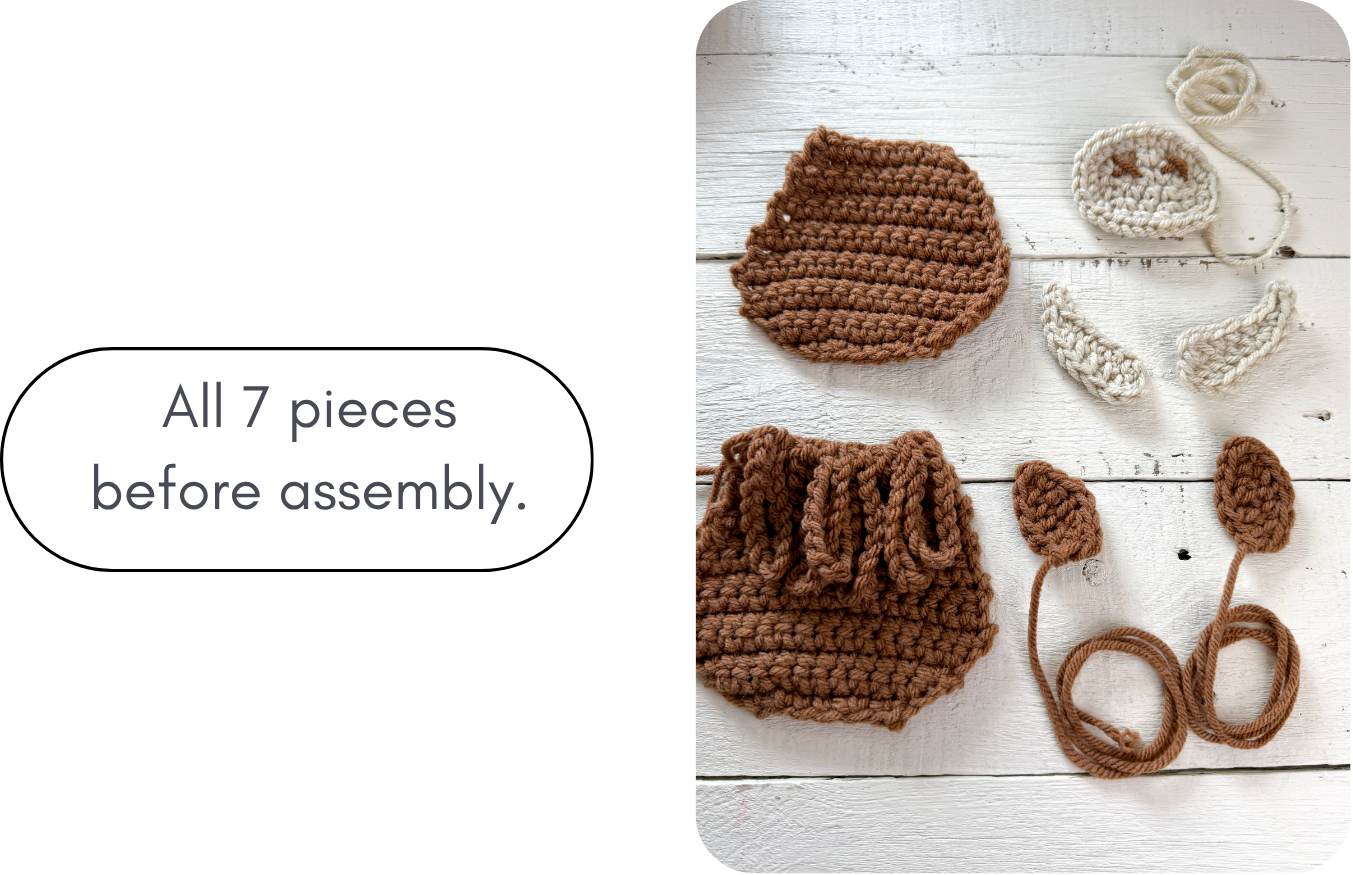
Intermediate: Using a variety of stitches, each cow is made of seven individual pieces, which are either sewn or crocheted together and then lightly stuffed. Pattern uses increases and decreases and you will need to work in rows and in the round.
Materials
- Yarn (For each cow):
- About 40 yards of worsted weight (size 4) brown yarn. I used Yarn Bee “Yarn ID” (80% acrylic/20% polyamide, 5 oz/142 g, 252 yds/230 m per skein) in the color Cafe au Lait.
- About 10 yards of worsted weight (size 4) beige yarn. I used Yarn Bee “Yarn ID” in the color Oats.
- Hook: size G/6 (4.00mm)
- A few yards of yarn or twine for stringing garland.
- Small amount of Polyfil or other stuffing material.
- Yarn needle, scissors, stitch markers.
- Optional: straight pins.
Size
Each cow is about 4 inches tall and about 5.5 inches wide.
Notes
- Each cow is made of two flat face panels (worked in rows) that are joined together with single crochet and lightly stuffed. The muzzle, ears, and horns are made separately by working in rounds around a starting chain and are sewn on to the face.
- To work in the back bump of the chain, flip the chain over and work into the single bump on the back of the chain rather than in the two V-shaped loops on the front. More info here.
- Working in the front loop only (flo): When looking at the top of a stitch or chain, you’ll see two loops forming a small “V”; to work in the front loop only, insert your hook under just the loop nearest you, leaving the back loop unworked.
- To Increase (inc) – work two sc in one stitch.
- To Decrease (dec) – insert hook into first stitch, yarn over and pull up a loop, insert hook into second stitch, yarn over and pull up a loop, yarn over and pull through all three loops on hook.
- I recommend blocking or steaming each piece before assembly as they have a tendancy to curl.
- The ch 1 at the beginning of each row does not count as a stitch.
- Pattern is written in US crochet terms.
Abbreviations
- ch = chain
- dc =double crochet
- dec = decrease
- flo = front loop only
- hdc = half double crochet
- inc = increase
- sc = single crochet
- sl st = slip stitch
- st(s) = stitch(es)
Crochet Highland Cow Garland Free Pattern
Face Panel (make 2):
With brown, chain 7.
Row 1: Starting in 2nd ch from hook, inc, inc, 1 sc, 1 sc, inc, inc. Ch 1, turn. (10 sc)
Row 2: Inc, sc in next 8 sts, inc. Ch 1, turn. (12 sc)
Row 3: Inc, sc in next 10 sts, inc. Ch 1, turn. (14 sc)
Row 4: Inc, sc in next 12 sts, inc. Ch 1, turn. (16 sc)
Rows 5 & 6: Sc in each st. Ch 1, turn. (16 sc)
Row 7: Dec, sc in next 12, dec. Ch 1, turn. (14 sc)
Row 8: Sc in each st. Ch 1, turn. (14 sc)
Row 9: Dec, sc in next 10, dec. Ch 1, turn. (12 sc)
Rows 10 & 11: Sc in each st. Ch 1, turn. (12 sc)
Row 12: Dec, sc in next 8, dec. Ch 1, turn. (10 sc)
Row 13: Sc in each st. Ch 1, turn. (10 sc)
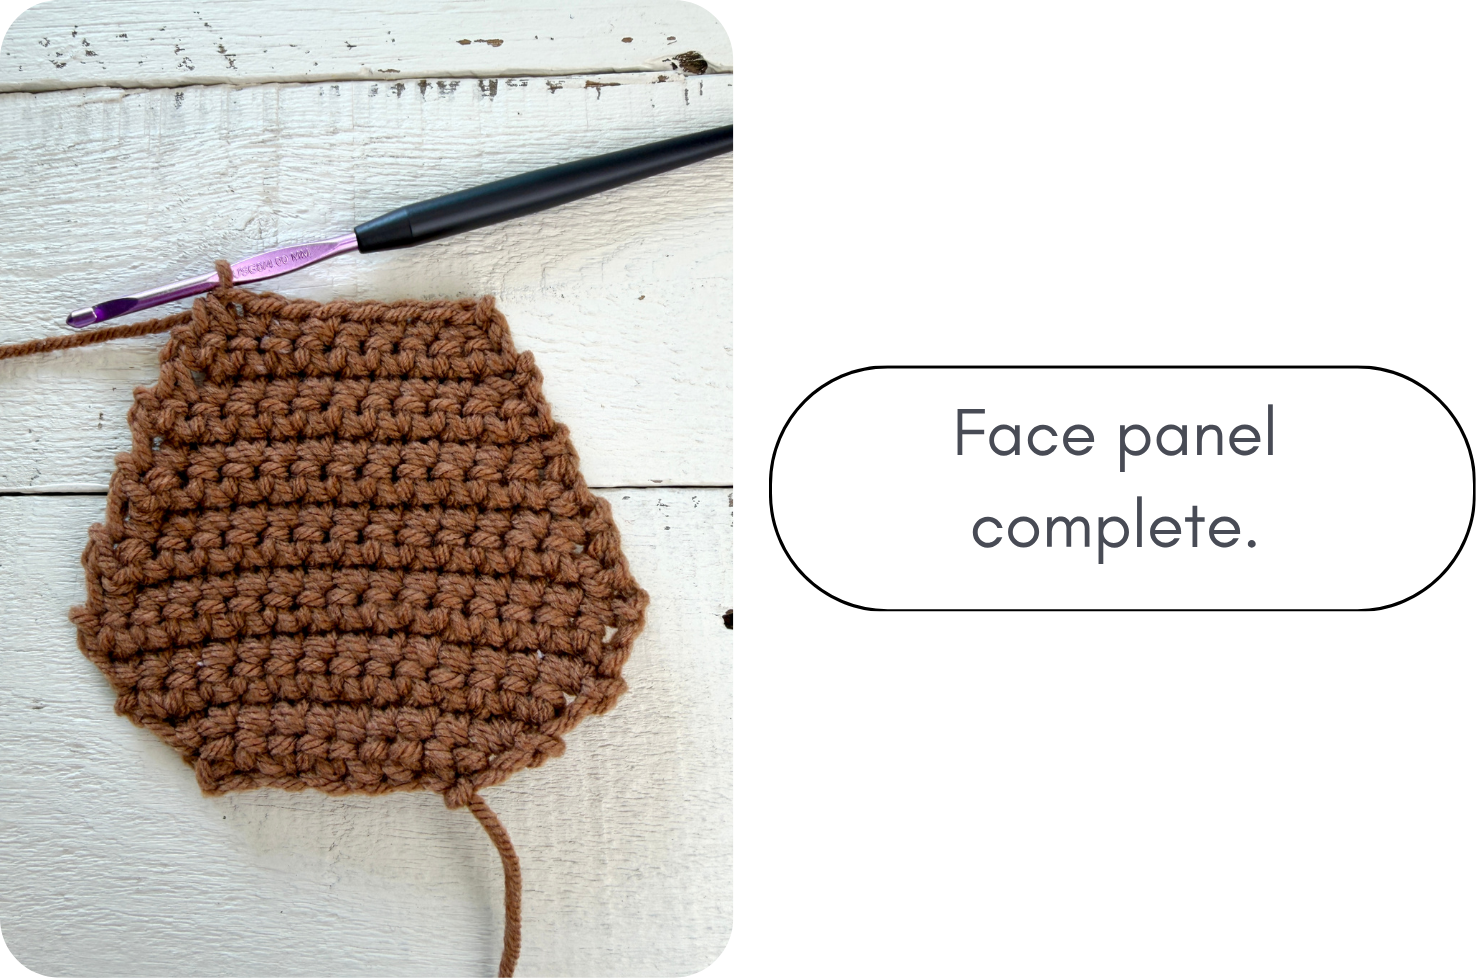
Row 14: Dec, sc in next 6, dec. (8 sc)
- For the first panel, fasten off here and weave in ends. This will become the Back Panel of the face.
- For the second panel, ch 1 and turn. Proceed to Front Panel Hair Fringe section.
Front Panel Hair Fringe
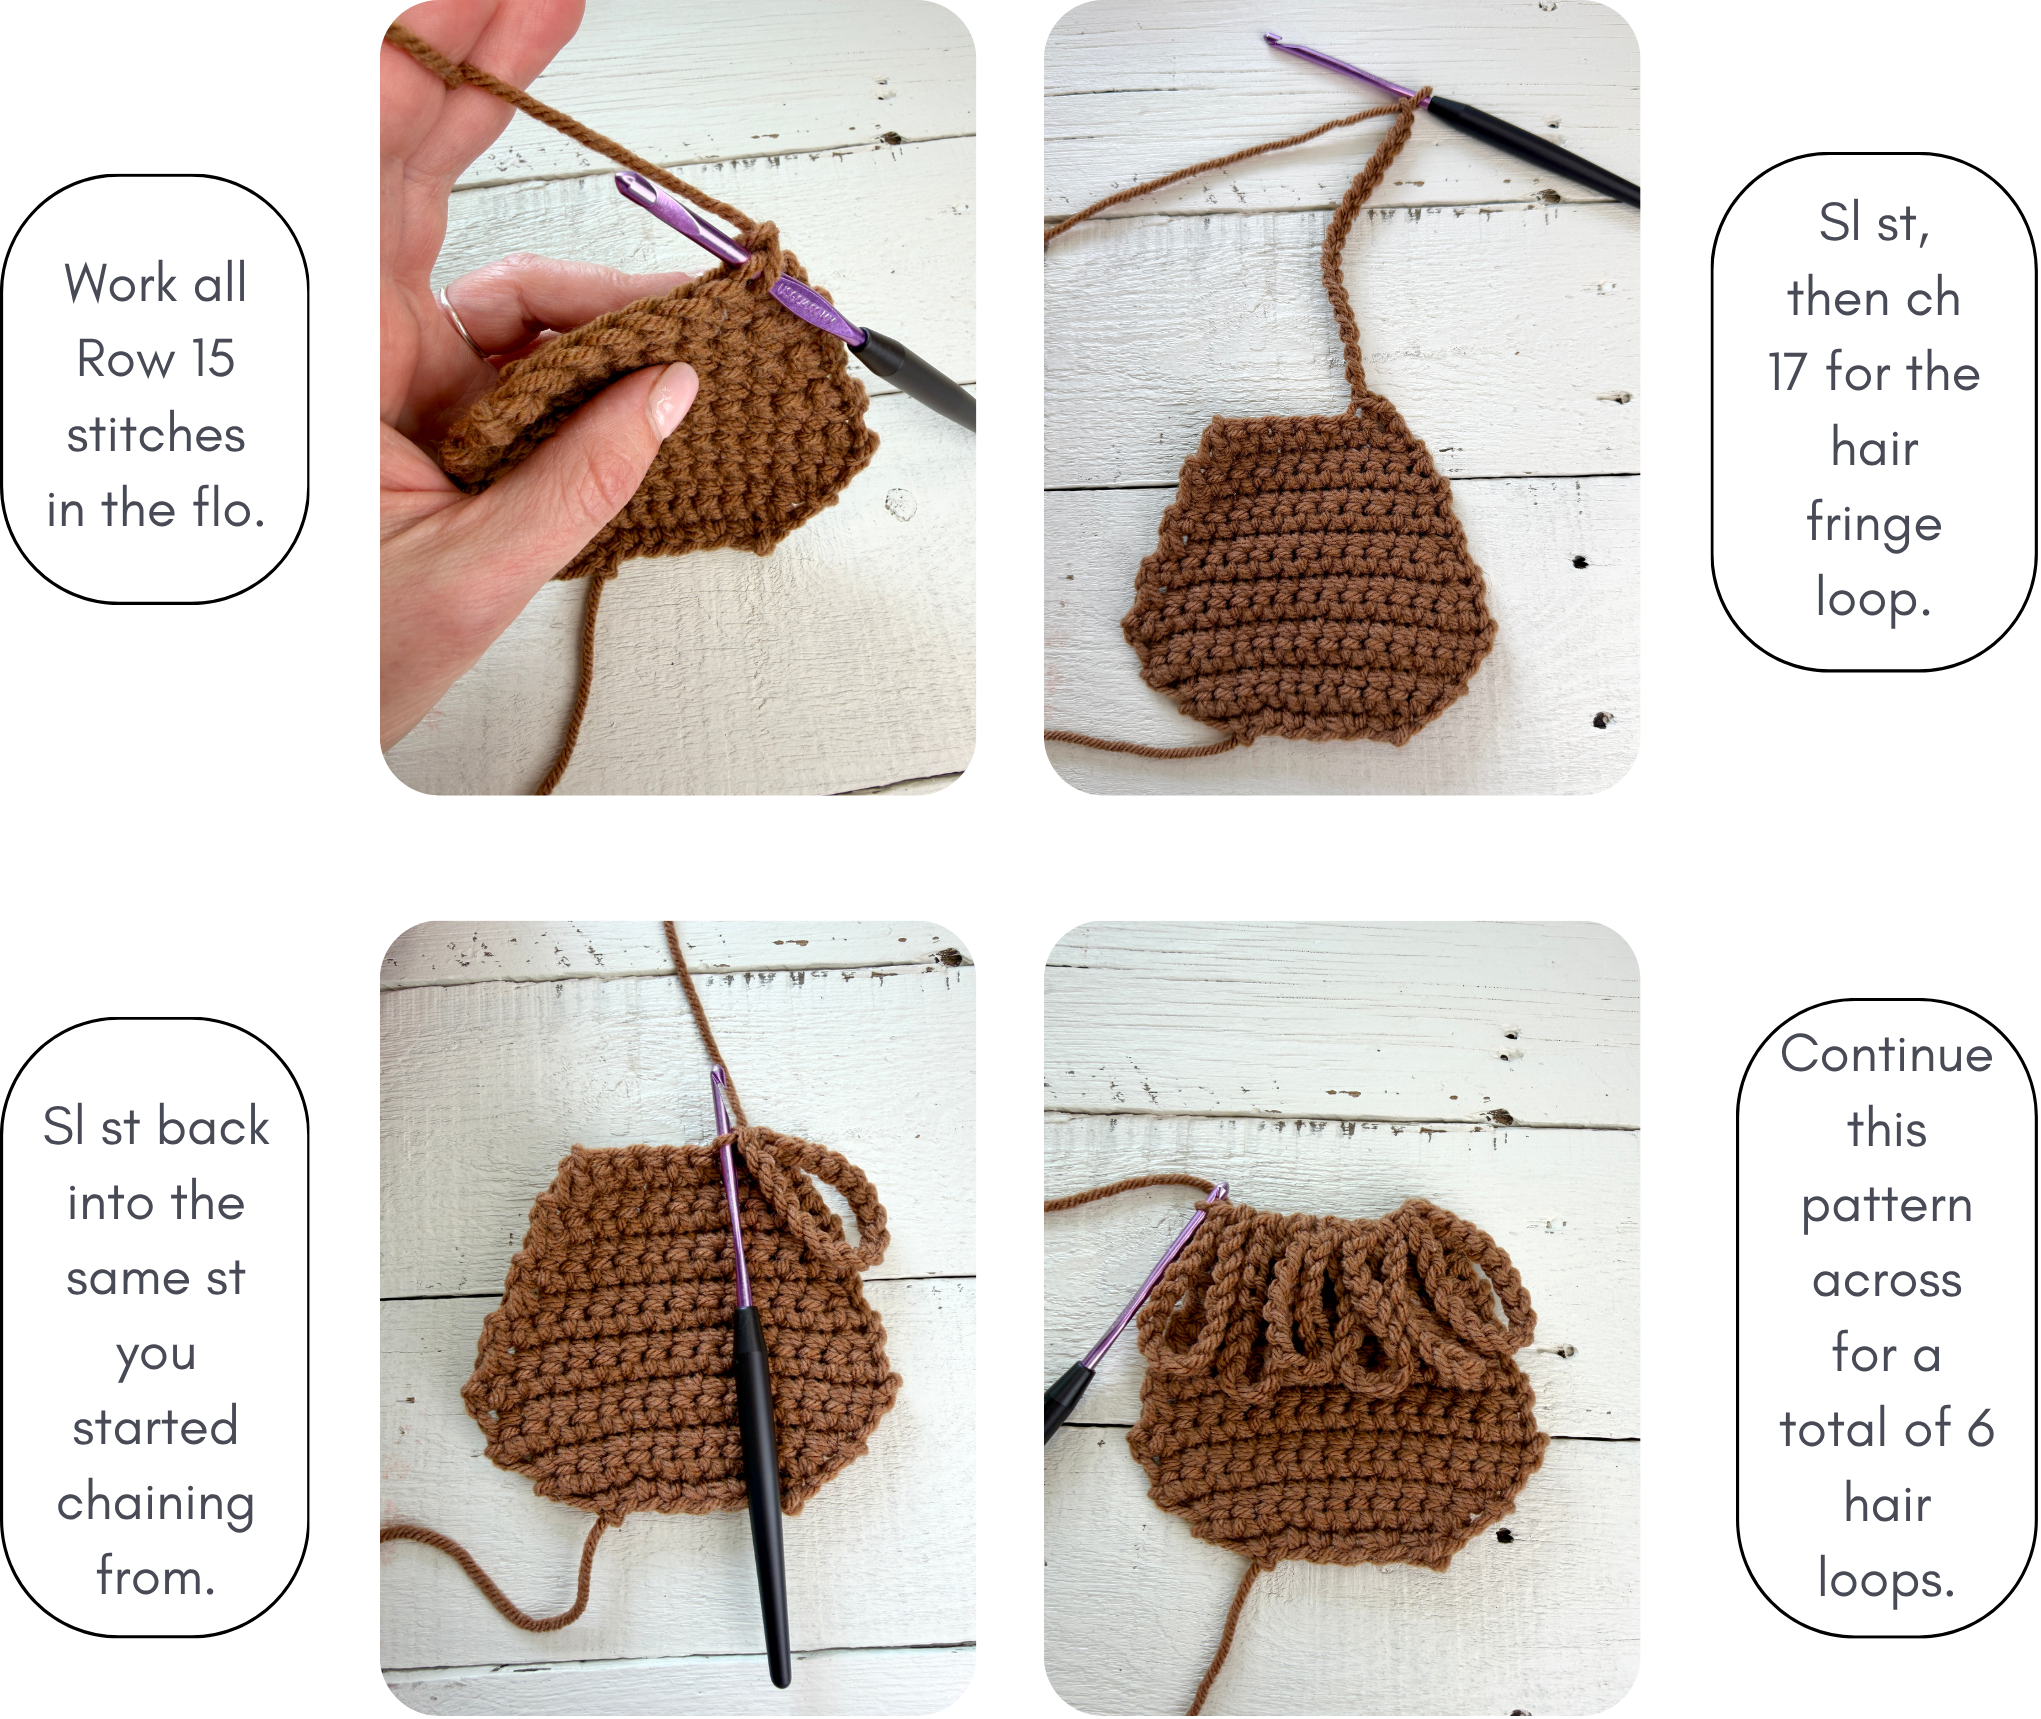
Work each stitch in the front loop only for Row 15. This will allow the fringe to angle down to the face and leave the back loop open to use when joining the two panels.
Row 15: Sl st (flo) in the first 2 sts, then ch 17, sl st (flo) back into the same st you started your chain from to secure the chain loop, *sl st (flo) in the next st, ch 17, sl st (flo) back into the same st to secure. Rep from * four more times for a total of 6 chain loops. Sl st (flo) in the last st. Leave the working yarn attached, we will use this to join the two face panels.
Muzzle (make 1)
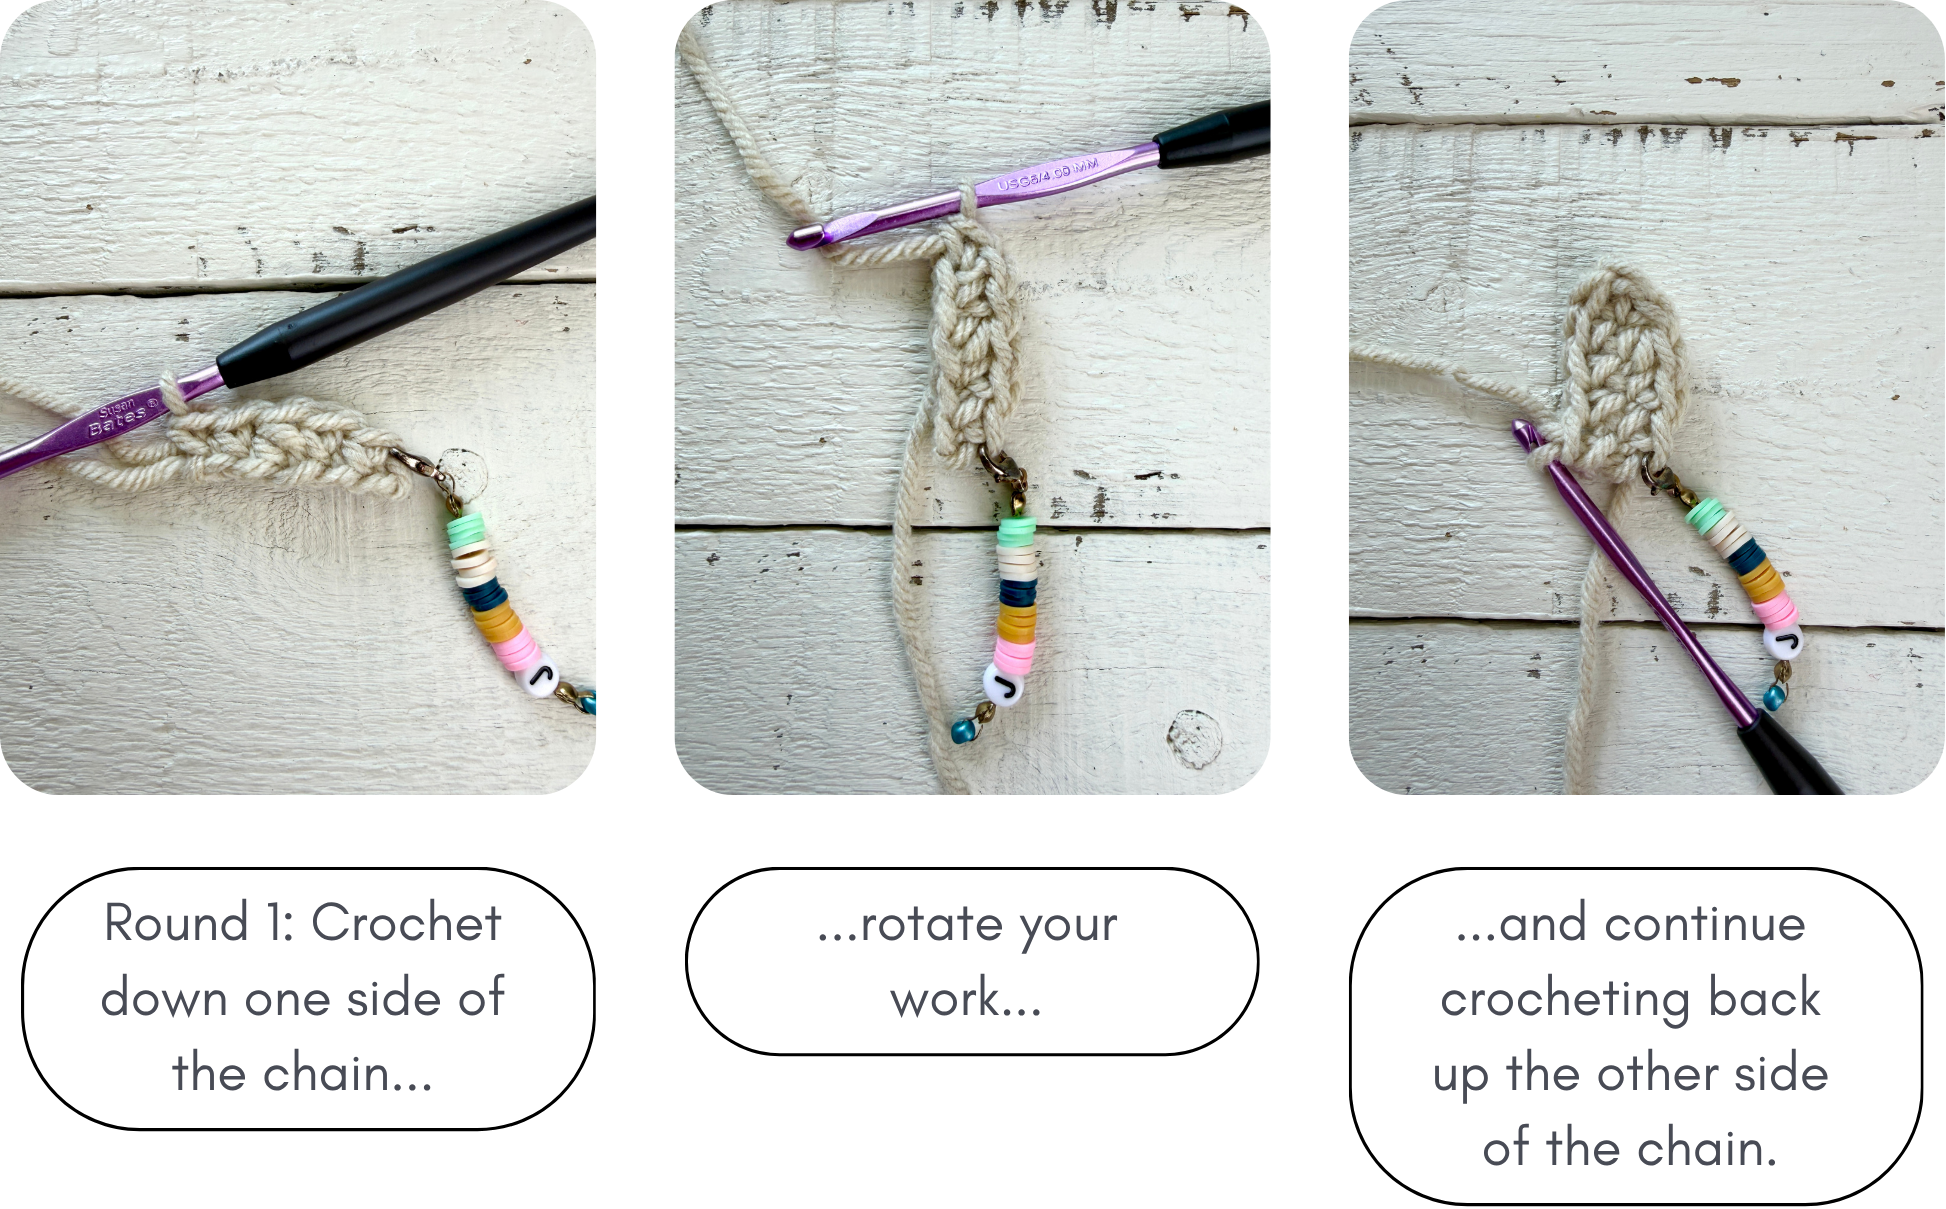
The muzzle is worked in continuous rounds (spiral). Do not join rounds; use a stitch marker to mark the beginning of each round. Round 1 is worked down one side of the starting chain and back up the other side to form an oval.
With beige yarn, ch 6,
Round 1: Working in the back bump of the ch, sc in 2nd ch from hook (place sm in this st), sc in next, hdc in next, sc in each of the next 2 chs, rotate your work so that you are working back up the other side of the ch, sc into the other side of the ch you just sc’d into, sc in each of the last 4 chs. Do not join. (10 sts)
Round 2: 2 sc in the first st (move sm to the first of these), 1 sc in next, 2 hdc, [1 sc, 2 sc] 3 times, 1 sc. Do not join. (15 sts)
Round 3: 2 sc in each st around. (30 sts)
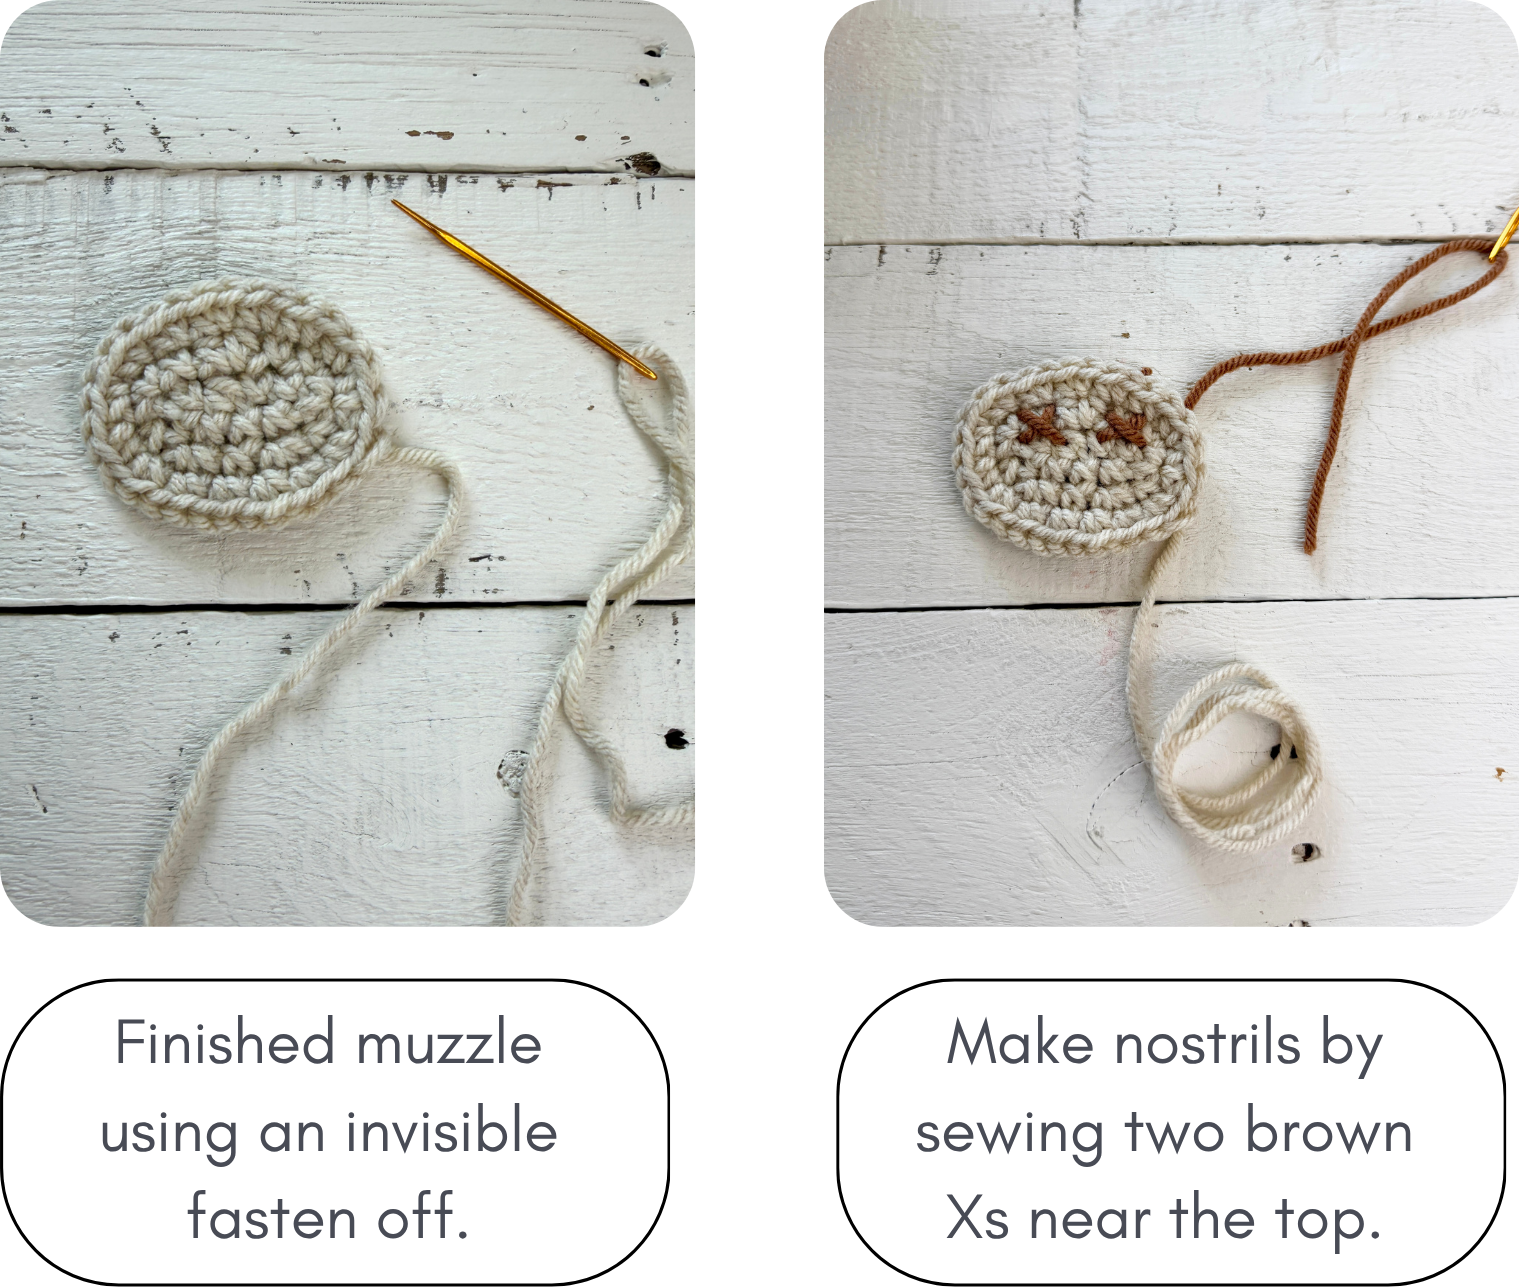
- Use an invisible fasten off to finish this round: Cut yarn leaving a 12″ long tail (we will use this to sew the muzzle to the face panel). Pull the tail through your last loop to fasten off and tighten gently. Thread the tail onto a yarn needle. Insert your needle under both loops of the next stitch, then insert the needle into the back loop only of the last stitch you made (where your yarn tail came from). Tug lightly until it looks like a natural stitch. Then weave in the tail on the back side of the muzzle.
- To make the nostrils, thread a 10″ length of brown yarn onto your needle and, starting from the back of the muzzle panel, sew two Xs wide apart toward the top of the muzzle (the “top” is the side of the oval with the hdcs). Tie the two ends of the brown yarn together to secure the Xs and trim ends.
Ears (make 2)
The ears are also made by working down one side of the starting chain and back up the other side to form an oval.
With brown yarn, ch 7,
Round 1: Working in the back bump of the ch, sc in 2nd ch from hook, hdc, dc, hdc, sc, sl st (rotate work so you are working back up the other side of the ch), in other side of the ch you just sl st’d into, sl st again, then sc in next, hdc, dc, hdc, sc. Sl st into the 1st st of the round to join. This will also slightly cup the ear. Fasten off, leaving a long tail for sewing the ears and horns to the face. Weave in starting end.
Horns
Note: The horn panels are directional. Make one left and one right horn (mirror images) per cow so that the “right side” of each panel can face forward when assembled.
Right Horn
With beige, ch 10,
Round 1: Working in the back bump of the ch, dc in 3rd ch from hook, 1 dc in next ch, 1 hdc in next 2 chs, 2 sc in next ch, 1 sc in next ch, sl st in last 2 chs, ch 1 (this helps form a point), (rotate work so that you are working back down the other side of the chain),
sl st in the other side of the ch you made the last sl st in, then sl st in each of the next 2 chs, 1 sc in each of the next 3 chs, 1 hdc in the last 2 chs, sl st to the 1st dc of the round.
Fasten off and weave in all ends (we will use brown to sew it to the face).
Left Horn
With beige, ch 10,
Round 1: Working in the back bump of the ch, hdc in 3rd ch from hook, 1 hdc in next ch, 1 sc in next 3 chs, sl st in last 3 chs, ch 1 (this helps form a point), (rotate work so that you are working back down the other side of the chain),
sl st in the other side of the ch you made the last sl st in, then sl st in the next ch, 1 sc in next ch, 2 sc in next ch, 1 hdc in next 2 chs, 1 dc in last 2 chs, sl st to the 1st hdc of the round.
Fasten off and weave in all ends.
Assembling the Cows
Attach the muzzle to the front face panel before moving on to cow assembly.
- Thread the yarn tail of the muzzle onto a yarn needle.
- Position the muzzle on the front face panel just below where the hair fringe falls. Optional: pin in place with straight pins while you sew.
- Sew back and forth through the muzzle and face panel (near the edge of the muzzle) the whole way around.
Attaching the Horns and Ears
We will sew on the ears and horns before joining the face panels together.
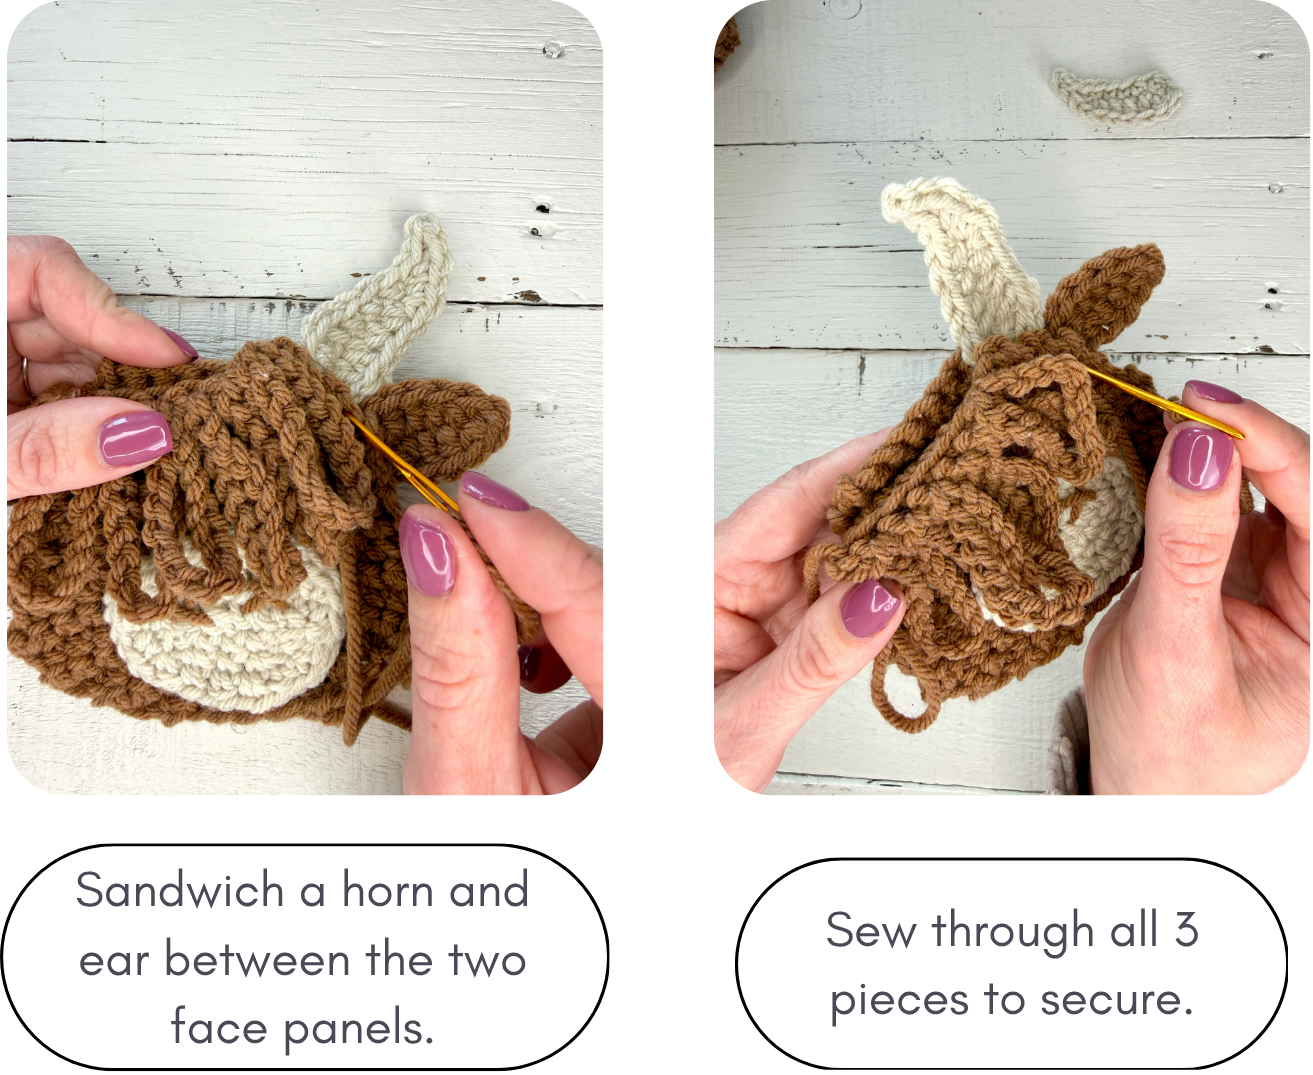
- Align the two face panels with the wrong sides facing in and the front panel towards you.
- On one side of the face, insert a horn and an ear between the two panels near the top (see picture). The horn should go above the ear and be sure that the “right sides” of each piece are facing you. Optional: use straight pins to hold the pieces in place while you sew.
- Thread the tail of the ear onto a yarn needle (you will use this to attach both the ear and the horn), begin sewing back and forth through all three layers (front panel, ear, back panel) to secure. Continue the same process with the horn.
- Repeat this process for the other ear and horn.
- Tie off and weave in your ends or tuck them inside the face panels.
Joining the Face Panels
With the front panel towards you, we will single crochet through both face panels around the edges to join. To do that:
- You should have (brown) working yarn still attached at the top left edge (right edge for lefties!) of the front face panels. If not, attach brown yarn here.
- For the portion where the horn and ear are already sewn on, sc evenly along the edge of just the front panel since this part is already sewn together.
- Once you are past the horn and ear, begin single crocheting evenly through both panels around the bottom of the face and back up the other side of the face until you reach the second ear/horn portion. Again, single crochet around the edge of just the front panel here.
- Stop here and use polyfil to lightly stuff the cow head before crocheting the top closed.
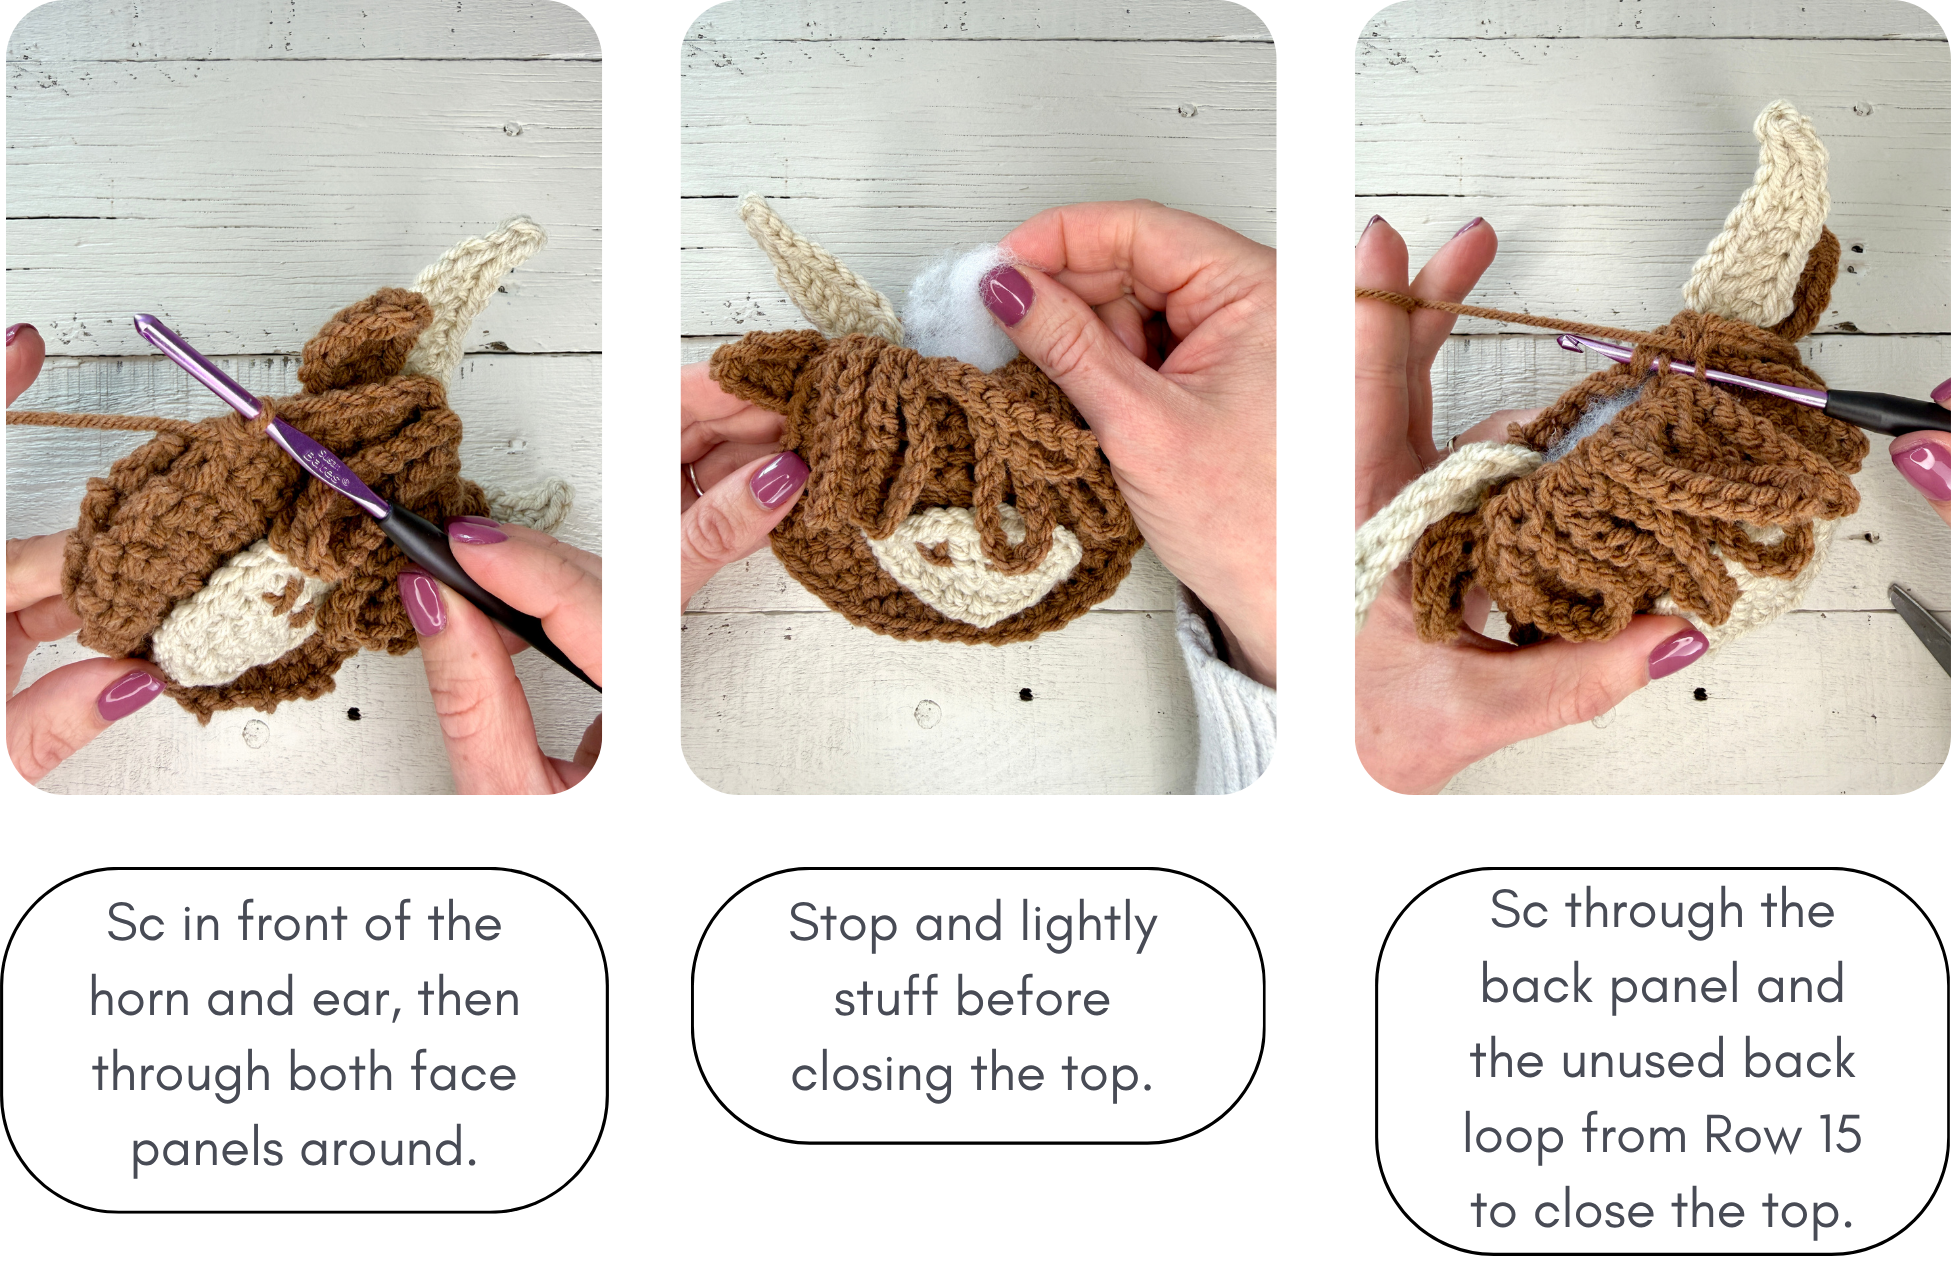
- To finish joining the two panels, sc through the unworked back loop from Row 15 when we made the front panel hair fringe and the top stitches of the back panel.
- Sl st to the first sc to join this “round”.
- Fasten off and weave in any remaining ends.
- Your cow is finished!
Making the Garland
Make as many cows as you would like for your garland – I made four for a 5-foot garland.
- Cut a 6-foot piece of twine, string, or yarn and thread it onto a yarn needle. I used a double stranded length of beige yarn.
- Use the needle to thread the yarn/twine through a few stitches on the back of each cow (near the top). I found it best to thread it at two points on the back of each cow head. Check to see the cow is hanging correctly.
- Continue attaching the other cows and slide them to adjust positioning.
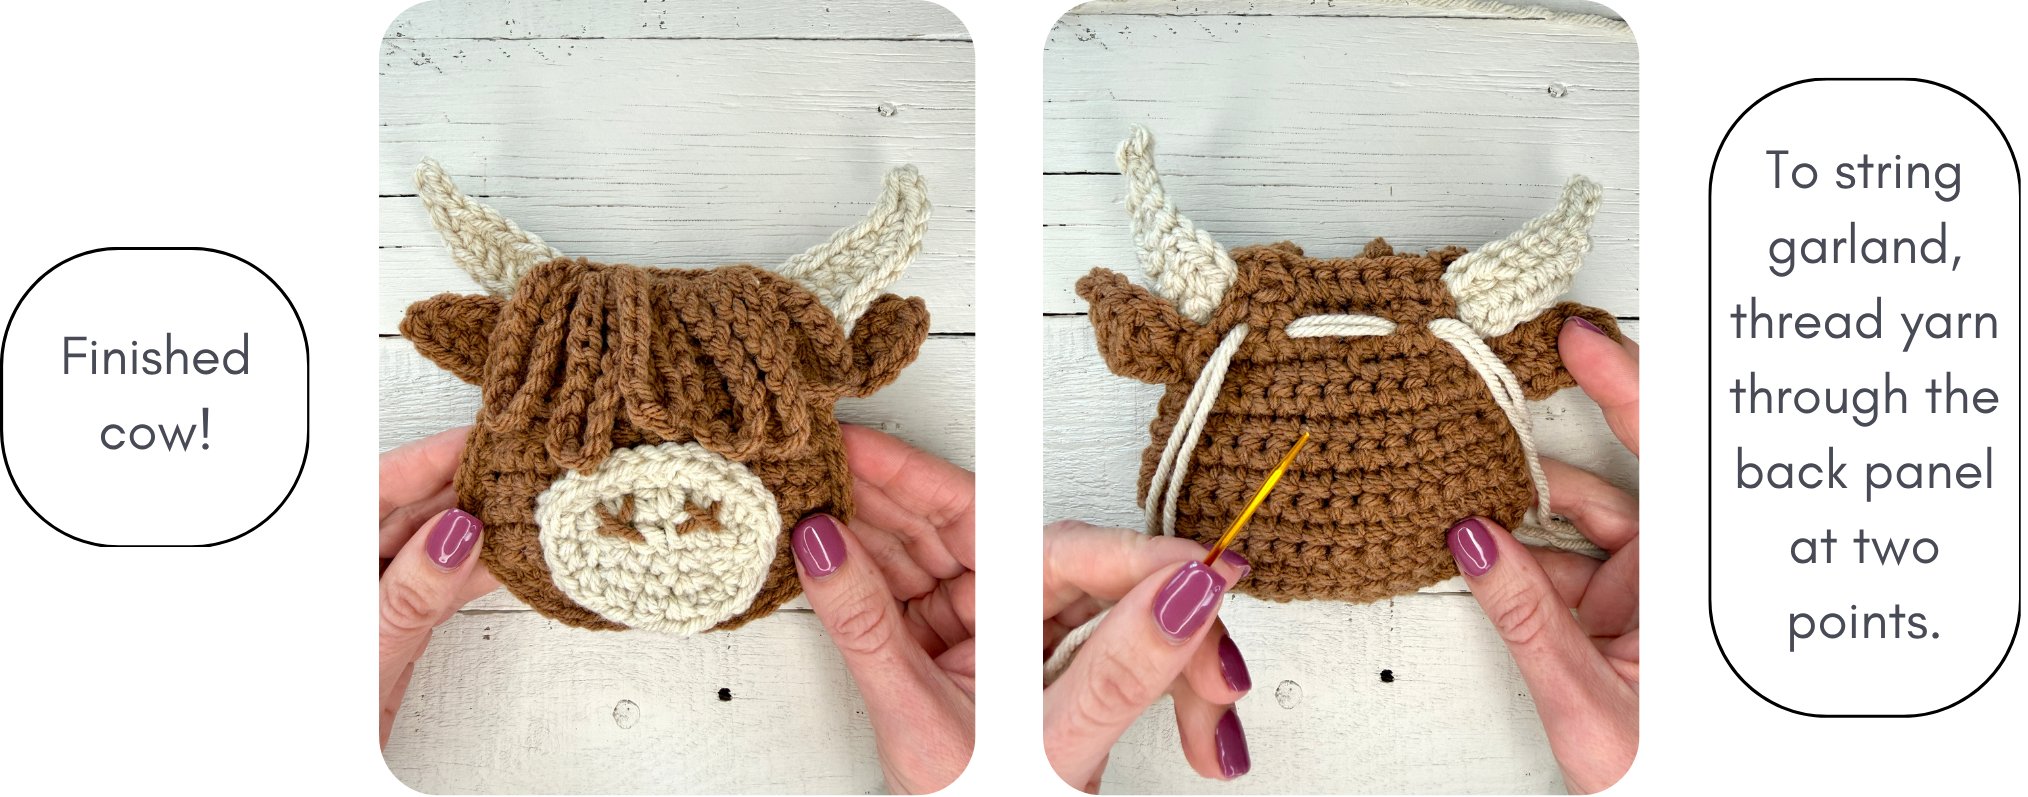
Your garland is finished!
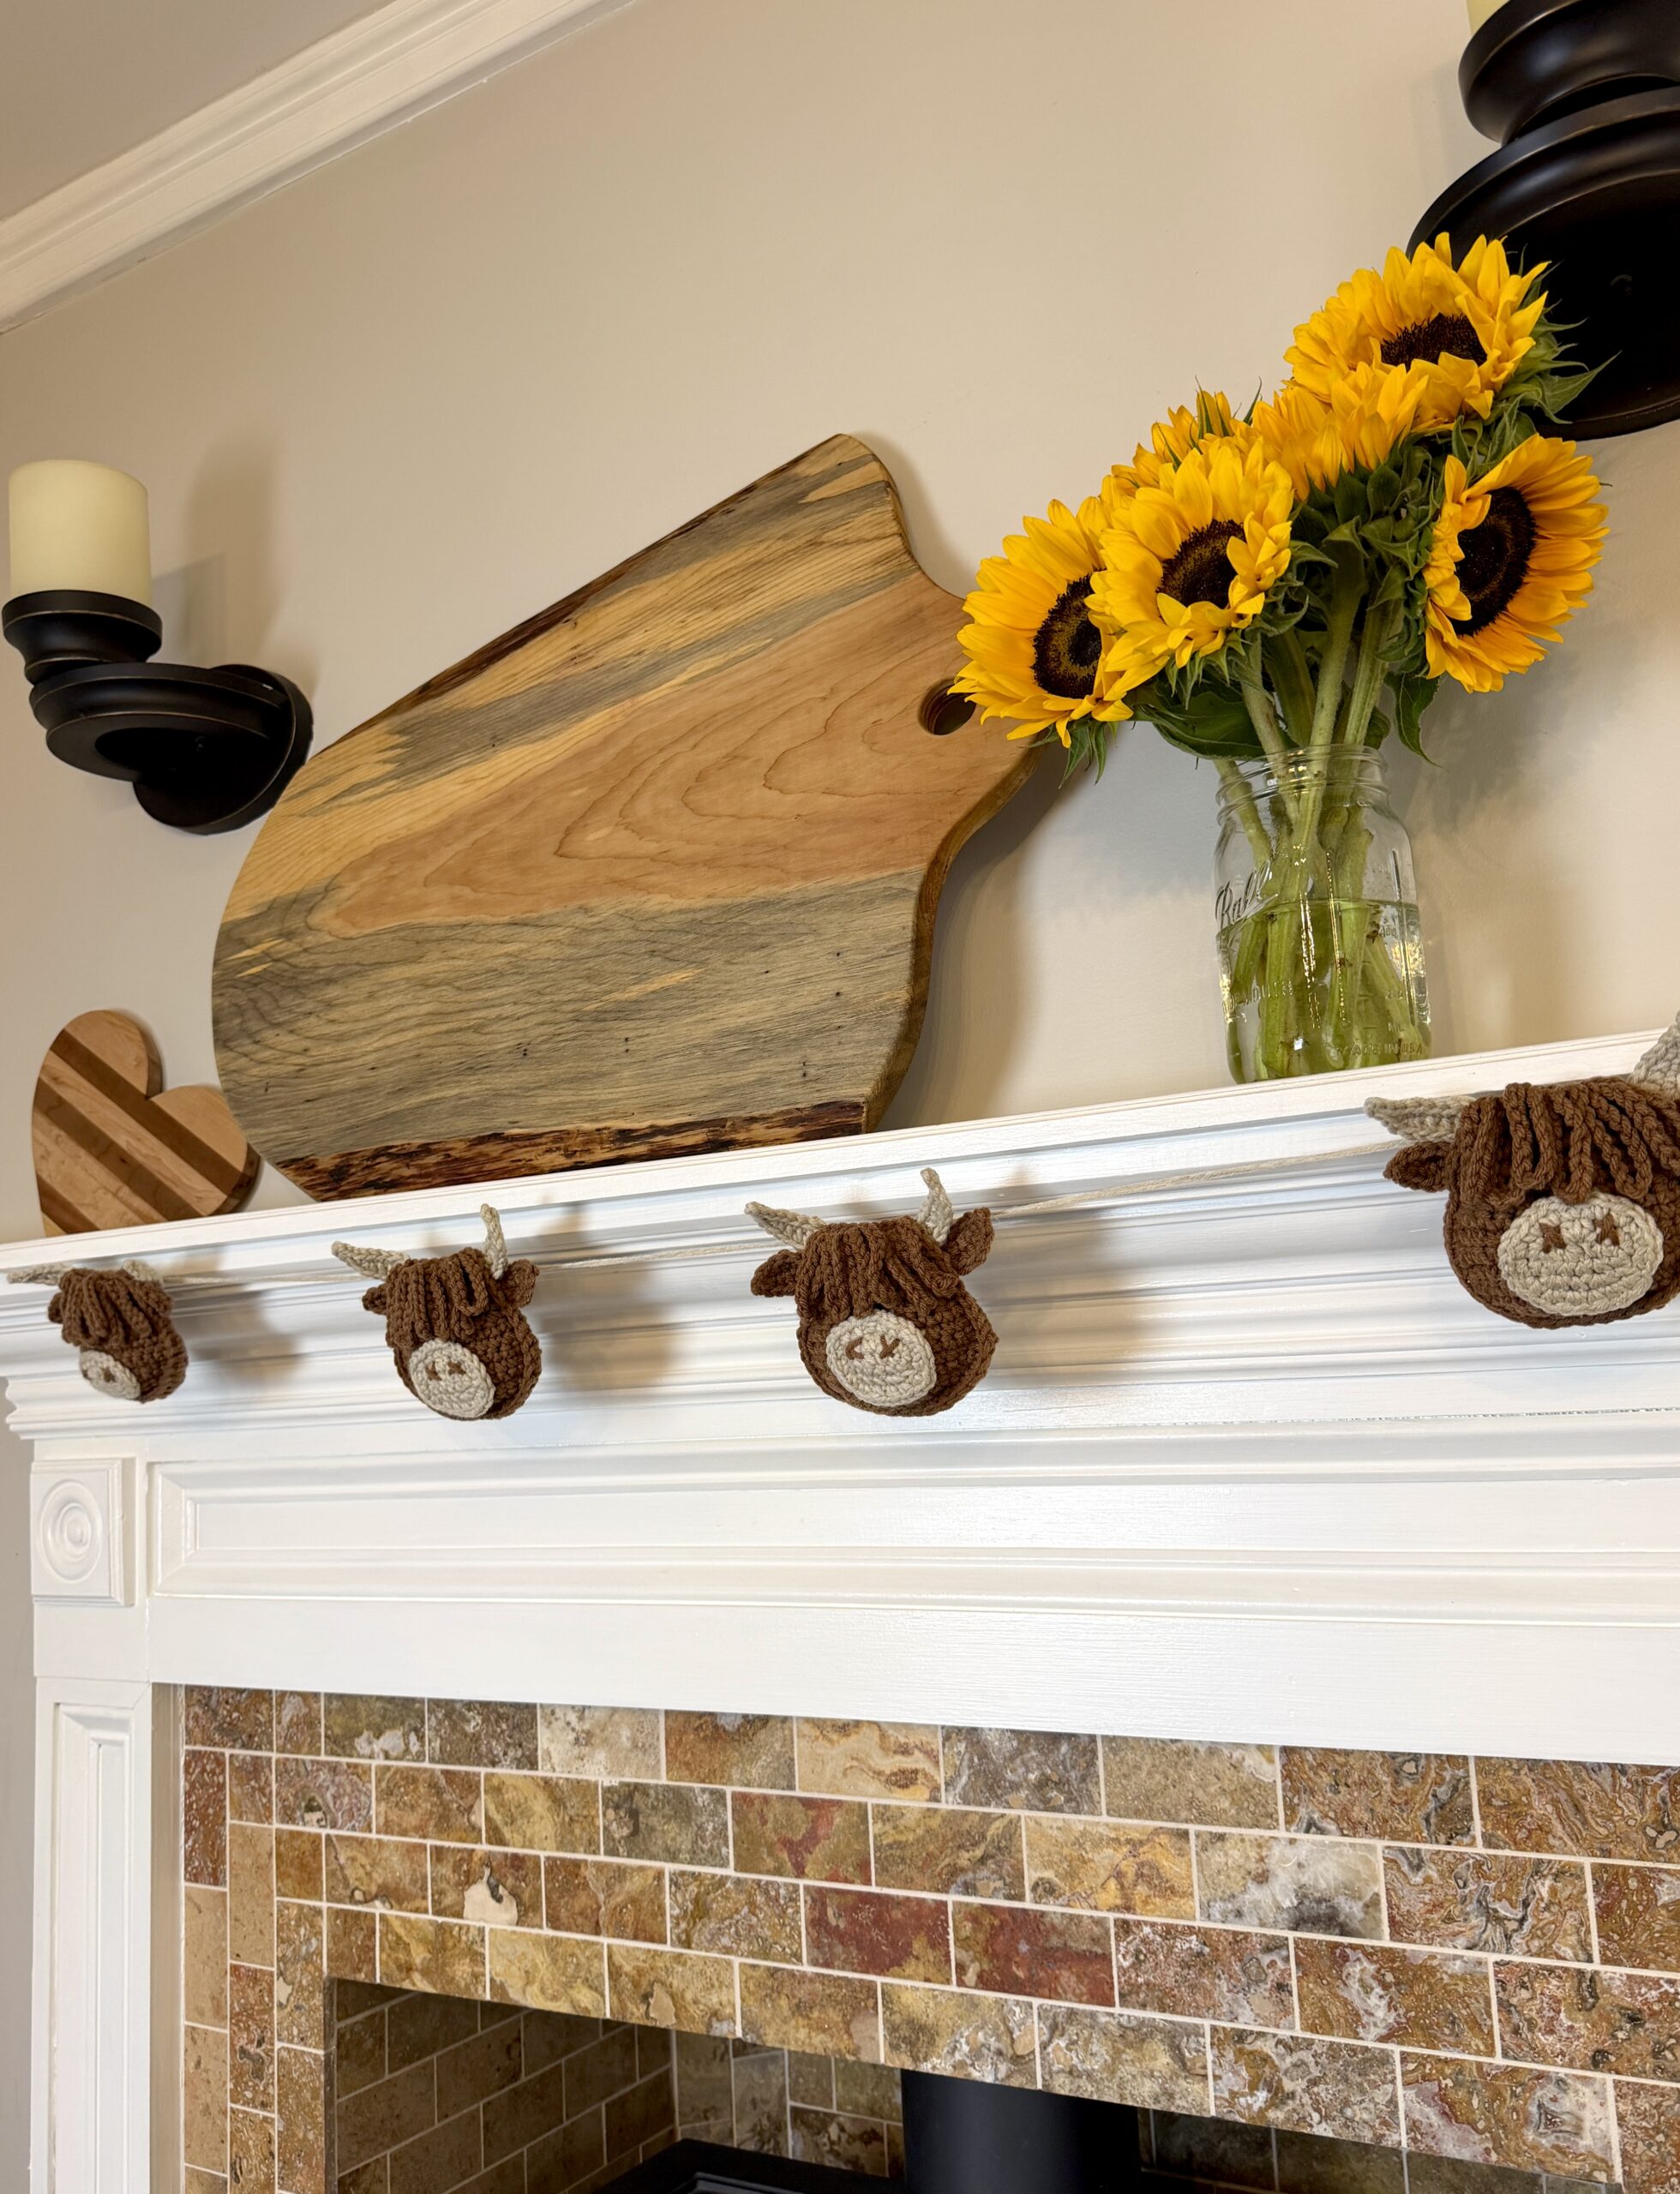
I hope you enjoyed crocheting this crochet Highland Cow Garland pattern! Tag me on Instagram @theknottednest to share your project. You can find more project ideas and patterns in the Patterns Section here on the blog.
Happy making!

You May Also Like
Cozy Convertible Mittens
Dreaming of Spring Triangle Scarf