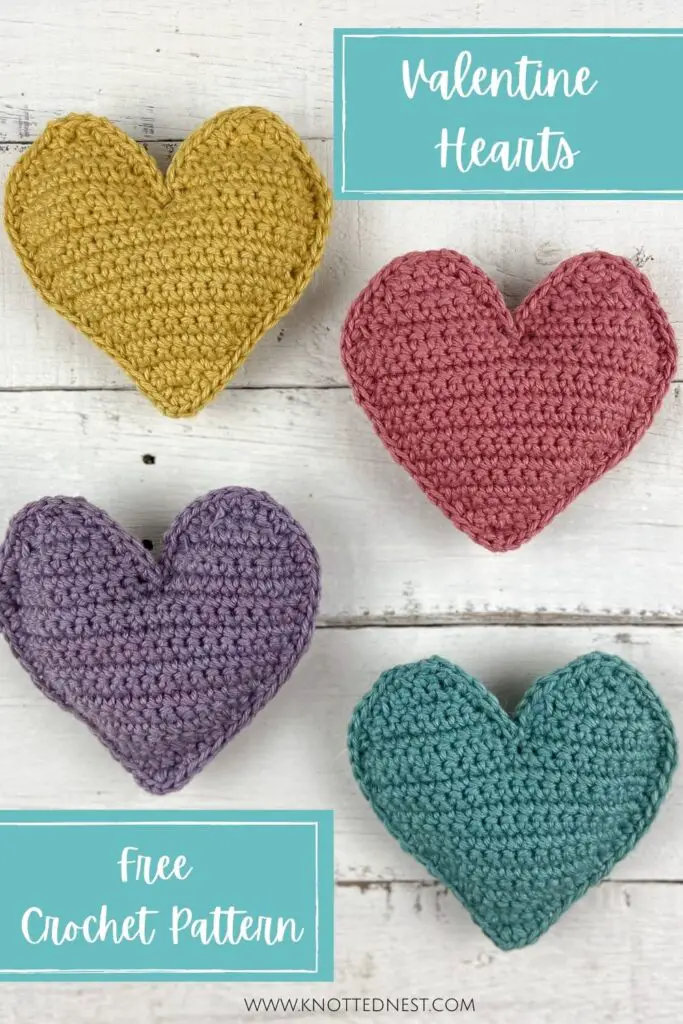
Valentine Hearts Crochet Garland
Crochet garlands are kinda my jam – I’ve made them for almost every season/holiday (check out my patterns for Easter Bunny Garland, Rustic Pumpkin Garland, and Christmas Tree & Star Garland to get a sampling). It just makes me happy to see crochet hanging around the house and my kiddos get a kick out of guessing what the next season’s garland will be!
Read on for a little background info about this fun project or scroll on down for the free pattern!
Pin this pattern for later!
Inspiration
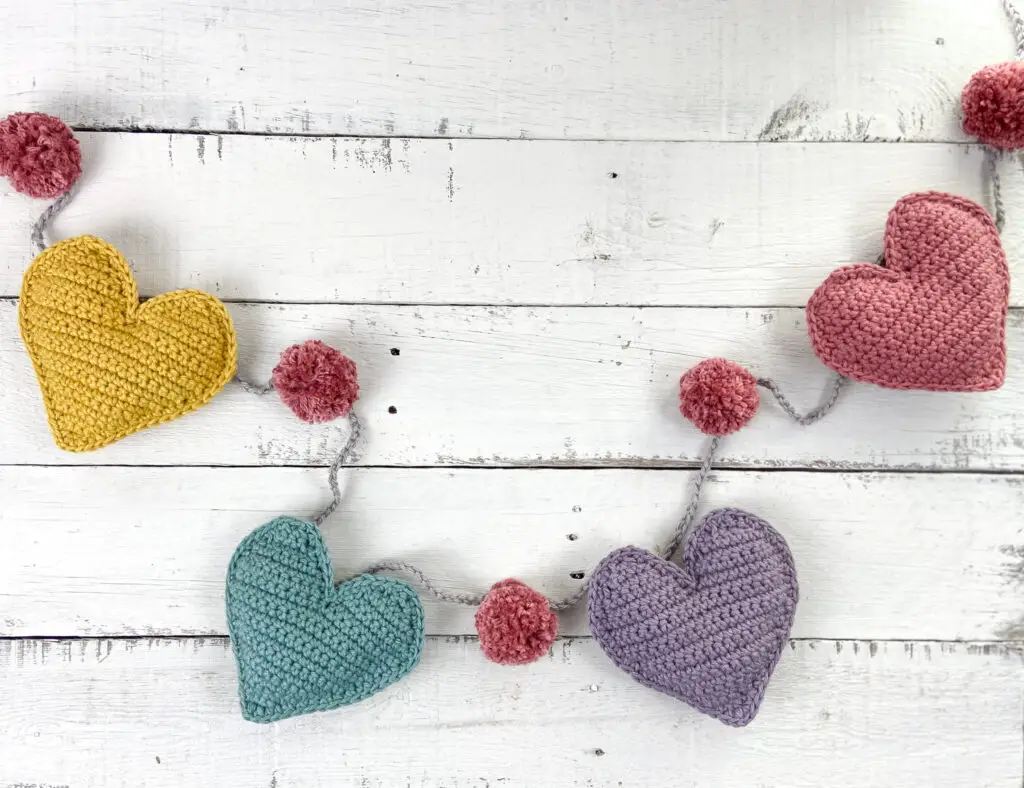
I had a vague idea that I wanted to make a crochet hearts garland for Valentine’s Day, but I wanted to shake things up a bit and I just wasn’t feeling inspired. Then a few nights ago while cooking dinner, an idea hit me (don’tcha love it when that happens!?) – instead of the traditional horizontal garland, why not make it vertical?! Don’t mind if I do!

Of course, I also had to see how it would look to string these sweet Valentine hearts up the traditional way, but I’m really diggin’ vertical look too! It kind of reminds me of those conversation hearts candy that taste terrible but are fun to get…. 🙂
You could even pop a few of these fun crochet hearts in a basket for table decor or hang them in your windows for a more indoor/outdoor approach. You really don’t even need to be limited to Valentine’s Day – I think these would make the cutest nursery decor!
Construction and Supplies
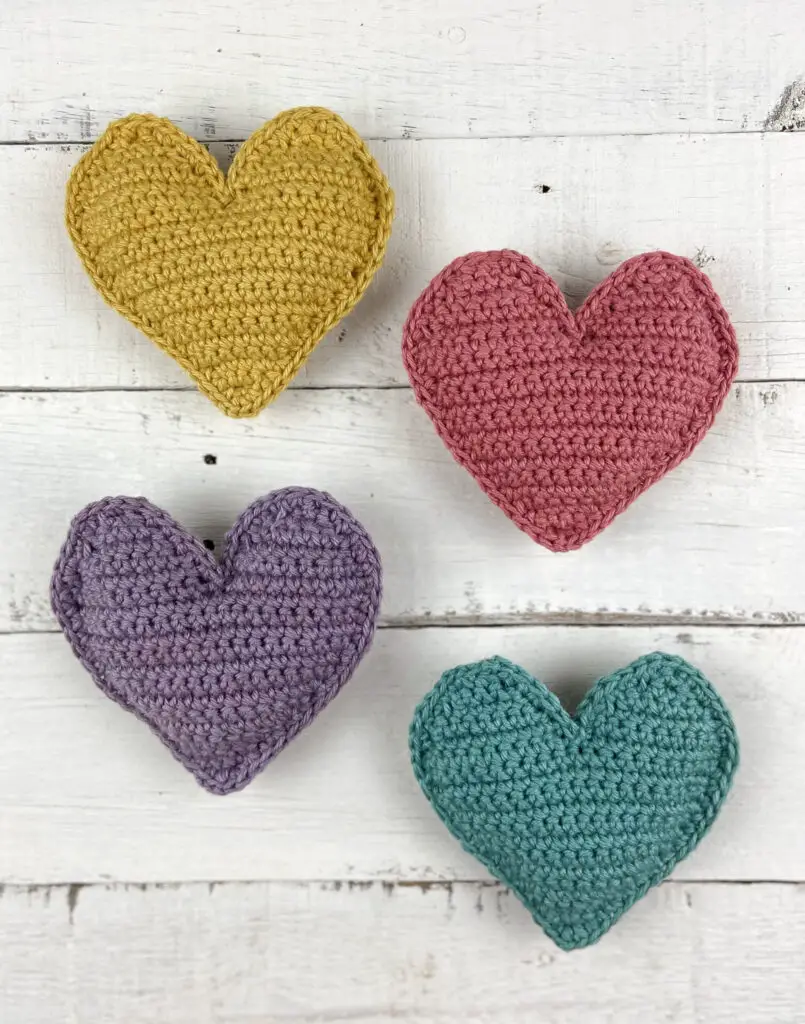
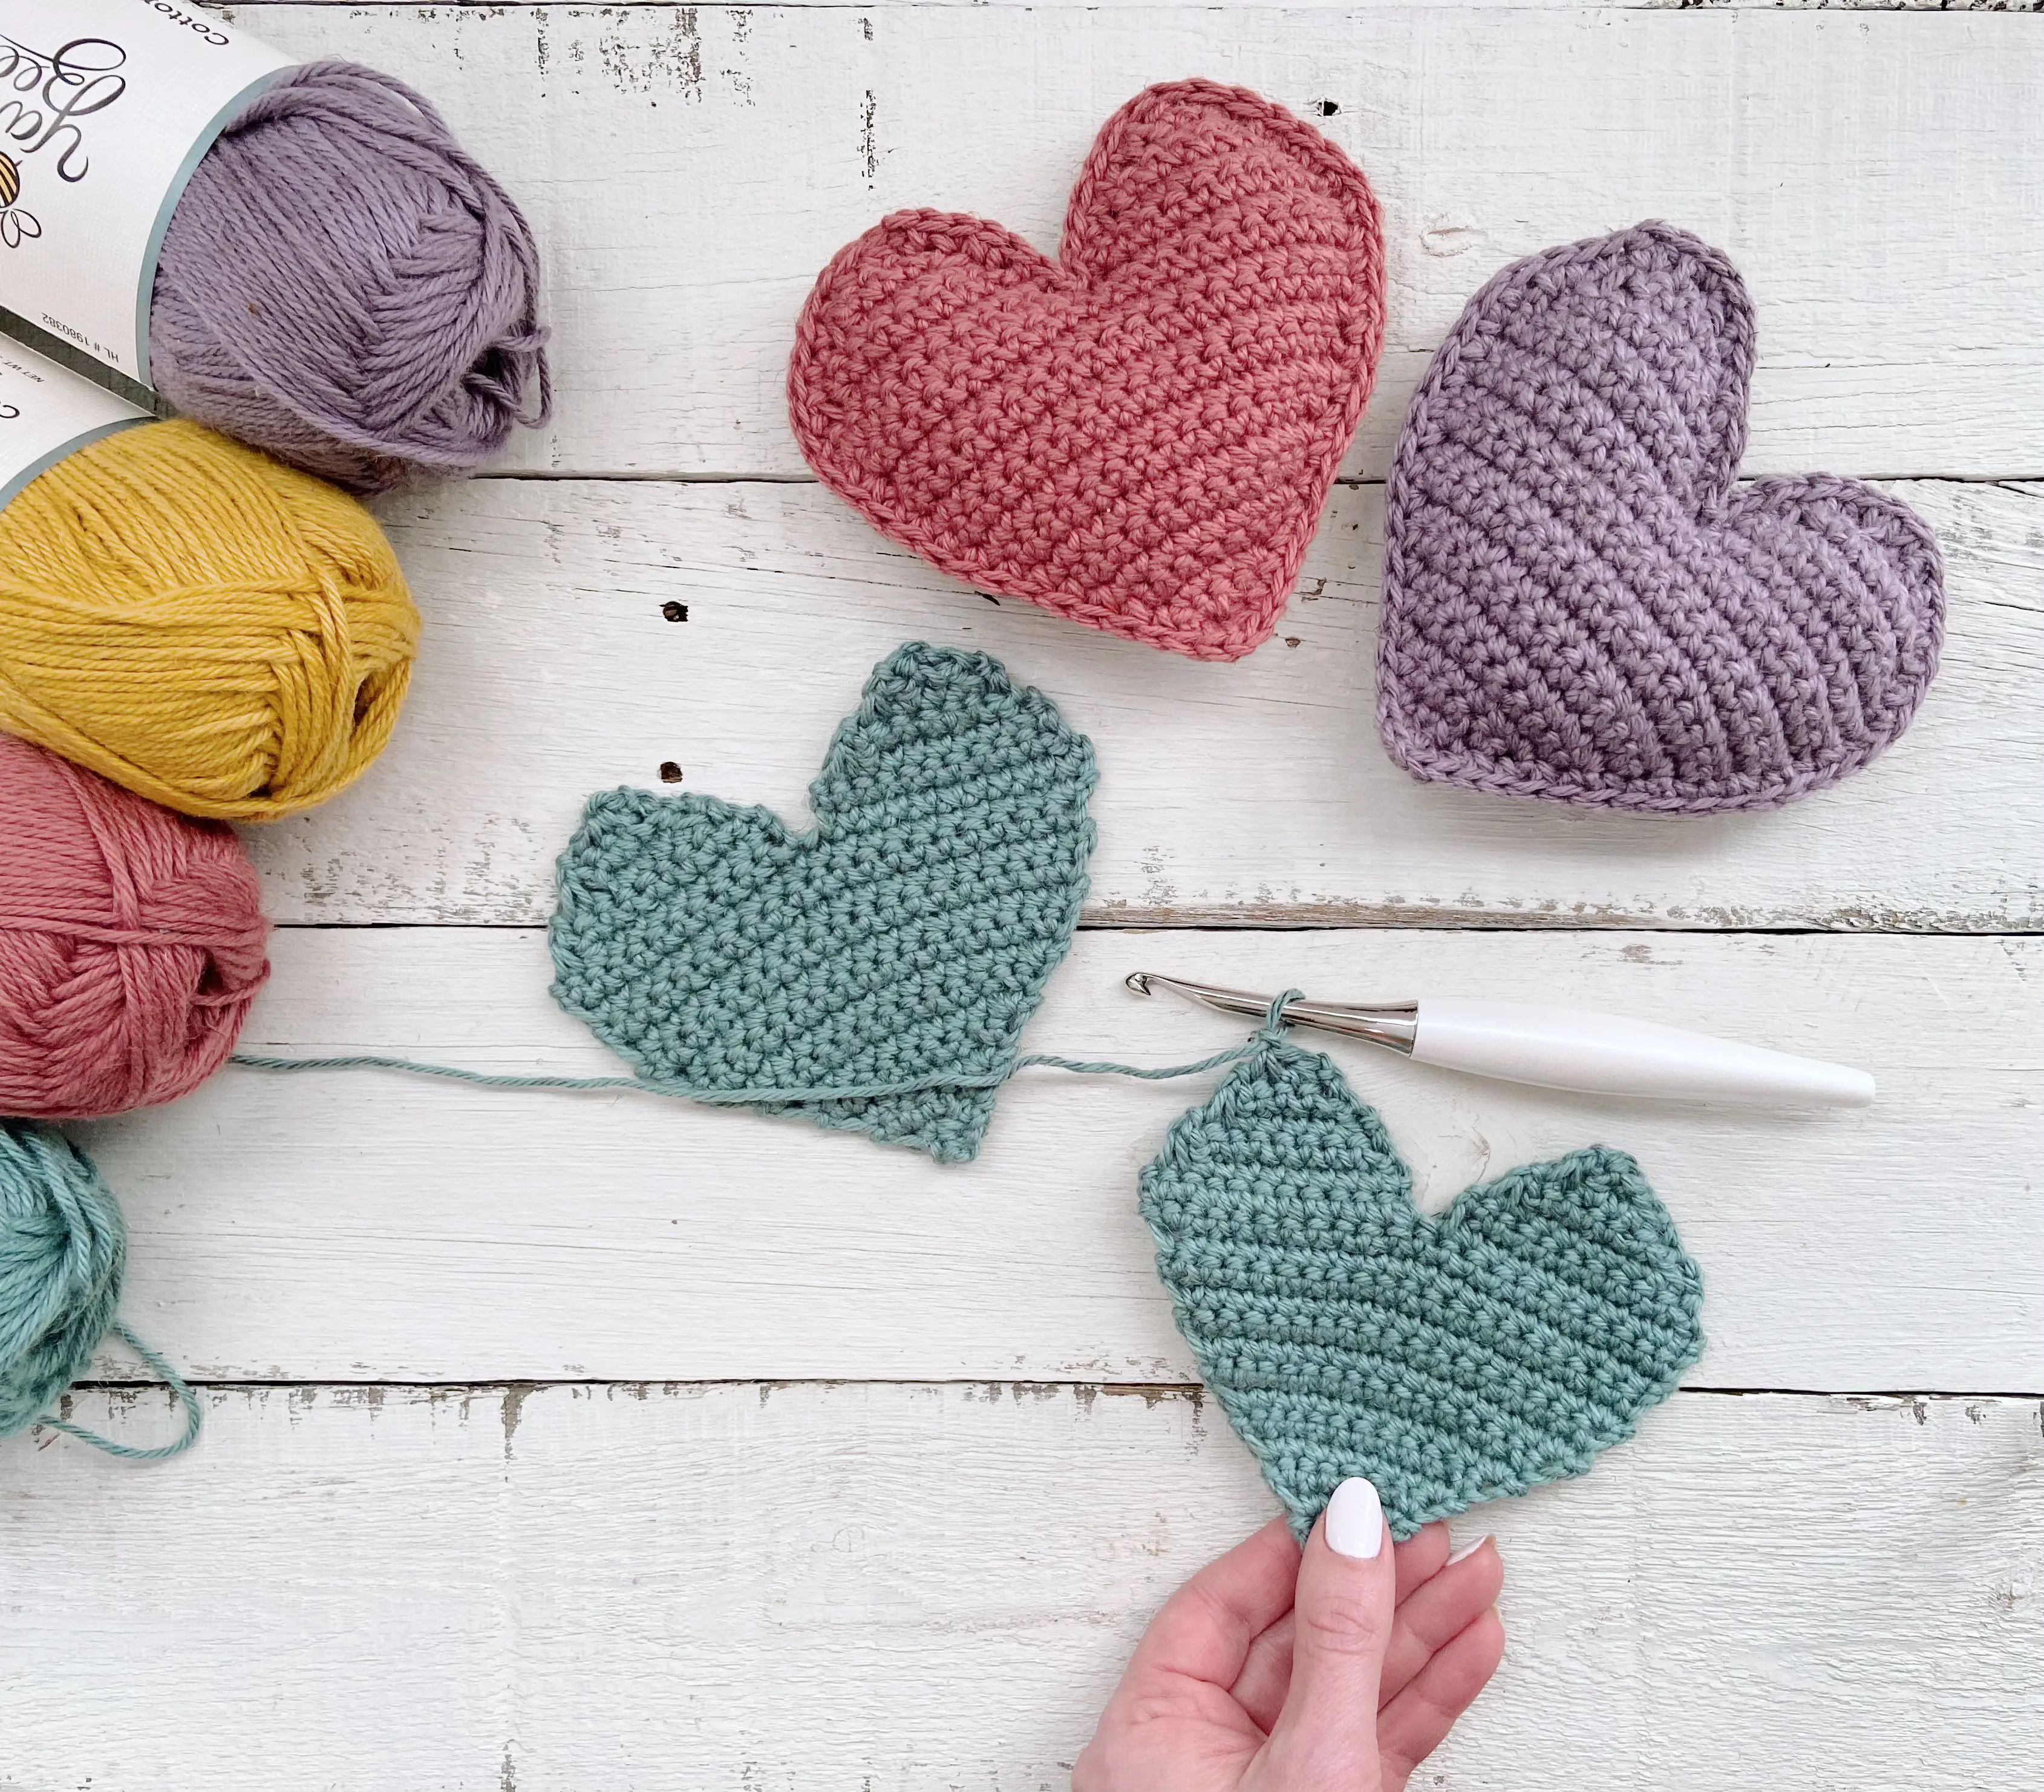
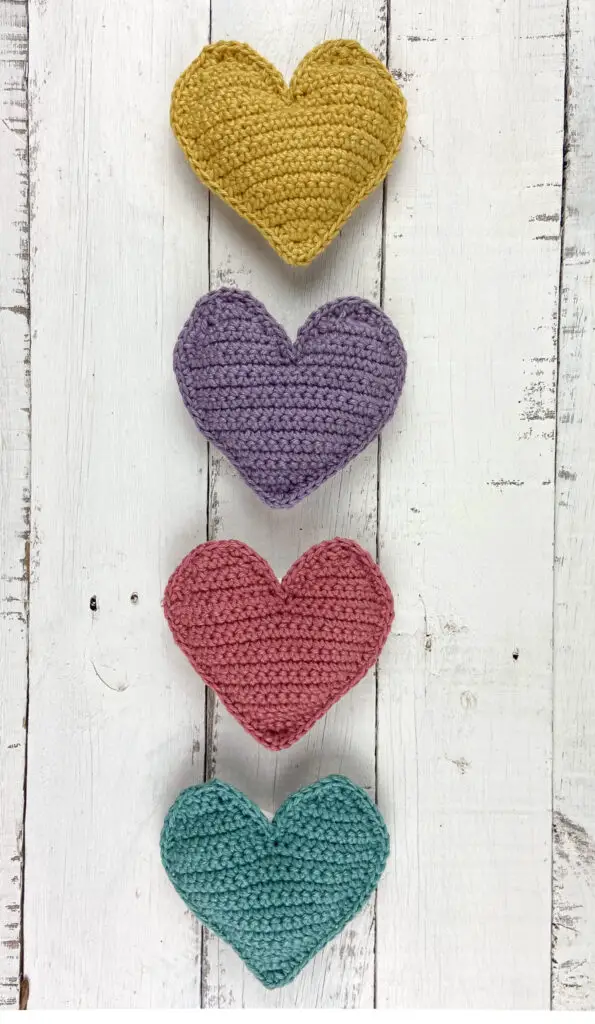
Like all of my crochet garlands, the Valentine’s Heart Garland is constructed in a 2D style: each heart is made of two identical panels that are worked flat, joined together, and lightly stuffed. And it’s all made with one stitch! If you can single crochet, you can make these hearts.
To be honest, I chose the yarn for this project – Yarn Bee Cotton Et Lin – based on color. But I am so glad I did because it’s PERFECT for making crochet garlands! As you might have guessed from the name, it’s a cotton/linen blend. So, while it has a nice softness, it doesn’t have a lot of stretch, which is exactly what you want when making a piece that needs to hold its shape.
Of course any worsted weight yarn will do for this project! Some yarns I’d recommend for subbing are WeCrochet’s Brava or Lion Brand Vanna’s Choice. It would also be fun to play around with different yarn weights for these hearts (how cute would it be to string up a bunch of itty bitty crochet hearts?!? Maybe I’ll put that on the list for next year!)
For this project, you’ll also need some stuffing material and bit of cardboard for making pom poms (or a pom pom maker if you want to get fancy!).
Let’s make some hearts!
You can also get an ad-free, printable PDF of this pattern on Etsy or Ravelry!
Valentine Crochet Hearts Garland Pattern
Skill Level – Easy
Materials
- About 30 – 40 yards of worsted weight yarn per heart in your choice of colors. You will also need an additional 10-20 yards for the Garland chain and 10-15 yards per pom pom. I used Yarn Bee Cotten Et Lin (in Mauve, Smokey Plum, Sulphur, cyan, and haze). WeCrochet’s Brava yarn or Lion Brand’s Vanna’s Choice yarn would also be great for this pattern.
- Size G (4.00mm) crochet hook.
- Polyfill or other stuffing material.
- Yarn (Tapestry) Needle, scissors, measuring tape.
- 2″ piece of cardboard for making pom poms (or pom pom maker).
Dimensions – each heart measures approx. 5″ x 4.5″.
Gauge – 9 sts x 9 rows = 2″ sq using sc.
Notes
- Each piece is made of two flat panels that are joined together and lightly stuffed.
- Yarn, colors, and layout for this project are all easily customizable.
- The Ch 1 turning chain used throughout does NOT count as a stitch.
- Pattern written in US terms.
- Step-by-step instructions are given for making pom poms by hand, but you can use a pom pom maker or any other method to make 2″ pom poms.
Special Stitches
- Increase (Inc) = work 2 sc in one stitch.
- Decrease (Dec) = insert hook into first st, yo and pull up a loop (2 loops on hook), insert hook into next st, yo and pull up a loop (3 loops on hook), yo and pull through all 3 loops.
Abbreviations
- ch = chain
- dec = decrease
- inc = increase
- sc =single crochet
- sl st = slip stitch
- st =stitch
- yo = yarn over
Pattern
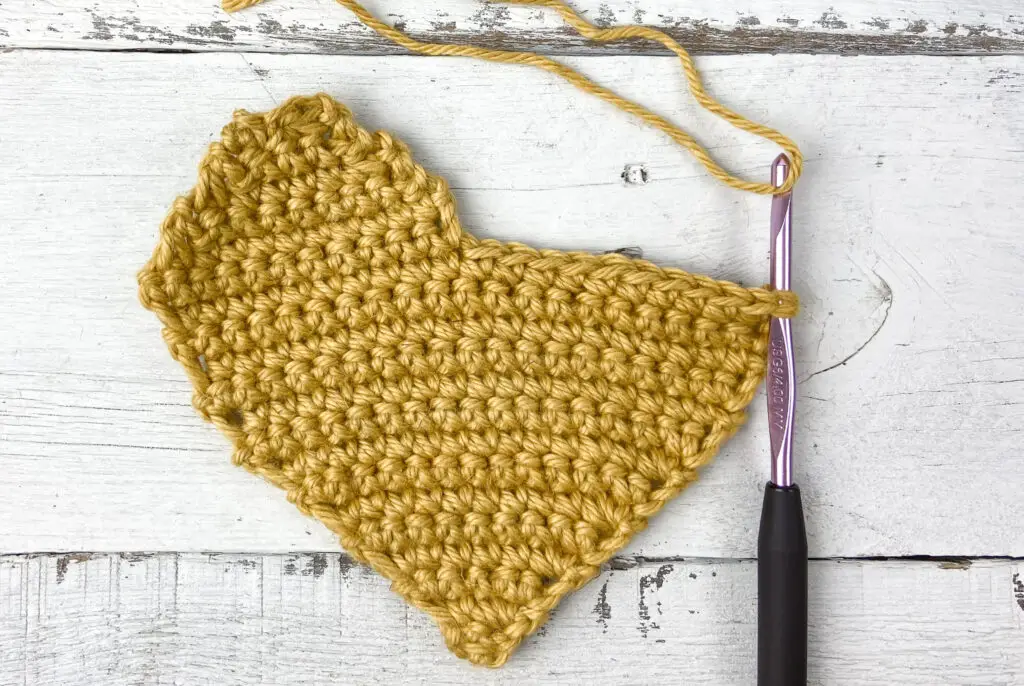
Heart Panel (make 2):
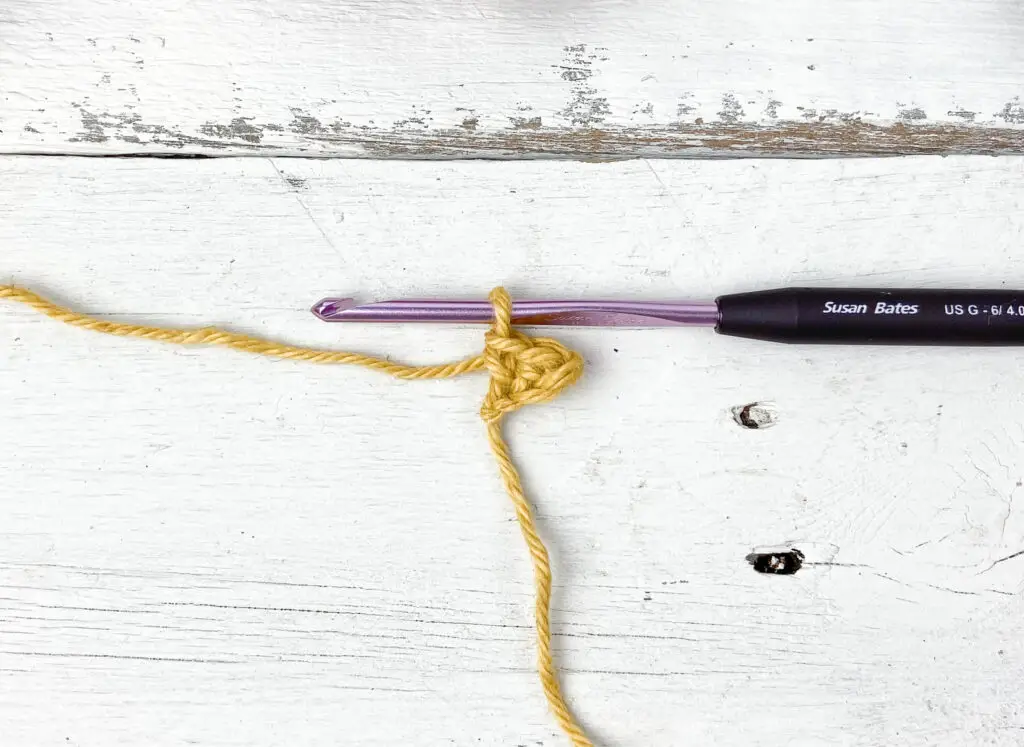
Ch. 3
Row 1: Sc in 2nd ch from hook and in next ch. Ch 1, turn. <2 sc>
Row 2: Inc in each st. Ch 1, turn <4 sc >
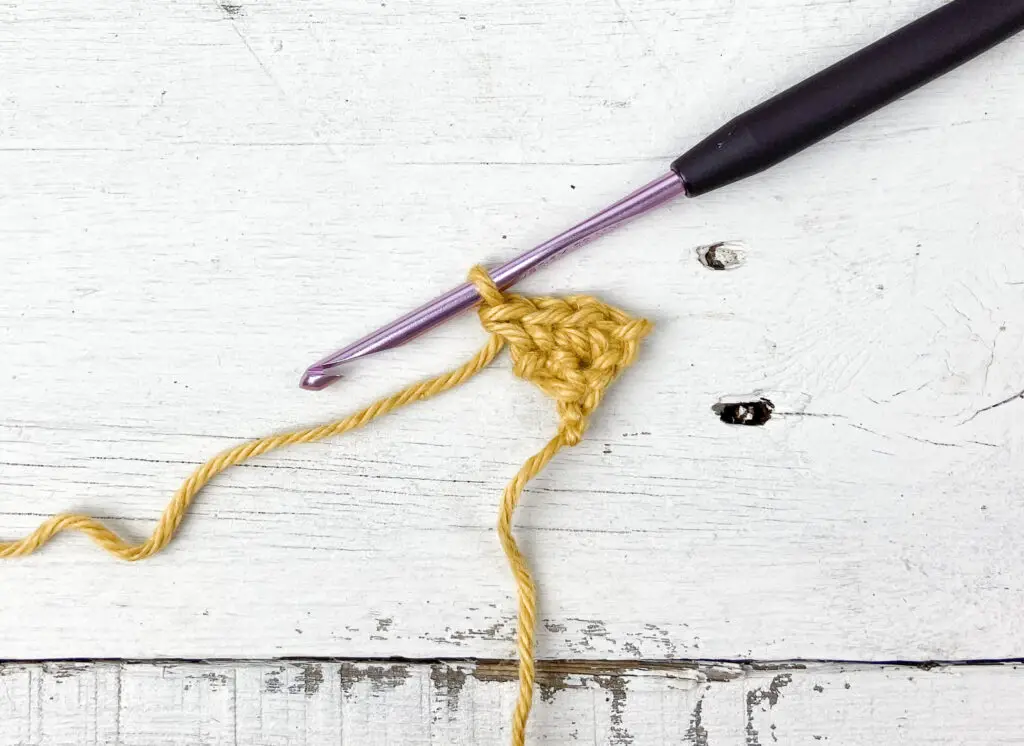
Row 3: Inc, sc in next 2 sts, inc. Ch 1, turn. <6 sc>
Row 4: Inc, sc in next 4 sts, inc. Ch 1, turn <8 sc>
Row 5 Inc, sc in next 6 sts, inc. Ch 1, turn <10 sc>
Row 6: Inc, sc in next 8 sts, inc. Ch 1, turn <12 sc>
Row 7: Inc, sc in next 10 sts, inc. Ch 1, turn <14 sc>
Row 8: Inc, sc in next 12 sts, inc. Ch 1, turn <16 sc>
Row 9: Inc, sc in next 14 sts, inc. Ch 1, turn <18 sc>
Row 10: Sc in each st. Ch 1, turn <18sc>
Row 11: Inc, sc in next 16 sts, inc. Ch1, turn. <20 sc>
Row 12 – 13: Sc in each st. Ch 1, turn. <20 sc>
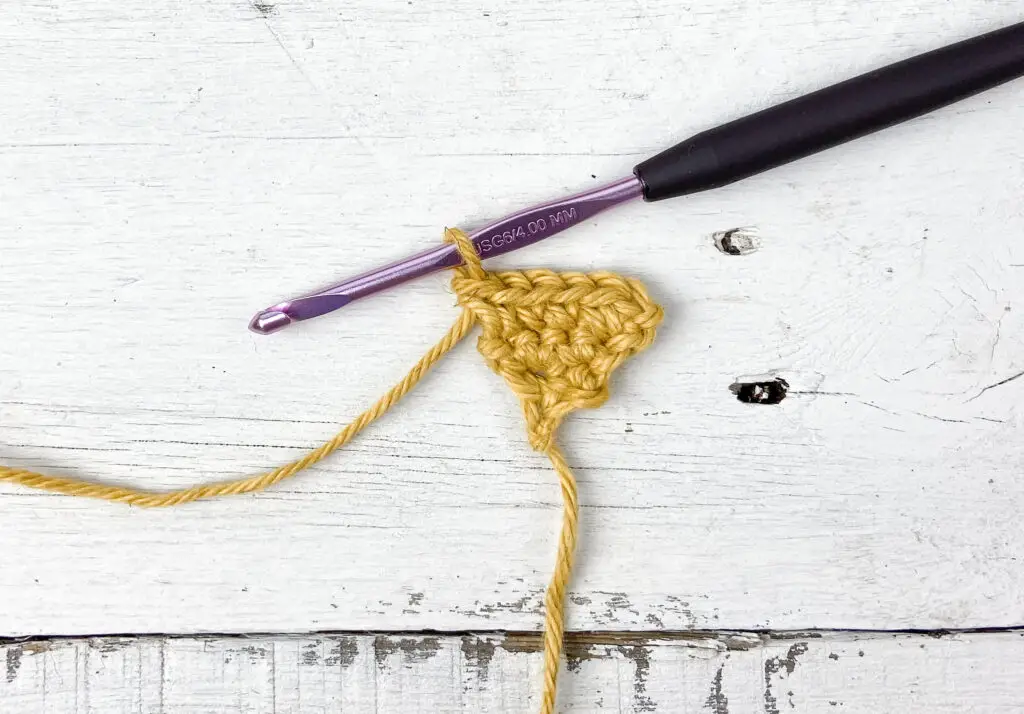
Row 14: Inc, sc in next 18 sts, inc. Ch 1, turn. <22 sc>
Now we will start the top “bumps” of the heart shape. Each bump is worked separately. You will begin the first bump by crocheting halfway across the panel and then turning. You will complete the first bump before reattaching your yarn to Row 14 to make the second.
1st “Bump” of heart
Row 15: Sc in next 11 sts (leave remaining sts unworked for now). Ch 1, turn. <11sc>
Row 16: Sc in next 9 sts, dec over last two sts. Ch 1, turn <10 sc >
Row 17: Dec, sc in next 6 sts, dec. Ch 1, turn. <8 sc>
Row 18: Dec, sc in next 4 sts, dec. Ch 1, turn <6 sc>
Row 19: Dec, sc in next 2 sts, dec. Ch 1, turn <4 sc>
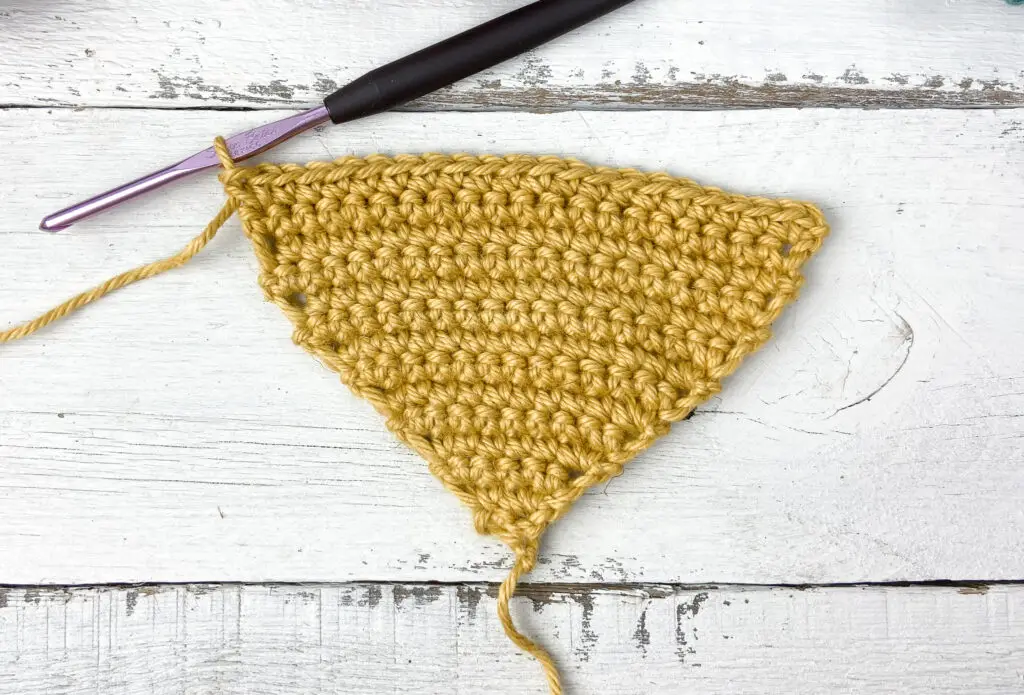
Row 20: Dec, dec. <2 sc>
Fasten off and weave in ends.
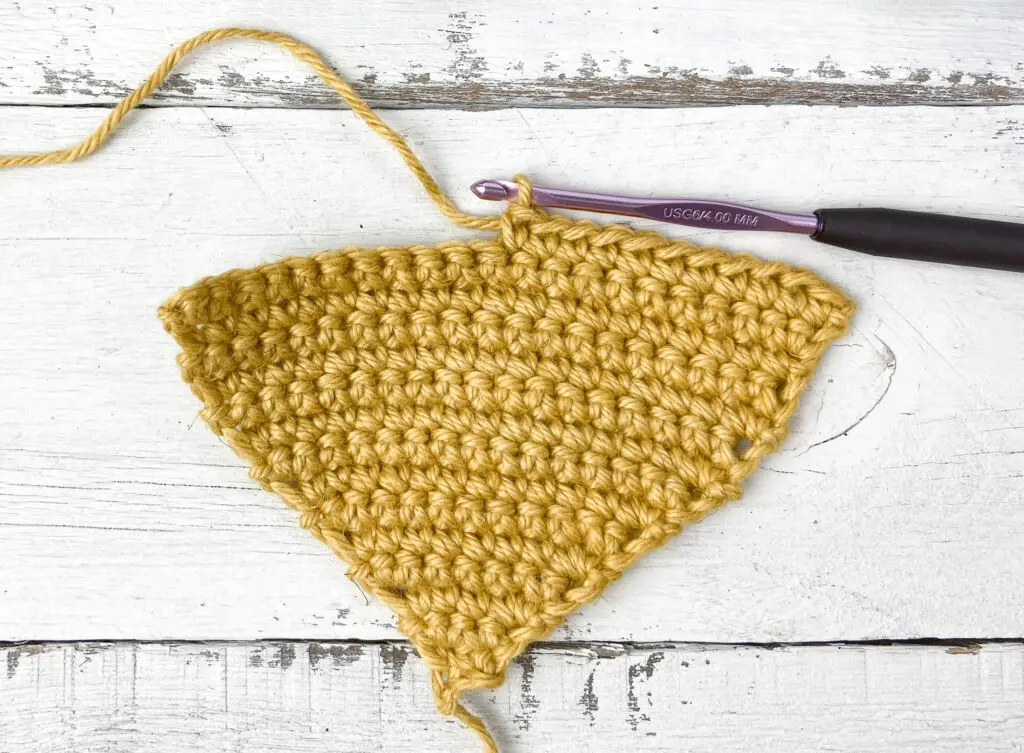
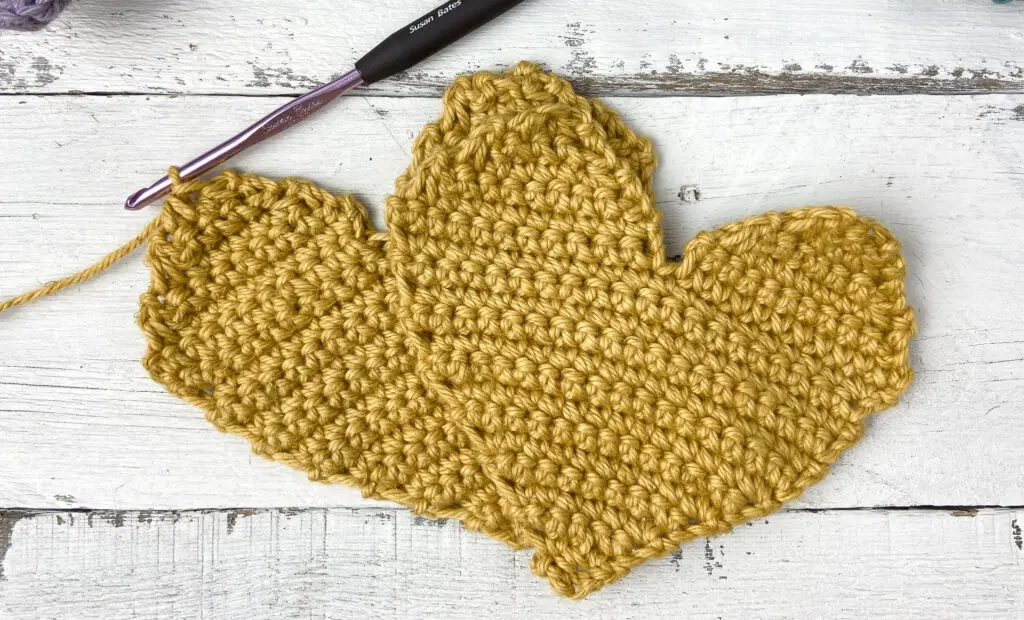
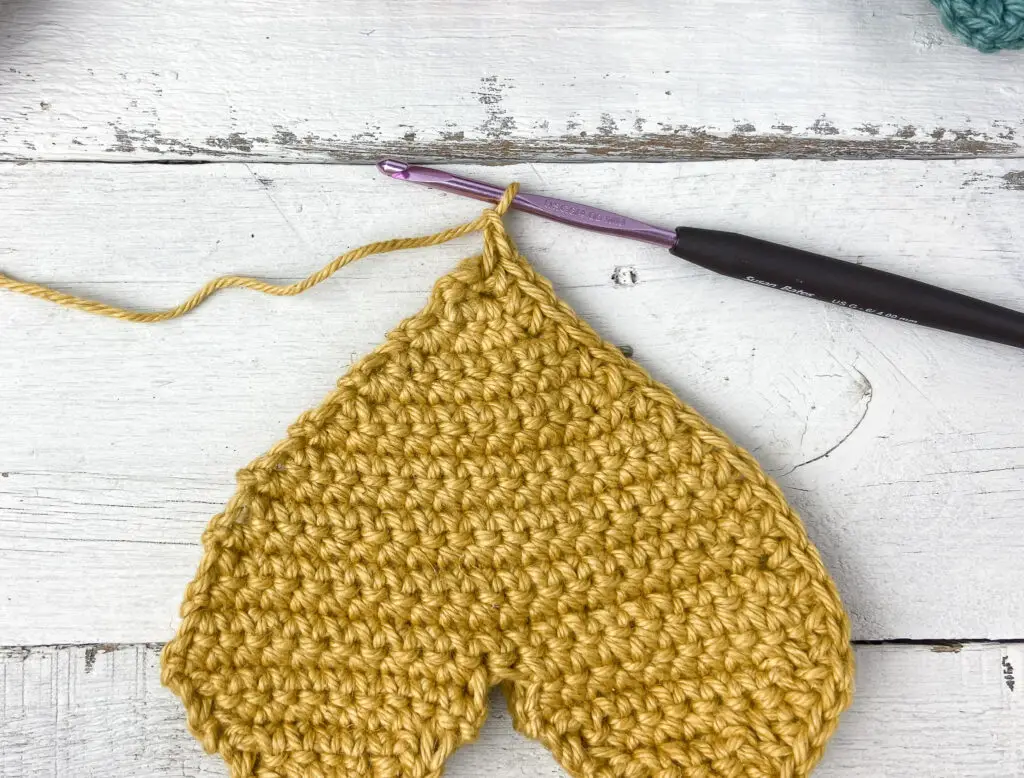
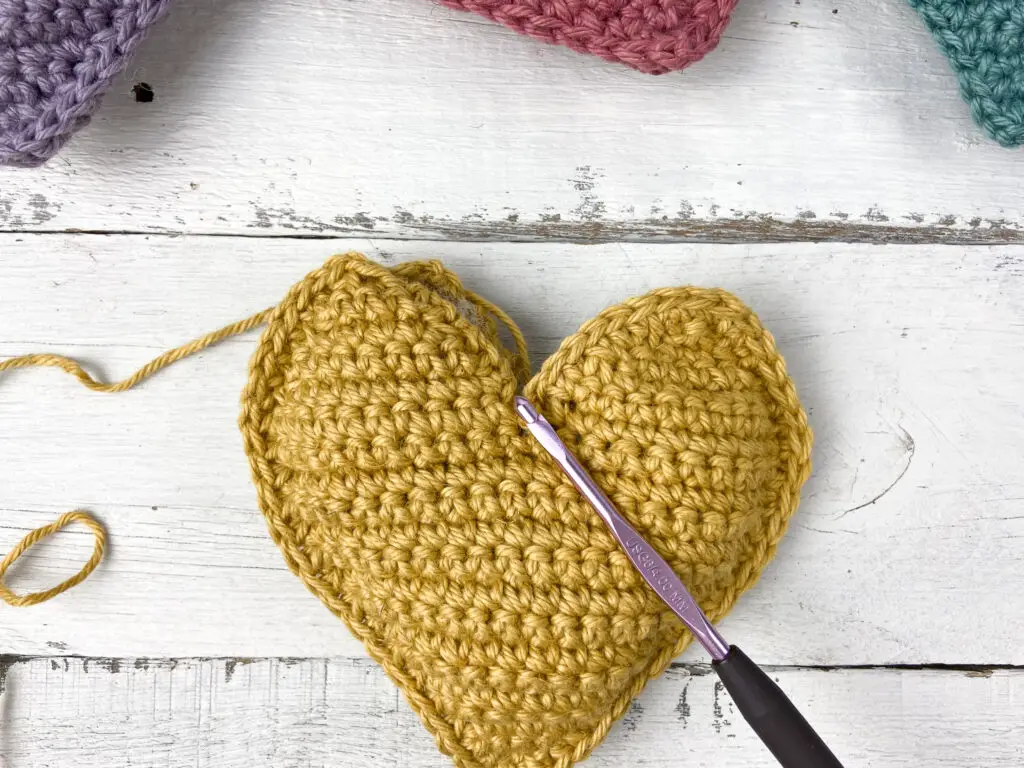
2nd “Bump” of heart
*Turn panel so that 1st bump is on the left. Attach yarn with a slip stitch at the top right of Row 14 (See pic)*
Repeat Rows 15 – 20, fasten off and weave in end for first panel, but leave second panel attached to yarn. We will use this to join the two heart panels. Proceed to Assembly.
Heart Assembly
– Align two heart panels, being sure the rows line up. It’s easiest if the panel still attached to the yarn is on top.
*Tip: Play around with your colors, it might be fun to join the panels with a contrasting color!
– Ch 1, and begin sc-ing through both panels to join.
– Continue sc evenly down the side of the heart.
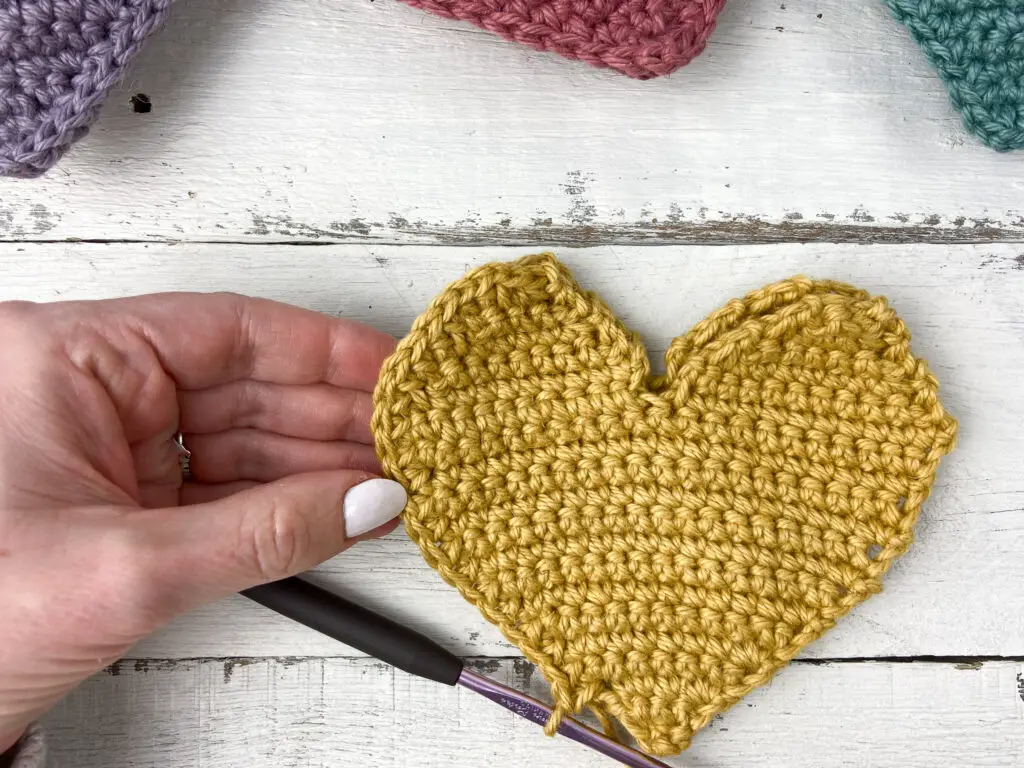
– At the bottom tip, (sc, ch 1, sc) in the same st to create a point.
-Continue sc evenly around. When you reach the indent between the two top bumps, work a sl st instead of a sc to help define this area.
-Before you finish joining the panels, use a small amount of polyfill to lightly stuff the heart.
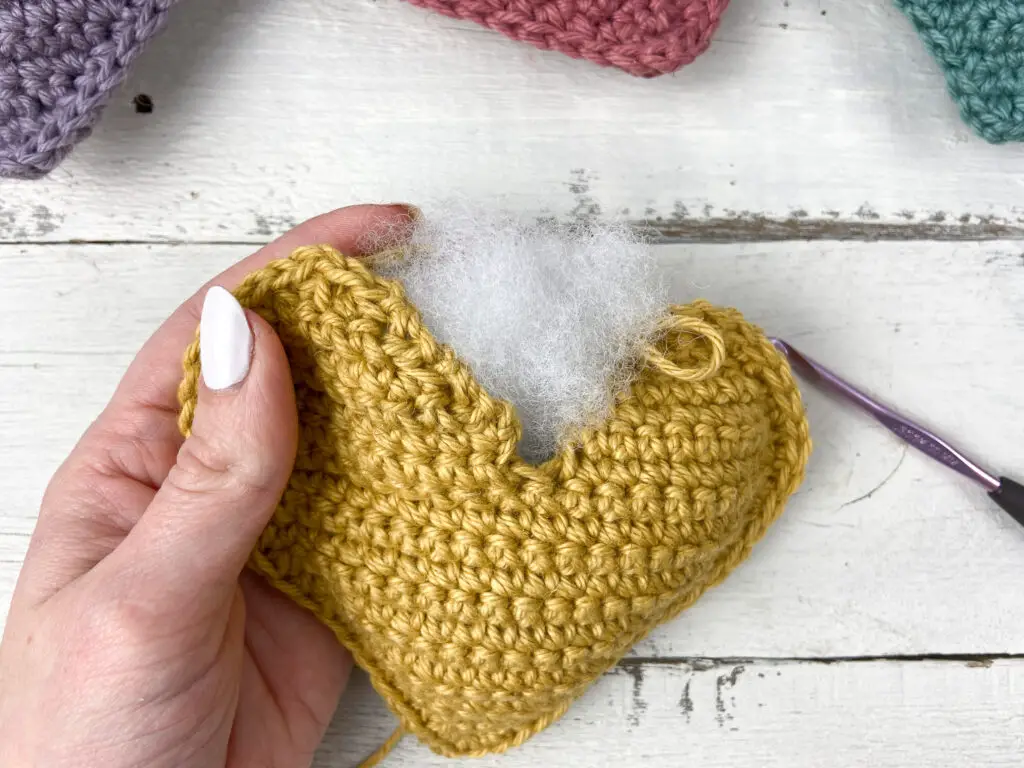
– Continue sc until you are back to where you started. Sl st to first sc to join round. Fasten off and weave in any ends. Heart finished!
Pom Poms
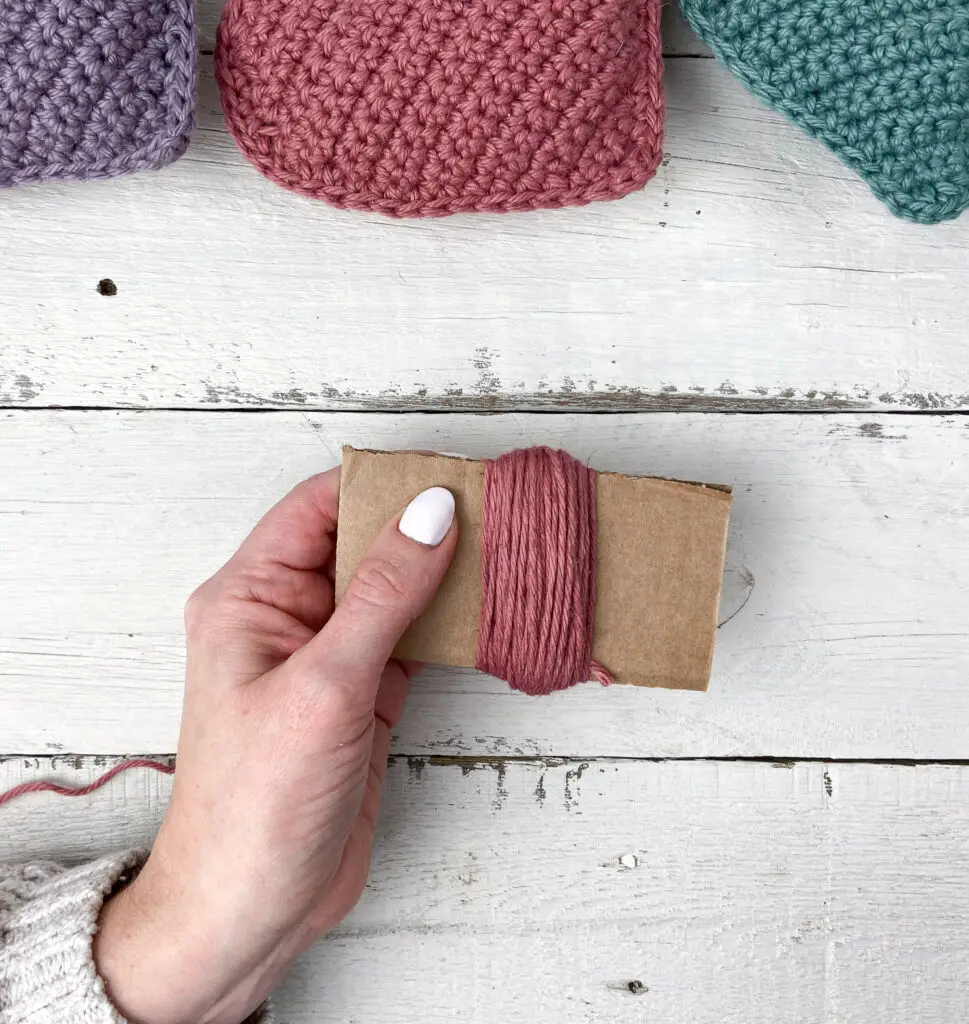
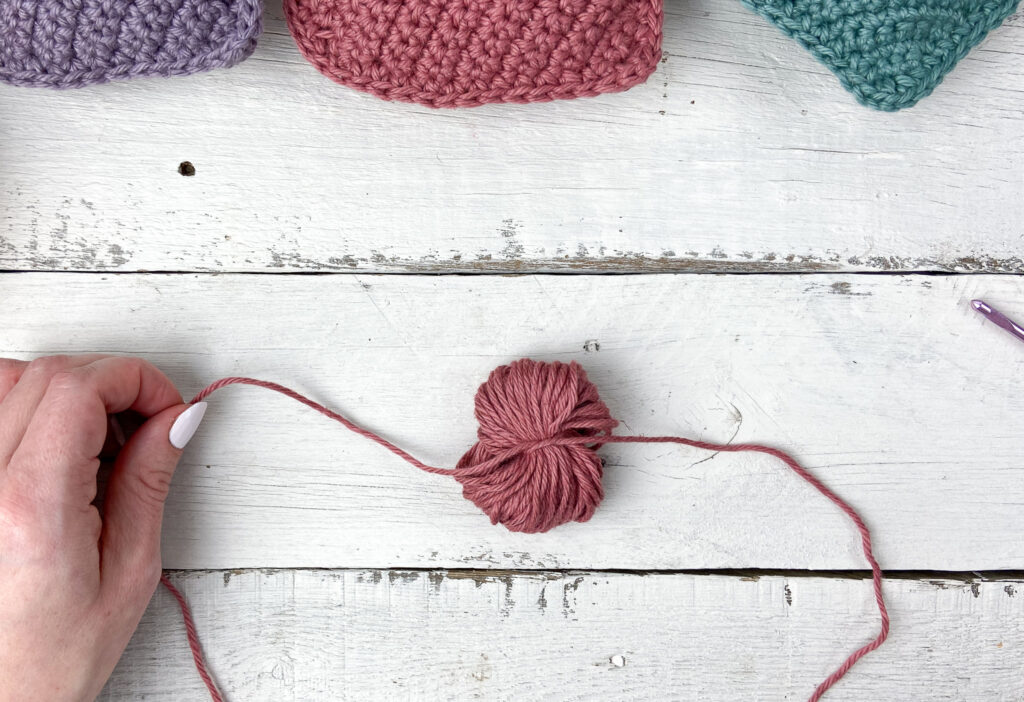
(For each pom pom , you’ll need: a 2″ piece of cardboard, 10 – 15 yards of yarn, a 10″ length of the same yarn pre-cut, sharp scissors.)
1. Wrap yarn around a 2″ piece of cardboard about 70 times.
2. Holding the yarn loop tightly, slide it off the cardboard and use the 10″ piece of yarn to wrap around the middle of the loop. Pull it as tight as you can and tie several times to secure.
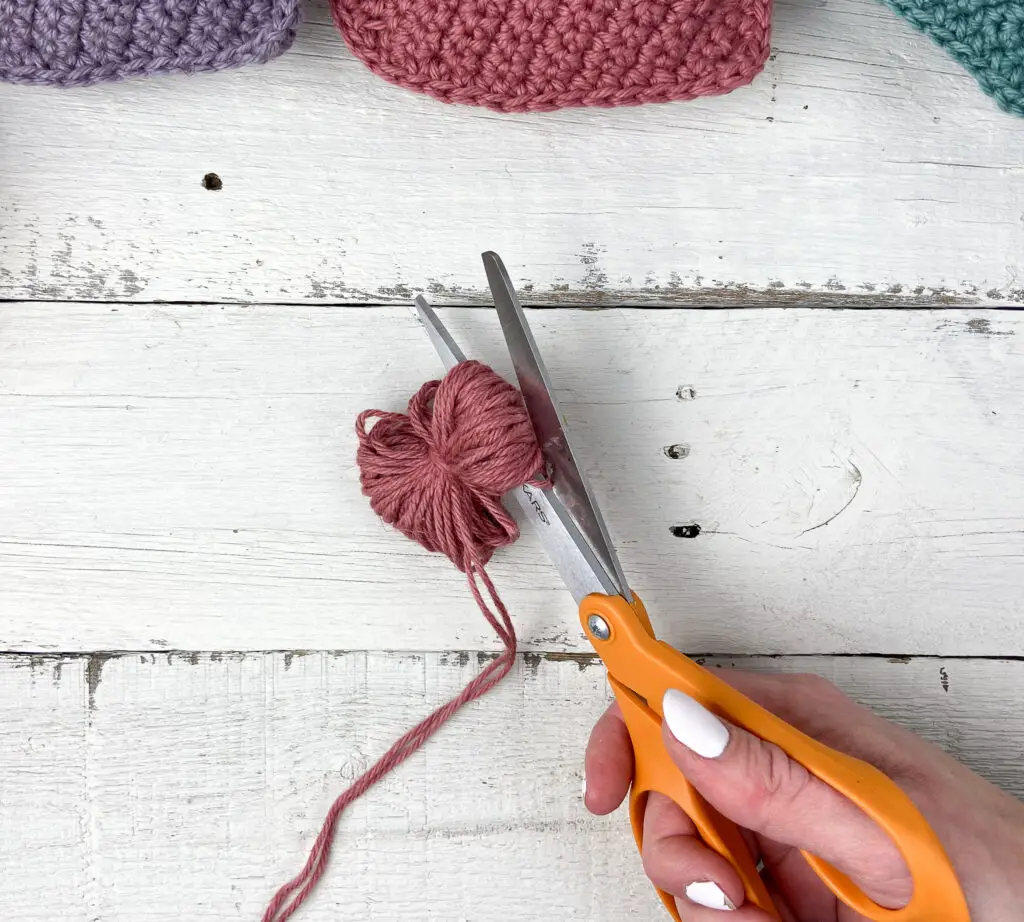
3. Using sharp scissors, cut the loops at either end of the yarn bundle.
4. Pom pom will look uneven at first. Use sharp scissors to trim ends (avoid cutting the long tails of the string you used to secure bundle. This is what you will use to attach pom to garland).
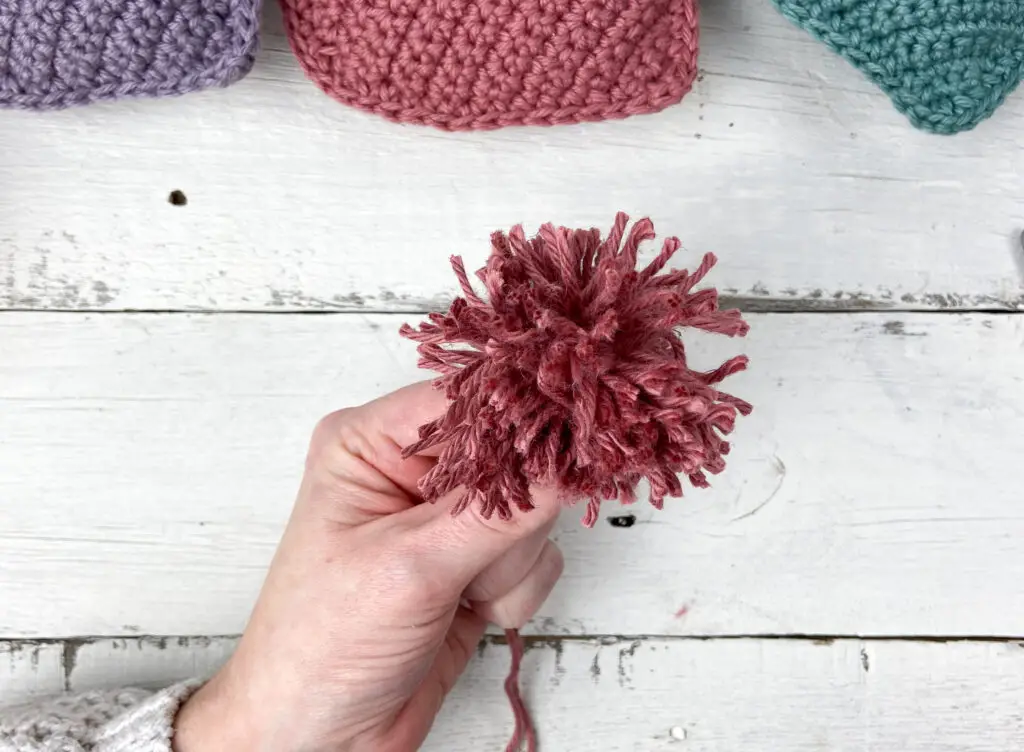
5. Continue to trim and shape pom pom until you are happy with the results!
1. 
2. 
3. 
4. 
5.
Garland Assembly
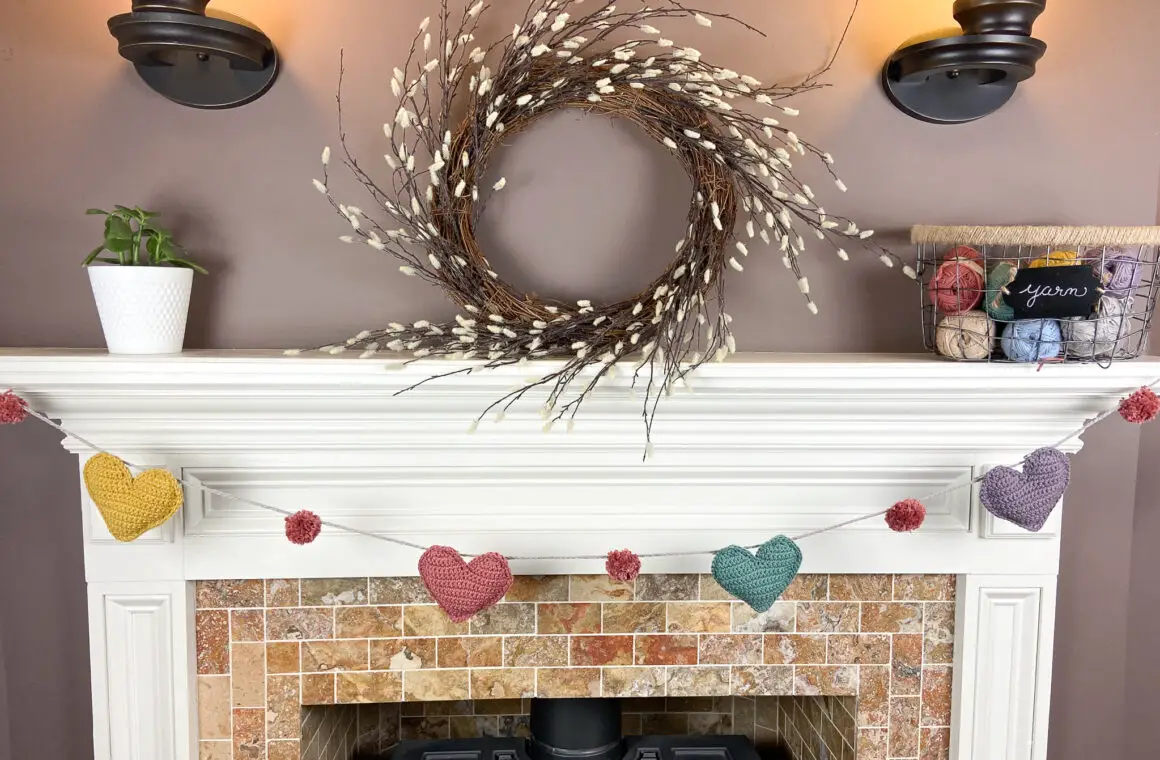
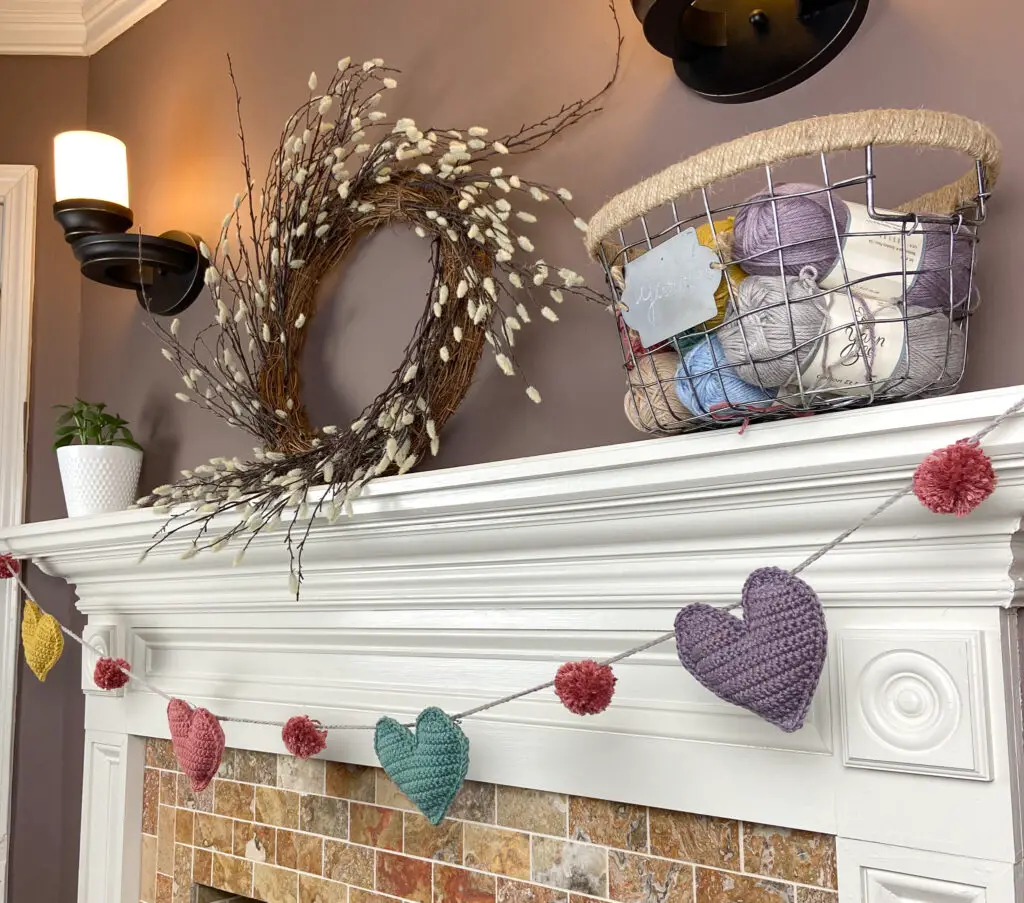
For horizontal garland (approx 70″)
– Ch 235. Fasten off.
– Lay chain flat and space hearts and pom poms evenly along the chain where you would like to place them.
Note: I made 4 hearts and 5 pom poms (see pic), but the layout is up to you!
– First, attach the pom poms using the long tails we left. I found it easiest to use a yarn needle to thread the tails through the chain (so the pom pom won’t slide around.). It takes a little trial and error to get the pom poms to hang right. Tying them very tightly or even tying each of the two tails in different spots on the chain can help stabilize the poms. Repeat for each pom pom.
– Then, using a small length of corresponding color yarn and a yarn needle, thread through the back side of one bump of the heart near the top. Next thread through the chain and tie tightly to secure. Repeat this process for the other bump. Repeat for each heart. Trim or weave in to hide any ends and you’re done!

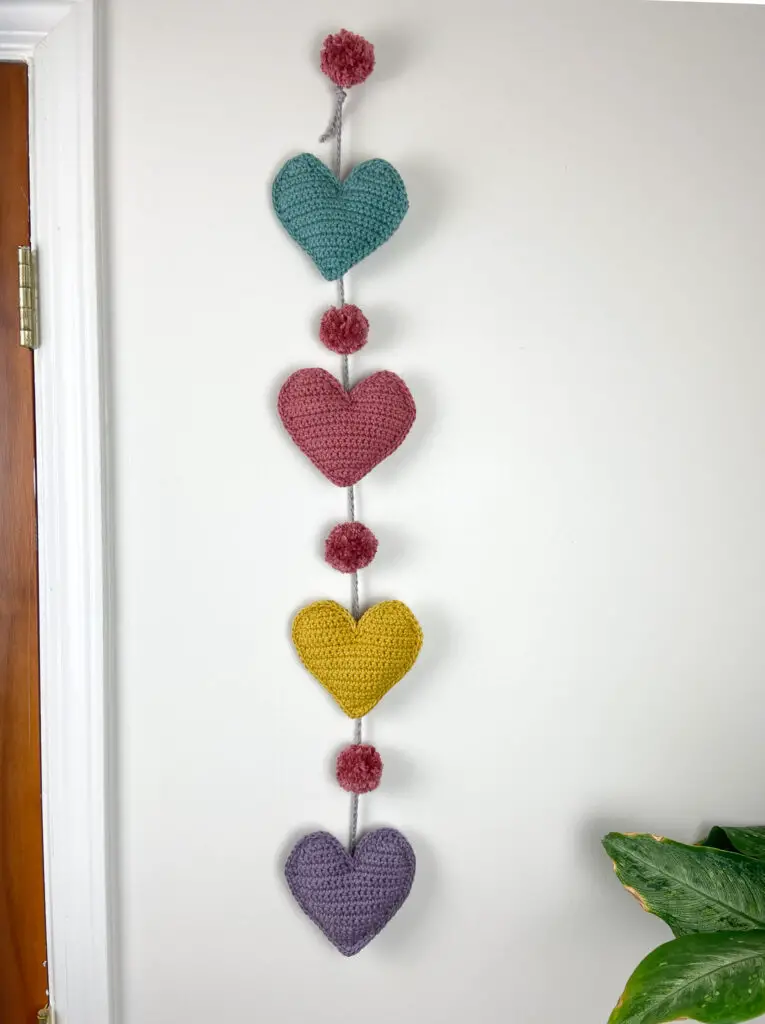
For vertical garland (approx 37″)
– Ch 125. Fasten off.
– Lay chain flat and space hearts and pom poms evenly along the chain where you would like to place them.
Note: for this version, I did 4 hearts and 4 poms (see pic), but again, up to you!
– Attach pom poms first using the technique described in horizontal garland instructions.
_ For the hearts on this version, I used a small length of yarn and a yarn need to thread the through the back of the heart in the center just below the indent between the two bumps. Thread through the chain and tie tightly to secure. Repeat for each heart. Trim or weave in any loose ends and you’re done!
I hope you enjoyed this pattern! Tag me on Instagram @theknottednest and use the hashtag #crochetvalentinehearts to share your project!
Don’t forget to check out my other crochet garlands – Easter Bunny Garland, Rustic Pumpkin Garland, and Christmas Tree and Star Garland!
Find more free project ideas, check out the Patterns section here on the blog!
Happy making!


One Comment
Pingback: